Important Safety Information
Please read and understand all instructions before beginning installation. Failure to follow these instructions may result in electric shock, fire, or other hazards that can cause injury or property damage. Keep these instructions for future reference.
- WARNING: Risk of electric shock. Disconnect power at the circuit breaker or fuse box before installation or servicing.
- All electrical connections must be in accordance with local codes and ordinances, National Electric Code (NEC), and ANSI/NFPA 70-1999.
- Consult a qualified electrician if you are unsure about the installation process.
- This fixture is rated for 120 Volts.
- This product is UL and ETL listed, indicating compliance with safety standards.
Package Contents
Carefully unpack your new fixture and lay out all parts on a clear area. Ensure all components listed below are present before discarding any packaging materials.
- Semi-Flush Mount Fixture (1)
- Mounting Hardware (e.g., mounting plate, screws, wire nuts)
- Glass Shade (1)
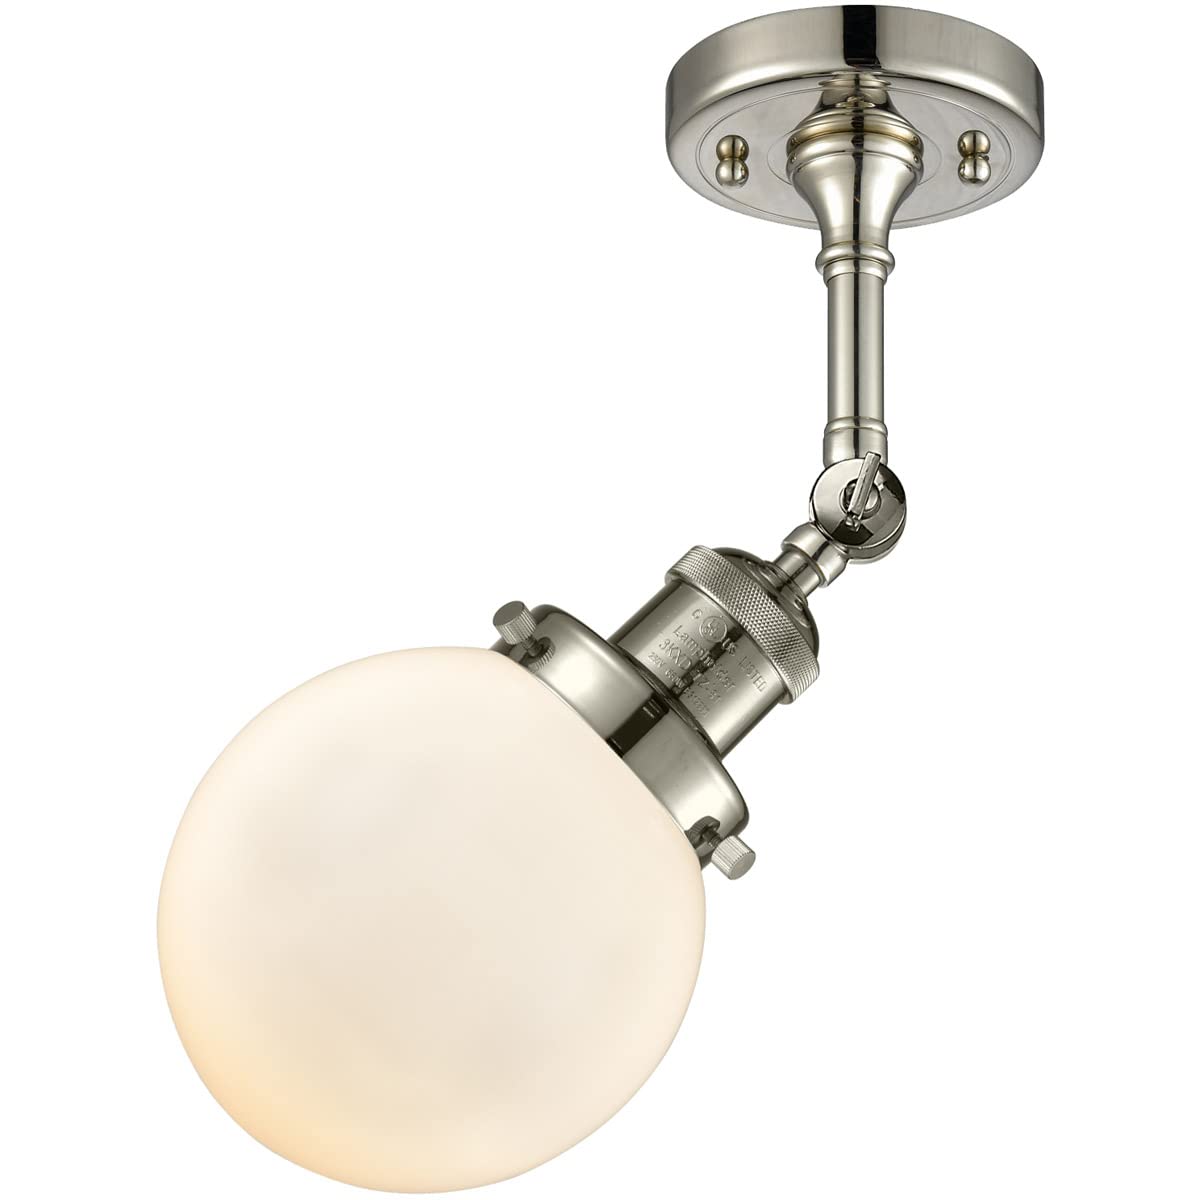
Image 1: Front view of the Innovations LED Semi-Flush Mount in Polished Nickel. The fixture features a circular backplate, an adjustable arm, and a spherical white glass shade. The metal components are finished in polished nickel.
Setup and Installation
Assembly is required for this fixture. Follow these steps for safe and proper installation.
- Turn Off Power: Before starting, ensure the power to the junction box is turned off at the circuit breaker or fuse box.
- Prepare Mounting Plate: Attach the mounting plate to the junction box using the provided screws. Ensure it is securely fastened.
- Make Electrical Connections: Connect the fixture's wires to the corresponding house wires. Connect the black fixture wire to the black (live) house wire, the white fixture wire to the white (neutral) house wire, and the bare copper or green fixture wire to the green or bare copper (ground) house wire. Secure connections with wire nuts.
- Mount Fixture: Carefully align the fixture base with the mounting plate and secure it with the provided screws or nuts. Ensure no wires are pinched during this step.
- Install Glass Shade: Attach the spherical glass shade to the fixture according to the design. Typically, this involves securing it with small thumb screws or a threaded ring.
- Restore Power: Once installation is complete and all connections are secure, restore power at the circuit breaker.

Image 2: Side view of the Innovations LED Semi-Flush Mount. This perspective highlights the polished nickel finish of the metal arm and the connection point to the wall or ceiling, along with the spherical glass shade.
Operating Instructions
This LED semi-flush mount is designed for simple operation.
- Power On/Off: Operate the light using a standard wall switch connected to the fixture's circuit.
- Dimmable Feature: This fixture is dimmable. To utilize the dimming function, ensure you have a compatible LED dimmer switch installed on the circuit. Follow the dimmer switch manufacturer's instructions for proper operation.
- Light Source: The fixture uses an integrated LED light source with a color temperature of 2700 Kelvin, providing a warm white light.
Maintenance
Regular maintenance will help preserve the appearance and functionality of your fixture.
- Cleaning: Disconnect power before cleaning. Wipe the fixture with a soft, dry cloth. Do not use abrasive cleaners, solvents, or polishes as they may damage the finish.
- Glass Shade: The glass shade can be carefully removed and washed with mild soap and water, then dried thoroughly before reattaching.
- LED Light Source: The LED light source is integrated and not user-replaceable. If the LED fails, contact customer support for assistance.
Troubleshooting
If you experience issues with your fixture, refer to the following common problems and solutions:
| Problem | Possible Cause | Solution |
|---|---|---|
| Light does not turn on. | No power to the fixture. | Check circuit breaker or fuse. Ensure wall switch is in the 'ON' position. Verify electrical connections. |
| Light flickers or dims improperly. | Incompatible dimmer switch or loose connection. | Ensure a compatible LED dimmer switch is used. Check wire connections for tightness. |
| Fixture is loose. | Mounting screws are not tight. | Tighten mounting screws securely to the junction box. |
If the problem persists after attempting these solutions, contact Innovations customer support.
Specifications
- Model: INNO201F-PN-G201-6-LED
- Brand: Innovations
- Finish: Polished Nickel
- Material: Plastic (shade), Metal (fixture body)
- Light Source Type: Integrated LED
- Number of Light Sources: 1
- Wattage: 3.5 watts
- Voltage: 120 Volts
- Color Temperature: 2700 Kelvin (Warm White)
- Special Feature: Dimmable
- Mounting Type: Ceiling Mount (Semi-Flush)
- Product Dimensions: Approximately 6 x 12 x 14.25 inches (Width x Depth x Height)
- Item Weight: 2.8 pounds
- Safety Rating: ETL, UL Listed (Damp location rated)
- UPC: 793588811563
Warranty and Support
Innovations provides the following warranty for this product:
- Finish: 2-year warranty
- Electrical Components: Lifetime warranty
For warranty claims, technical support, or any questions regarding your Innovations LED Semi-Flush Mount, please contact Innovations customer service. Keep your purchase receipt as proof of purchase for warranty purposes.


