1. Introduction
This manual provides detailed instructions for the installation, operation, and maintenance of your Utilitech 240-Degree 2-Head Halogen Motion-Activated Flood Light with Timer. Please read this manual thoroughly before installation and retain it for future reference.
This flood light is designed for outdoor security lighting, featuring a 240-degree motion detection range and adjustable timer settings. Its durable white-powder coated aluminum construction ensures longevity.
2. Safety Information
WARNING: Risk of electric shock. Disconnect power at the fuse or circuit breaker before installation or servicing.
- Ensure all wiring connections are secure and properly insulated.
- This product must be installed in accordance with the applicable installation code by a person familiar with the construction and operation of the product and the hazards involved.
- Do not install near combustible materials.
- Use only bulbs specified in this manual.
- Avoid touching bulbs with bare hands during installation or replacement, as oils can reduce bulb life.
- Fixture may become hot during operation. Allow to cool before handling.
- Suitable for use in wet locations.
3. Package Contents
Carefully unpack your flood light and ensure all items are present:
- 1 x Utilitech 2-Head Motion-Activated Flood Light Unit
- 1 x Mounting Hardware Kit (screws, wire nuts, gasket)
- 1 x Instruction Manual
Note: Two 150-watt medium base halogen bulbs are required and not included.
4. Product Overview
Familiarize yourself with the components of your flood light:
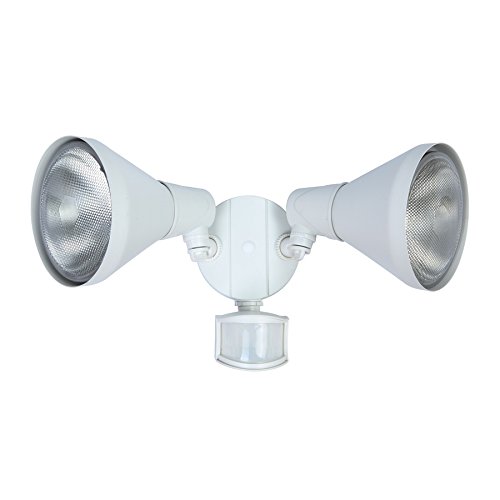
Figure 1: Front view of the Utilitech 2-Head Motion-Activated Flood Light. It features two adjustable lamp heads and a motion sensor located below the central mounting plate.
- Lamp Heads: Two adjustable heads for directing light.
- Motion Sensor: Detects movement within its 240-degree, 70-foot range.
- Timer Control: Located on the sensor, allows adjustment of light duration (1, 3, or 10 minutes).
- Light Shields: Provide additional bulb protection.
- Mounting Plate: For wall or eave installation.
5. Setup and Installation
5.1. Tools Required (Not Included)
- Screwdriver
- Wire Strippers
- Pliers
- Caulking Gun and Weatherproof Sealant
5.2. Mounting Location
- Choose a wall or eave location that provides the desired coverage area for motion detection.
- Ensure the mounting surface is sturdy and can support the fixture's weight.
- Avoid mounting near reflective surfaces or heat sources that could trigger the motion sensor falsely.
5.3. Wiring Instructions
- Turn off power: Locate the circuit breaker or fuse box and turn off the power to the area where you will be installing the flood light.
- Prepare wiring: If replacing an existing fixture, disconnect it. Strip approximately 3/4 inch of insulation from the ends of the house supply wires.
- Connect wires:
- Connect the black (hot) wire from the fixture to the black (hot) wire from the supply using a wire nut.
- Connect the white (neutral) wire from the fixture to the white (neutral) wire from the supply using a wire nut.
- Connect the green or bare copper (ground) wire from the fixture to the green or bare copper (ground) wire from the supply using a wire nut.
- Secure fixture: Carefully tuck all wires into the junction box. Mount the flood light fixture to the junction box using the provided mounting hardware. Ensure the gasket is properly seated to prevent moisture entry.
- Seal: Apply weatherproof sealant around the edges of the mounting plate where it meets the wall/eave to prevent water intrusion.
5.4. Bulb Installation
- Ensure power is still off.
- Unscrew the protective covers from the lamp heads.
- Insert two 150-watt medium base (E-26) PAR38 bulbs into the sockets. Compatible bulb types include PAR38 LED, PAR38 incandescent, PAR38 halogen, and PAR38 dimmable CFL.
- Screw the protective covers back onto the lamp heads.
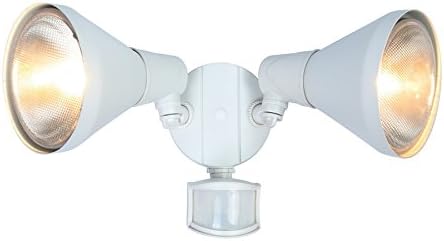
Figure 2: Close-up view of one lamp head, showing the bulb housing and light shield. This image highlights the design of the individual light units.
6. Operating Instructions
6.1. Power On
Once installation is complete, restore power at the circuit breaker. The flood light will enter a warm-up period, typically lighting up for a short duration before settling into motion-sensing mode.
6.2. Adjusting Lamp Heads
The two lamp heads are adjustable. Loosen the adjustment screws on each head, position the light to cover your desired area, and then tighten the screws securely.
6.3. Motion Sensor Adjustment
The motion sensor detects movement within a 240-degree field up to 70 feet. The sensitivity of the sensor may be adjustable (refer to the sensor unit for specific dials if present). Test the detection range by walking through the desired coverage area.
6.4. Timer Settings
The integrated timer allows you to set how long the light remains on after motion is detected. The available settings are 1, 3, or 10 minutes. Locate the timer dial on the motion sensor and rotate it to your preferred duration.
6.5. Manual Override
This flood light features a manual override option, allowing it to operate constantly for a selected period. To activate manual override, quickly turn the wall switch OFF and then ON. The light will stay on continuously. To return to motion-sensing mode, turn the wall switch OFF for approximately 10 seconds, then turn it back ON. The light will then revert to automatic motion-activated operation.
7. Maintenance
7.1. Cleaning
- Ensure power is off before cleaning.
- Wipe the fixture with a soft, damp cloth. Do not use abrasive cleaners or solvents.
- Keep the motion sensor lens clean to ensure optimal performance.
7.2. Bulb Replacement
- Always turn off power at the circuit breaker before replacing bulbs.
- Allow bulbs to cool completely before touching them.
- Unscrew the protective covers and carefully remove the old bulbs.
- Install new 150-watt medium base (E-26) PAR38 bulbs. Avoid touching new bulbs with bare hands.
- Replace protective covers and restore power.
8. Troubleshooting
| Problem | Possible Cause | Solution |
|---|---|---|
| Light does not turn on. |
|
|
| Light stays on continuously. |
|
|
| Light turns on for no apparent reason. |
|
|
9. Specifications
| Model Number | 6211W-PIR26B |
| Brand | Utilitech |
| Power Source | Hardwired (Corded Electric) |
| Wattage | 300 watts (total, 2 x 150W bulbs) |
| Bulb Type | Halogen (compatible with PAR38 LED, incandescent, halogen, dimmable CFL) |
| Bulb Base | Medium base (E-26) |
| Motion Detection Angle | 240-Degree |
| Detection Range | 70 feet |
| Timer Settings | 1, 3, 10 minutes |
| Material | Aluminum (white-powder coated) |
| Fixture Finish | Matte |
| Dimensions (H x W x D) | 7.48 x 16.34 x 6.61 inches |
| Weight | 1.21 lbs (0.55 kg) |
| Safety Listing | ETL Safety Listed |
| Special Features | Dimmable (with compatible bulbs), Motion Sensor, Manual Override |
10. Warranty
This Utilitech flood light is covered by a 5-year limited warranty from the date of purchase. This warranty covers defects in materials and workmanship under normal use. It does not cover damage resulting from improper installation, accident, misuse, abuse, or unauthorized modifications.
Please retain your proof of purchase for warranty claims.
11. Customer Support
If you have any questions, require assistance with installation, or encounter issues not covered in this manual, please contact Utilitech customer support. Refer to your product packaging or the Utilitech website for current contact information.
For efficient service, please have your product model number (6211W-PIR26B) and date of purchase available.


