
1. Introduction
This manual provides detailed instructions for the installation, operation, and maintenance of your Aramox 200W Rotary Dimmer Switch. Please read this manual thoroughly before installation and use to ensure proper function and safety.

Image 1.1: Overview of the Aramox 200W Rotary Dimmer Switch, including the dimmer unit, infrared remote control, and compatible LED strip lighting.
2. Safety Information
- Ensure the power supply is disconnected before installation or maintenance to prevent electric shock.
- Installation should be performed by a qualified electrician or in accordance with local electrical codes.
- Do not exceed the maximum load capacity of 200W.
- This dimmer is designed for AC 220V systems. Verify your electrical system voltage before installation.
- The product has an IP65 protection level, indicating resistance to dust and low-pressure water jets. However, avoid submerging the device in water.
3. Package Contents
The package includes the following items:
- 1 x Rotary Dimmer Switch Unit
- 1 x Infrared (IR) Remote Control
- Mounting Screws (quantity may vary)

Image 3.1: Contents of the product package, showing the dimmer switch, remote control, and mounting hardware.
4. Specifications
| Feature | Detail |
|---|---|
| Brand | Aramox |
| Model Number | Aramoxbhefygz876-02 |
| Material | Polycarbonate (PC) |
| Operating Voltage | AC 220V |
| Frequency | 50 ~ 60Hz |
| Maximum Load Power | 200W |
| Protection Level | IP65 |
| Dimmer Switch Size (L x W x H) | 8.6 x 8.6 x 5.5 cm (3.39 x 3.39 x 2.17 inches) |
| Remote Control Size (L x W x H) | 8.6 x 3.6 x 0.65 cm (3.39 x 1.42 x 0.26 inches) |
| Switch Type | Rotary, 1-way |
| Mounting Type | Surface Mount |
| Country of Origin | China |

Image 4.1: Dimensional drawing of the dimmer switch and remote control.
5. Setup and Installation
The dimmer switch is designed for easy installation and supports both surface and recessed mounting. Always ensure power is off before beginning installation.
5.1 Wiring Diagram
Refer to the wiring diagram provided with your product for specific connection details. Generally, the dimmer switch will have input terminals for live (L) and neutral (N) wires from the power supply, and output terminals for connecting to the light fixture.
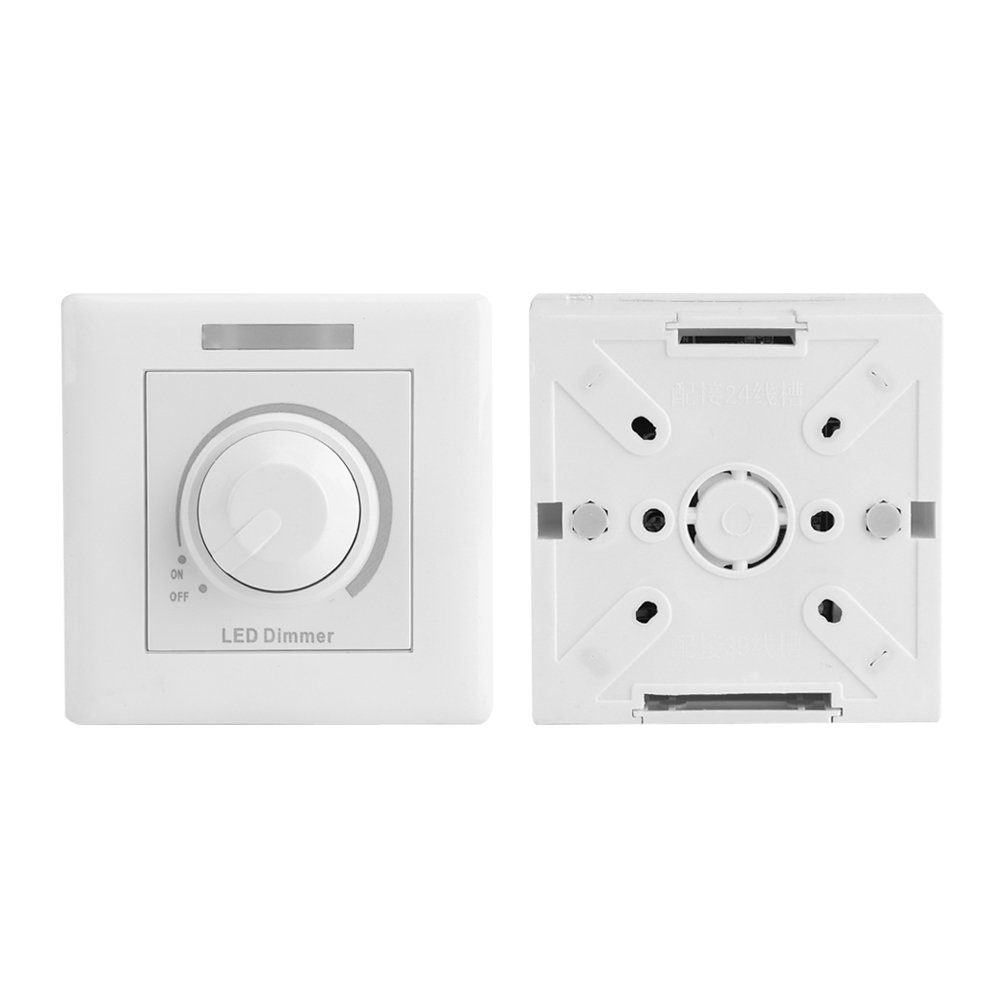
Image 5.1: Front and rear views of the dimmer switch, illustrating the connection terminals on the back.
5.2 Mounting
- Surface Mounting: Position the dimmer unit on the desired surface. Mark the screw holes. Drill pilot holes if necessary. Secure the dimmer unit using the provided mounting screws.
- Recessed Mounting: Ensure you have an appropriate electrical box for recessed installation. Connect the wiring, then secure the dimmer unit into the electrical box using the provided screws.
Warning: Incorrect wiring can cause damage to the device or electrical hazards. If you are unsure, consult a professional electrician.
6. Operating Instructions
The Aramox Rotary Dimmer Switch can be operated using its rotary knob or the included infrared remote control.
6.1 Using the Rotary Knob
- Turn On/Off: Press the rotary knob to toggle the light on or off.
- Adjust Brightness: Rotate the knob clockwise to increase brightness and counter-clockwise to decrease brightness.

Image 6.1: Side view of the dimmer switch, highlighting the rotary knob for manual control.
6.2 Using the IR Remote Control
The IR remote control provides convenient wireless operation and can control up to four dimmer units.

Image 6.2: The infrared remote control with various buttons for brightness adjustment and scene selection.
- Power Button (⏻): Press to turn the light on or off.
- Brightness Adjustment (+ / -): Use the '+' button to increase brightness and '-' button to decrease brightness.
- Preset Brightness (25%, 50%, 75%, 100%): Directly set the brightness to a specific percentage.
- Delay Off: Activates a timed delay before turning off the light.
- Scene Buttons (1, 2, 3, 4): These buttons can be used to control multiple dimmer units (up to 4) if configured. Refer to advanced setup instructions for multi-dimmer control.

Image 6.3: A hand demonstrating the use of the remote control.
7. Maintenance
- Cleaning: Wipe the dimmer switch and remote control with a soft, dry cloth. Do not use abrasive cleaners or solvents.
- Power Off for Cleaning: Always disconnect power to the dimmer switch before cleaning the unit.
- Battery Replacement (Remote): If the remote control's range decreases or it stops responding, replace its battery. Refer to the remote's compartment for battery type (typically a button cell battery).
8. Troubleshooting
| Problem | Possible Cause | Solution |
|---|---|---|
| Light does not turn on. | No power supply, incorrect wiring, faulty bulb, dimmer switch off. | Check power supply, verify wiring connections, replace bulb, ensure dimmer is turned on. |
| Light flickers or hums. | Incompatible bulb type, load too low/high, loose connection. | Ensure bulbs are dimmable LED or incandescent. Check total wattage is within 200W limit. Verify wiring. |
| Remote control not working. | Dead battery, obstruction, out of range, remote not paired (if applicable). | Replace remote battery. Ensure clear line of sight to dimmer. Move closer to dimmer. (No pairing info provided, assume IR line-of-sight). |
| Dimmer gets hot. | Overload, poor ventilation. | Reduce connected load to below 200W. Ensure adequate airflow around the dimmer unit. |
9. Warranty and Support
Specific warranty information for this product is not provided in the available data. For warranty claims or technical support, please contact the retailer or manufacturer directly using the contact information provided at the point of purchase.