1. Introduction
The Godox V350S is a compact and versatile flash unit designed for select Sony cameras. It features a built-in 2.4 GHz radio system, high-speed sync (HSS), and a rechargeable lithium-ion battery. This manual provides detailed instructions for the proper setup, operation, and maintenance of your V350S flash unit.
2. What's in the Box
- Godox V350S Flash Unit
- Mini Stand
- Protective Case
- Diffuser
- Li-Ion Battery Pack
- Battery Charger
- Charger Cable
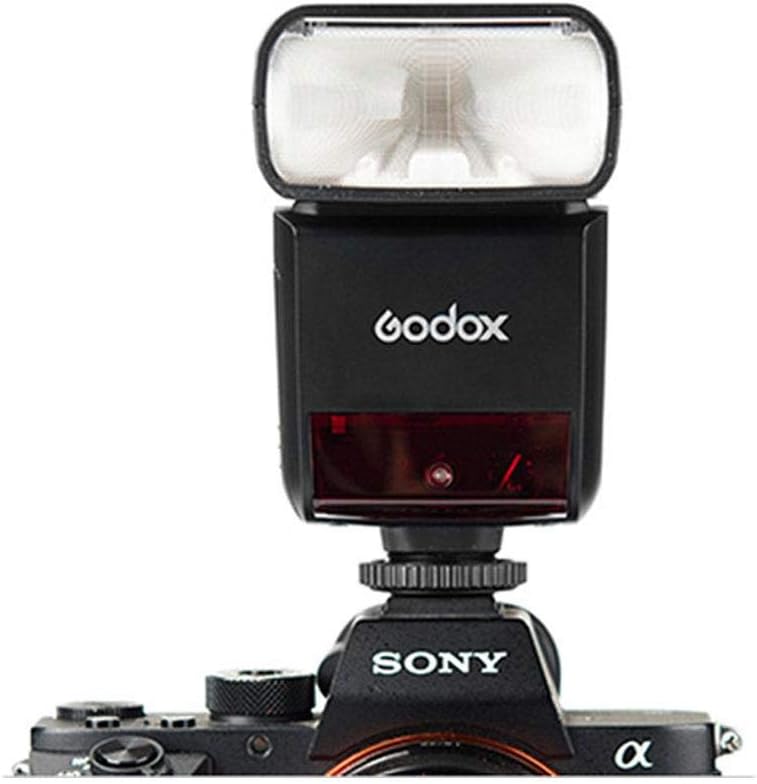
Image: All components included in the Godox V350S package.
3. Key Features
- High-Speed Sync (HSS): Supports shutter speeds up to 1/8000s.
- Built-in 2.4 GHz Wireless X System: Functions as a master or slave unit for wireless triggering with a range of up to 164 feet (50 meters).
- Rechargeable Lithium-Ion Battery: Provides up to 500 full power flashes with a fast recycle time of 0.1 to 1.7 seconds.
- Flexible Flash Head: Tilts from -7 to 90 degrees and rotates 270 degrees for bounce flash applications.
- Zoom Head: Covers a focal length range of 24-105mm, with a 14mm wide-angle panel.
- Multiple Flash Modes: Includes TTL auto flash, manual flash, and multi (stroboscopic) flash.
- Compatibility: Designed for select Sony cameras, including a7R, a7RII, a7RIII, a58, a99, ILCE6000L, a77II, RX10, and a9.

Image: The Godox V350S flash unit.
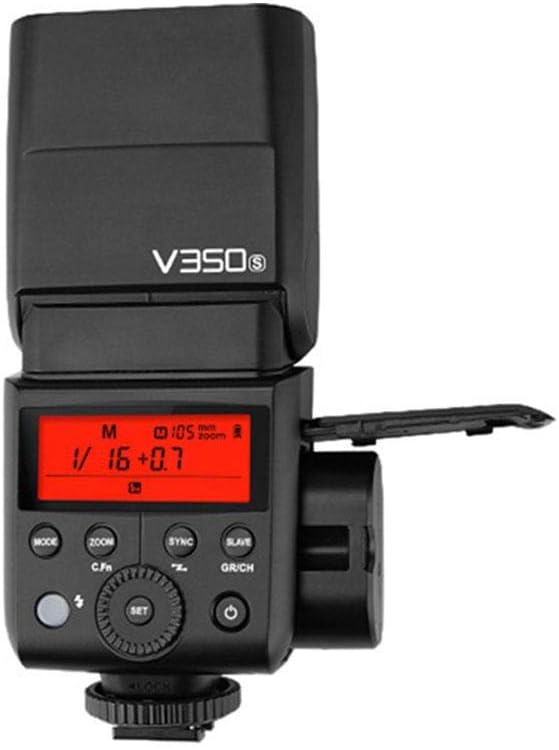
Image: Front view of the Godox V350S flash, highlighting the control panel and LCD display.
4. Setup
4.1 Battery Installation
- Open the battery compartment cover located on the side of the flash unit.
- Insert the provided Li-Ion battery pack, ensuring correct polarity.
- Close the battery compartment cover securely.
4.2 Mounting the Flash on Camera
- Slide the flash unit's mounting foot into your camera's hot shoe.
- Rotate the locking ring on the flash foot clockwise until it is firmly secured. Do not overtighten.
4.3 Powering On/Off
- To power on, press the power button until the LCD screen illuminates.
- To power off, press and hold the power button until the LCD screen turns off.

Image: The Godox V350S flash held in hand, demonstrating its compact size.

Image: Godox V350S flash mounted on a compatible Sony camera.
5. Operating the Flash
5.1 Flash Modes
Press the MODE button to cycle through the available flash modes:
- TTL Auto Flash: The flash output is automatically adjusted to achieve correct exposure.
- Manual Flash (M): Allows manual control over flash power output (1/1 to 1/128). Use the dial and SET button to adjust.
- Multi Flash (Stroboscopic): Fires a series of rapid flashes during a single exposure to capture multiple movements. Adjust frequency, flash count, and power.
5.2 High-Speed Sync (HSS)
To enable HSS, press the SYNC button. The HSS icon will appear on the LCD. This allows you to use flash with shutter speeds faster than your camera's native flash sync speed.
5.3 Wireless Flash Function (2.4 GHz X System)
The V350S can operate as a master or slave unit within the Godox 2.4 GHz wireless X system.
- Master Mode: Mount the V350S on your camera and set it to master mode (usually indicated by an 'M' or specific icon). It can control other Godox slave flashes.
- Slave Mode: Set the V350S to slave mode (indicated by 'S' or specific icon) to be triggered by a Godox master unit or XProS transmitter. Ensure the channel and group settings match the master unit.
Use the GR/CH button to adjust groups and channels for wireless communication.
5.4 Zoom Function
Press the ZOOM button to adjust the flash head's zoom coverage. This can be set to auto or manually adjusted to match your lens's focal length.
5.5 Flash Head Adjustment
The flash head can be tilted vertically from -7 to 90 degrees and rotated horizontally 270 degrees (180 degrees left, 90 degrees right) to direct light for bounce flash or creative lighting.
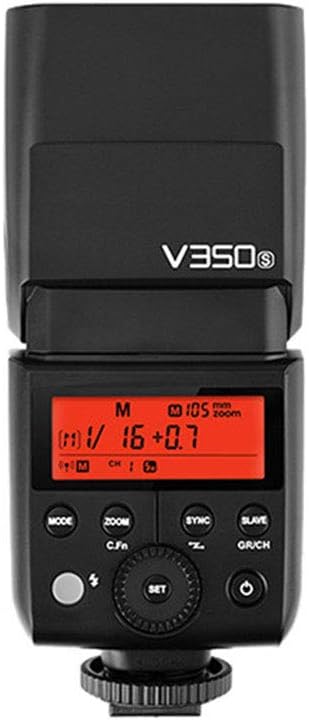
Image: Close-up of the Godox V350S LCD display, showing operational settings.
6. Maintenance
6.1 Cleaning
- Use a soft, dry cloth to clean the flash unit.
- For stubborn dirt, use a slightly damp cloth with a mild cleaning solution, then wipe dry.
- Do not use strong solvents or abrasive cleaners.
- Keep the flash tube and sensor clean for optimal performance.
6.2 Battery Care
- Charge the battery fully before first use.
- Store the battery in a cool, dry place when not in use.
- If storing for extended periods, charge the battery to approximately 50% capacity every few months to maintain battery health.
6.3 Storage
- Store the flash unit in its protective case to prevent damage.
- Avoid storing in areas with extreme temperatures, high humidity, or direct sunlight.
7. Troubleshooting
- Flash not firing:
- Check if the flash is securely mounted on the camera's hot shoe.
- Ensure the battery is charged and correctly inserted.
- Verify that the flash is powered on and not in sleep mode.
- Check camera flash settings to ensure external flash is enabled.
- Flash output is too weak/strong:
- In TTL mode, check camera exposure compensation settings.
- In Manual mode, adjust the power output setting on the flash.
- Ensure the flash head zoom matches the lens focal length.
- Wireless triggering issues:
- Confirm that the master and slave units are set to the same channel and group.
- Ensure both units are within the effective wireless range.
- Check for obstructions between the master and slave units.
- Flash does not recycle quickly:
- The battery may be low; recharge or replace it.
- High power settings require longer recycle times. Reduce power if faster recycling is needed.
8. Specifications
| Model | V350S |
| Compatible Mountings | Sony Alpha |
| Flash Sync Speed | Up to 1/8000 seconds (HSS) |
| Item Weight | 10.2 ounces (approx. 289 grams) |
| Product Dimensions | 2.83 x 8.27 x 7.17 inches (approx. 7.2 x 21 x 18.2 cm) |
| Power Source | Rechargeable Li-Ion Battery Pack |
| Recycle Time | 0.1 - 1.7 seconds |
| Guide Number | 118' at ISO 100 and 105mm |
| Zoom Range | 24-105mm (14mm with wide-angle panel) |
| Wireless Function | Master, Slave (2.4 GHz X System) |
9. Warranty and Support
For warranty information and technical support, please refer to the documentation provided with your purchase or visit the official Godox website. Keep your proof of purchase for any warranty claims.


