1. Introduction
This manual provides detailed instructions for the proper installation, operation, and maintenance of your DollaTek 2x20W 12V Digital HiFi Audio Stereo YDA138-E Class-D Amplifier Board. This compact and efficient amplifier board is designed for various audio projects, offering clear stereo sound output. Please read this manual thoroughly before use to ensure optimal performance and safety.
2. Safety Information
- Ensure the power supply voltage matches the specified 12V DC. Using an incorrect voltage can damage the board.
- Avoid short-circuiting the output terminals.
- Do not expose the board to moisture, water, or extreme temperatures.
- Handle the board by its edges to prevent damage to components.
- Disconnect power before making any connections or disconnections.
- Keep out of reach of children.
3. Product Overview
The DollaTek YDA138-E amplifier board is a high-definition Class D amplifier featuring a dual-core chipset. It provides two channels of audio output, each capable of delivering 20W. Key features include:
- Frequency Range: 20Hz-60KHz
- Number of Channels: Two channels (left and right)
- Chipset: YDA138-E
- Output Power: DC12V 20W x 2
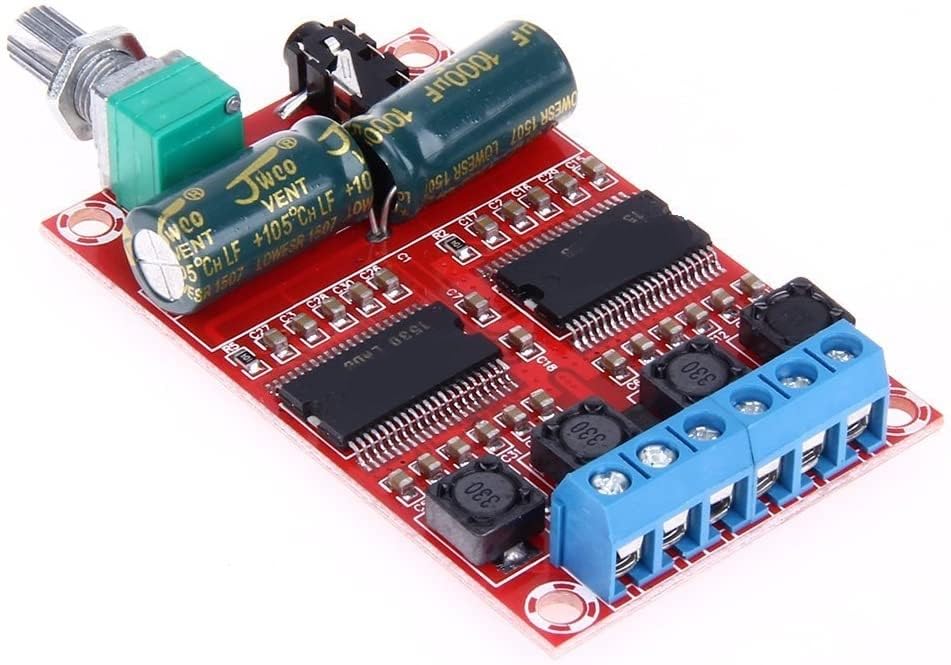
Figure 3.1: Overall view of the DollaTek YDA138-E amplifier board. This image displays the main components including the YDA138-E chips, capacitors, volume potentiometer, 3.5mm audio input jack, and blue screw terminals for power and speaker connections.
Component Identification
- Volume Potentiometer: Located on one side, used to adjust the output volume.
- 3.5mm Audio Input Jack: For connecting audio sources.
- Speaker Output Terminals (Blue): Screw terminals for connecting left and right speakers.
- Power Input Terminals (Blue): Screw terminals for connecting 12V DC power.
- YDA138-E Chipsets: The main amplifier integrated circuits.
- Capacitors: Large cylindrical components for power filtering.
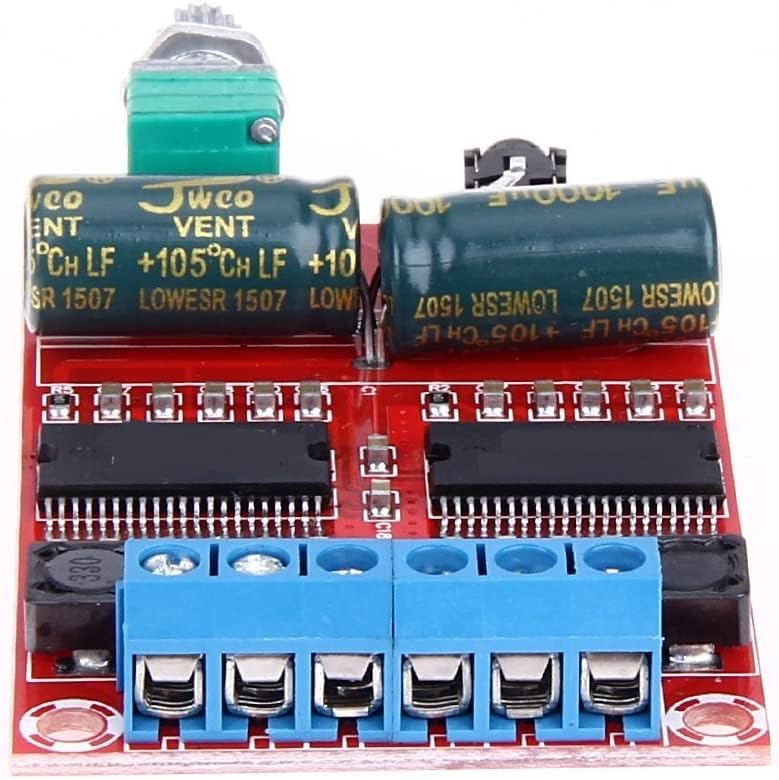
Figure 3.2: Close-up of the amplifier board, highlighting the YDA138-E chips, large capacitors, and the blue screw terminals for power and speaker connections. This view helps in identifying specific connection points.
4. Setup Instructions
Follow these steps to correctly set up your amplifier board:
4.1 Power Connection
- Identify the power input terminals on the blue screw terminal block. These are typically labeled VCC (positive) and GND (negative).
- Using appropriate gauge wire, connect the positive (+) output of a 12V DC power supply to the VCC terminal.
- Connect the negative (-) output of the 12V DC power supply to the GND terminal.
- Ensure all connections are secure to prevent loose contacts or short circuits.
4.2 Audio Input Connection
- Locate the 3.5mm audio input jack on the board.
- Connect your audio source (e.g., smartphone, MP3 player, computer) to this jack using a standard 3.5mm audio cable.
4.3 Speaker Connection
- Identify the speaker output terminals on the blue screw terminal block. These are typically labeled OUTL+ / OUTL- for the left channel and OUTR+ / OUTR- for the right channel.
- Connect your passive speakers (4-8 Ohm impedance recommended) to the corresponding terminals. Ensure correct polarity (+ to + and - to -) for each speaker.
- Tighten the screw terminals to secure the speaker wires.
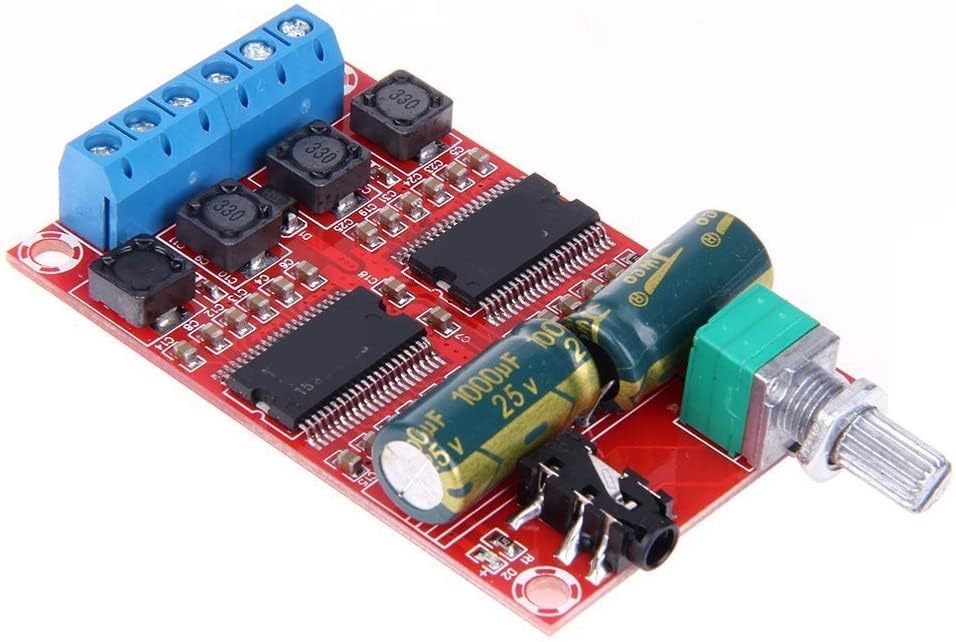
Figure 4.1: This image illustrates the various connection points on the amplifier board, including the 3.5mm audio input, the volume control knob, and the blue screw terminals for both power supply and speaker outputs.
5. Operating Instructions
- After all connections are made as described in Section 4, ensure the volume potentiometer is set to its minimum position (fully counter-clockwise).
- Apply power to the amplifier board by connecting your 12V DC power supply.
- Start playing audio from your connected source.
- Slowly rotate the volume potentiometer clockwise to increase the audio output to your desired level.
- To turn off the amplifier, disconnect the power supply.
6. Maintenance
- Keep the amplifier board clean and free from dust. Use a soft, dry cloth or a brush to gently remove any accumulated dust.
- Avoid spilling liquids on the board. If accidental spillage occurs, immediately disconnect power and allow the board to dry completely before re-applying power.
- Do not attempt to modify the circuit board unless you are a qualified electronics technician. Unauthorized modifications can void the warranty and cause damage.
- Store the board in a dry, cool environment when not in use.
7. Troubleshooting
- No Sound Output:
- Check if the 12V DC power supply is correctly connected and functioning.
- Verify that the audio input cable is securely connected to both the source and the amplifier board.
- Ensure speakers are correctly wired to the output terminals with correct polarity.
- Confirm the volume potentiometer is turned up.
- Test with a different audio source or speakers to isolate the problem.
- Distorted Sound:
- Reduce the input volume from your audio source.
- Ensure the power supply can provide sufficient current (e.g., 2A or more for 2x20W output).
- Check that your speakers' impedance is within the recommended range (4-8 Ohm).
- Humming Noise:
- Ensure proper grounding. If mounted in a metal enclosure, ensure the potentiometer's metal body is properly grounded to the board's ground plane to prevent hum.
- Check for ground loops in your audio setup.
- Ensure the power supply is stable and free from ripple.
- Amplifier Shuts Off:
- This may indicate thermal overload or overcurrent protection. Ensure adequate ventilation.
- Verify speaker impedance is not too low (e.g., 4 Ohm speakers at very high volumes might trigger protection if power supply is insufficient).
8. Specifications
| Brand | DollaTek |
| Model | YDA138-E |
| Voltage Input | 12 Volts DC (Max 15 Volts) |
| Number of Channels | 2 (Stereo) |
| Output Power | 20W x 2 |
| Frequency Range | 20Hz-60KHz |
| Mounting Type | Surface Mount |
| Item Weight | 1.41 ounces |
| Package Dimensions | 4.33 x 2.52 x 0.31 inches |
| ASIN | B07DK1BQMS |
| UPC/GTIN | 742548980634 |
9. Warranty and Support
For warranty information or technical support, please refer to the retailer or manufacturer's official website where you purchased this product. Keep your purchase receipt as proof of purchase. If you encounter issues not covered in this manual, please contact DollaTek customer service for assistance.


