
m s DX-668 (R380)
M S 15 Function Bicycle Computer DX-668 User Manual
Model: DX-668 (R380)
Introduction
This manual provides detailed instructions for the installation, operation, and maintenance of your M S 15 Function Bicycle Computer DX-668. This device is designed to provide essential cycling data, including speed, distance, and time, to enhance your riding experience. Please read this manual thoroughly before first use to ensure proper setup and functionality.
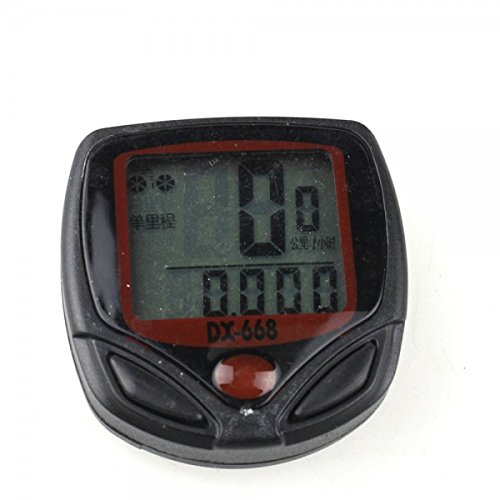
Image: Front view of the M S 15 Function Bicycle Computer DX-668, showing its LCD display and control buttons.
What's in the Box
Verify that all components are present in the package:
- 1 x LCD Bike Bicycle Cycle Computer Odometer Speedometer (DX-668 unit)
- 1 x Universal sensor bracket
- 1 x Wheel magnet
- 1 set x Cable ties
- 1 x Cable (for sensor connection)
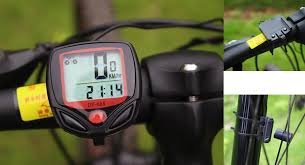
Image: All components included with the bicycle computer: the main unit, sensor cable, mounting bracket, and wheel magnet.
Setup and Installation
Follow these steps to properly install your bicycle computer:
- Mounting the Computer Bracket: Attach the universal sensor bracket to your bicycle's handlebar. Ensure it is securely fastened and positioned for easy viewing.
- Installing the Speed Sensor: Mount the speed sensor on the front fork of your bicycle. Position it so that the sensor's detection area aligns with the wheel magnet.
- Attaching the Wheel Magnet: Securely attach the wheel magnet to a spoke on your front wheel. The magnet should pass within 5mm of the speed sensor with each wheel rotation. Adjust the sensor and magnet positions as needed to achieve this clearance.
- Connecting the Cable: Connect the sensor cable to the main computer unit. Use the provided cable ties to neatly secure the cable along the fork and frame, preventing it from interfering with moving parts.
- Initial Settings:
- Setting Speed Scale (km/h, m/h): Power on the device. Use the buttons to select your preferred speed unit (kilometers per hour or miles per hour).
- Setting Tyre Circumference: Input your bicycle's wheel circumference in millimeters. This is crucial for accurate speed and distance calculations. Refer to your tire's sidewall for size, or measure manually.
- Setting the Last Value of the Odometer: If replacing an old computer, you may input your previous total odometer reading to maintain continuity. Otherwise, set to 0.
- Setting the Clock (12h/24h): Adjust the current time and select your preferred 12-hour or 24-hour format.
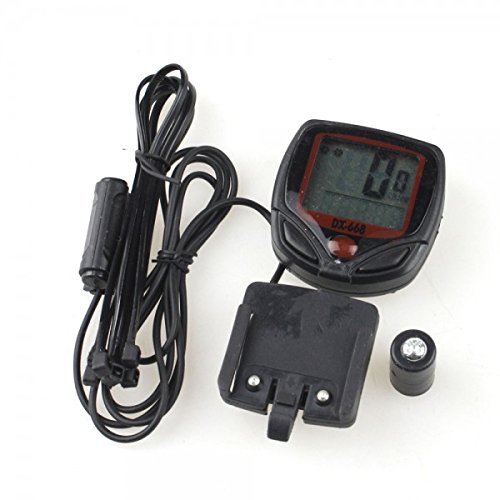
Image: The bicycle computer mounted on the handlebar, with the speed sensor attached to the fork and the magnet on a wheel spoke, illustrating proper installation.
Operating Instructions
The DX-668 features 15 functions accessible via its buttons. The display shows various data points depending on the selected mode.

Image: The bicycle computer display showing current speed (0 KM/HR) and the current time (2:14), as seen when mounted on a bicycle.
Functions Overview:
- SPO (Current Speed): Displays your real-time cycling speed.
- ODO (Odometer): Shows the total accumulated distance traveled by the bicycle. This value is stored even when the device is off.
- DST (Trip Distance): Displays the distance covered during the current trip. This can be reset for each new ride.
- TM (Elapsed Time): Shows the duration of the current trip. This timer starts when you begin riding and pauses when you stop.
- "+" "-" Comparator: Indicates whether your current speed is faster (+) or slower (-) than your average speed.
- AVS (Average Speed): Calculates and displays the average speed for the current trip.
- SETTING SPEED SCALE (km/h, m/h): Allows selection of the preferred unit for speed and distance measurement.
- SETTING TYRE CIRCUMFERENCE: Used to input the precise circumference of your bicycle's wheel for accurate measurements.
- SETTING THE LAST VALUE OF THE ODOMETER: Enables manual adjustment of the total odometer reading, useful for transferring data or initial setup.
- CLK (Clock 12h/24h): Displays the current time and allows selection between 12-hour and 24-hour formats.
- AUTO ON/OFF: The computer automatically turns on when motion is detected and turns off after a period of inactivity to conserve battery.
- SCAN: Cycles through various data displays (e.g., DST, TM, AVS) automatically, showing each for a few seconds.
- MAINTENANCE: This function may indicate a maintenance reminder or a log for service intervals (refer to full product manual for specific details if available).
To navigate between functions, use the buttons on the device. Typically, there are two buttons: one for mode selection and another for setting values or resetting trip data. Consult the on-screen prompts for specific button actions.
Maintenance
Proper maintenance ensures the longevity and accuracy of your bicycle computer:
- Cleaning: Wipe the unit with a soft, damp cloth. Do not use abrasive cleaners or solvents.
- Water Resistance: The DX-668 is water-resistant. However, avoid submerging it in water or exposing it to heavy downpours for extended periods.
- Battery Replacement: When the display becomes dim or erratic, it's time to replace the battery. Typically, these units use a common coin cell battery (e.g., CR2032). Refer to the battery compartment for the correct type and polarity.
- Sensor and Magnet Check: Periodically check that the speed sensor and wheel magnet are securely mounted and maintain the correct clearance (within 5mm).
Troubleshooting
If you encounter issues with your bicycle computer, try these common solutions:
- No Speed Reading / Incorrect Readings:
- Check the alignment and distance between the speed sensor and the wheel magnet. They should be within 5mm.
- Ensure the sensor cable is securely connected to the main unit.
- Verify that the wheel circumference setting is correct.
- Check the battery level.
- Display is Blank or Dim:
- Replace the battery.
- Ensure the unit is properly seated in its bracket.
- Unit Not Turning On/Off Automatically:
- Check for any obstructions to the sensor.
- Ensure the magnet is passing the sensor correctly.
If problems persist, contact customer support for further assistance.
Specifications
| Brand | m s |
| Model Number | DX-668 (R380) |
| Screen Size | 1.54 Inches |
| Display Type | LCD |
| Sensor Type | Speed Sensor |
| Mounting Type | Handlebar Mount |
| Human Interface Input | Buttons |
| Included Components | Cable, Magnet, Sensor |
| Water Resistance | Yes (Water Proof) |
| Functions | 15 Functions (SPO, ODO, DST, TM, Comparator, AVS, Setting Speed Scale, Setting Tyre Circumference, Setting Odometer Value, CLK, Auto ON/OFF, Scan, Maintenance) |
Warranty and Support
For warranty information or technical support, please refer to the product packaging or contact the manufacturer directly. Keep your purchase receipt as proof of purchase.
Manufacturer: m s
Related Documents - DX-668 (R380)
 |
MS22C-002 Portable Tire Inflator Instruction Manual Comprehensive instruction manual for the MS22C-002 Portable Tire Inflator, covering product features, accessories, operation, safety guidelines, and maintenance. |
 |
Eaton DX-SIN3 Sine-Wave Filter Instruction Leaflet Installation and technical specifications for Eaton DX-SIN3 series sine-wave filters, including dimensions, mounting, electrical connection, and derating data. |
 |
KEYENCE DX Series Handheld Terminal Instruction Manual - Safety, Specifications, and Usage Guide Comprehensive instruction manual for KEYENCE DX Series handheld terminals (DX-A600, DX-A600GE, DX-A400, DX-A400GE, DX-W600 models). Covers safety precautions, regulatory compliance (FCC, ISED, CE, UKCA, UL), unit installation, cleaning, specifications, and warranty information. |
 |
KEYENCE DX Series Handheld Terminal Instruction Manual Instruction manual for the KEYENCE DX Series handheld terminals, covering safety precautions, regulations, installation, specifications, and handling for models DX-A600, DX-A600GE, DX-A400, DX-A400GE, and DX-W600. |
 |
Entel DX-IS Land Series Quick Start User Guide | Intrinsically Safe Radios Quick start guide for the Entel DX-IS Land Series intrinsically safe two-way radios. Learn about packing, battery charging, controls, indicators, accessories, and basic operation. |
 |
Entel DX-IS Land Series Quick Start User Guide Quick start guide for the Entel DX-IS Land Series intrinsically safe two-way radios, covering setup, controls, battery information, and basic operation. Includes accessory compatibility and compliance details. |
Ask a question about this manual
Ask about setup, troubleshooting, compatibility, parts, safety, or missing instructions. Manuals+ will review the question and use this page’s manual context to help answer it.