
1. Introduction
This manual provides essential information for the proper installation, operation, and maintenance of your TWTADE WH138 500 ohm single turn rotary linear variable potentiometer. Please read this manual thoroughly before use to ensure optimal performance and safety.
2. Product Features
- Product Type: Rotary Potentiometer
- Model: WH138 500 ohm
- Resistance Value: 500 ohm
- Type: Single Turn Rotary Linear Variable Potentiometer
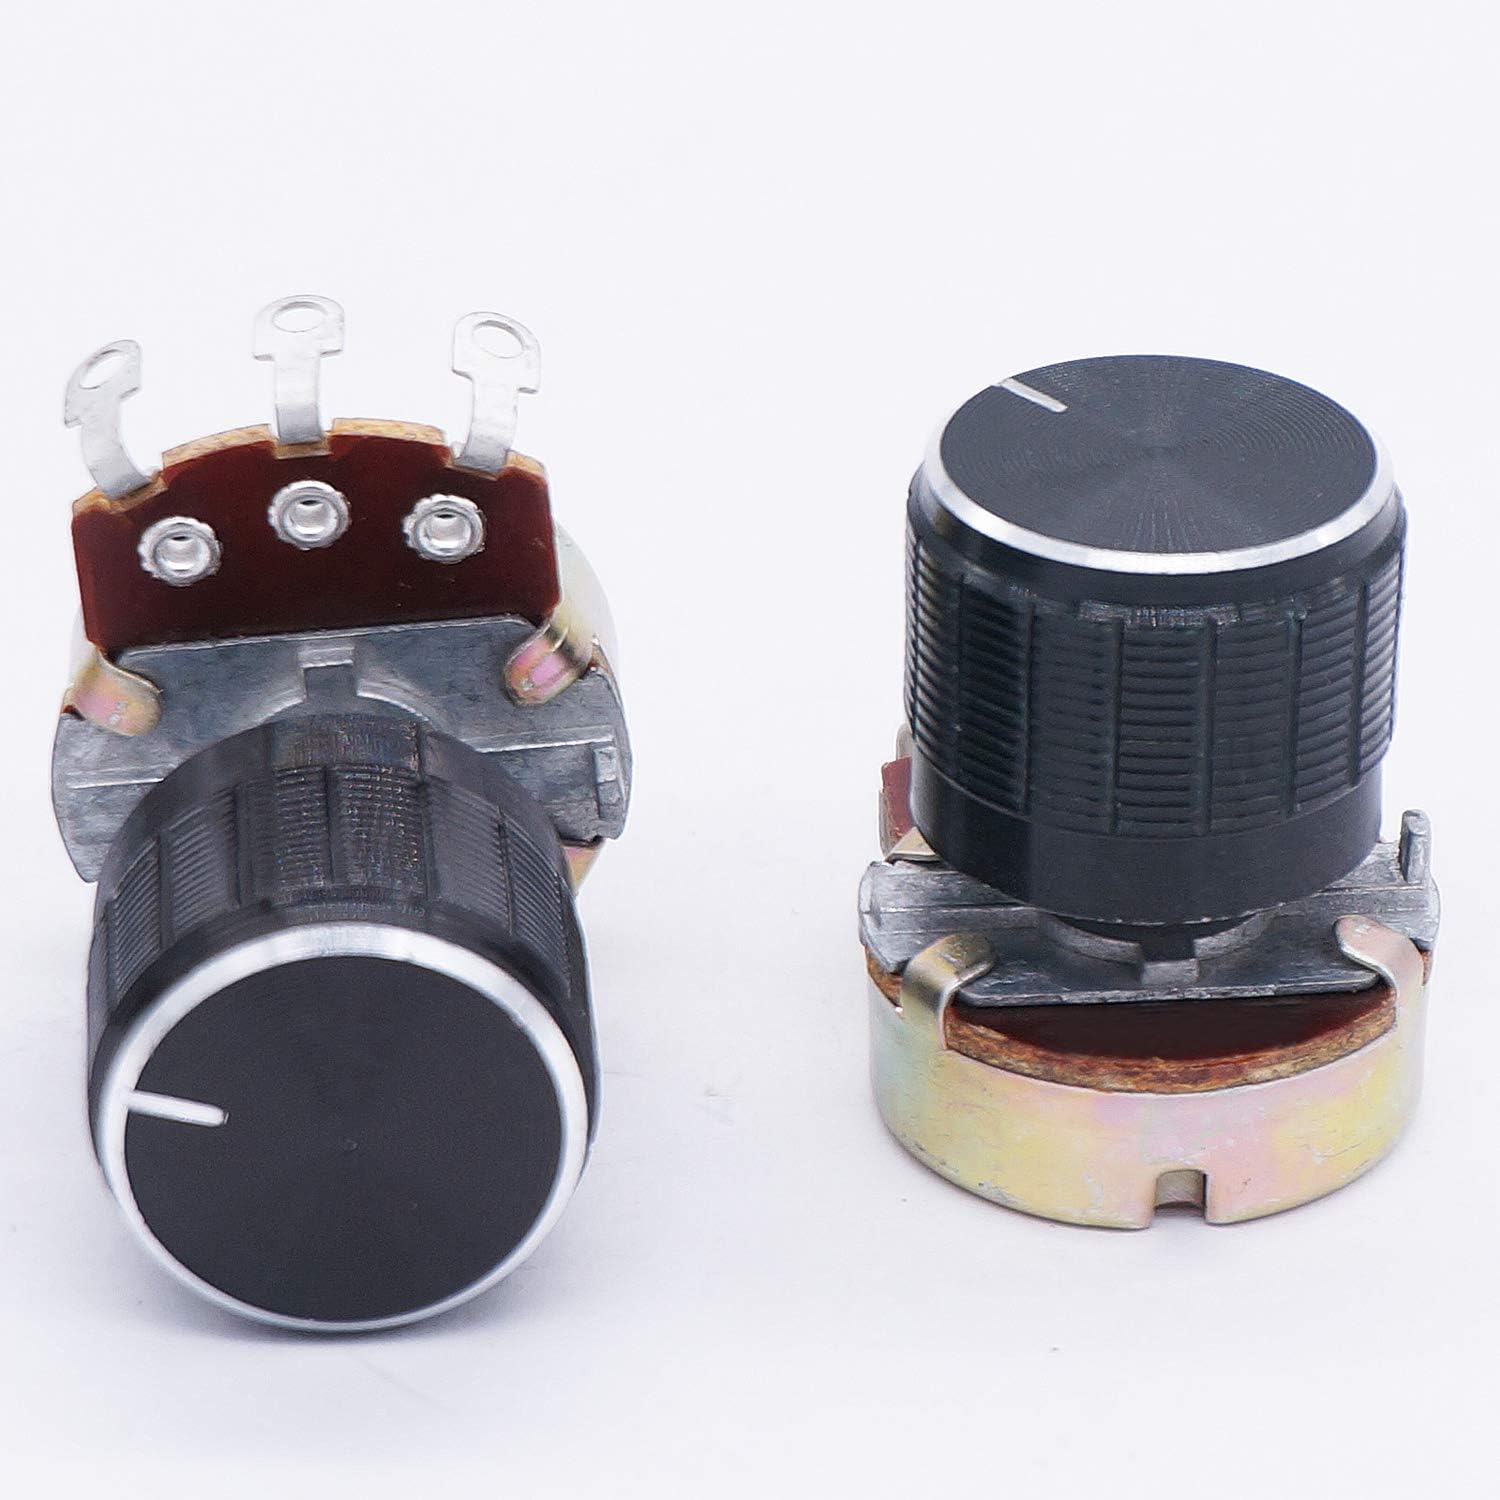
- Includes: 3 potentiometers and 3 black aluminum alloy knobs
- Potentiometer Body Size: 24 x 10mm (Diameter x Height)
- Potentiometer Total Height: 26mm
- Screw Thread Diameter: 8mm
- Shaft Diameter: 6mm
- Shaft Length: 8mm
- Rotary Knob Size: 17 x 21mm (Height x Max. Diameter)
- Rated Power (Linear taper B): 0.5W
- Rated Power (Other Tapers): 0.25W
- Switch Circuit: S.P.S.T.
- Rated Power (Switch): 1A at AC/DC 125V
- Rotational Life (Potentiometer): 10,000 Cycles
- Rotational Life (Joystick): 100,000 Cycles Min.
- Material: Carbon
3. Product Components


4. Installation and Setup
Potentiometers are variable resistors commonly used to control electrical signals such as volume, tone, or brightness. Proper installation is crucial for functionality and safety.
4.1. Safety Precautions
- Always disconnect power to the circuit before installing or replacing components.
- Ensure proper soldering techniques are used to prevent cold joints or short circuits.
- Verify the potentiometer's specifications (resistance, power rating) match your circuit requirements.
4.2. Wiring a Potentiometer
A typical potentiometer has three terminals:
- Terminal 1 (End Terminal): Connect to one end of the voltage source or signal input.
- Terminal 2 (Wiper): This is the output terminal. Its resistance varies as the shaft is rotated.
- Terminal 3 (End Terminal): Connect to the other end of the voltage source or ground.
For variable resistance applications (e.g., current limiting), you can use only two terminals: one end terminal and the wiper. For voltage divider applications (e.g., volume control), all three terminals are typically used.
4.3. Mounting the Potentiometer
- Drill an 8mm diameter hole in the panel where the potentiometer will be mounted.
- Insert the potentiometer shaft through the hole.
- Secure the potentiometer with the provided nut and washer on the front side of the panel.
- Press the black aluminum alloy knob onto the splined shaft until it is firmly seated.
5. Operation
Once installed and wired correctly, the potentiometer operates by rotating the attached knob. This rotation moves the wiper contact along the resistive track, changing the resistance between the wiper and the two end terminals.
- Clockwise Rotation: Typically increases the resistance between Terminal 1 and the wiper, and decreases resistance between the wiper and Terminal 3.
- Counter-Clockwise Rotation: Typically decreases the resistance between Terminal 1 and the wiper, and increases resistance between the wiper and Terminal 3.
The specific effect of rotation depends on how the potentiometer is wired into the circuit (e.g., as a rheostat or voltage divider).
6. Maintenance
Potentiometers are generally low-maintenance components. However, certain practices can extend their lifespan and ensure reliable operation:
- Keep Clean: Avoid exposing the potentiometer to dust, dirt, or moisture, which can degrade the resistive track and wiper contact.
- Avoid Excessive Force: Do not apply excessive rotational force to the knob, as this can damage the internal mechanism or shaft.
- Regular Inspection: Periodically check wiring connections for looseness or corrosion.
- Storage: Store unused potentiometers in a dry, clean environment.
7. Troubleshooting
If you encounter issues with your potentiometer, consider the following troubleshooting steps:
- No Change in Resistance/Output:
- Check all wiring connections for continuity and proper soldering.
- Ensure the wiper terminal is correctly connected.
- Verify the potentiometer is not damaged internally (e.g., broken resistive track).
- Intermittent or Scratchy Sound (in audio applications):
- This often indicates a dirty or worn resistive track. Cleaning with a specialized electronic contact cleaner may help, but replacement is often the best solution for severe cases.
- Resistance Value Incorrect:
- Use a multimeter to measure the resistance across the end terminals (should match the rated value) and between an end terminal and the wiper as you rotate the shaft.
- Ensure you have selected the correct resistance value for your application.
- Knob Loose or Not Turning:
- Ensure the mounting nut is tightened securely.
- Check if the knob is properly seated on the splined shaft.
- If the shaft itself is stiff or broken, the potentiometer may need replacement.
8. Specifications
| Attribute | Value |
|---|---|
| Product Name | Potentiometer |
| Model | WH138 500 ohm |
| Type | Rotary Potentiometer |
| Potentiometer Body Size | 24 x 10mm (D * H) |
| Potentiometer Total Height | 26mm |
| Screw Thread Diameter | 8mm |
| Shaft Diameter | 6mm |
| Shaft Length | 8mm |
| Rotary Knob Size | 17 x 21mm (H * Max. D) |
| Rated Power (Linear taper B) | 0.5W |
| Rated Power (Other Tapers) | 0.25W |
| Switch Circuit | S.P.S.T |
| Rated Power (Switch) | 1A at AC/DC 125V |
| Rotational Life (Potentiometer) | 10,000 Cycles |
| Rotational Life (Joystick) | 100,000 Cycles Min. |
| Item Weight | 1.76 ounces (for 3 pieces) |
| Material | Carbon |
| Manufacturer | TWTADE |
9. Contact and Support
For further assistance or inquiries regarding your TWTADE potentiometer, please refer to the official TWTADE store or contact their customer support channels.
Official TWTADE Store: TWTADE Store on Amazon