1. Introduction
Thank you for choosing the Docooler LiitoKala Lii-500 Smart Battery Charger. This advanced charger is designed to provide efficient and safe charging for various rechargeable batteries, including Li-ion, Ni-MH, and Ni-CD types. It features an intuitive LCD display, four independent charging slots, and multiple charging current options, along with a USB output function.
Please read this manual carefully before use to ensure proper operation and to maximize the lifespan of your batteries and charger.
2. Safety Instructions
To prevent injury, property damage, or damage to the charger and batteries, observe the following safety precautions:
- Use only the supplied AC adapter. Using an incompatible adapter may cause damage or fire.
- Do not charge non-rechargeable batteries. This can lead to explosion, rupture, or leakage.
- Ensure correct battery polarity (+/-) when inserting batteries into the charger slots.
- Do not disassemble, modify, or attempt to repair the charger. Contact customer support for assistance.
- Keep the charger away from water, moisture, direct sunlight, and high temperatures.
- Do not operate the charger if it appears damaged or has been dropped.
- Keep out of reach of children.
- Ensure adequate ventilation during charging. Do not cover the charger.
3. Product Overview
3.1. Components
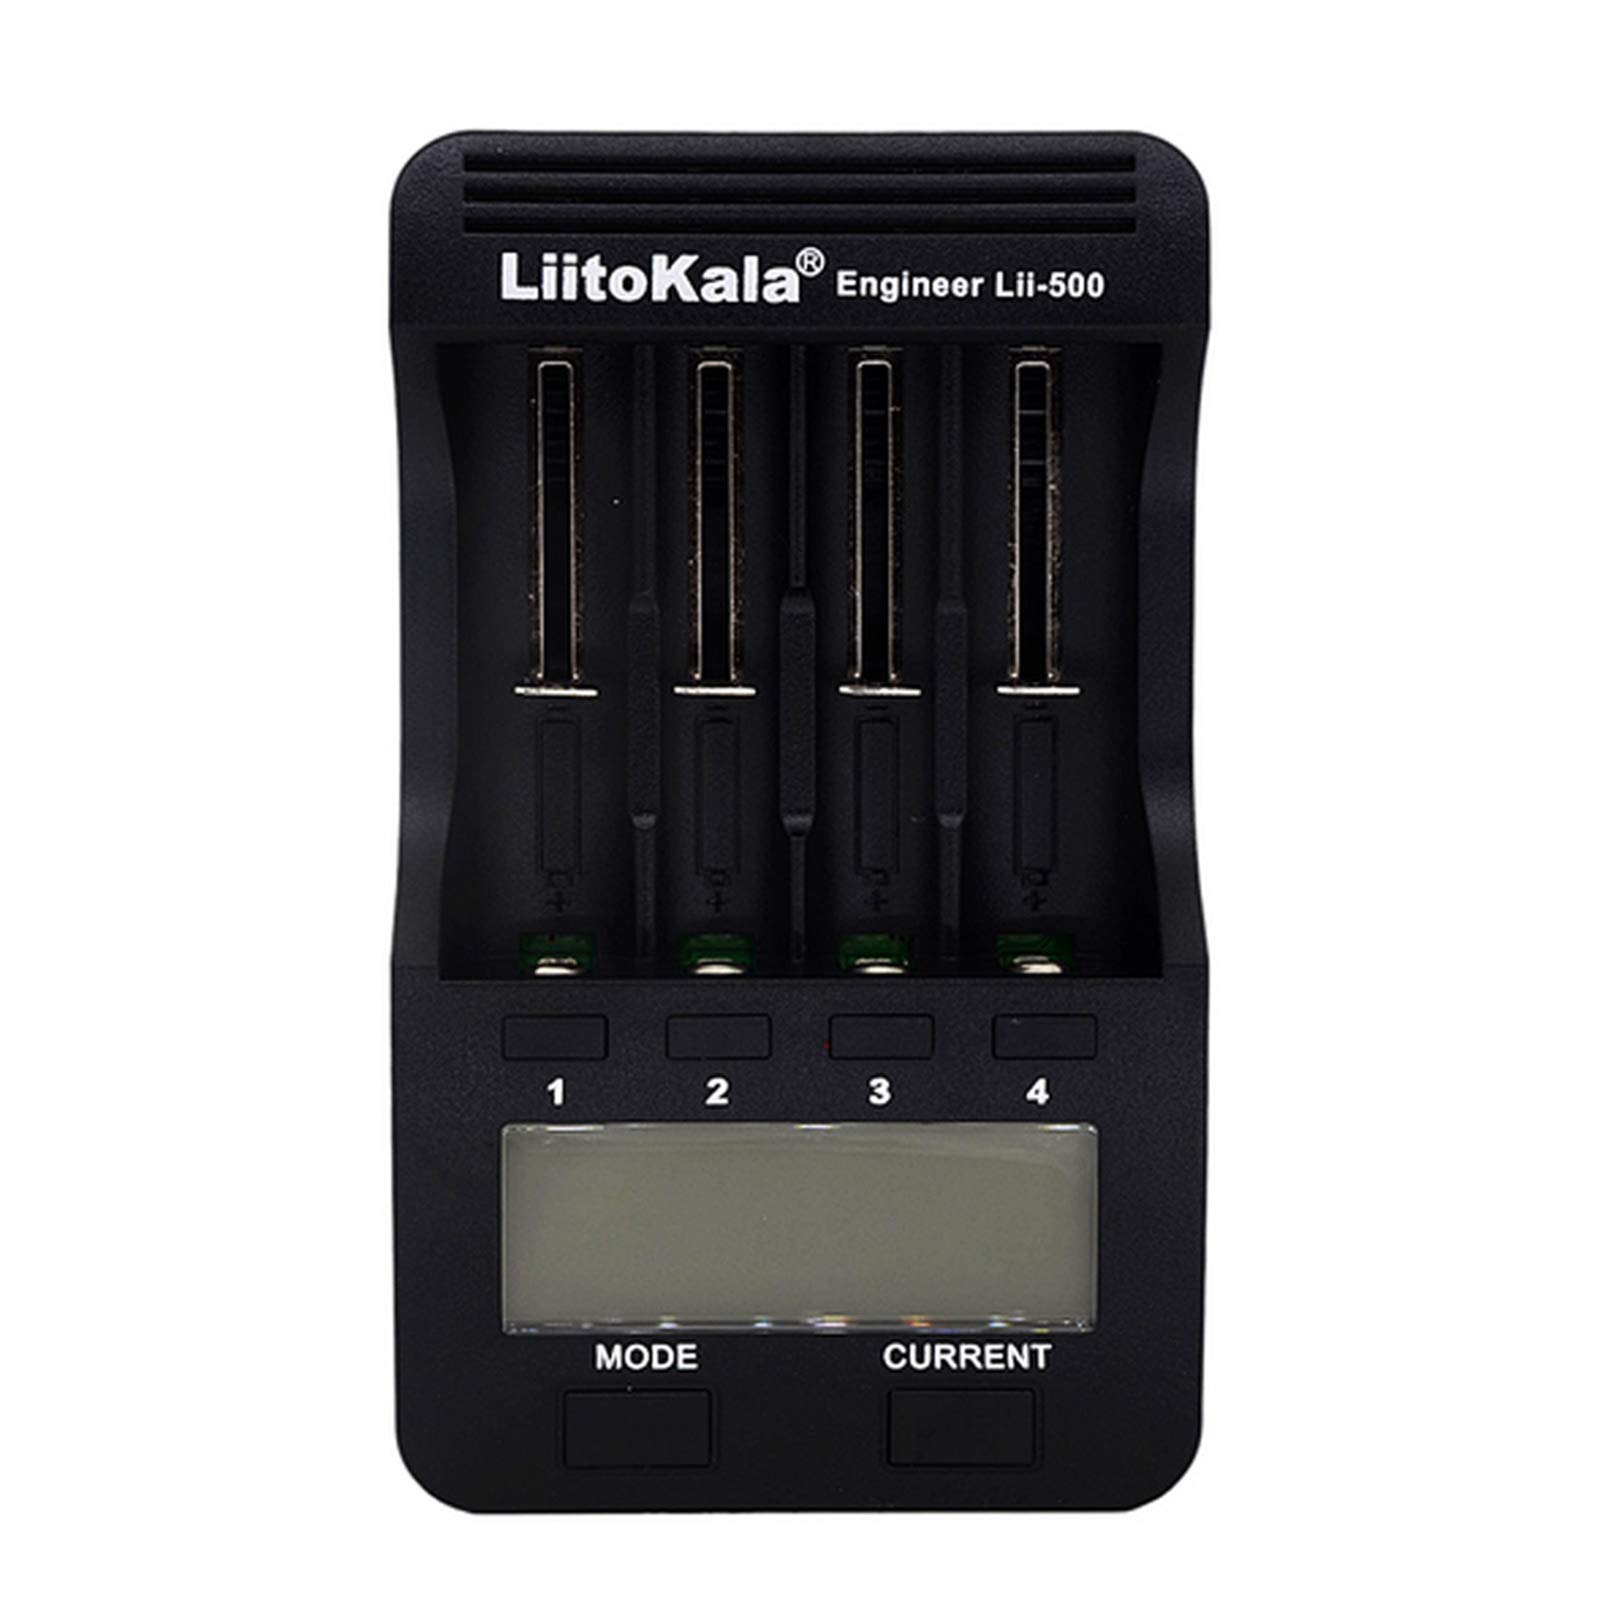
Figure 1: Top view of the Lii-500 charger, displaying the four independent battery slots and the LCD screen.

Figure 2: Lii-500 charger with four batteries inserted, illustrating how batteries fit into the slots and the visibility of the LCD display.
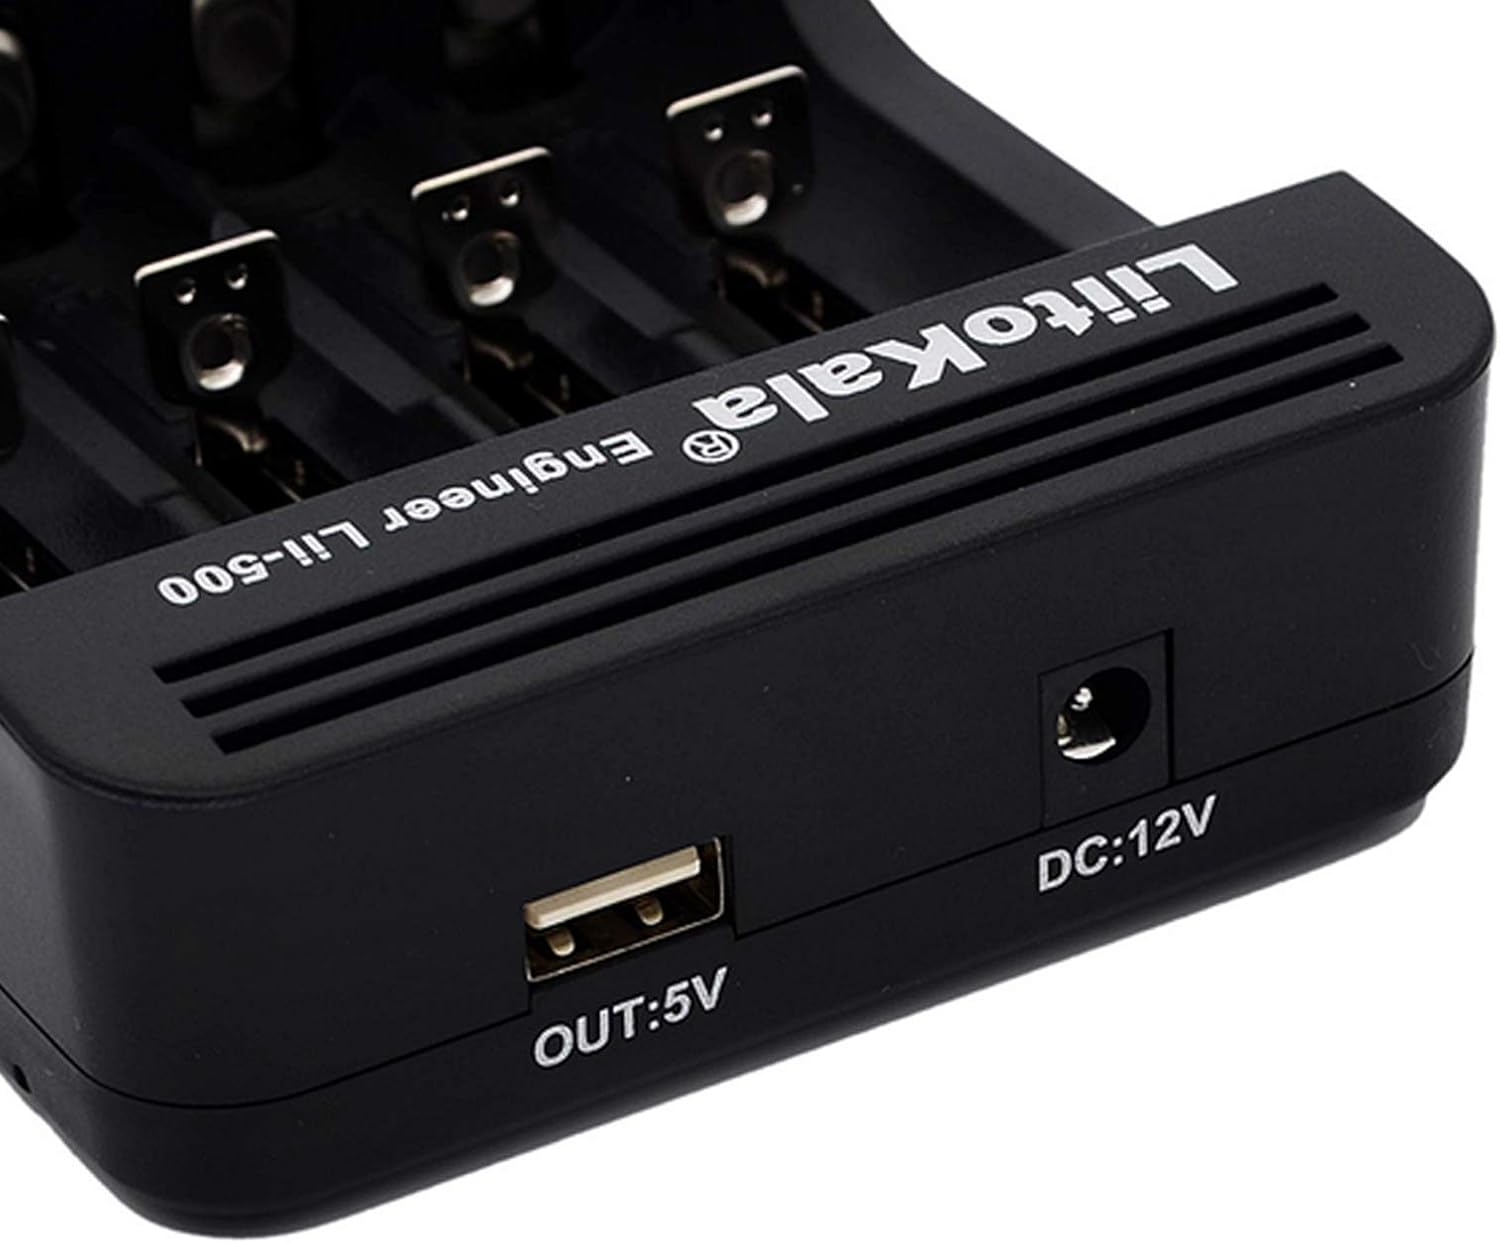
Figure 3: Side view of the Lii-500 charger, highlighting the DC 12V power input and the 5V USB output port.

Figure 4: Dimensions of the Lii-500 charger, indicating its compact size.
3.2. LCD Display
The LCD screen provides real-time information for each battery slot, including:
- Voltage (V): Current battery voltage.
- Current (mA): Selected charging/discharging current.
- Time (h): Elapsed charging/discharging time.
- Capacity (mAh): Accumulated capacity during charging/discharging.
- Internal Resistance (mR): Battery's internal resistance (displayed during test modes).
4. Specifications
| Feature | Specification |
|---|---|
| Input Voltage | DC 12V / 2A |
| Charging Current (Li-ion) | 300mA / 500mA / 700mA / 1000mA x 4 |
| Charging Current (Ni-MH/Ni-CD) | 300mA / 500mA / 700mA / 1000mA x 4 |
| Discharge Current | 250mA / 500mA x 4 |
| USB Output | 5V / 1000mA (requires 1-4 Li-ion batteries) |
| Compatible Batteries | Li-ion (3.7V): 26650, 22650, 26500, 18650, 18490, 17670, 17500, 17355, 16340, 14500, 10440 Ni-MH/Ni-CD (1.2V): AA, AAA, C, SC |
| Dimensions | 15.9cm x 9.3cm x 3.7cm (approx.) |
| Weight | 210 Grams (approx.) |
5. Setup
- Connect Power: Plug the provided AC adapter into a power outlet and connect the DC 12V end to the charger's input port. The LCD screen will illuminate.
- Insert Batteries: Carefully insert one or more rechargeable batteries into the charging slots, observing the correct polarity (+/-). The charger will automatically detect the battery type (Li-ion or Ni-MH/Ni-CD) and display its current voltage.
6. Operating Instructions
The Lii-500 charger offers three main operating modes: Charge, Fast Test, and Normal Test.
6.1. Mode Selection
After inserting a battery, press the MODE button to cycle through the available modes:
- Charge Mode: Standard charging of batteries.
- Fast Test Mode: Quickly determines battery capacity by discharging and then fully charging.
- Normal Test Mode: Provides a more accurate capacity measurement by fully charging, then discharging, and finally recharging the battery.
If no mode is selected within 8 seconds, the charger will default to Charge Mode at 500mA.
6.2. Current Selection
In Charge Mode, after selecting the mode, press the CURRENT button to choose the desired charging current (300mA, 500mA, 700mA, or 1000mA). The selected current will apply to all active slots. For optimal battery life, it is generally recommended to use lower charging currents unless faster charging is required.
6.3. Independent Slot Operation
Each of the four slots operates independently. You can set different modes and currents for each battery by pressing the corresponding slot number button (1, 2, 3, or 4) after inserting a battery, then using the MODE and CURRENT buttons.
6.4. USB Output Function
The Lii-500 features a 5V/1000mA USB output port, allowing it to function as a power bank. This function is active only when 1 to 4 fully charged Li-ion batteries are inserted into the charger. Ni-MH/Ni-CD batteries do not support the USB output function.

Figure 5: Illustration of the Lii-500 charger providing power via its USB output port to charge a mobile device.
7. Maintenance
- Cleaning: Disconnect the charger from power before cleaning. Use a soft, dry cloth to wipe the surface. Do not use abrasive cleaners or solvents.
- Storage: Store the charger in a cool, dry place away from direct sunlight and extreme temperatures when not in use.
- Battery Care: For optimal battery life, avoid fully discharging Li-ion batteries frequently. Store batteries at approximately 50% charge if not used for extended periods.
8. Troubleshooting
| Problem | Possible Cause | Solution |
|---|---|---|
| Charger not powering on. | Power adapter not connected or faulty. | Ensure the AC adapter is securely plugged into both the wall outlet and the charger. Try a different outlet. |
| Battery not charging. | Incorrect battery insertion; battery is non-rechargeable; battery is severely over-discharged (0V activation needed). | Check battery polarity. Ensure it's a rechargeable battery. The charger has 0V activation; if it doesn't start, the battery might be beyond recovery. |
| USB output not working. | Only Li-ion batteries support USB output; batteries are not sufficiently charged. | Ensure 1-4 Li-ion batteries are inserted and fully charged. Ni-MH/Ni-CD batteries do not provide USB output. |
| Charger gets warm during operation. | Normal operation, especially during high-current charging or discharge cycles. | Ensure adequate ventilation around the charger. If it becomes excessively hot to touch, reduce the charging current or discontinue use and contact support. |
9. Warranty and Support
Docooler products are designed for reliability and performance. For warranty information or technical support, please refer to the documentation included with your purchase or contact your retailer. Keep your purchase receipt as proof of purchase.
For further assistance, you may visit the official Docooler website or contact their customer service department.


