Introduction
This manual provides detailed instructions for the installation, operation, and maintenance of your RSHTECH External Hard Drive Enclosure (Model DE-319). Please read this manual thoroughly before using the product to ensure proper functionality and longevity.
Product Overview
The RSHTECH External Hard Drive Enclosure is designed to provide a convenient and efficient way to connect 2.5-inch and 3.5-inch SATA I/II/III HDDs and SSDs to your computer via USB 3.0. It supports drives up to 16TB and features the ASM1153E master chip for stable 6Gbps data transfer rates with UASP protocol support. Its tool-free design and robust ABS construction ensure ease of use and durability.

Figure 1: RSHTECH External Hard Drive Enclosure, showing the main unit, power adapter, and USB 3.0 cables.
Package Contents
- RSHTECH External Hard Drive Enclosure (Model DE-319)
- 12V/2A Power Adapter
- USB 3.0 Data Cable
- User Manual (this document)
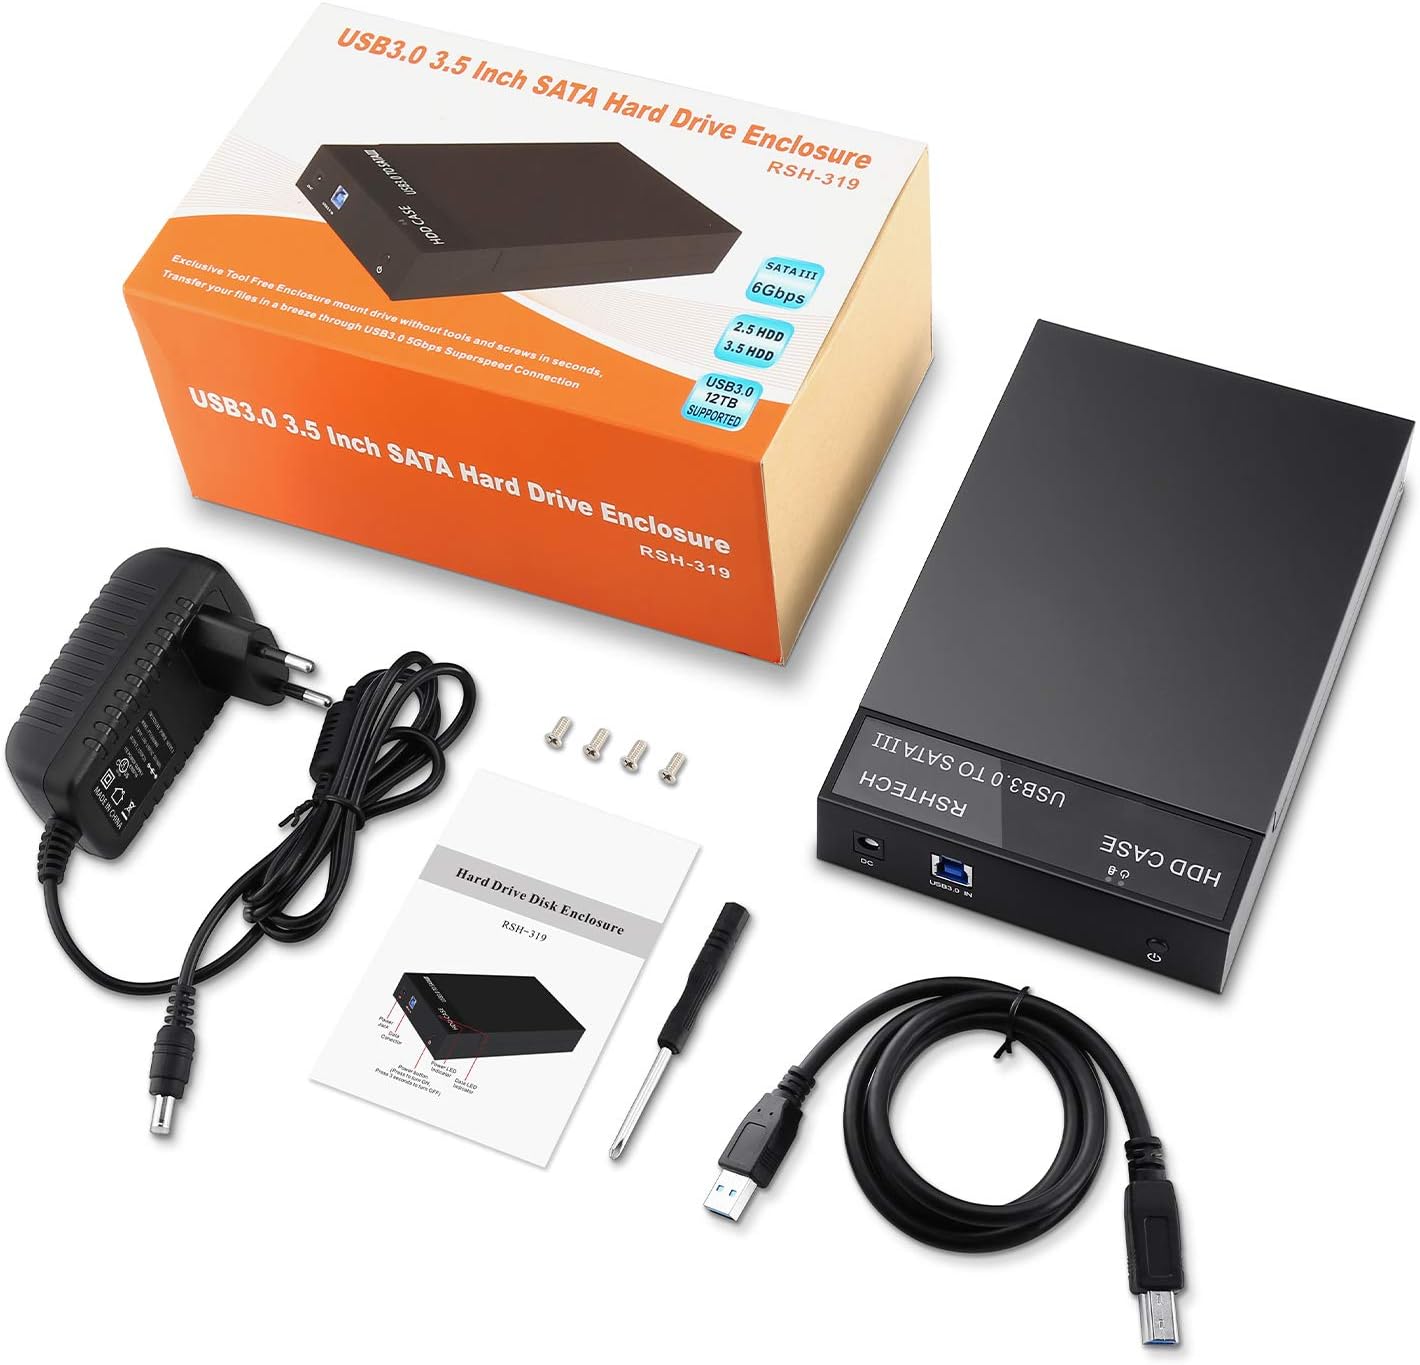
Figure 2: All items included in the product package, including the enclosure, power adapter, USB cable, and manual.
Setup Instructions
1. Installing the Hard Drive
- Gently slide open the enclosure cover. The tool-free design allows for easy access.
- Carefully insert your 2.5-inch or 3.5-inch SATA HDD/SSD into the enclosure, ensuring the SATA connectors align properly.
- Slide the enclosure cover back until it clicks securely into place.

Figure 3: Illustrates the easy slide-open mechanism for hard drive installation.
2. Connecting to Your Computer
- Connect the provided 12V/2A power adapter to the DC input port on the enclosure and then plug it into a power outlet.
- Connect one end of the USB 3.0 data cable to the USB 3.0 port on the enclosure.
- Connect the other end of the USB 3.0 data cable to an available USB 3.0 port on your computer. For optimal performance (6Gbps), ensure you use a USB 3.0 port. Using a USB 2.0 port may result in slower transfer speeds.
- The LED indicator on the enclosure will illuminate, indicating power and activity status.

Figure 4: The enclosure connected to a laptop, demonstrating the USB 3.0 connection and highlighting SATAIII 6Gbps and UASP support.
Operating Instructions
1. Drive Recognition
Once connected, your operating system (Windows, macOS, Linux) should automatically detect the new external drive. For new hard drives, you may need to initialize and format the drive through your operating system's Disk Management utility before it can be used.
2. Data Transfer
You can now drag and drop files to and from the external drive as you would with any other storage device. The enclosure supports UASP (USB Attached SCSI Protocol) for faster data transfer speeds, especially with SSDs.

Figure 5: The enclosure connected and in use with a laptop, demonstrating its compact and functional design.
3. Sleep Mode
The enclosure features an automatic sleep mode. If there is no data activity for 10 minutes, the drive will enter sleep mode to conserve power and extend drive lifespan. It will automatically wake up upon data access.
4. Hot-Swapping
The enclosure supports hot-swapping. However, always ensure to safely eject or unmount the drive from your operating system before disconnecting the enclosure or removing the hard drive to prevent data corruption.
Maintenance
- Keep the enclosure clean and free from dust. Use a soft, dry cloth for cleaning.
- Ensure proper ventilation. The hollow design aids in heat dissipation, but avoid blocking the ventilation holes.
- Avoid exposing the device to extreme temperatures, humidity, or direct sunlight.
- Do not drop or subject the enclosure to strong impacts, as this may damage the internal hard drive.
- When not in use, it is recommended to manually turn off the power adapter to fully power down the device.
Troubleshooting
| Problem | Possible Cause | Solution |
|---|---|---|
| Drive not detected by computer. |
|
|
| Slow data transfer speed. |
|
|
| Enclosure gets warm. | Normal operation. | The enclosure is designed with a hollow structure for heat dissipation. Some warmth during operation is normal. Ensure adequate airflow around the device. |
Specifications
- Model: DE-319
- Brand: RSHTECH
- Interface: USB 3.0 (backward compatible with USB 2.0)
- Data Transfer Rate: Up to 6 Gbps (with UASP support)
- Compatible Drives: 2.5-inch & 3.5-inch SATA I/II/III HDD/SSD
- Max Capacity: Up to 16TB (Note: Some specifications mention 20TB, but 16TB is confirmed in product features)
- Chipset: ASM1153E
- Power Supply: External 12V/2A Power Adapter
- Material: ABS Plastic
- Dimensions: Approximately 18 cm (L) x 11.6 cm (W) x 3.3 cm (H)
- Operating System Compatibility: Windows XP/Vista/7/8/10, Linux, macOS
- Features: Tool-free installation, Automatic 10-minute sleep mode, Hot-swappable, LED indicator
Warranty and Support
RSHTECH products come with a standard manufacturer's warranty. For specific warranty terms and conditions, please refer to the warranty card included with your product or visit the official RSHTECH website. For technical support, troubleshooting assistance, or any inquiries, please contact RSHTECH customer service through their official channels.
You can find more information and support resources on the RSHTECH Brand Store.


