
1. Introduction
Thank you for choosing the Arcchio LED Panel 'Arya'. This instruction manual provides essential information for the safe installation, operation, and maintenance of your new LED ceiling light. Please read this manual thoroughly before installation and retain it for future reference.

Overview of the Arcchio LED Panel 'Arya', a sleek, rectangular ceiling light designed for modern interiors.
2. Safety Instructions
Always observe the following safety precautions to prevent injury or damage to the product:
- Electrical Installation: Installation must be performed by a qualified electrician in accordance with local electrical codes and regulations.
- Power Disconnection: Ensure the main power supply is switched off at the circuit breaker before any installation, maintenance, or cleaning.
- Voltage: This product operates on 230 Volts. Verify your electrical supply matches this requirement.
- Indoor Use Only: The product has an IP20 rating, indicating it is protected against solid objects larger than 12.5mm but has no protection against water. It is suitable for indoor use only.
- Handling: Handle the LED panel with care to avoid damage to the light source or housing.
- Cleaning: Use a soft, dry cloth for cleaning. Do not use abrasive cleaners or solvents.
3. Package Contents
Verify that all components are present in the package:
- 1 x Arcchio LED Panel 'Arya'
- 1 x Remote Control
- Mounting hardware (screws, anchors)
- Instruction Manual
4. Setup and Installation
The Arcchio LED Panel 'Arya' is designed for ceiling mount installation. Due to the electrical nature of this product, professional installation is strongly recommended.
4.1 Pre-Installation Steps
- Power Off: Turn off the main power supply to the installation area at the circuit breaker.
- Unpack: Carefully remove the LED panel and all components from the packaging. Inspect for any damage.
- Identify Mounting Location: Choose a suitable location on the ceiling, ensuring it can support the weight of the fixture (approximately 2 kg).
4.2 Mounting the Fixture
The panel features integrated mounting brackets. Refer to the following images for guidance on the physical structure and internal components.

This image displays the rear of the LED panel, highlighting the mounting mechanism and internal components for installation.
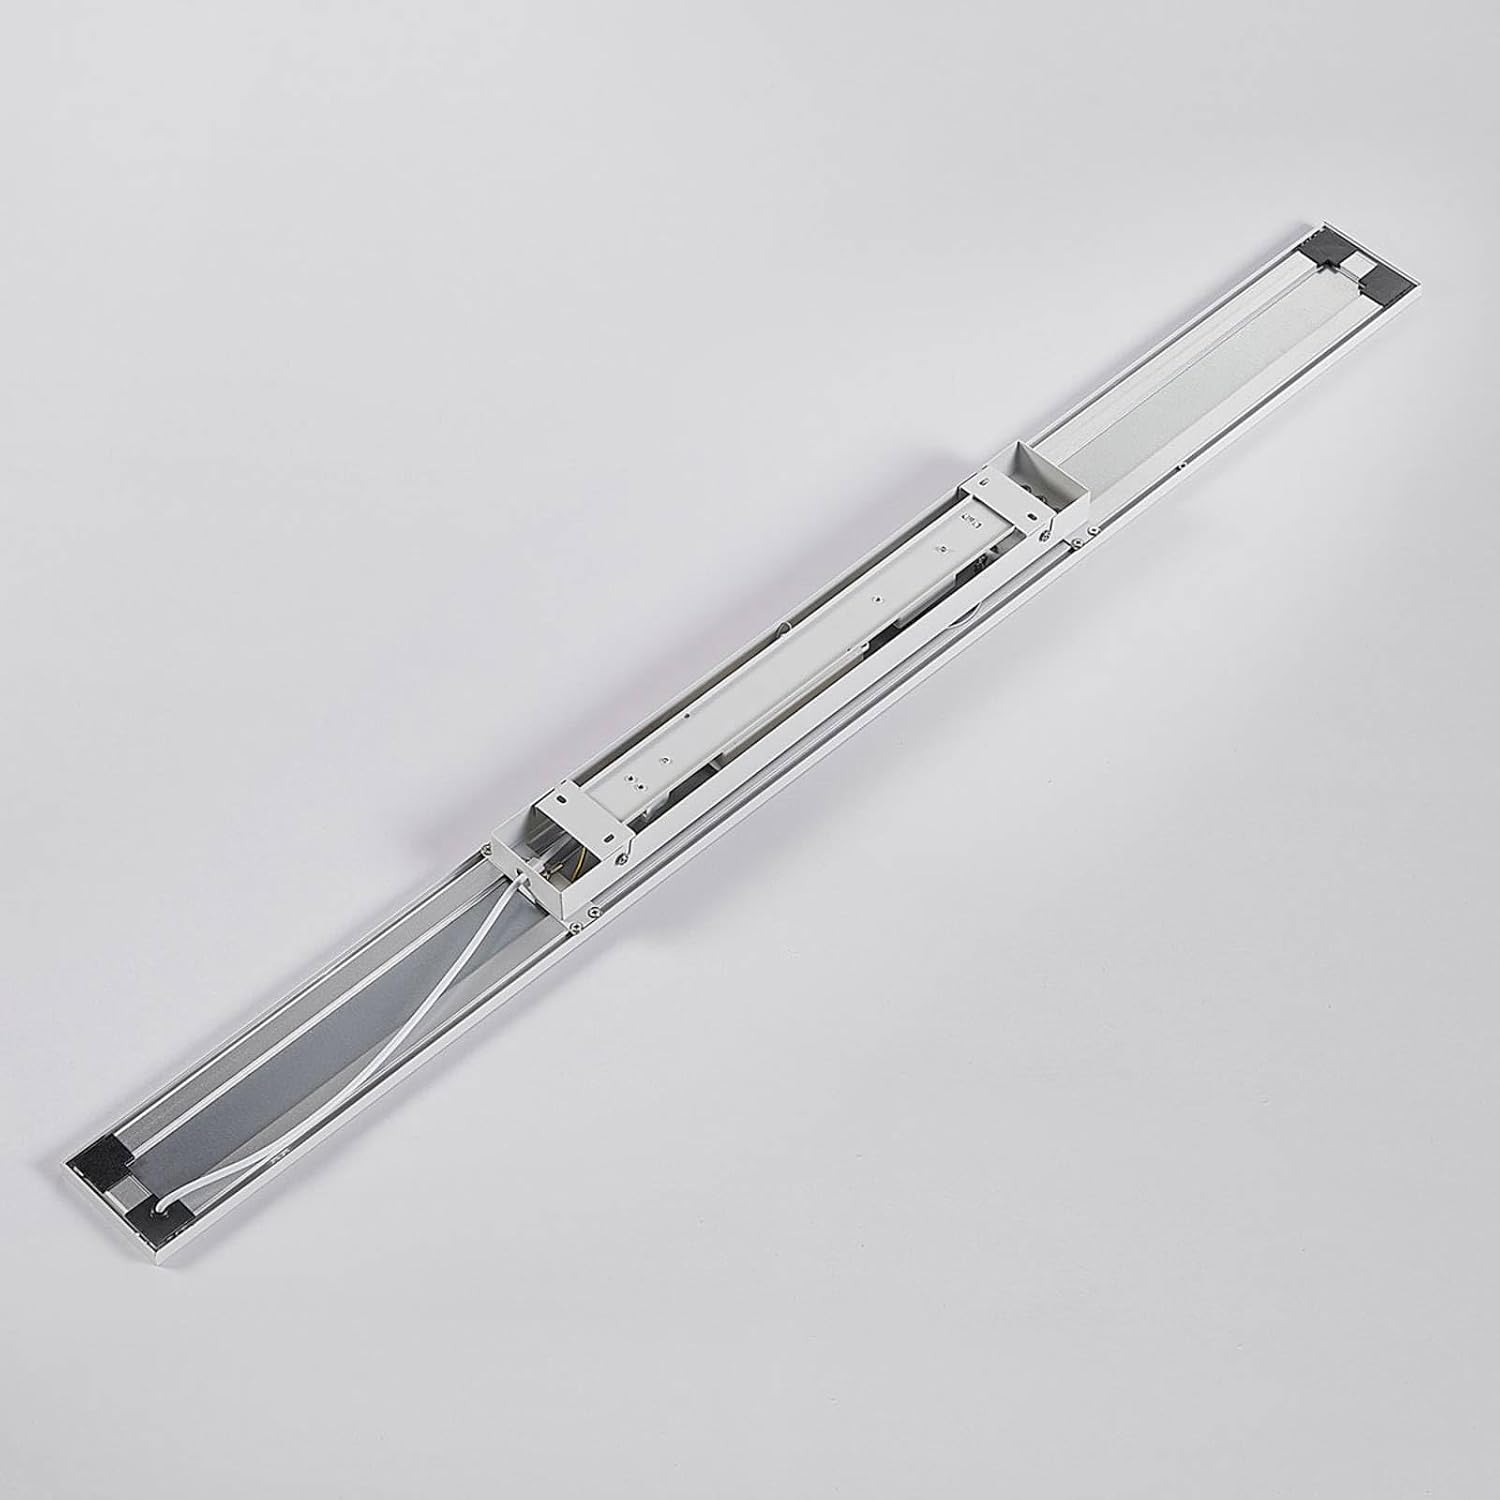
A detailed view of the LED panel's internal wiring and driver, essential for understanding electrical connections.
- Mark Drill Holes: Hold the panel against the ceiling at the desired location and mark the positions for the mounting screws.
- Drill Holes: Drill appropriate holes for the provided anchors (if necessary) and insert them.
- Wire Connections: Connect the electrical wires from the ceiling to the terminal block on the LED panel. Ensure correct polarity (Live, Neutral, Earth).
- Secure Panel: Attach the LED panel to the ceiling using the screws, ensuring it is securely fastened.
- Power On: Restore power at the circuit breaker.
5. Operating Instructions
The Arcchio LED Panel 'Arya' is operated using the included remote control. This allows for convenient power control, dimming, and color temperature adjustment.

The dedicated remote control for the LED panel, featuring buttons for power, brightness adjustment, and color temperature selection (3000K-6000K).
5.1 Remote Control Functions
- Power On/Off: Press the 'I' button to turn the light on, and the 'O' button to turn it off.
- Dimming: Use the '+' and '-' buttons to increase or decrease the brightness of the light. The lamp can be continuously dimmed to create a desired lighting atmosphere.
- Color Temperature Adjustment: The remote allows adjustment between warm white (3000K) and cool white (6000K). Use the '3000K' and '6000K' buttons or the circular control to select your preferred color temperature.
- Night Light Mode: The moon icon button activates a low-brightness night light setting.

The Arcchio LED Panel 'Arya' mounted on a ceiling, illuminating a study or office environment.
6. Maintenance
Regular maintenance ensures the longevity and optimal performance of your LED panel.
- Cleaning: Before cleaning, ensure the power supply is disconnected. Wipe the surface of the panel with a soft, dry, or slightly damp cloth. Do not use harsh chemicals or abrasive materials.
- Light Source: The LED light source is integrated and not user-replaceable. If the light source fails, the entire fixture may need to be replaced.
- Inspection: Periodically check the mounting and electrical connections for any signs of wear or loosening.
7. Troubleshooting
If you encounter issues with your Arcchio LED Panel, refer to the following common problems and solutions:
| Problem | Possible Cause | Solution |
|---|---|---|
| Light does not turn on. | No power supply, loose wiring, faulty remote control battery. | Check circuit breaker. Verify wiring connections. Replace remote control batteries. |
| Remote control not working. | Batteries depleted, remote out of range, obstruction. | Replace batteries. Ensure clear line of sight to the panel. Move closer to the panel. |
| Light flickers or dims unexpectedly. | Unstable power supply, loose connection. | Consult a qualified electrician to check the electrical supply and connections. |
If the problem persists after attempting these solutions, please contact customer support or a qualified electrician.
8. Specifications
Key technical specifications for the Arcchio LED Panel 'Arya':
| Feature | Specification |
|---|---|
| Brand | Arcchio |
| Model Number | 9621582 |
| Dimensions (L x W x H) | 119.5 x 10 x 4.5 cm |
| Weight | 2 kg |
| Material | Plastic |
| Color | White |
| Light Source | Integrated LED |
| Wattage | 30 Watts |
| Luminous Flux | 1600 Lumen |
| Voltage | 230 Volts |
| Area Lighting Classification (IP Rating) | IP20 |
| Special Features | Dimmable, Remote Control, Energy Saving |
| EU Energy Efficiency Label | F (formerly A+) |

The EU Energy Efficiency Label for the LED panel, indicating its energy class and consumption. For more details, visit the EPREL database.
9. Warranty and Support
For warranty information and customer support, please refer to the terms and conditions provided by your retailer or contact Arcchio customer service directly. Keep your proof of purchase for any warranty claims.