
Product Overview
The JENSEN JCR-315 Digital AM/FM Dual Alarm Clock Radio is designed for convenience and functionality. It features a classic wooden exterior with a blue backlit digital LCD display. Key features include dual alarms, selectable wake-up options (radio or alarm), calendar display, sleep/snooze functions, and a built-in 1-amp USB charging port. The unit also offers a 3-setting dimmer switch for display brightness adjustment and a digital tuner with 10 AM and 10 FM station presets. An auxiliary input jack allows connection of external audio devices.

Image: Front view of the Jensen JCR-315 Digital AM/FM Dual Alarm Clock Radio, showcasing its wooden finish, fabric speaker grille, blue LCD display, and control buttons.
Setup and Initial Use
Power Connection
Connect the AC power cord to a standard 120-volt AC wall outlet. The unit is designed to operate on AC power.
Battery Backup Installation
For battery backup, install 2 AAA batteries (not included) into the battery compartment located on the bottom of the unit. This ensures that your time and alarm settings are retained during a power outage.
Antenna Setup
Extend the telescopic antenna fully for optimal FM radio reception. For AM reception, the unit has a built-in antenna; try rotating the unit for better signal.
Setting the Time
- Press and hold the SET button until the time display flashes.
- Use the UP or DOWN buttons to adjust the hour. Press SET to confirm.
- Use the UP or DOWN buttons to adjust the minute. Press SET to confirm.
- Continue pressing SET to cycle through and set the year, month, and date using the UP or DOWN buttons.
- Press SET again to exit time/date setting mode.

Image: Front view of the Jensen JCR-315 showing the digital display with the time set to 1:04, indicating the clarity of the blue backlit LCD.
Operating Instructions
Turning On/Off and Volume Control
- Press the ON/OFF button to turn the unit on or off.
- Rotate the VOLUME knob to adjust the sound level.
Radio Operation (AM/FM)
- Press the AM/FM button to switch between AM and FM bands.
- Use the TUNE + or TUNE - buttons to manually tune to a desired frequency.
- To auto-scan for the next available station, press and hold TUNE + or TUNE -.
Setting Radio Presets
- Tune to the desired station.
- Press and hold the M+ button until the preset number flashes.
- Use the UP or DOWN buttons to select the desired preset number (1-10 for AM, 1-10 for FM).
- Press M+ again to save the station to the selected preset.
- To recall a preset station, short press the M+ button to cycle through saved stations.
Setting Dual Alarms
- Press the ALARM button once for Alarm 1, or twice for Alarm 2. The alarm time will flash.
- Use the UP or DOWN buttons to set the alarm hour, then press ALARM to confirm.
- Use the UP or DOWN buttons to set the alarm minute, then press ALARM to confirm.
- Select wake mode (Radio or Alarm Tone) using UP or DOWN, then press ALARM to confirm and activate the alarm. An alarm icon will appear on the display.
Snooze and Sleep Functions
- When the alarm sounds, press the SLEEP / SNOOZE / DIMMER button to activate snooze, which will silence the alarm for approximately 9 minutes.
- To set the sleep timer, press the SLEEP / SNOOZE / DIMMER button repeatedly while the radio is playing to cycle through sleep times (e.g., 90, 60, 30, 15 minutes, OFF). The radio will turn off automatically after the selected time.
Display Dimmer
- Press the SLEEP / SNOOZE / DIMMER button (when the unit is off or not in snooze/sleep mode) to cycle through the display brightness settings: Hi, Mid, Low.
USB Charging Port
Connect your smartphone or other USB-powered device to the built-in 1-amp USB charging port on the back of the unit to charge it while you sleep or use the radio.

Image: Side view of the Jensen JCR-315 showing a smartphone connected to its USB charging port, illustrating the charging capability.
Auxiliary Input
Connect an external audio device (e.g., MP3 player, smartphone) to the AUX IN jack on the back of the unit using a 3.5mm audio cable (not included). The unit will automatically switch to AUX mode when a cable is inserted. Control playback from your connected device.
Maintenance
Cleaning the Unit
Wipe the exterior of the unit with a soft, damp cloth. Do not use abrasive cleaners or solvents. Ensure the unit is unplugged before cleaning.
Battery Replacement
If the unit experiences frequent power interruptions or if the time/alarm settings are not retained during power outages, replace the 2 AAA backup batteries. Ensure correct polarity when inserting new batteries.
Troubleshooting
| Problem | Possible Cause | Solution |
|---|---|---|
| Unit does not turn on. | Power cord not properly connected. | Ensure AC power cord is securely plugged into a working outlet. |
| Display is dim or hard to read. | Dimmer setting is too low. | Press the SLEEP / SNOOZE / DIMMER button repeatedly to adjust brightness (Hi/Mid/Low). |
| Poor radio reception. | Antenna not extended or unit position. | Fully extend the telescopic antenna for FM. For AM, rotate the unit for better signal. |
| Alarm does not sound. | Alarm not set or volume too low. | Verify alarm is set and activated (alarm icon visible). Ensure volume is not at minimum if waking to radio. |
| Time/settings lost after power outage. | Backup batteries are dead or missing. | Install or replace 2 AAA backup batteries. |
Specifications
| Feature | Detail |
|---|---|
| Model Number | JCR-315 |
| Power Source | 120V AC, 60Hz |
| Battery Backup | 2 x 'AAA' size batteries (not included) |
| Radio Bands Supported | AM, FM |
| Tuner Technology | Digital PLL |
| Preset Stations | 10 AM, 10 FM |
| Connectivity | Auxiliary Input, USB Charging Port (1 Amp) |
| Product Dimensions (L x W x H) | 7.68" x 4.53" x 4.53" (19.5 cm x 11.5 cm x 11.5 cm) |
| Item Weight | 2.1 Pounds (0.95 kg) |
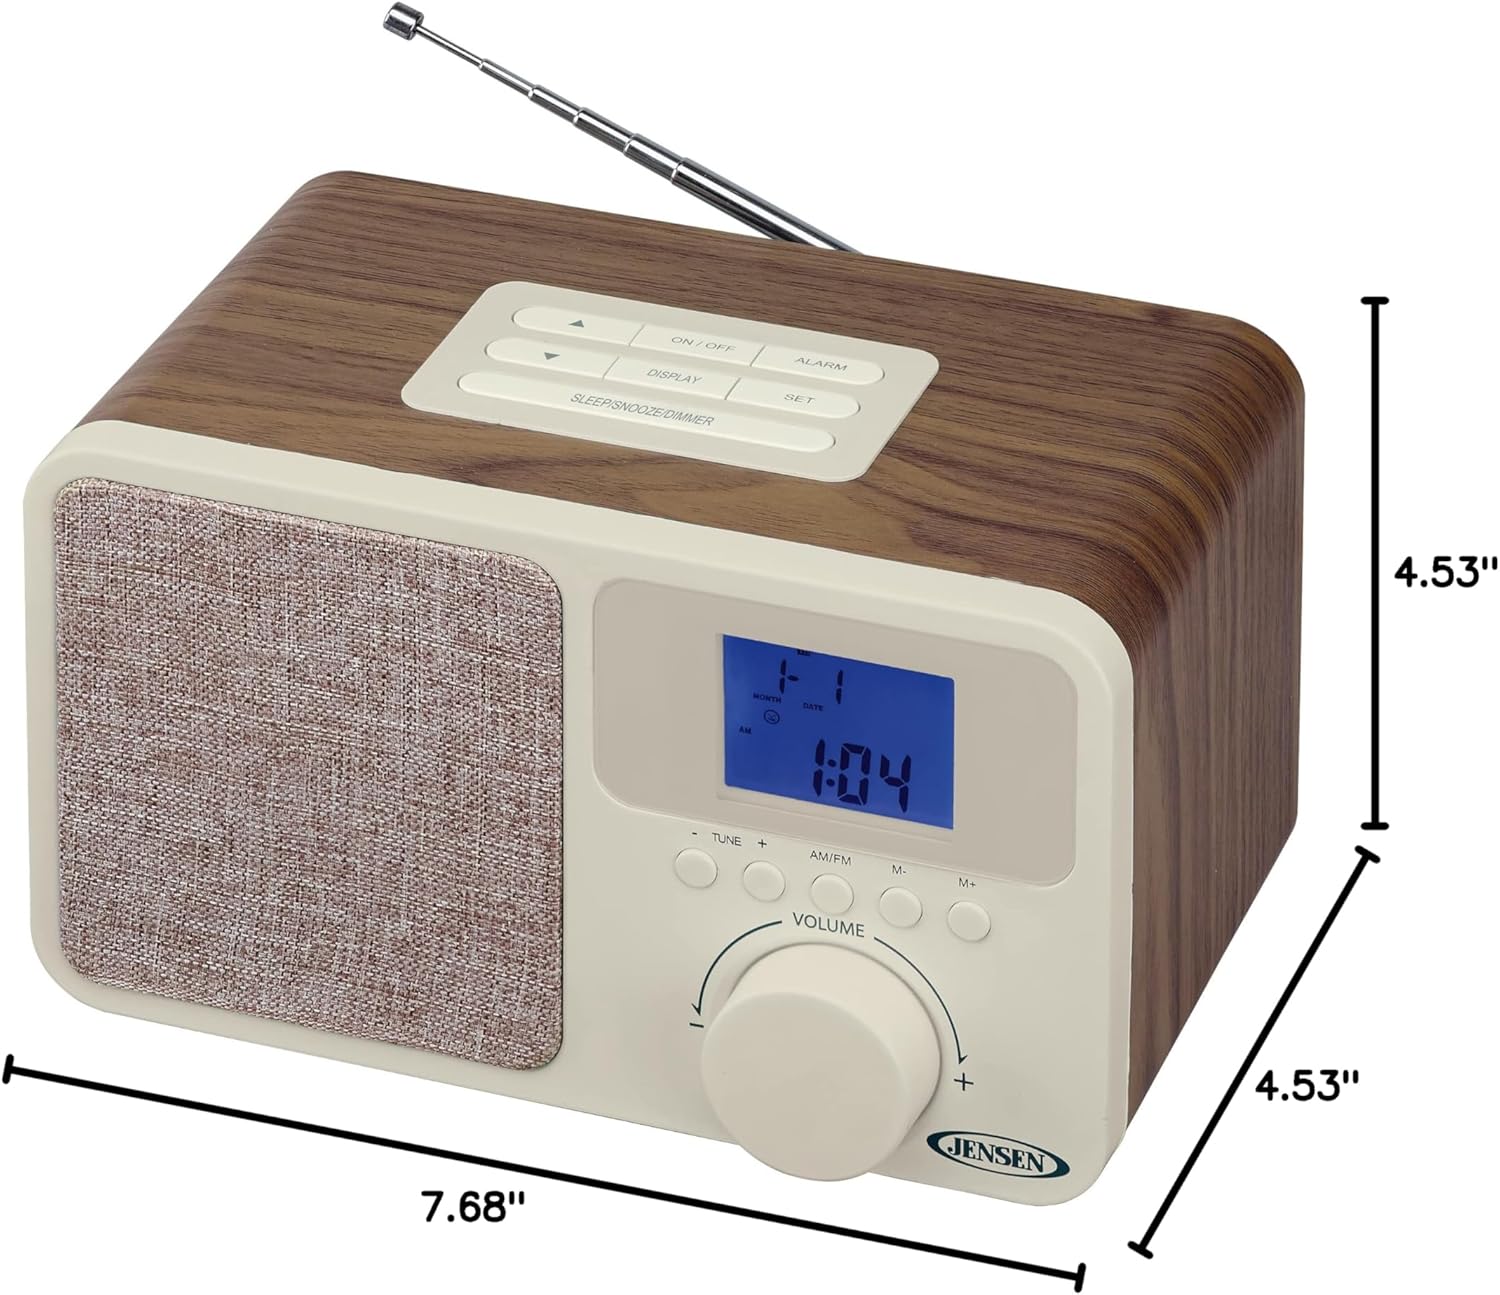
Image: The Jensen JCR-315 shown with its length (7.68"), width (4.53"), and height (4.53") dimensions clearly indicated.
Warranty and Support
For warranty information, technical support, or service inquiries regarding your Jensen JCR-315 Digital AM/FM Dual Alarm Clock Radio, please refer to the warranty card included with your product or visit the official Jensen website. You may also find additional support resources by visiting the Jensen Store on Amazon.
Please retain your purchase receipt as proof of purchase for any warranty claims.


