1. Introduction
This manual provides essential information for the safe and effective installation, operation, and maintenance of the Lewmar 0052509 12V Dual Direction Solenoid. This unit is designed to control the direction of a 12-volt DC motor, commonly used in marine applications such as windlasses or thrusters. Please read this manual thoroughly before installation and operation.
2. Safety Information
Important: Failure to follow these instructions may result in product damage, property damage, or serious injury.
- Always disconnect the battery power before attempting any installation, maintenance, or troubleshooting.
- Installation should be performed by a qualified marine electrician or technician.
- Ensure all electrical connections are secure, clean, and protected from moisture.
- Do not expose the solenoid to direct water spray or submersion unless specifically rated for such conditions.
- Use appropriate wire gauges for all connections to prevent overheating and voltage drop.
3. Setup and Installation
The Lewmar 0052509 solenoid is housed in a protective plastic enclosure, designed for durability in marine environments. Proper mounting and wiring are crucial for optimal performance and longevity.
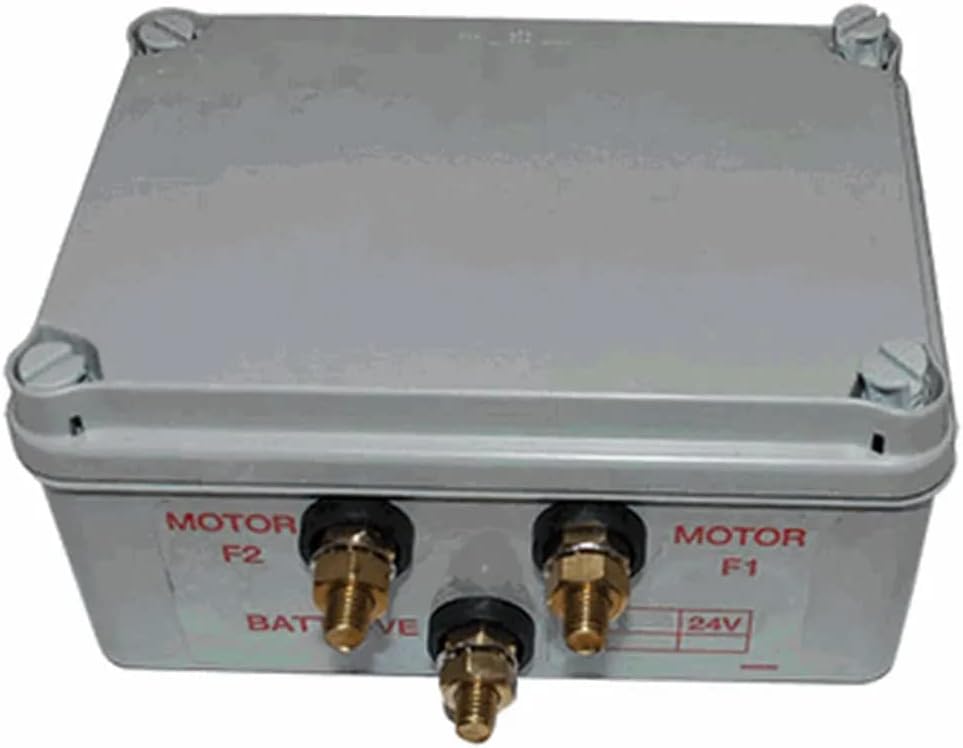
Figure 1: External View of Lewmar 0052509 Solenoid. This image shows the grey plastic enclosure with four corner screws, and three brass terminals visible on the front face. These terminals are labeled "MOTOR F2", "BATTERY", and "MOTOR F1", indicating their respective connection points for the motor and battery. A "24V" label is also visible, though the product is 12V, suggesting a common housing design.
3.1 Mounting Location
Select a mounting location that is:
- Protected from direct water ingress and excessive moisture.
- Easily accessible for wiring and future maintenance.
- Away from sources of extreme heat or vibration.
- Securely fastened to a rigid surface using appropriate fasteners.
3.2 Electrical Connections
Refer to the wiring diagram provided with your specific motor or windlass system for precise connections. General connections are as follows:
- Battery Connection: Connect the main positive (+) battery cable to the terminal labeled "BATTERY". Ensure a suitable fuse or circuit breaker is installed in line with the positive supply, as close to the battery as possible.
- Motor Connections: Connect the motor's field windings (or power input terminals) to the terminals labeled "MOTOR F1" and "MOTOR F2". The solenoid internally switches power to these terminals to control motor direction.
- Control Connections: The solenoid requires control signals (typically from a switch or remote control) to activate the internal relays. These connections are usually smaller gauge wires and are often found on separate terminals or a wiring harness not explicitly shown on the main power terminals. Consult your system's wiring diagram for these specific control inputs.

Figure 2: Internal View of Lewmar 0052509 Solenoid. This image displays the internal components of the solenoid, showing the two main relays responsible for switching the motor's direction. The robust brass terminals for power connections are visible, along with the internal wiring connecting them to the relays. The protective grey plastic casing is shown with its lid open.
Ensure all connections are tight and corrosion-free. Apply dielectric grease to terminals if operating in a high-moisture environment.
4. Operating Instructions
The Lewmar 0052509 solenoid acts as a power switch for your 12V DC motor, enabling dual-direction control. Operation is typically managed via a remote switch or control panel connected to the solenoid's control inputs.
- Activate the control switch for the desired direction (e.g., "Up" or "Down" for a windlass).
- The solenoid will engage, supplying power to the motor in the corresponding direction.
- Release the control switch to stop the motor.
Always ensure the motor is not under excessive load during operation to prevent overheating of the motor or solenoid.
5. Maintenance
Regular maintenance ensures the longevity and reliable operation of your solenoid.
- Periodic Inspection: Annually inspect all electrical connections for signs of corrosion, looseness, or damage. Clean terminals as necessary.
- Casing Integrity: Check the plastic casing for cracks or damage that could compromise its water resistance. Ensure the lid screws are tight.
- Environmental Protection: Keep the solenoid's environment as dry and clean as possible.
If any damage is observed, replace the unit or consult a qualified technician.
6. Troubleshooting
If you experience issues with your Lewmar 0052509 solenoid, consider the following common troubleshooting steps:
| Symptom | Possible Cause | Solution |
|---|---|---|
| Motor does not operate in either direction. | No power to solenoid; Blown fuse/tripped breaker; Loose battery connections; Faulty control switch. | Check battery voltage; Inspect and replace fuse/reset breaker; Tighten all power connections; Test control switch. |
| Motor operates in only one direction. | Faulty control switch for one direction; Internal solenoid relay failure for one direction. | Test control switch for both directions; If switch is functional, the solenoid may require replacement. |
| Solenoid clicks but motor does not run. | Poor motor connections; Motor fault; Excessive load on motor. | Check motor wiring; Inspect motor for damage; Reduce load on motor. |
| Solenoid gets excessively hot. | Overload condition; Undersized wiring; Prolonged operation. | Ensure motor is not overloaded; Verify correct wire gauge; Avoid continuous operation beyond duty cycle. |
If troubleshooting steps do not resolve the issue, contact Lewmar customer support or a qualified technician.
7. Specifications
| Attribute | Detail |
|---|---|
| Model Number | 0052509 |
| Voltage | 12V DC |
| Function | Dual Direction Motor Control Solenoid |
| Material (Casing) | Plastic |
| Color | Multi (typically grey) |
| Item Package Dimensions (L x W x H) | 8.98 x 7.76 x 4.84 inches |
| Package Weight | 1.44 Kilograms |
| Manufacturer | Lewmar |
| UPC | 743683317019 |
8. Warranty Information
This Lewmar product is covered by a manufacturer's warranty. For detailed information regarding warranty terms, conditions, and claim procedures, please refer to the official warranty documentation provided with your purchase or visit the official Lewmar website.
9. Customer Support
For technical assistance, spare parts, or any inquiries not covered in this manual, please contact Lewmar customer support. Contact details can typically be found on the official Lewmar website or on your product packaging.
Lewmar Official Website: www.lewmar.com


