1. Introduction
This manual provides essential information for the installation, operation, and maintenance of your Carbhub C1Q-S258 Carburetor replacement kit. This kit is designed to replace the Zama C1Q-S258 carburetor and is compatible with specific Stihl chainsaw models. Proper installation and maintenance are crucial for optimal performance and longevity of your equipment.
2. Product Compatibility and Contents
2.1. Compatible Models
This Carbhub C1Q-S258 Carburetor is specifically designed to fit the following Stihl chainsaw models:
- Stihl MS192
- Stihl MS192T
- Stihl MS192TC
It is a direct replacement for Zama C1Q-S258 and Stihl part number 1137-120-0650.

Figure 2.1: Image illustrating the Carbhub carburetor and its compatibility with Stihl chainsaws, highlighting features like easy installation, stable power, quick response, durability, and long life.
2.2. Package Contents
The Carbhub C1Q-S258 Carburetor kit includes the following components:
- 1x Carburetor (C1Q-S258)
- 2x Gaskets
- 1x Spark Plug
- 2x Fuel Filters
- 1x Primer Bulb
- 1x Oil Line
- 1x Oil Filter
- 1x Fuel Line
- 2 feet of 6617 Fuel Line

Figure 2.2: A complete view of the Carbhub C1Q-S258 Carburetor kit, showing the carburetor, fuel lines, spark plug, fuel filters, primer bulb, and gaskets.
3. Setup and Installation
Before beginning installation, ensure the chainsaw is turned off, cooled down, and the spark plug wire is disconnected to prevent accidental starting. It is recommended to wear appropriate safety gear, including gloves and eye protection.
3.1. Preparation
- Gather necessary tools: screwdrivers, wrenches, pliers, and a clean cloth.
- Drain any remaining fuel from the chainsaw's tank.
- Clean the area around the carburetor to prevent debris from entering the engine.
3.2. Removing the Old Carburetor
- Locate the air filter cover and remove it.
- Remove the air filter.
- Disconnect the throttle linkage and choke rod from the old carburetor.
- Carefully disconnect the fuel lines from the old carburetor. Note their positions for reinstallation.
- Unscrew the mounting bolts holding the carburetor to the engine intake.
- Remove the old carburetor and any old gaskets.
3.3. Installing the New Carburetor
- Place a new gasket (provided in the kit) onto the engine intake manifold.
- Position the new Carbhub carburetor onto the mounting studs, ensuring it aligns correctly with the intake.
- Secure the carburetor with the mounting bolts, tightening them evenly. Do not overtighten.
- Reconnect the fuel lines to their correct ports on the new carburetor. Ensure a snug fit to prevent leaks.
- Reconnect the throttle linkage and choke rod. Verify smooth operation of both.
- Replace the air filter and air filter cover.
- Consider replacing the fuel filter and spark plug with the new ones provided in the kit for optimal performance.
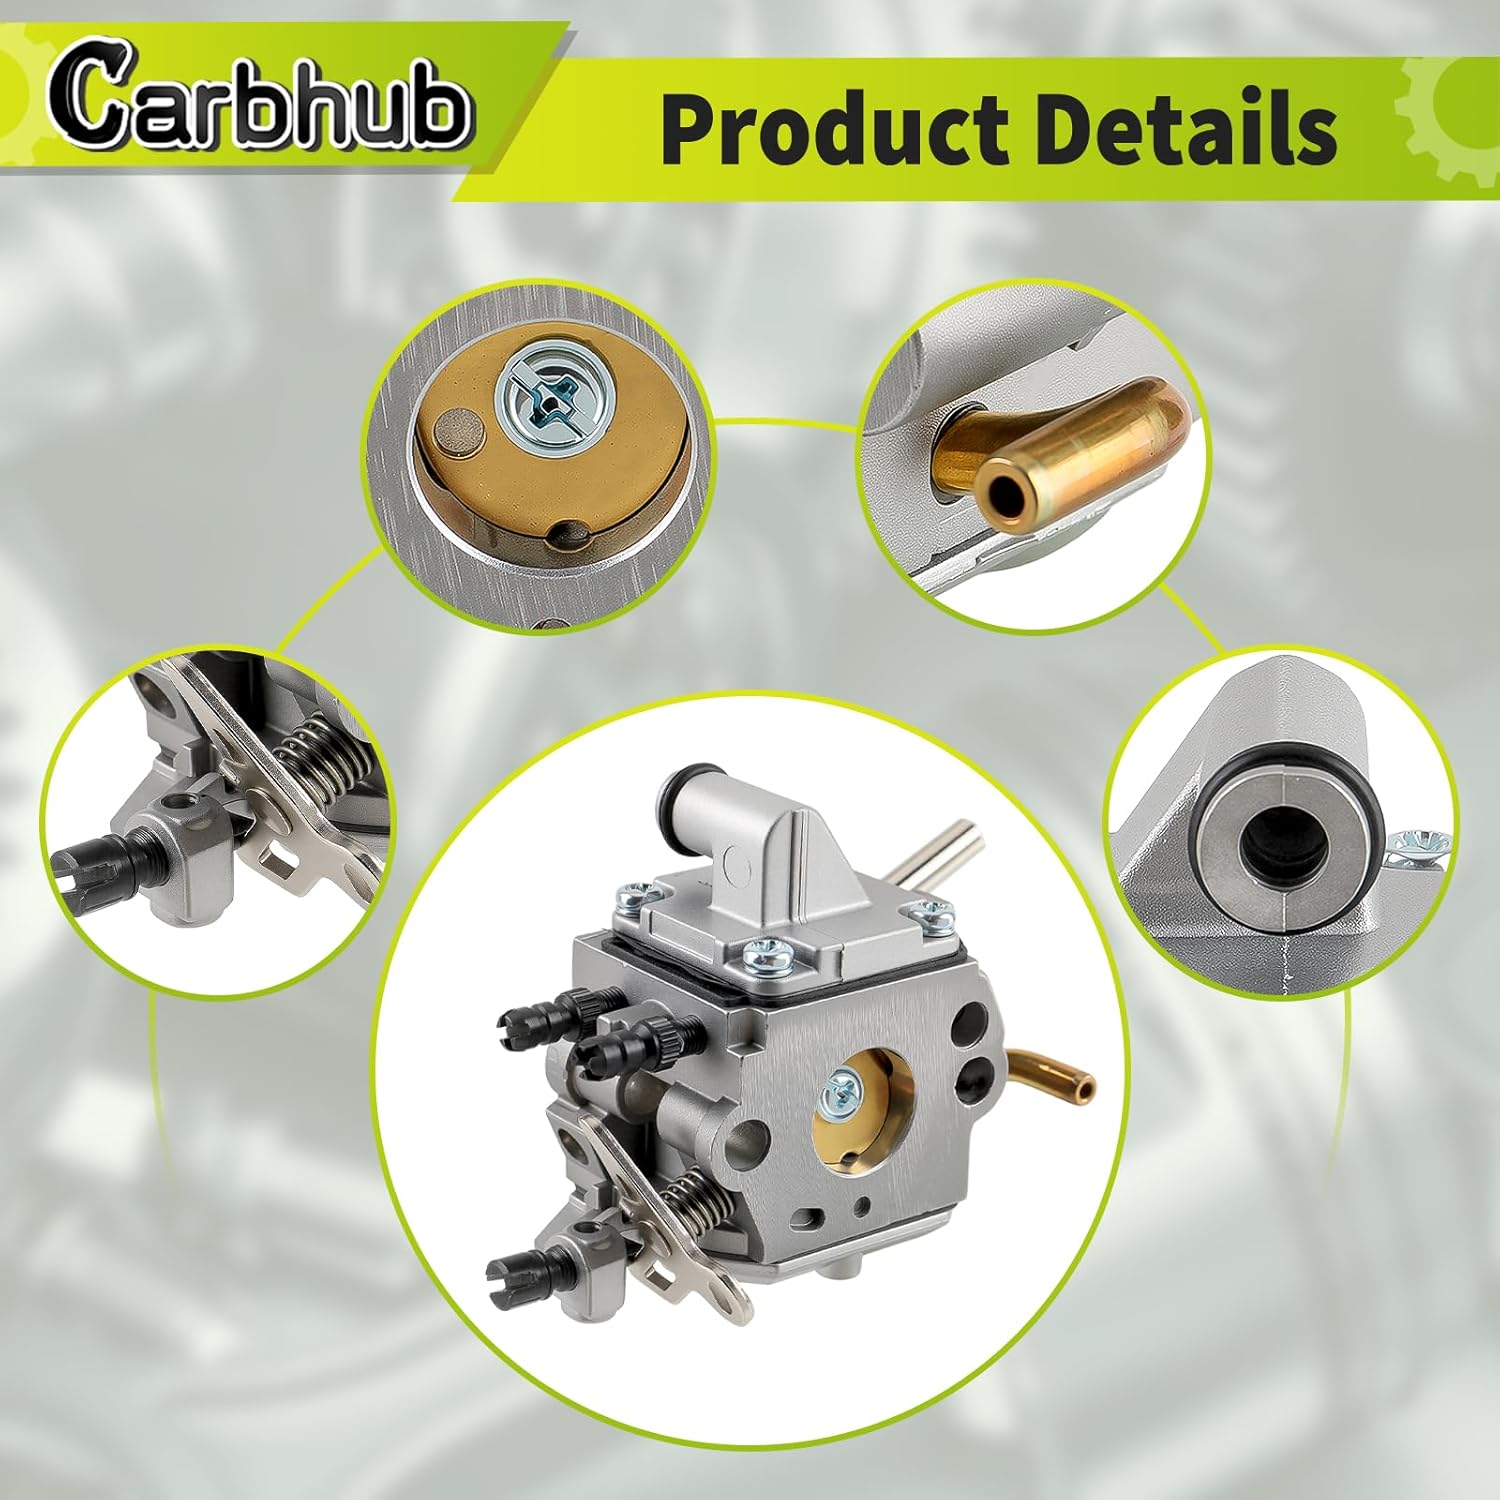
Figure 3.1: Detailed views of the Carbhub carburetor, highlighting various components and their construction, which can aid in understanding connection points during installation.
4. Operating Considerations
After installing the new carburetor, the chainsaw should be ready for operation. This carburetor is designed for high performance and typically requires no adjustment out of the box.
4.1. Initial Start-up
- Refill the fuel tank with the appropriate fuel mixture for your Stihl chainsaw.
- Prime the carburetor by pressing the primer bulb several times until fuel is visible.
- Engage the choke (if applicable for your model's starting procedure).
- Pull the starter cord until the engine attempts to start or "pops."
- Disengage the choke and pull the starter cord again until the engine starts.
- Allow the engine to warm up for a few minutes before operating under load.
4.2. Performance Expectations
A properly installed Carbhub carburetor should restore your chainsaw's performance, providing stable and powerful operation with quick response. If the engine does not run smoothly, refer to the troubleshooting section.

Figure 4.1: Image highlighting the performance benefits of the Carbhub carburetor, emphasizing high performance and no adjustment needed for typical operation.
5. Maintenance
Regular maintenance of your chainsaw and its components, including the carburetor, will ensure reliable operation and extend the lifespan of your equipment.
5.1. General Carburetor Maintenance
- Fuel Quality: Always use fresh, clean fuel mixed according to your chainsaw manufacturer's specifications. Stale or contaminated fuel is a common cause of carburetor issues.
- Fuel Filters: Regularly inspect and replace fuel filters (two are provided in the kit) to prevent debris from reaching the carburetor.
- Air Filter: Keep the air filter clean to ensure proper air-fuel mixture. A dirty air filter can cause the engine to run rich.
- Storage: When storing the chainsaw for extended periods, drain the fuel tank and run the engine until it stops to clear fuel from the carburetor. Alternatively, use a fuel stabilizer.
5.2. Spark Plug Maintenance
The kit includes a new spark plug. Inspect the spark plug periodically for wear, fouling, or incorrect gap. Replace it if necessary to ensure efficient ignition.
6. Troubleshooting
If you encounter issues after installing the new carburetor, review the following common problems and their potential solutions.
| Problem | Possible Cause | Solution |
|---|---|---|
| Engine won't start | No fuel, clogged fuel filter, faulty spark plug, incorrect choke setting. | Check fuel level, replace fuel filter, replace spark plug, ensure proper starting procedure. |
| Engine starts but dies quickly | Improper fuel mixture, air leak, clogged fuel line. | Ensure correct fuel mix, check all connections for air leaks, inspect fuel lines. |
| Engine runs rough or lacks power | Dirty air filter, partially clogged fuel filter, muffler screen clogged. | Clean/replace air filter, replace fuel filter, clean muffler screen (refer to chainsaw manual). |
| Fuel leaks | Loose fuel line connections, damaged gasket. | Tighten fuel line clamps, ensure gaskets are properly seated and undamaged. |
If problems persist after following these steps, it is recommended to consult a qualified small engine technician or refer to your chainsaw's original service manual.
7. Specifications
Key specifications for the Carbhub C1Q-S258 Carburetor kit:
- Model Number: C1Q-S258 1137-120-0650 MS192 MS192T
- Brand: Carbhub
- Item Weight: Approximately 7.8 ounces
- Package Dimensions: Approximately 4.41 x 3.15 x 2.4 inches
- UPC: 716955896765
- Replacement For: Zama C1Q-S258

Figure 7.1: Diagram illustrating the key dimensions of the Carbhub carburetor, including length, width, and height measurements.
8. Warranty and Support
For information regarding warranty coverage or technical support for your Carbhub C1Q-S258 Carburetor kit, please contact the seller directly through the platform where the purchase was made. Retain your proof of purchase for any warranty claims.