1. Introduction
Thank you for choosing the Taylor Weather Frcster WiFi. This device provides real-time indoor and outdoor temperature and humidity readings, barometric pressure, and a weather forecast, all accessible via a clear display and a dedicated mobile application. This manual will guide you through the setup, operation, and maintenance of your new weather forecaster to ensure optimal performance.
2. Product Overview
The Taylor Weather Frcster WiFi system consists of a main display unit and a wireless remote sensor. The main unit displays all weather data and connects to your home Wi-Fi network, while the remote sensor collects outdoor temperature and humidity data.
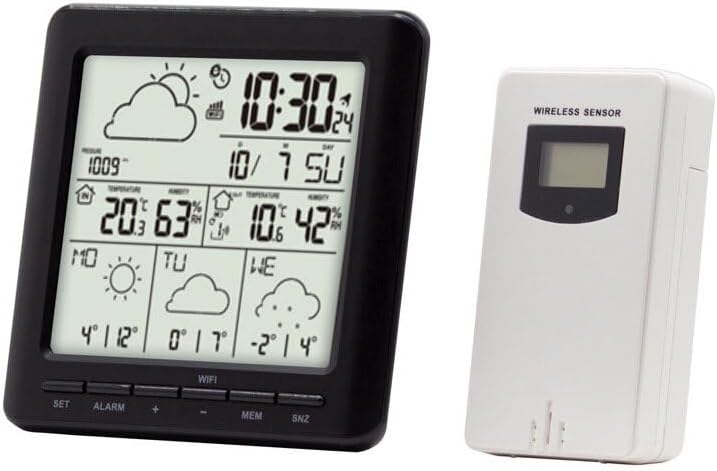
Image: The main display unit (left) shows time, date, indoor/outdoor temperature and humidity, barometric pressure, and weather forecast icons. The wireless remote sensor (right) transmits outdoor data to the main unit.
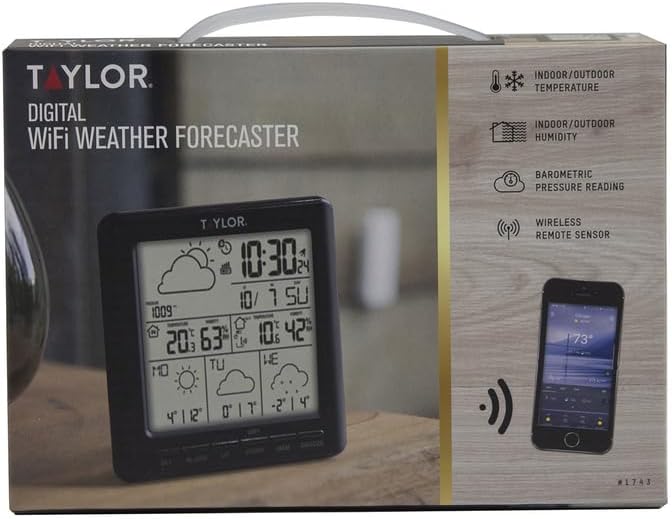
Image: The product packaging highlights key features such as indoor/outdoor temperature and humidity, barometric pressure reading, and wireless remote sensor connectivity.
3. Setup
3.1 Unpacking
- Carefully remove all components from the packaging.
- Verify that you have the main display unit and the wireless remote sensor.
3.2 Powering the Main Unit
- The main unit is powered by a corded electric connection.
- Plug the provided power adapter into the main unit and then into a standard electrical outlet. The display should illuminate.
3.3 Installing Batteries in the Wireless Sensor
- Locate the battery compartment on the back of the wireless sensor.
- Insert the required batteries (typically AA or AAA, not included) according to the polarity indicators (+/-).
- Close the battery compartment securely.
3.4 Sensor Placement
- Place the wireless sensor outdoors in a location protected from direct sunlight and precipitation. A shaded, well-ventilated area is ideal for accurate temperature and humidity readings.
- Ensure the sensor is within the effective transmission range of the main unit (typically up to 200 feet, line of sight). Avoid large metal objects or thick walls between the sensor and the main unit.
3.5 App Download and Wi-Fi Connection
- To access full features, including detailed forecasts and historical data, download the companion mobile application (e.g., "WeatherSense" or similar, as indicated in the product packaging or quick start guide) from your device's app store (Apple App Store for iOS, Google Play Store for Android).
- Follow the in-app instructions to create an account and connect your Taylor Weather Frcster WiFi to your home Wi-Fi network. This process typically involves putting the main unit into pairing mode and entering your Wi-Fi credentials into the app.
- Ensure your Wi-Fi network is 2.4GHz, as some devices may not support 5GHz networks.
4. Operating Instructions
4.1 Display Information
Once powered on and connected, the main unit display will show the following information:
- Time and Date: Automatically synchronized via Wi-Fi.
- Indoor Temperature and Humidity: Measured by the main unit.
- Outdoor Temperature and Humidity: Transmitted from the wireless sensor.
- Barometric Pressure: Indicates atmospheric pressure trends.
- Weather Forecast Icons: Displays predicted weather conditions (e.g., sunny, cloudy, rainy) for the next 12-24 hours based on barometric pressure changes.
4.2 Button Functions
The main unit features several buttons for basic control:
- SET: Used to enter settings mode for manual adjustments (e.g., time, date, units).
- ALARM: Activates or deactivates the alarm function.
- MEM: Displays maximum/minimum temperature and humidity records.
- SNZ: Snooze button for the alarm.
4.3 Using the Mobile Application
The mobile application provides enhanced functionality:
- View current and historical weather data remotely.
- Access more detailed weather forecasts.
- Customize settings and alerts.
- Manage multiple devices (if applicable).
5. Maintenance
5.1 Cleaning
- Wipe the main unit and sensor with a soft, damp cloth. Do not use abrasive cleaners or solvents.
- Ensure no moisture enters the device openings.
5.2 Battery Replacement (Wireless Sensor)
- When the sensor's battery indicator appears on the main unit display, replace the batteries promptly.
- Open the battery compartment, remove old batteries, and insert new ones, observing correct polarity.
- Dispose of old batteries responsibly.
5.3 Optimal Placement
- Periodically check the outdoor sensor's placement to ensure it remains protected from direct elements and provides accurate readings.
- Ensure the main unit is placed on a stable, flat surface indoors, away from direct heat sources or air conditioning vents that could affect indoor temperature readings.
6. Troubleshooting
6.1 No Forecast Information / Blank Screen Section
- Check App Connection: Ensure the device is properly connected to your Wi-Fi network via the mobile application. The forecast data is typically retrieved online.
- App Functionality: Verify that the mobile application is up-to-date and functioning correctly. Some users have reported issues with the app's ability to retrieve forecast data.
- Internet Connection: Confirm your home Wi-Fi has an active internet connection.
- Server Issues: Occasionally, the forecast data server may experience downtime. This is usually temporary.
6.2 Wireless Sensor Not Connecting / Incorrect Outdoor Readings
- Check Batteries: Ensure the wireless sensor has fresh batteries installed with correct polarity.
- Range: Move the sensor closer to the main unit to confirm it's within range.
- Interference: Avoid placing the sensor near large metal objects, thick walls, or other electronic devices that might cause interference.
- Re-pair: Refer to the quick start guide or app instructions for steps to re-pair the sensor with the main unit.
6.3 App Connectivity Issues / Registration Problems
- Wi-Fi Band: Ensure your router is broadcasting a 2.4GHz Wi-Fi signal, as the device may not be compatible with 5GHz networks.
- Firewall/Security: If you experience issues connecting or registering, check your network's firewall or security settings. Some users have reported issues with connections to certain servers.
- Reinstall App: Try uninstalling and reinstalling the mobile application.
- Router Reboot: Reboot your Wi-Fi router and the main unit.
If problems persist after attempting these troubleshooting steps, please refer to the manufacturer's website for further support or contact their customer service.
7. Specifications
| Feature | Detail |
|---|---|
| Brand | Taylor |
| Model Name | IP-SV679F |
| Part Number | 1743 |
| Power Source (Main Unit) | Corded Electric |
| Connectivity Technology | Wi-Fi |
| Special Feature | Weather Resistant (Sensor) |
| Material | Plastic |
| Item Weight | 0.68 Pounds |
| Item Dimensions (LxWxH) | 2 x 8.1 x 6 inches |
| Manufacturer | Taylor Precision Products |
| UPC | 077784032381 |
8. Warranty and Support
The Taylor Weather Frcster WiFi comes with a manufacturer's warranty. For specific details regarding the warranty period, coverage, and terms, please refer to the documentation included with your product or visit the official Taylor Precision Products website.
For technical support, troubleshooting assistance beyond what is provided in this manual, or to inquire about replacement parts, please contact Taylor Precision Products customer service directly. Contact information can typically be found on their official website or on the product packaging.


