1. Introduction
This manual provides comprehensive instructions for the installation, operation, maintenance, and troubleshooting of your ATOTO A6 Pro A6Y1021PRB-G 10-inch Android Car Navigation Stereo. Please read this manual thoroughly before using the product to ensure proper functionality and safety.
The ATOTO A6 Pro is an advanced in-car entertainment system featuring a 10.1-inch display, Android operating system, dual Bluetooth, Wi-Fi connectivity, and gesture control capabilities.
2. Safety Information
Important Safety Instructions:
- Do not attempt to operate the device in a manner that distracts you from driving. Always prioritize road safety.
- Installation should be performed by a qualified professional to prevent damage to the vehicle or the device.
- Ensure all wiring is correctly connected and insulated to avoid short circuits or electrical hazards.
- Do not expose the device to extreme temperatures, direct sunlight for prolonged periods, or excessive moisture.
- Avoid using harsh chemicals or abrasive cleaners on the screen or unit.
3. Package Contents
Verify that all items are present in the package:
- 1 x ATOTO A6 Pro Car Radio
- 1 x Bluetooth Adapter
- 1 x USB Extension Cable
- 1 x External Microphone
- 1 x WiFi Antenna
- 1 x GPS Antenna
- 1 x Power Camera Input Cable
- Brackets and Mounting Screws
- User Manual (this document)
Note: Additional accessories such as DVR camera, steering wheel control remote, OBD2 tool, rearview camera, or TPMS are sold separately.
4. Setup and Installation
The ATOTO A6 Pro features a 10.1-inch floating display. Ensure your vehicle's dashboard can accommodate the unit's dimensions (178mm x 100mm for the double DIN base, 252mm x 155mm for the screen) without obstructing essential controls or vents.
4.1. Pre-Installation Checks
- Disconnect the vehicle's battery before starting installation.
- Confirm compatibility with your vehicle's wiring harness.
- If using optional accessories (e.g., DVR, rearview camera), connect them before fully installing the main unit.
4.2. Physical Installation Steps
- Remove the existing car radio and dashboard trim.
- Attach the mounting brackets to the ATOTO A6 Pro unit.
- Connect the wiring harness, including power, speakers, and accessory cables. Refer to the wiring diagram provided in the package.
- Connect the GPS antenna, Wi-Fi antenna, and external microphone. Position the antennas for optimal signal reception.
- Slide the unit into the dashboard opening and secure it with screws.
- Adjust the display module's height and viewing angle as needed. The display offers adjustable height and angle settings.
- Reinstall the dashboard trim.


5. Operating Instructions
5.1. Initial Power-On and Setup
- Reconnect the vehicle's battery.
- Turn on the vehicle's ignition. The ATOTO A6 Pro should power on automatically.
- Follow the on-screen prompts for initial setup, including language selection, time zone, and Wi-Fi connection.
5.2. User Interface Overview
The system runs on ATOTO AICE OS 9.x, based on Android 6.0. The main screen displays various applications and widgets. Navigation is primarily via the 10.1-inch 5-touch capacitive touchscreen.

5.3. Key Features and Functions
- Navigation: Built-in GPS receiver module with external GPS antenna. Google Maps is pre-installed; other navigation apps can be installed from the Google Play Store.
- Bluetooth: Dual Bluetooth (BT1 5.0 & BT2 4.0). BT1 supports HFP/HSP/A2DP/AVRCP/PBAP with aptX for high-quality audio.
- Wi-Fi: Dual-band Wi-Fi (2.4G and 5G) for internet access.
- Phone Mirroring/Casting: Easy-connect app supports iOS (Air-play) and Android (USB/Wi-Fi) devices.
- Radio: Built-in FM/AM Radio Tuner with RDS.
- Audio: Built-in Max 4*49W BTL Amplifier with RMS 4*29W. Features a preset 9-band EQ with 12 section adjustable frequency.
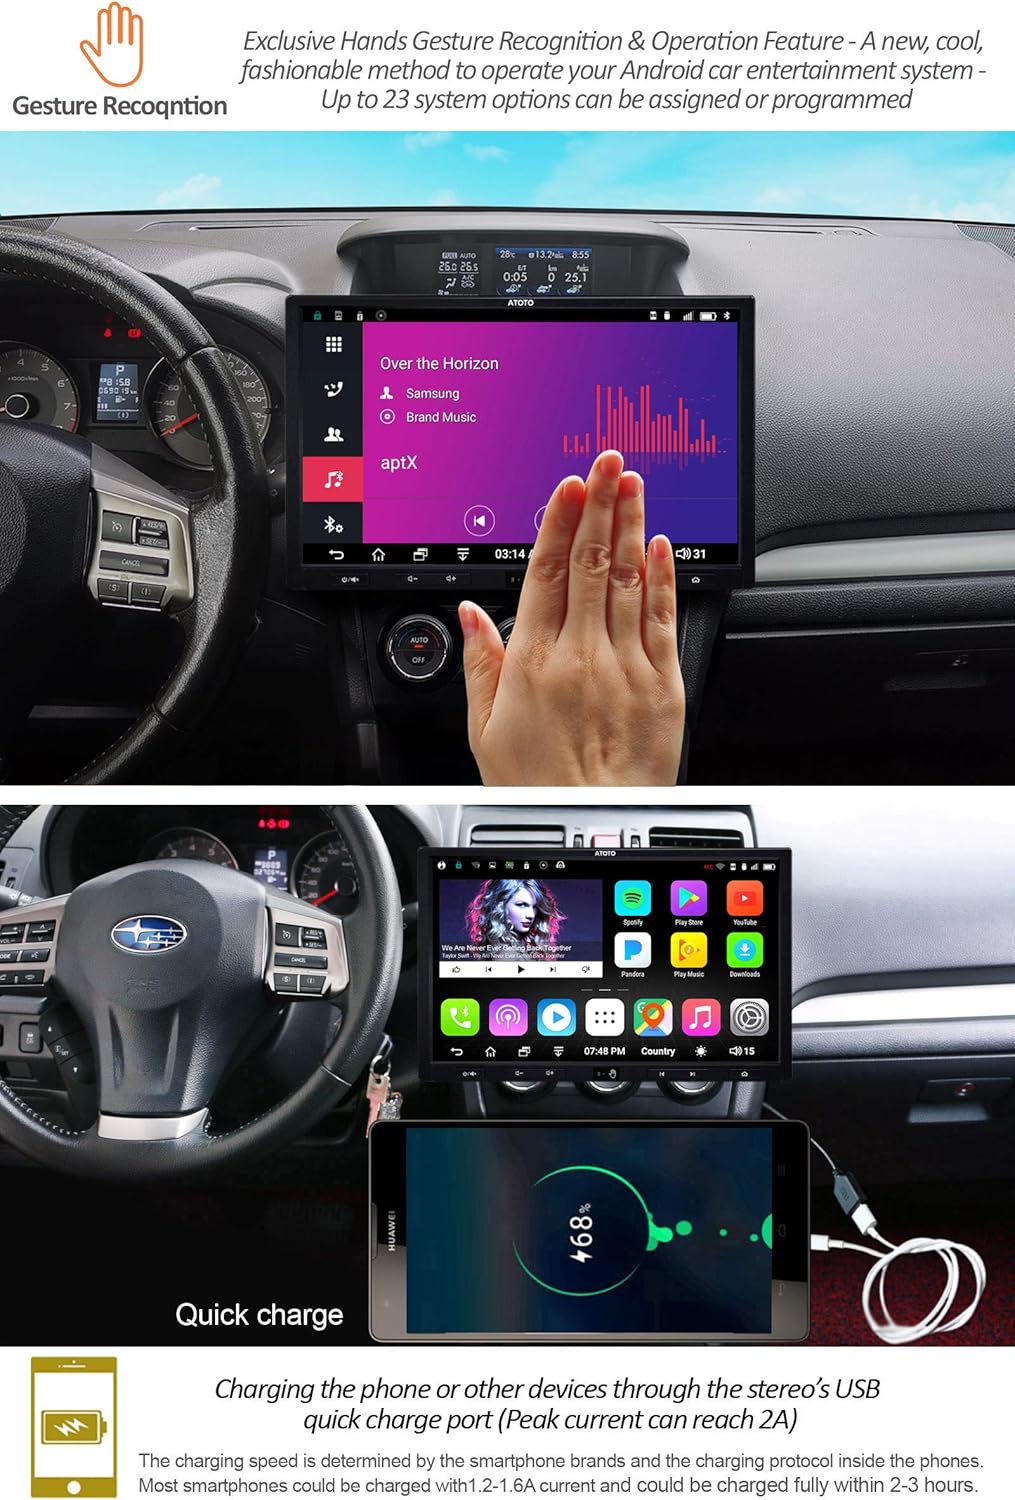
- Gesture Control: (Available on Pro models) Recognizes 7 types of hand gestures (Move Up, Move Down, Move Forward, Move Backward, Circle clock-wise, Circle Counter-clockwise, Wave) with up to 23 programmable options.

Gesture Control Demonstration:
Video 5.3.1: Demonstration of the gesture recognition feature on the ATOTO A6 Pro, showing how hand movements control various functions like volume adjustment and track skipping.
5.4. Connectivity
- USB Interfaces: 4 USB interfaces for connecting USB drives and optional USB devices. Supports unlimited external storage devices (e.g., SSD Hard-drive) if powered by USB 500mA.
- Micro SD Slot: For media files and dash DVR records.
- AUX Audio/Video Input: For external audio/video sources.
- RCA Audio Out: 4-CH RCA Audio Out (2v) for external amplifiers.
- Sub-woofer Out: Separate Sub-woof Out (0.8v) with manual/automatic mode.
- Reversing Camera Input: Dedicated input for a rearview camera.

6. Maintenance
6.1. Cleaning the Device
- Use a soft, dry cloth to clean the screen and exterior.
- For stubborn smudges, lightly dampen the cloth with water or a screen-safe cleaner.
- Avoid spraying cleaners directly onto the unit.
6.2. Software Updates
Periodically check for system firmware updates to ensure optimal performance and access to new features. Updates can typically be found on the ATOTO official website or through the device's settings menu (if available).
6.3. General Care
- Do not attempt to disassemble or modify the unit. This can void the warranty and cause damage.
- Protect the screen from sharp objects to prevent scratches.
7. Troubleshooting
If you encounter issues with your ATOTO A6 Pro, refer to the following common problems and solutions:
| Problem | Possible Cause | Solution |
|---|---|---|
| Unit does not power on. | Incorrect wiring, blown fuse, vehicle battery disconnected. | Check power connections, inspect vehicle fuses, ensure battery is connected. |
| No sound from speakers. | Speaker wires incorrectly connected, volume too low, mute activated. | Verify speaker wiring, increase volume, check if mute is active. |
| GPS signal is weak or unavailable. | GPS antenna improperly installed or obstructed. | Ensure GPS antenna has a clear view of the sky and is securely connected. |
| Bluetooth connection issues. | Device not in pairing mode, interference, incorrect pairing process. | Ensure both devices are in pairing mode, clear previous pairings, try again. |
| Touchscreen unresponsive. | Temporary software glitch, screen damage. | Restart the unit. If the problem persists, contact customer support. |
For further assistance, please refer to the support section or contact ATOTO customer service.
8. Specifications
| Feature | Detail |
|---|---|
| Model Number | A6Y1021PRB-G |
| Display | 10.1" 1024*600 5-Touch Capacitive Touchscreen, 600cd/m2, 178° IPS display |
| Operating System | ATOTO AICE OS 9.x (based on Android 6.0 Marshmallow) |
| Processor | MTK 8127A Soc-based Quad-core 1.5Ghz CPU with ARM Mali-450 MP4 GPU |
| Memory/Storage | 2GB RAM / 32GB Internal Storage |
| Bluetooth | Dual Bluetooth (BT1 5.0 with aptX, BT2 4.0) |
| Wi-Fi | Dual-band (2.4G & 5G) |
| Pre-Amplifier | Max 4*49W BTL Amplifier (RMS 4*29W), 9-band EQ |
| GPS | Built-in GPS Receiver module with external GPS antenna |
| Inputs | Reversing camera input, AUX Audio/Video input, 4 USB interfaces, 1 Micro SD slot |
| Outputs | 4-CH RCA Audio Out (2v), Separate Sub-woof Out (0.8v) |
| Dimensions (Base) | 178mm x 100mm (Double DIN) |
| Dimensions (Screen) | 252mm x 155mm (10.1-inch floating display) |
| Weight | 6.69 pounds |
9. Warranty and Support
ATOTO provides a manufacturer's warranty for this product. Please register your product for warranty purposes. Rooting the ATOTO A6 system is not covered by the manufacturer's warranty and may damage the device.
For detailed warranty information, product registration, and technical support, please visit the official ATOTO website or contact their customer service directly.
Official ATOTO Store: amazon.com/atoto


