
1. Introduction
This manual provides essential information for the safe and efficient installation, operation, and maintenance of your EUROPLAST 125mm Duct Fan. Please read these instructions carefully before installation and use, and retain them for future reference.
The EUROPLAST 125mm Duct Fan is designed for effective air extraction in various environments, including kitchens and bathrooms. Its robust construction from high-quality ABS plastic ensures durability and ease of maintenance.
2. Safety Information
WARNING: Electrical shock hazard. Disconnect power before installation or servicing.
- Read all instructions thoroughly before operating the fan.
- Installation and electrical connections must be performed by a qualified electrician in accordance with all local and national electrical codes.
- Ensure the power supply voltage matches the fan's specifications (230 Volts).
- The fan casing is made of plastic and does not require a protective earth conductor. However, all other electrical safety precautions must be observed.
- Do not operate the fan if any part is damaged.
- Do not block the air inlet or outlet. Ensure adequate airflow around the fan.
- This fan is rated IPX4, providing protection against splashing water. It is suitable for use in damp environments like bathrooms, but should not be submerged or exposed to direct water jets.
- Operating temperature range: 5°C to +40°C. Do not operate outside this range.
- Keep children and unauthorized persons away from the fan during operation and maintenance.
3. Product Overview
The EUROPLAST 125mm Duct Fan is a compact and efficient inline fan designed for integration into round ventilation ducts. It features a durable ABS plastic housing and a powerful motor for effective air extraction.

Image 1: Front view of the EUROPLAST 125mm Duct Fan.

Image 2: Close-up view of the fan blades and central motor housing.
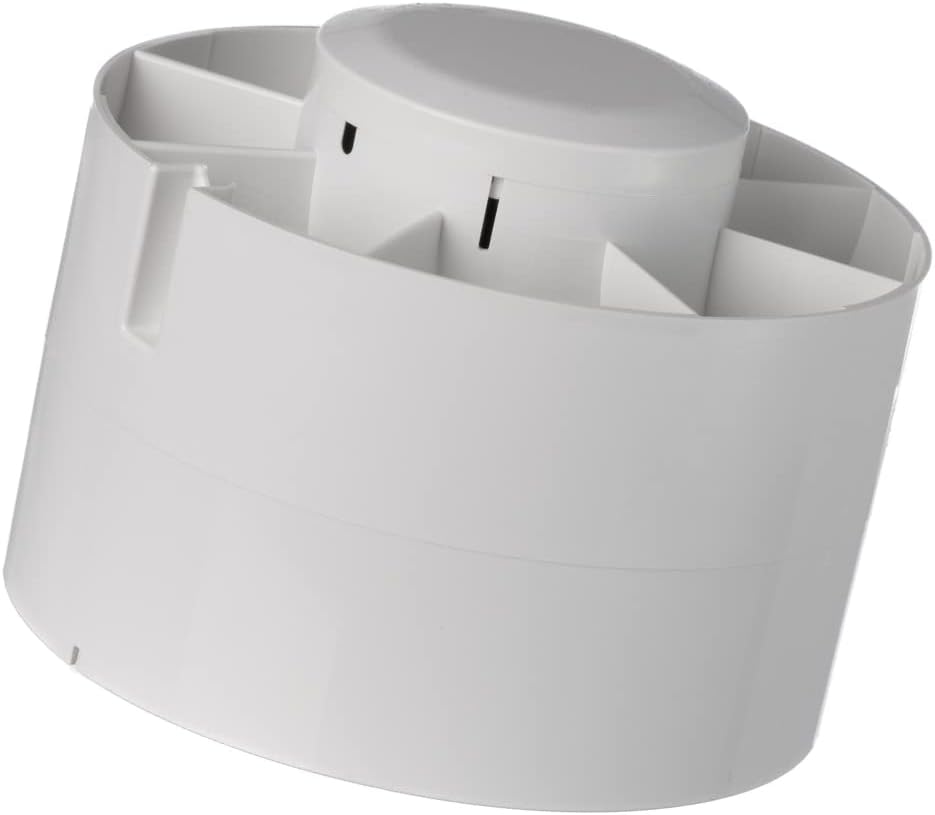
Image 3: Side view of the fan casing, showing its cylindrical design.
4. Specifications
Technical data for the EUROPLAST 125mm Duct Fan (Model SANS MINUTERIE):
| Parameter | Value |
|---|---|
| Brand | EUROPLAST |
| Model Number | SANS MINUTERIE |
| Diameter | 125mm (4.9 inches) |
| Voltage | 230 Volts |
| Frequency | 50 Hz |
| Power | 16 Watts |
| Airflow (Suction Power) | 150 m³/h |
| Noise Level (at 3m) | 36 dB(A) |
| RPM | 2360 |
| Material | High-quality ABS Plastic |
| IP Rating | IPX4 (Splash-proof) |
| Operating Temperature | 5°C to +40°C |
| Product Dimensions (L x W x H) | 12.4 x 9.1 x 12.4 cm |
| Item Weight | 420 grams |
| Country of Origin | Latvia |
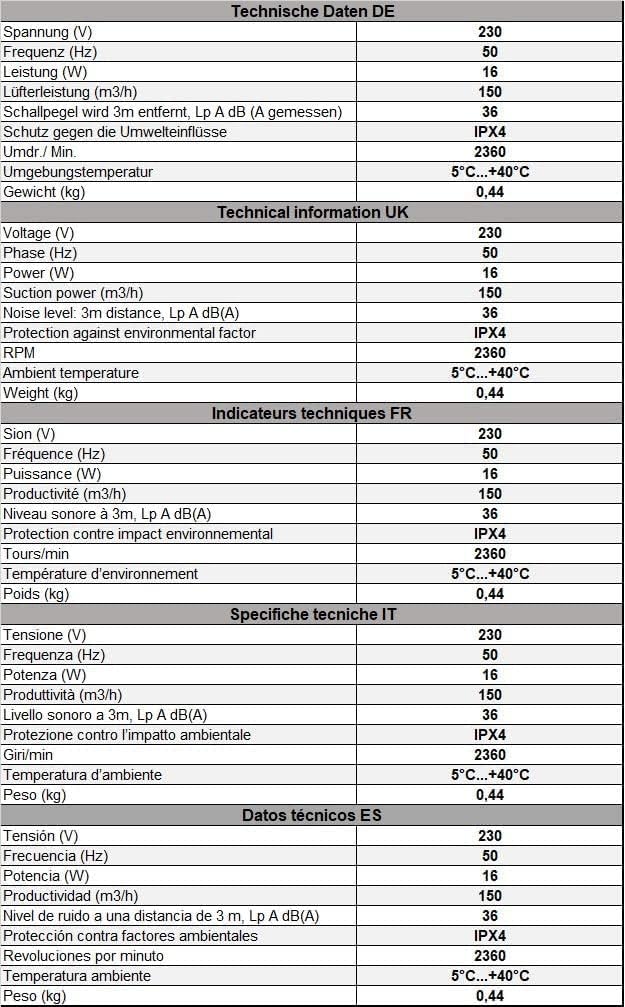
Image 4: Technical data table, including specifications in English, German, French, Italian, and Spanish.

Image 5: Diagram showing the fan's dimensions: 124mm (4.9") diameter and 91mm (3.6") depth.
5. Setup and Installation
The EUROPLAST 125mm Duct Fan is designed for easy installation within round ventilation ducts. It can be installed horizontally within the ductwork.
5.1. Pre-Installation Checks
- Ensure the power supply is disconnected at the main switch before commencing any work.
- Verify that the duct diameter is compatible with the 125mm fan.
- Check for any obstructions in the ductwork that might impede airflow.
- Confirm that the installation location allows for future access for maintenance.
5.2. Mounting the Fan
- Identify the desired position for the fan within the ventilation duct. The fan can be installed with all types of round air ducts.
- Insert the fan into the duct. Ensure a snug fit to prevent air leakage.
- Secure the fan in place using appropriate clamps or fasteners (not included) to the ductwork or a mounting bracket if necessary. The fan is designed for horizontal installation within the duct.

Image 6: Rear view of the fan, showing the electrical connection terminal and internal structure.
5.3. Electrical Connection
CAUTION: All electrical work must be performed by a qualified professional.
- Remove the terminal cover on the fan (refer to Image 6).
- Connect the electrical supply wires to the terminal block inside the fan. This model does not require a protective earth conductor due to its plastic casing.
- Ensure all connections are secure and correctly polarized (Live and Neutral).
- Replace the terminal cover securely.
- Once installation is complete, restore power and test the fan's operation.
6. Operating Instructions
The EUROPLAST 125mm Duct Fan operates by drawing air through the ductwork. This model (SANS MINUTERIE) does not include a built-in timer function.
6.1. Basic Operation
- Once properly installed and connected to the power supply, the fan will activate when power is supplied to its circuit.
- The fan is typically controlled by an external wall switch or a separate ventilation control system (not included).
- To turn the fan ON, activate the external switch. To turn it OFF, deactivate the external switch.
6.2. Airflow Direction
Ensure the fan is installed with the correct airflow direction for your application. The fan is designed to extract air from one side and expel it from the other. Consult the markings on the fan or the installation diagram for the intended airflow direction.
7. Maintenance
Regular cleaning and maintenance will ensure optimal performance and extend the lifespan of your EUROPLAST 125mm Duct Fan. The fan is designed for easy disassembly for cleaning.
7.1. Cleaning Instructions
WARNING: Always disconnect the power supply to the fan before performing any cleaning or maintenance.
- Disconnect the fan from the main power supply.
- Carefully remove the fan from the ductwork. The low-maintenance tubular fan is easy to disassemble for cleaning.
- Using a soft brush or a vacuum cleaner, remove any dust, dirt, or debris accumulated on the fan blades and inside the casing.
- For stubborn dirt, wipe surfaces with a damp cloth and a mild detergent. Do not use abrasive cleaners or solvents.
- Ensure all parts are completely dry before reassembling and reinstalling the fan.
- Reassemble the fan and reinstall it into the ductwork. The fan can then be quickly reassembled.
- Restore power and test the fan.
8. Troubleshooting
If you encounter issues with your EUROPLAST 125mm Duct Fan, refer to the following common problems and solutions:
| Problem | Possible Cause | Solution |
|---|---|---|
| Fan does not turn on | No power supply Loose electrical connection Faulty external switch |
Check power supply to the circuit. Verify all electrical connections are secure (ensure power is off first). Test the external switch. |
| Reduced airflow | Blocked air ducts Dirty fan blades Incorrect installation direction |
Check ducts for obstructions. Clean fan blades and casing (refer to Maintenance section). Verify fan is installed in the correct airflow direction. |
| Excessive noise or vibration | Loose mounting Debris on fan blades Damaged fan motor/bearings |
Ensure fan is securely mounted in the duct. Clean fan blades thoroughly. If noise persists, contact customer support. |
If the problem persists after attempting these solutions, please contact EUROPLAST customer support.
9. Warranty and Support
The EUROPLAST 125mm Duct Fan comes with a 2-year availability of spare parts from the manufacturer. This ensures that components for repair or replacement will be available for a period of two years from the date of purchase.
For warranty claims, technical assistance, or to inquire about spare parts, please contact your retailer or the EUROPLAST customer service department. Please have your product model number (SANS MINUTERIE) and purchase date available when contacting support.
For further information, you may visit the official EUROPLAST website or contact your local distributor.


