1. Introduction
This manual provides essential information for the proper installation, function, and maintenance of your USPEEDA Ignition Coil, model P54809. This component is designed to replace the original ignition coil in compatible Wen Power Pro generators, ensuring reliable engine starting and operation. Please read this manual thoroughly before attempting any installation or maintenance procedures.
Important Safety Notice: Always disconnect the generator's spark plug wire and battery (if applicable) before performing any service or maintenance to prevent accidental starting and electrical shock. Wear appropriate personal protective equipment (PPE) such as gloves and eye protection.

Image 1.1: The USPEEDA Ignition Coil P54809, featuring its main body, mounting brackets, and spark plug wire with boot.
2. Product Compatibility
The USPEEDA Ignition Coil P54809 is a direct replacement for the original part number P54809. It is compatible with various Wen Power Pro branded gas generators, specifically those with 11HP, 13HP, 14HP, 15HP, or 16HP engines, and wattages ranging from 5500 to 9000 Watts.
Compatible Wen Power Pro Generator Models:
- 5500 Watt, Model 56551
- 6800 Watt, Model 56680
- 7000E Watt, Model 56682
- 8750 Watt, Model 56875
- 9000 Watt, Model 56900
- 9000E Watt, Model 56877
3. Safety Instructions
- Always ensure the generator engine is off and cooled down before beginning any work.
- Disconnect the spark plug wire from the spark plug to prevent accidental engine start-up.
- If the generator has a battery, disconnect the negative terminal to prevent electrical hazards.
- Wear safety glasses to protect your eyes from debris.
- Use insulated tools when working with electrical components.
- Keep children and bystanders away from the work area.
- Dispose of old parts responsibly according to local regulations.
4. Installation Guide
Replacing an ignition coil requires basic mechanical skills. If you are unsure about any step, consult a qualified technician.
- Prepare the Generator: Ensure the generator is turned off, the engine is cool, and the spark plug wire is disconnected from the spark plug. Disconnect the battery if applicable.
- Locate the Old Ignition Coil: The ignition coil is typically mounted near the flywheel or crankshaft, with the spark plug wire extending from it.
- Disconnect Wires: Carefully disconnect any low-voltage wires connected to the ignition coil. Note their positions for correct re-connection.
- Remove Mounting Bolts: Use an appropriate wrench or socket to remove the bolts securing the old ignition coil to the engine block.
- Remove Old Coil: Carefully remove the old ignition coil, ensuring not to damage any surrounding components.
- Install New Ignition Coil: Position the new USPEEDA Ignition Coil P54809 in the same location as the old one. Ensure the mounting holes align.
- Set Air Gap (Crucial Step): Before tightening the mounting bolts, insert a feeler gauge (typically 0.010-0.014 inches or as specified by your generator's manual) between the ignition coil's laminations and the flywheel magnets. Push the coil firmly against the flywheel, then tighten the mounting bolts. Remove the feeler gauge. This ensures the correct air gap for optimal spark generation.
- Reconnect Wires: Reconnect the low-voltage wires to the new ignition coil. Ensure connections are secure.
- Reconnect Spark Plug Wire: Firmly connect the spark plug boot to the spark plug.
- Test: Reconnect the battery (if disconnected). Start the generator and check for proper operation.
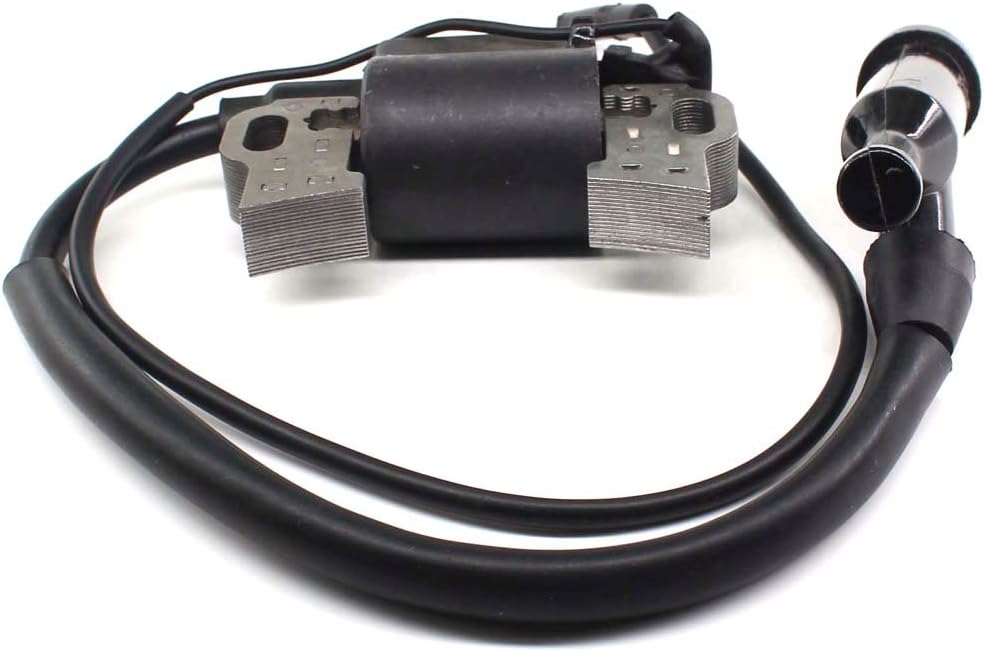
Image 4.1: The ignition coil's mounting brackets, which secure it to the engine block.

Image 4.2: The coil body and spark plug wire connection point.
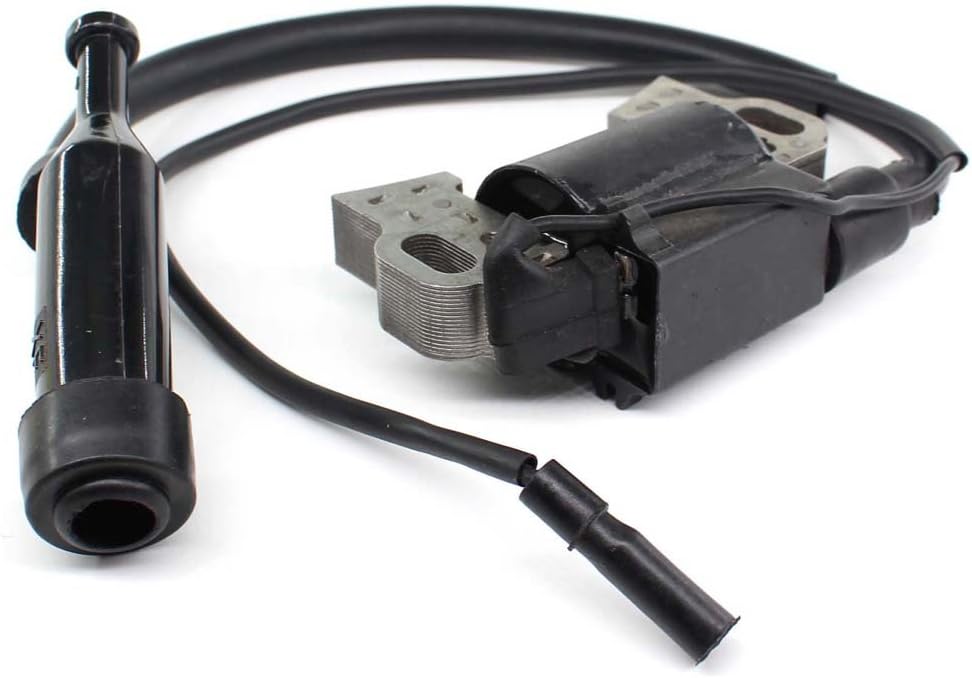
Image 4.3: The spark plug boot, designed to connect securely to the spark plug.
5. Operation and Function
The ignition coil is a critical component of your generator's ignition system. Its primary function is to transform the low voltage from the generator's charging system into the high voltage (thousands of volts) required to create a spark at the spark plug. This spark ignites the air-fuel mixture in the engine's combustion chamber, initiating the power stroke and allowing the engine to run. A properly functioning ignition coil ensures consistent and strong spark delivery, which is essential for efficient engine performance and reliable starting.
6. Maintenance and Inspection
Regular inspection of your ignition coil can help identify potential issues before they lead to engine problems. While ignition coils are generally low-maintenance, periodic checks are recommended.
- Visual Inspection: Check the coil body for any signs of cracks, melting, or physical damage. Inspect the spark plug wire and boot for cuts, abrasions, or deterioration.
- Connection Check: Ensure all electrical connections to the coil are clean, tight, and free from corrosion.
- Spark Plug Boot: Verify that the spark plug boot fits snugly onto the spark plug. A loose connection can lead to misfires or no spark.
- Cleanliness: Keep the coil and surrounding area free from dirt, oil, and debris, which can affect its performance and heat dissipation.

Image 6.1: Side profile of the ignition coil, useful for inspecting the coil body and wire integrity.
7. Troubleshooting
If your generator experiences ignition-related issues, the following table provides common problems, possible causes, and solutions.
| Problem | Possible Cause | Solution |
|---|---|---|
| Engine cranks but won't start (no spark) | Faulty ignition coil, disconnected spark plug wire, fouled spark plug, incorrect air gap. | Check spark plug wire connection. Inspect/replace spark plug. Verify ignition coil air gap. Test/replace ignition coil. |
| Engine misfires or runs rough | Weak spark from coil, loose spark plug boot, partially fouled spark plug. | Ensure spark plug boot is secure. Inspect/clean/replace spark plug. Check coil connections. |
| Intermittent spark | Loose wiring connections, failing ignition coil, moisture. | Check all wiring for tightness and corrosion. Inspect coil for cracks. Ensure dry environment. |

Image 7.1: Top view of the ignition coil, useful for checking overall integrity and wire routing.
8. Specifications
| Specification | Detail |
|---|---|
| Brand | USPEEDA |
| OEM Part Number | P54809 |
| Item Dimensions (L x W x H) | 4.72 x 2.76 x 2.36 inches |
| Item Weight | 9.3 ounces |
| Installation Type | Bolt-On |
| Connector Gender | Male |
| UPC | 606015363767 |
| Wattage Compatibility | 5500-9000 Watts (Generator) |
9. Warranty and Support
For information regarding product warranty, returns, or technical support, please refer to the retailer's policy where the product was purchased or contact USPEEDA customer service directly. Keep your purchase receipt as proof of purchase.
Contact Information: Please visit the official USPEEDA website or the retailer's support page for the most current contact details.