1. Introduction
This manual provides detailed instructions for the MARATHON CL030068 Atomic Wall Clock. This clock is designed to automatically synchronize with the NIST radio signal for precise timekeeping, and it displays time, date, day of the week, and indoor temperature.

Image 1.1: The MARATHON CL030068 Atomic Wall Clock, showcasing its large digital display and sleek design.
2. Package Contents
- MARATHON CL030068 Atomic Wall Clock
- AA Alkaline Batteries (included)
- User Manual (this document)
3. Setup
3.1 Battery Installation
- Locate the battery compartment on the back of the clock.
- Insert the included AA batteries, ensuring correct polarity (+ and -).
- Close the battery compartment cover.
3.2 Initial Synchronization and Time Zone Selection
Upon battery insertion, the clock will automatically begin searching for the NIST atomic time signal. This process may take several minutes to several hours, depending on your location and signal strength. The atomic time signal is broadcast from Colorado, USA, and is primarily effective in North America.
- Time Zone: Locate the time zone switch or button on the back of the clock. Select your appropriate North American time zone: Pacific, Mountain, Central, Eastern, Atlantic, Newfoundland, Alaska, or Hawaii.
- Signal Reception: For optimal signal reception, place the clock near a window, away from electronic devices that may cause interference. The signal is often strongest during nighttime hours.

Image 3.1: The atomic wall clock mounted on a wall, demonstrating its suitability for various environments.
4. Operating Instructions
4.1 Display Modes
The clock offers multiple display modes. Use the 'MODE' button (if available) or refer to specific buttons on the back of your clock to cycle through the following displays:
- Time Display: Choose between AM/PM or 24-hour format.
- Date Display: Shows the month, weekday, and date.
- Temperature Display: Displays the indoor room temperature in Celsius or Fahrenheit. Use the ‘C/F’ button to switch between units.
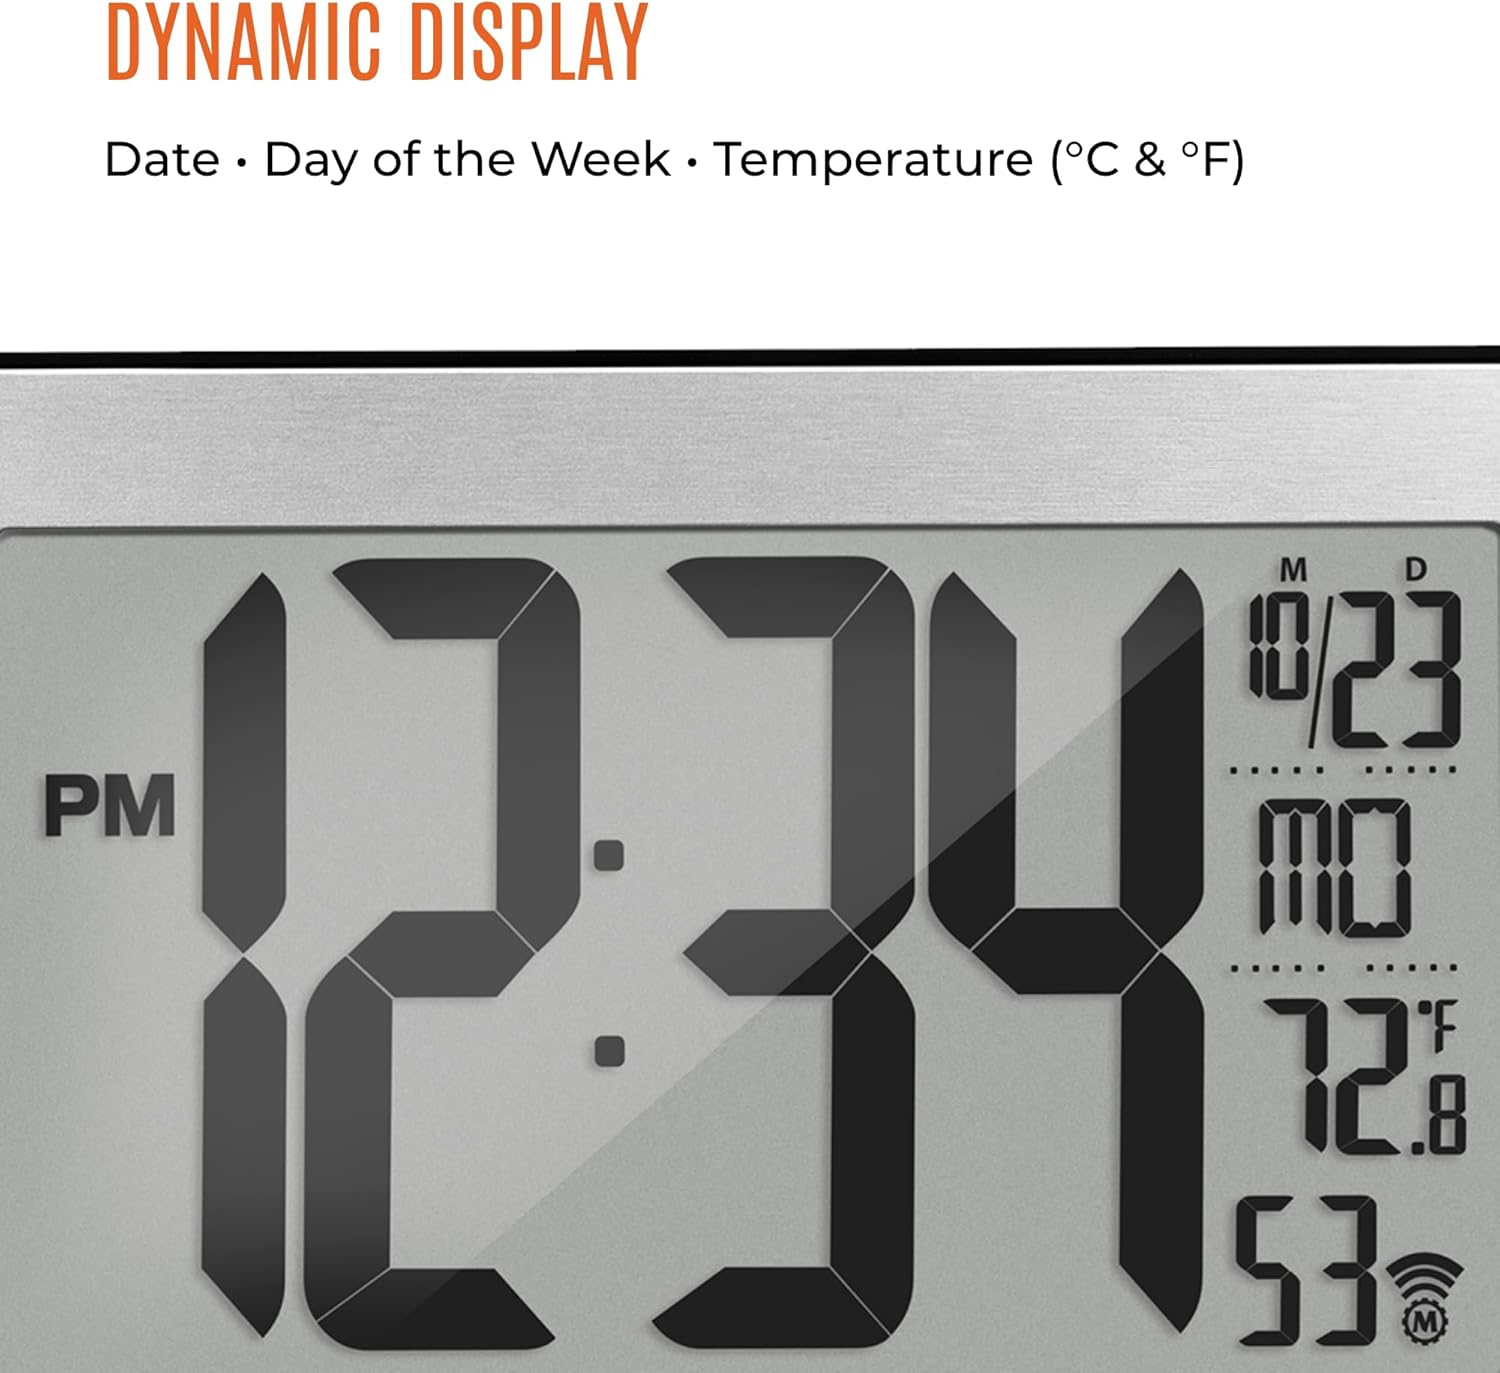
Image 4.1: A close-up view of the clock's dynamic display, showing time, date, day, and temperature.
4.2 Manual Time Setting
In the event that the atomic signal cannot be received, or if you wish to set the time manually, follow these steps:
- Press and hold the 'SET' button (or similar) until the time display begins to flash.
- Use the '+' or '-' buttons to adjust the hour, then press 'SET' to confirm.
- Repeat for minutes, year, month, and day.
- Press 'SET' one last time to exit manual setting mode.
5. Features Overview
- Self-Setting and Self-Adjusting: Automatically synchronizes with the NIST atomic clock signal for accurate time, including Daylight Saving Time adjustments.
- Large Display: Features a 9-inch display with large 4-inch digits for easy readability from a distance.
- Multiple Display Modes: Provides options for AM/PM or 24-hour time, full date (month, weekday, date), and indoor temperature in Celsius or Fahrenheit.
- Eight North American Time Zones: Supports Pacific, Mountain, Central, Eastern, Atlantic, Newfoundland, Alaska, and Hawaii standard times.
- Versatile Placement: Designed for both wall mounting and tabletop use with a sturdy fold-out stand.
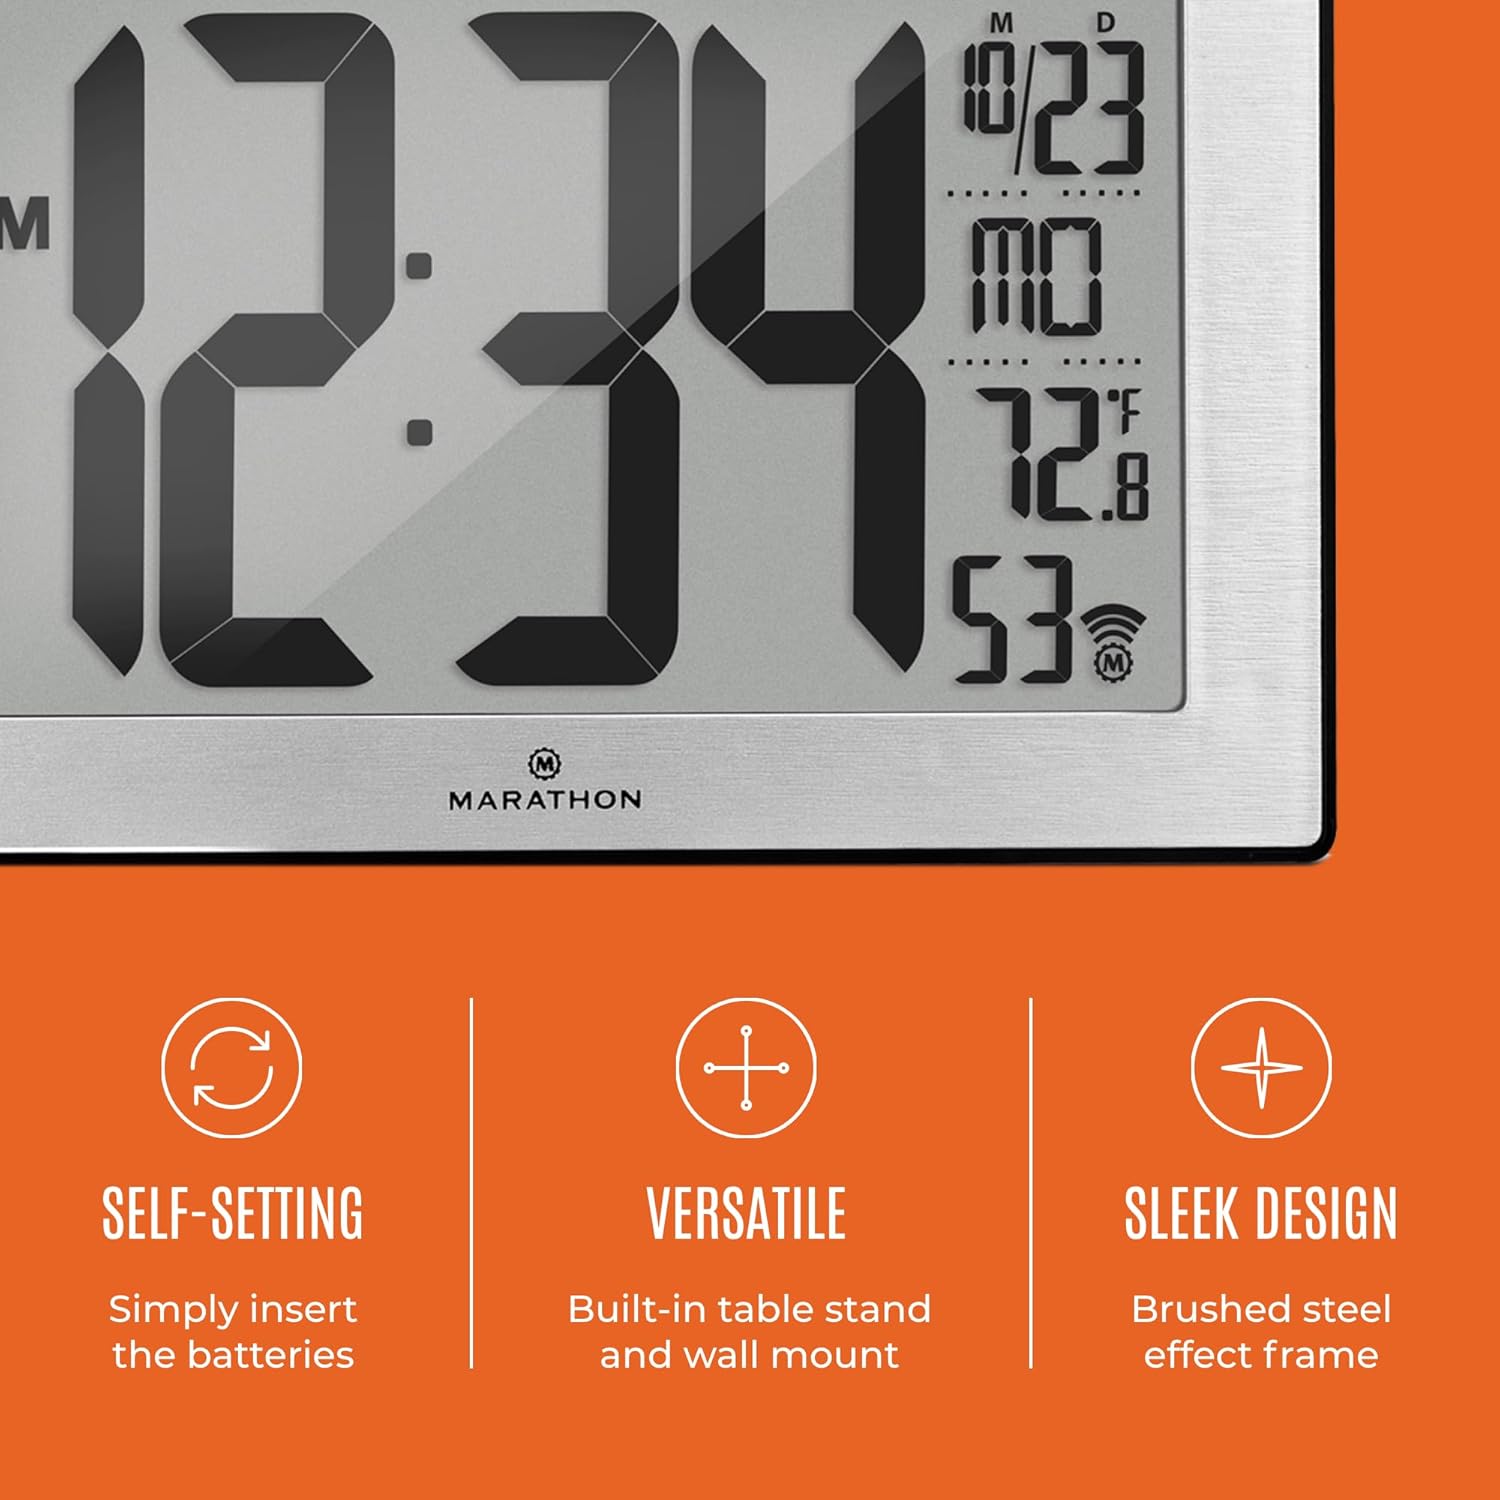
Image 5.1: Key features of the clock, including its self-setting capability, versatile placement options, and sleek design.
6. Mounting and Placement
6.1 Wall Mounting
The clock features a keyhole slot on the back for easy wall mounting. Ensure the wall is suitable for supporting the clock's weight (approximately 558g).
6.2 Tabletop Placement
Utilize the integrated fold-out stand on the back of the clock to place it securely on any flat surface, such as a desk, shelf, or table.
6.3 Optimal Signal Reception
For best atomic signal reception, position the clock:
- Near a window.
- Away from large metal objects or electronic devices that may cause interference (e.g., televisions, computers, microwaves).
- In an area with minimal structural obstructions.

Image 6.1: The clock displayed in a home environment, illustrating its ease of placement and clear visibility.
7. Maintenance
7.1 Battery Replacement
When the display dims or becomes erratic, it is time to replace the batteries. Always replace all batteries at the same time with new, high-quality AA alkaline batteries. Do not mix old and new batteries or different types of batteries.
7.2 Cleaning
To clean the clock, use a soft, dry cloth. Do not use abrasive cleaners, solvents, or chemical sprays, as these may damage the display or casing.
8. Troubleshooting
| Problem | Possible Cause | Solution |
|---|---|---|
| Clock does not display anything. | Batteries are dead or incorrectly installed. | Check battery polarity. Replace with fresh AA batteries. |
| Clock does not synchronize with atomic signal. | Poor signal reception due to location or interference. | Move the clock to a different location, preferably near a window and away from electronics. Allow several hours, especially overnight, for synchronization. Manually set the time if necessary. |
| Incorrect time displayed. | Incorrect time zone selected or atomic signal not received. | Verify the correct time zone is selected. Attempt to resynchronize or manually set the time. |
| Temperature reading is inaccurate. | Clock placed near a heat source or vent. | Relocate the clock to an area with stable ambient temperature. |
9. Specifications
| Feature | Detail |
|---|---|
| Model Number | CL030068 |
| Brand | MARATHON |
| Display Type | Digital |
| Color | Black Frame with Steel Inset |
| Product Dimensions | 24 x 3.81 x 16 cm (9.4 x 1.5 x 6.3 inches) |
| Item Weight | 558 g (1.23 lbs) |
| Power Source | AA Batteries (included) |
| Special Features | Atomic Time Synchronization, Calendar Display, Temperature Display |
| Time Zones | 8 North American Time Zones |

Image 9.1: Dimensions of the MARATHON CL030068 Atomic Wall Clock.
10. Warranty and Support
For warranty information and customer support, please refer to the manufacturer's official website or contact their customer service department. Keep your purchase receipt as proof of purchase.

Image 10.1: The MARATHON brand logo and a brief historical note about the company.


