
1. Important Safety Information
WARNING: Read and understand all instructions before operating this tool. Failure to follow all instructions listed below may result in electric shock, fire, and/or serious personal injury.
- Always wear eye protection that conforms to ANSI Z87.1 and hearing protection when operating pneumatic tools.
- Never point the tool at yourself or others.
- Disconnect the air supply before making adjustments, clearing jams, or servicing the tool.
- Keep hands and body parts away from the discharge area of the tool.
- Ensure the workpiece is securely fastened before nailing.
- Do not operate the tool if it is damaged or malfunctioning.
- Use only clean, dry, regulated compressed air at the recommended pressure.
- Keep children and bystanders away while operating a power tool.
2. Product Overview
The PowerSmart PS6130 is a pneumatic 18 gauge brad nailer designed for various finishing and trim applications. Its lightweight aluminum construction and tool-free features enhance user convenience and efficiency.
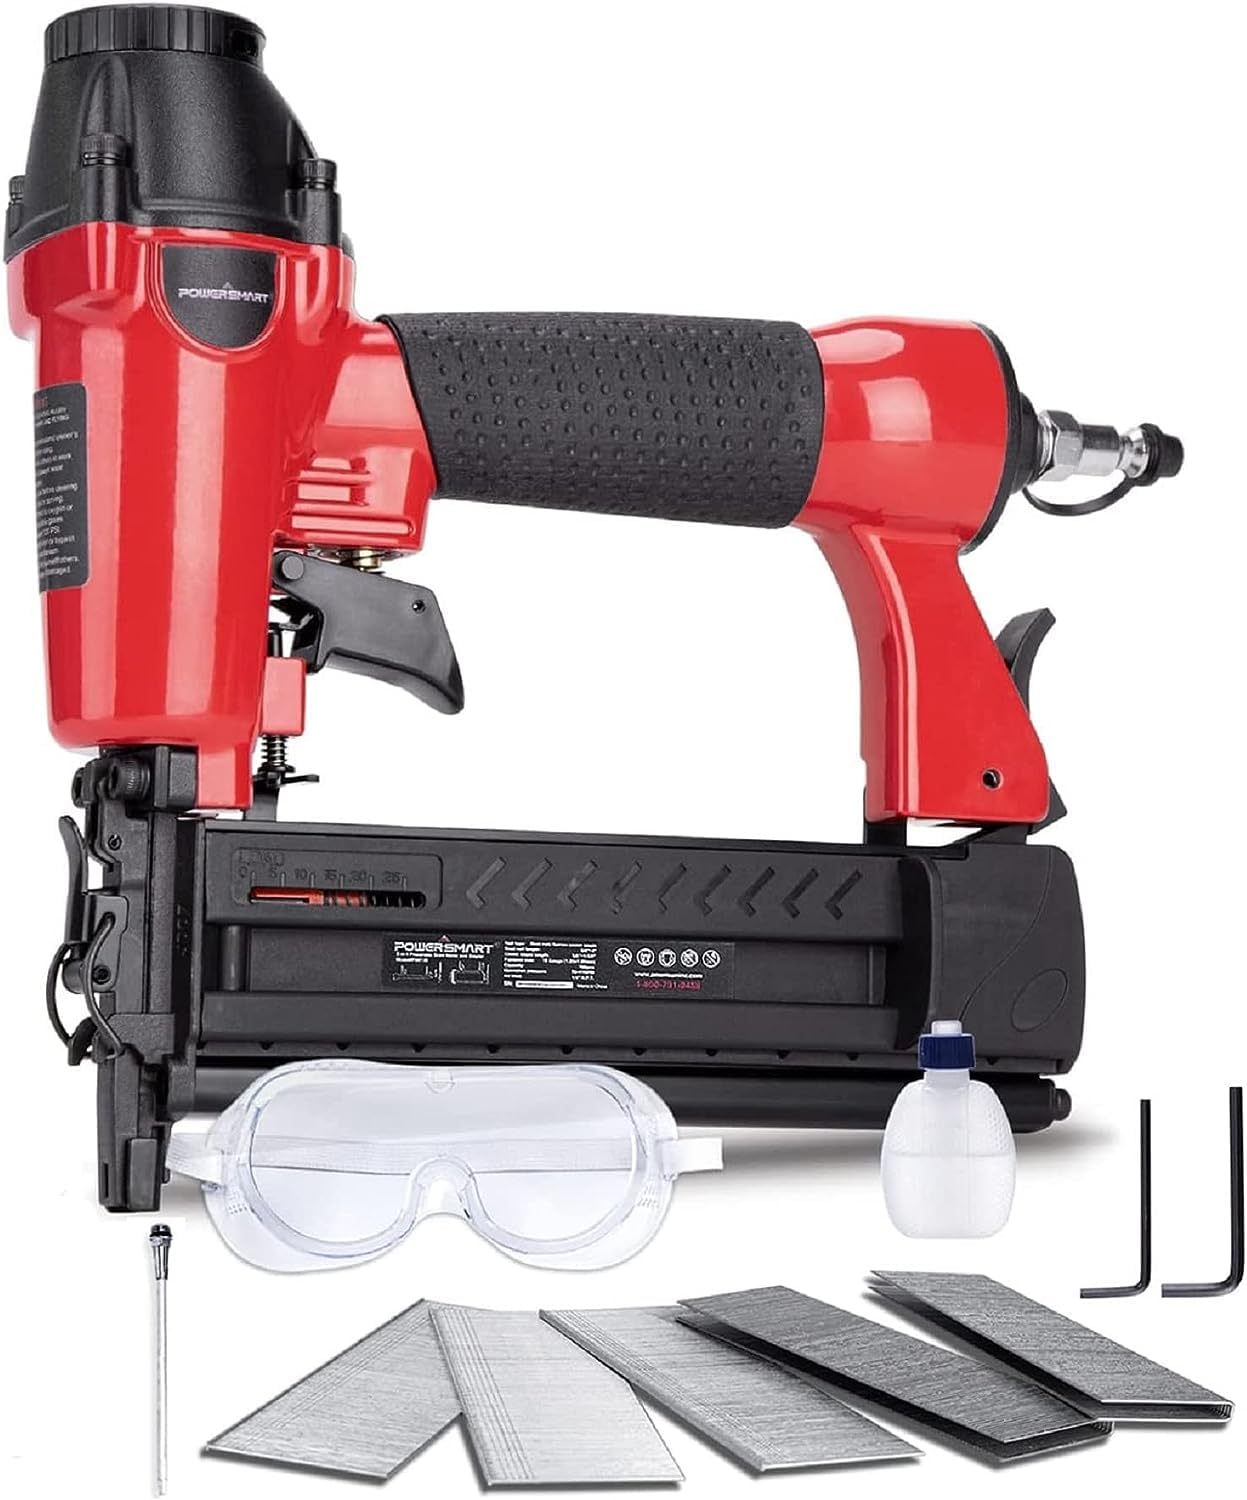
Figure 1: PowerSmart PS6130 Pneumatic 18 Gauge Brad Nailer, showing its overall design.
2.1 Key Components
- Trigger: Activates the nailing mechanism.
- Magazine: Holds brad nails.
- Depth Adjustment Dial: Controls the nail driving depth.
- Exhaust Port: Directs expelled air.
- Air Inlet: Connection point for the air hose.
- Nose Piece/Work Contact Element: Engages with the workpiece for firing.
- Jam Release Latch: Allows for tool-free clearing of jammed nails.
3. Setup and Preparation
3.1 Unpacking
Carefully remove the nailer and all accessories from the packaging. Inspect the tool for any damage that may have occurred during shipping. Retain packaging for future storage or transport.
3.2 Air Supply Connection
- Ensure your air compressor is off and the air tank is drained.
- Attach a quick-connect air fitting (not included) to the tool's air inlet.
- Connect an air hose from your compressor to the tool.
- Set the air compressor's regulator to an operating pressure between 70-100 PSI. The maximum allowable pressure is 120 PSI.
- Turn on the air compressor and allow it to build pressure.
3.3 Loading Brad Nails
This nailer accommodates 18 gauge brad nails from 5/8 inches to 2 inches in length. The magazine capacity is up to 100 brad nails.
- Disconnect the air supply from the tool.
- Pull back the magazine follower until it locks into place.
- Insert a strip of 18 gauge brad nails into the magazine with the points facing down.
- Release the magazine follower, allowing it to push the nails forward.
- Reconnect the air supply.
3.4 Adjusting Depth of Drive
The tool features a tool-free depth-of-drive adjustment. Rotate the depth adjustment dial located near the nose of the tool to achieve the desired nail depth. Test on a scrap piece of material before final application.
4. Operating Instructions
4.1 Basic Operation
- Ensure all safety precautions are followed and the air supply is connected.
- Place the nose piece of the nailer firmly against the workpiece where the nail is to be driven.
- Squeeze the trigger to drive a nail. The tool will not fire unless the nose piece is depressed against a surface.
- Lift the tool from the workpiece after each nail is driven.
4.2 Clearing Nail Jams
The PowerSmart PS6130 features a tool-free jam release mechanism for easy clearing of jammed nails.
- Immediately disconnect the air supply from the tool.
- Locate the quick jam release nose latch.
- Open the glide plate by activating the latch.
- Carefully remove any jammed nails or debris from the nose area.
- Close the glide plate securely.
- Reconnect the air supply and resume operation.
5. Maintenance
Regular maintenance ensures optimal performance and extends the life of your tool. Always disconnect the air supply before performing any maintenance.
5.1 Lubrication
Apply 3-5 drops of pneumatic tool oil into the air inlet before each use and after every 1-2 hours of continuous operation. This lubricates internal components and prevents wear.
5.2 Cleaning
- Keep the tool clean and free of debris. Wipe down the exterior with a clean cloth.
- Periodically inspect the nose piece and magazine for accumulated dust or foreign objects and remove them.
5.3 Storage
When not in use, disconnect the air supply and store the tool in a clean, dry place, away from direct sunlight and extreme temperatures. Apply a few drops of oil before storing for extended periods.
6. Troubleshooting
| Problem | Possible Cause | Solution |
|---|---|---|
| Tool does not fire |
|
|
| Nails jam frequently |
|
|
| Nails not driven flush |
|
|
| Air leaks |
|
|
7. Specifications
| Feature | Specification |
|---|---|
| Model Number | PS6130 |
| Power Source | Air-powered |
| Nail Gauge | 18 Gauge |
| Nail Length Capacity | 5/8" to 2" (15.8mm to 50.8mm) |
| Magazine Capacity | 100 Brad Nails |
| Operating Pressure | 70-100 PSI (4.8-6.9 bar) |
| Maximum Pressure | 120 PSI (8.3 bar) |
| Item Weight | 2.6 pounds (1.18 kg) |
| Product Dimensions | 11.4 x 3.1 x 13 inches (29 x 7.9 x 33 cm) |
| Material | Aluminum |
8. Warranty Information
This PowerSmart PS6130 Pneumatic 18 Gauge Brad Nailer comes with a TWO (2) YEARS LIMITED WARRANTY from the date of purchase. This warranty covers defects in material and workmanship under normal use. It does not cover damage resulting from misuse, abuse, accident, neglect, improper maintenance, or normal wear and tear.
For warranty claims or service, please retain your proof of purchase and contact PowerSmart customer support.
9. Customer Support
If you have any questions, require assistance, or need to report an issue with your PowerSmart PS6130 Brad Nailer, please contact our customer support team.
- Website: www.powersmartusa.com (Note: This is a placeholder URL as no specific support link was provided.)
- Email: support@powersmartusa.com (Note: This is a placeholder email as no specific support email was provided.)
- Phone: Refer to the PowerSmart official website for current contact numbers.
Please have your model number (PS6130) and date of purchase available when contacting support.