1. Introduction
The Blackvue DR900S-1CH is a high-performance 4K UHD dashcam designed to provide comprehensive video surveillance for your vehicle. This manual provides detailed instructions for installation, operation, maintenance, and troubleshooting to ensure optimal performance and longevity of your device. The DR900S-1CH features 4K UHD recording for the front camera, enhanced night vision, built-in Wi-Fi and GPS, and compatibility with BlackVue Over the Cloud services for remote access and notifications.
2. What's in the Box
Upon unboxing your Blackvue DR900S-1CH, please verify that all the following components are included:
- Blackvue DR900S-1CH Camera Unit
- Mounting Hardware
- Power Cable
- Instruction Manual
3. Product Features
The Blackvue DR900S-1CH dashcam is equipped with advanced features to enhance your driving safety and vehicle security:
- 4K UHD Front Recording: Captures video at 3840x2160 resolution at 30 frames per second, providing exceptional detail.
- Cloud Connectivity: Compatible with Free BlackVue Over the Cloud Service, offering remote live view, emergency alarms, and more.
- Integrated Connectivity: Features built-in 2.4/5GHz Wi-Fi, G-Sensor, and GPS for comprehensive data logging and connectivity.
- High-Resolution Sensor: Equipped with an 8 Megapixel CMOS Sensor for the front camera, ensuring clear image capture even in challenging lighting conditions.
- Enhanced Night Vision: Optimized for superior performance in low-light environments.
- Temperature Resilience: Designed with a high-temperature cutoff to ensure reliable operation in hotter climates.
- H.265 (HEVC) Compression: Utilizes advanced video compression technology for reduced file sizes without compromising 4K UHD quality. H.264 (AVC) is also available for broader compatibility.
- Adaptive Format-Free File Management: Ensures efficient and reliable recording by automatically managing the microSD card.
- Loop Recording & Intelligent Parking Mode: Continuously records footage, overwriting older files when the card is full. Intelligent Parking Mode automatically detects impacts and motion when your vehicle is parked, recording only relevant events to conserve memory and extend card lifespan.
- Event File Overwrite Protection: Important event files are protected from being overwritten during loop recording.
- BlackVue App & Viewer: Easily manage settings and browse videos with location and speed data on free apps for iOS/Android and viewer software for Windows/Mac.

Figure 1: Blackvue DR900S-1CH Dashcam highlighting key features like 4K UHD, Cloud compatibility, 5G WiFi, and H.265 video coding.

Figure 2: Dashcam unit displaying recording LED indicators and speaker, emphasizing built-in impact and motion detection features.
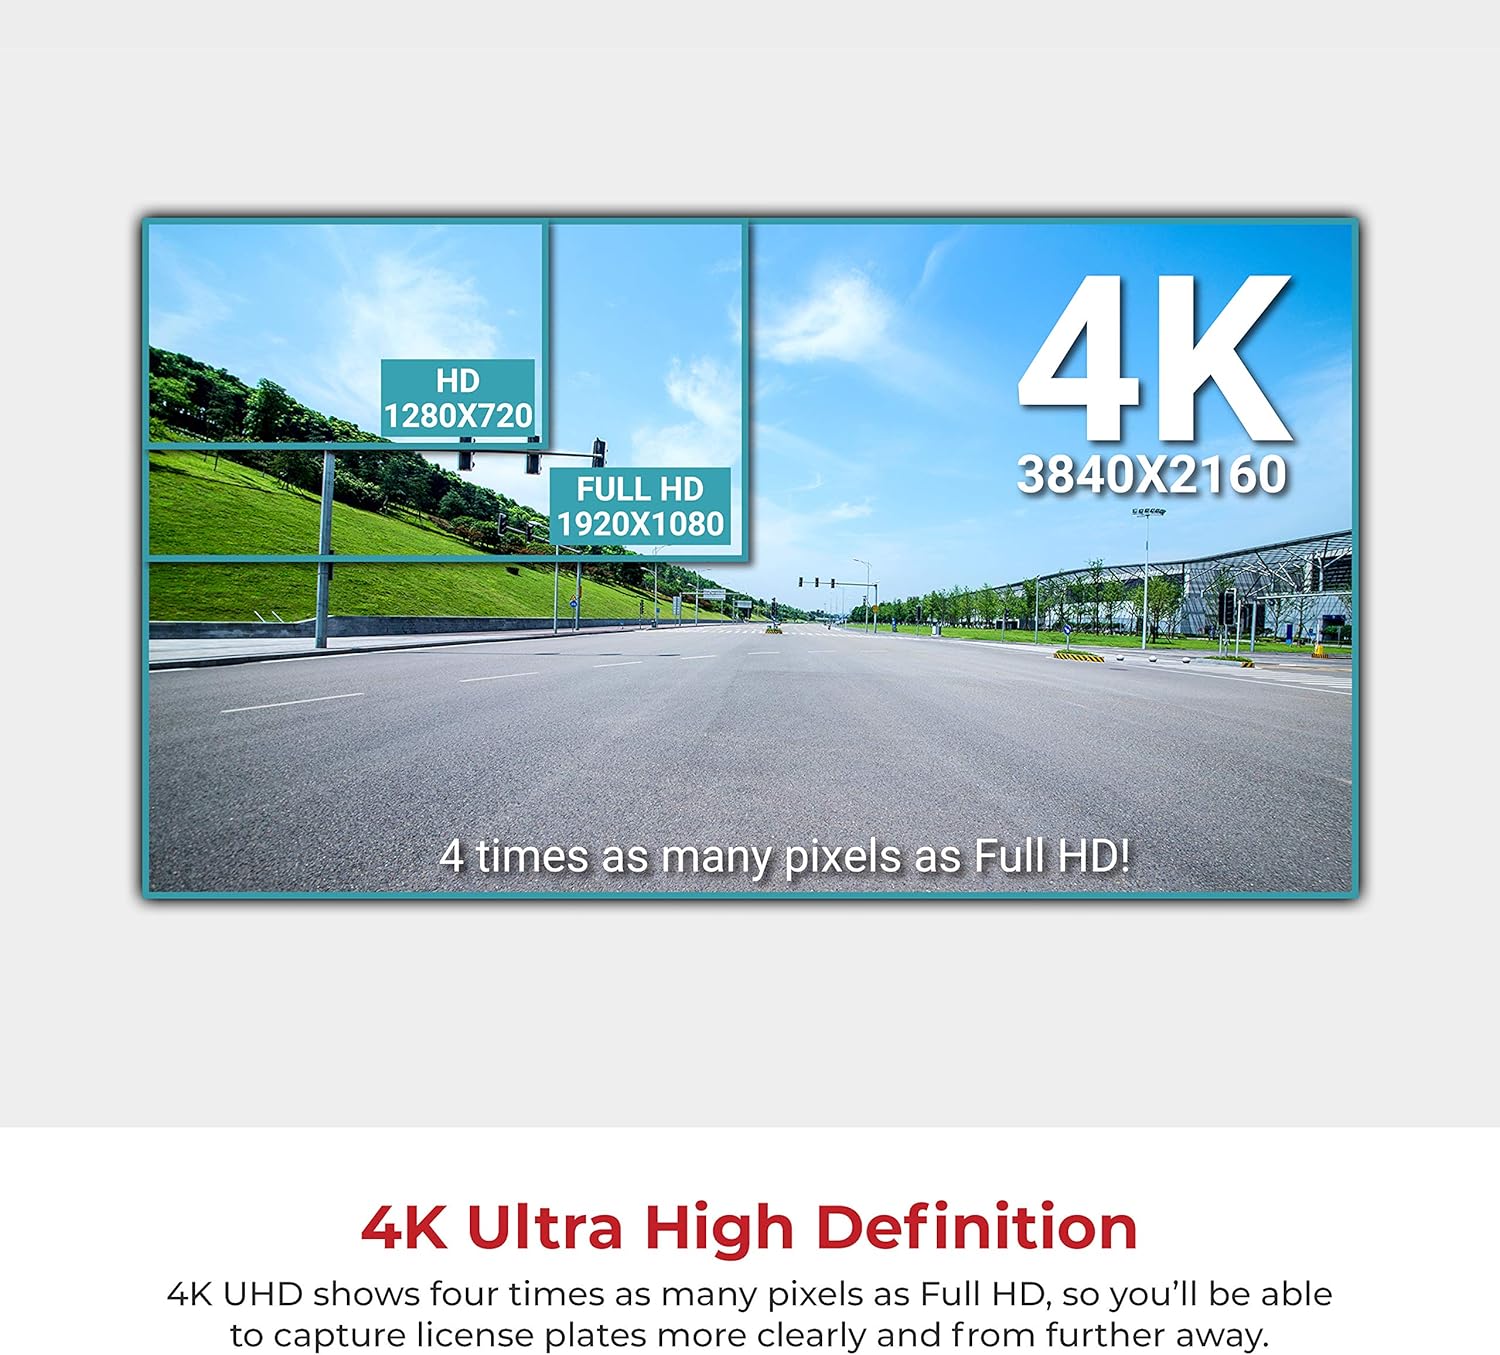
Figure 3: Visual comparison illustrating 4K Ultra High Definition resolution, which offers four times the pixels of Full HD.

Figure 4: Explanation of H.265 compression technology, highlighting its efficiency in providing better video quality with smaller file sizes compared to H.264.
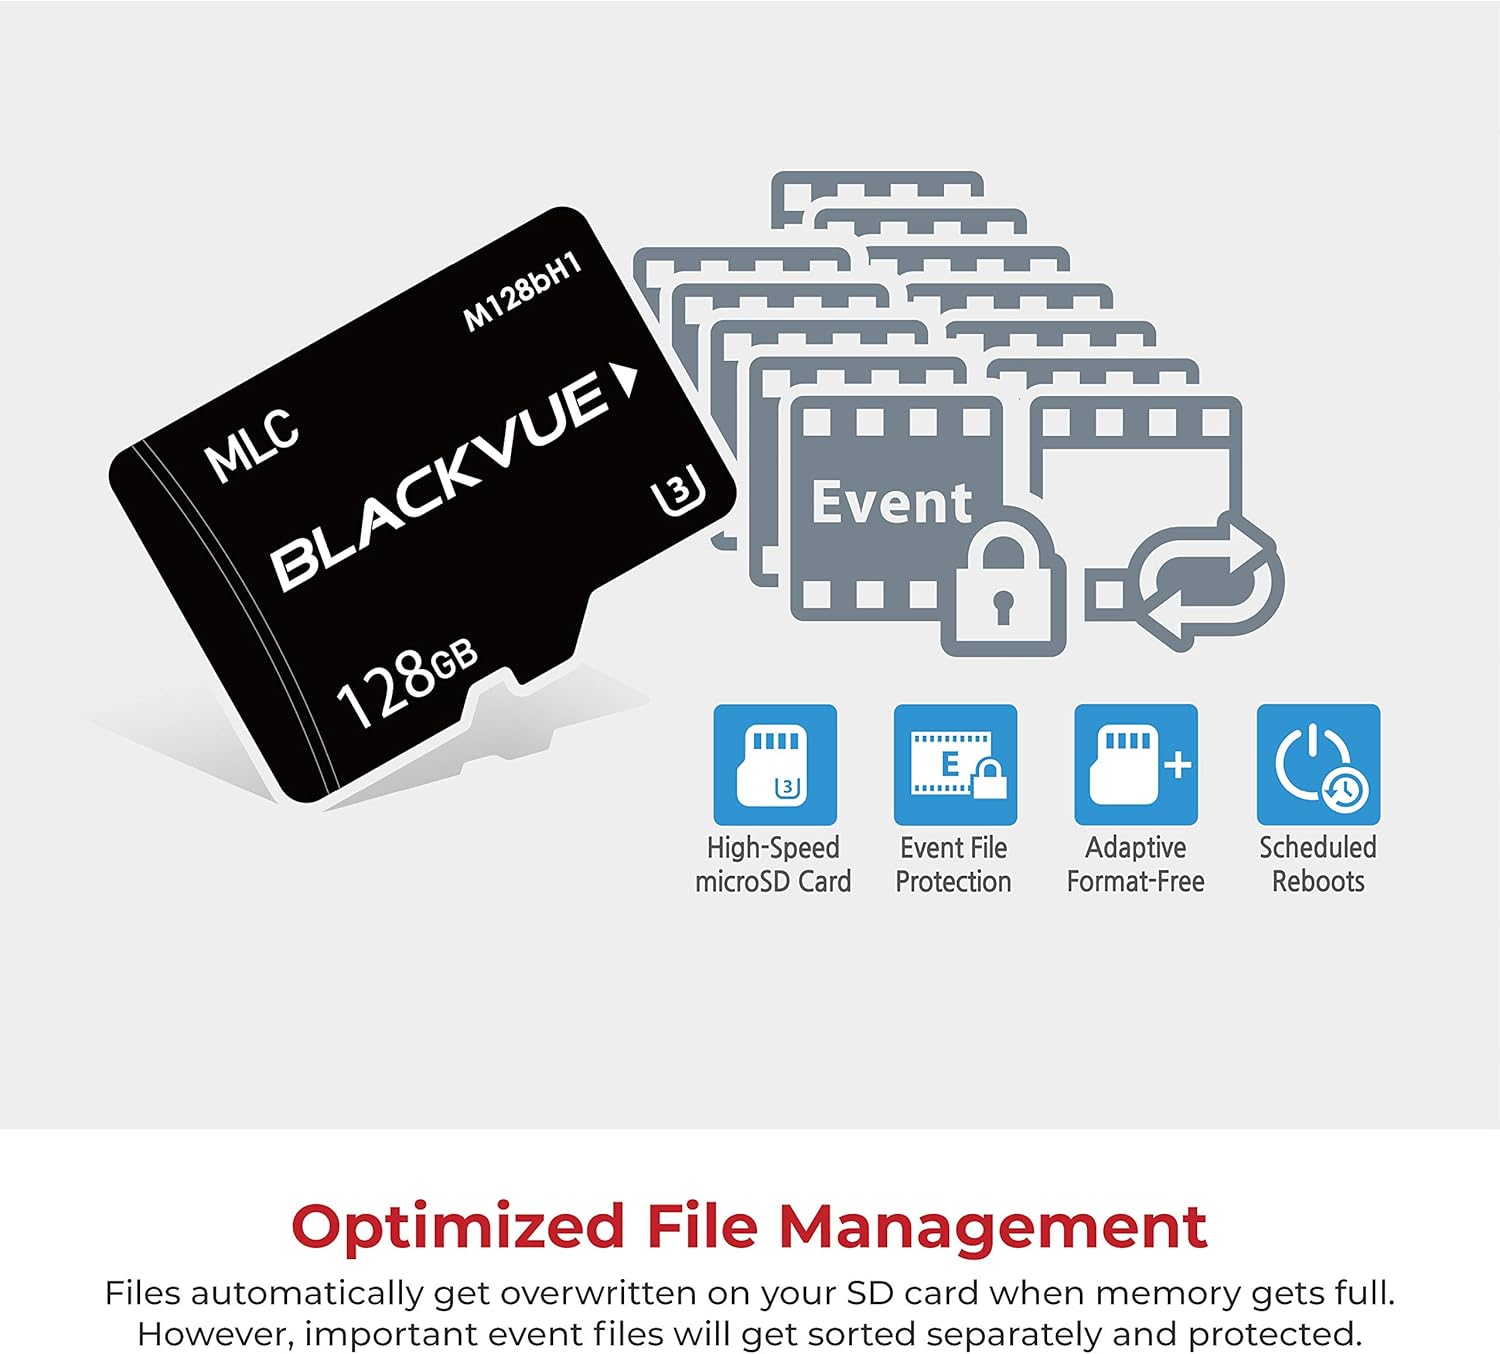
Figure 5: Optimized file management features, including high-speed microSD card support, event file protection, adaptive format-free technology, and scheduled reboots.

Figure 6: Detailed close-up of the Blackvue DR900S-1CH dashcam unit.
4. Setup and Installation
Follow these steps to install your Blackvue DR900S-1CH dashcam in your vehicle. For a visual guide, please refer to the installation video below.
- Prepare the Mounting Area: Ensure the windshield area where the dashcam will be mounted is clean and dry.
- Remove Vehicle Trim (if necessary): Carefully remove any necessary trim or covers to access wiring. This may include the cover around your rearview mirror or the reading light panel.
- Connect Power Adapter: Plug the dashcam's power adapter into the appropriate power source in your vehicle. If using a conversion cable for a reading light, unplug the internal plug from the reading light, connect it to the conversion cable, and pull the conversion cable plug from the ceiling.
- Mount the Dashcam: Align the buckles on the dashcam mount with the corresponding slots and snap it into place. Ensure the camera has a clear view of the road.
- Route Cables: Neatly route the power cable and any other necessary cables (e.g., for a rear camera, if applicable) along the windshield and vehicle trim to keep them out of the way and secure.
- Reinstall Trim: Reinstall any removed trim or covers, ensuring all connections are secure and no wires are pinched.
- Power On and Test: Start your vehicle to power on the dashcam. Verify that it powers on correctly and begins recording.
Video 1: General dashcam installation guide, demonstrating steps like removing covers, connecting power adapters, and securing the dashcam. Note: This video shows a general installation process and may not be specific to all vehicle models or the DR900S-1CH's exact mounting.
5. Operating Instructions
The Blackvue DR900S-1CH is designed for intuitive operation. Here's how to get started and manage your settings:
- Power On/Off: The dashcam automatically powers on and off with your vehicle's ignition.
- Recording Modes: The dashcam supports Normal Recording, Event Recording (triggered by impact/motion), and Intelligent Parking Mode. LEDs on the unit indicate the current recording status.
- Wi-Fi Connection: To connect your smartphone to the dashcam via Wi-Fi, enable Wi-Fi on the dashcam (usually by a proximity sensor or button) and then connect to the BlackVue network from your phone's Wi-Fi settings.
- BlackVue App Usage:
- Live View: Access a real-time feed from your dashcam's cameras to adjust the viewing angle or monitor your vehicle.
- Video Playback: Browse and play recorded videos stored on the microSD card or in the Cloud.
- Settings Management: Adjust various settings including:
- Basic Settings: Time, date, time zone, video resolution (e.g., 4K UHD @ 30fps), video codec (H.265 recommended), image quality, enhanced night vision, and brightness.
- Recording Settings: Enable/disable normal recording, automatic parking mode, voice recording, date & time display, speed unit (MPH/KM/H), event file protection, and camera rotation.
- Sensitivity: Adjust G-sensor sensitivity for normal and parking modes, and motion detection sensitivity for parking mode.
- System Settings: Manage LED indicators, proximity sensor functions, voice guidance volume, scheduled reboots, speed alerts, and user text overlay.
- Wi-Fi Settings: Change Wi-Fi credentials, band (2.4GHz/5GHz), and auto turn on/off options.
- Cloud Services: Enable BlackVue Over the Cloud service, set up cloud hotspot settings, and configure push notification settings for manual recording, motion detection, event recording, overspeed, parking mode entry/exit, and high-temperature warnings.
- Scheduled Reboot: The dashcam can be configured to automatically reboot at a set time (e.g., 3 AM) to ensure stable operation.

Figure 7: The BlackVue App & Viewer allows easy configuration and video browsing across multiple platforms.
6. Maintenance
Regular maintenance ensures the longevity and optimal performance of your Blackvue DR900S-1CH dashcam:
- MicroSD Card Management: Periodically format your microSD card (at least once a month) using the BlackVue App or Viewer to prevent data corruption and ensure smooth recording. While the Adaptive Format-Free File Management reduces the need for frequent manual formatting, it is still recommended.
- Lens Cleaning: Gently clean the dashcam's lens with a soft, lint-free cloth to remove dust or smudges that could affect video quality.
- Firmware Updates: Regularly check for and install the latest firmware updates via the BlackVue App or Viewer to benefit from new features, improvements, and bug fixes.
7. Troubleshooting
If you encounter issues with your Blackvue DR900S-1CH, try the following troubleshooting steps:
- Dashcam Not Powering On:
- Check the power cable connection to the dashcam and the vehicle's power outlet.
- Ensure the vehicle's ignition is on (if connected to an ignition-switched power source).
- Test the power outlet with another device to confirm it is functional.
- Recording Issues (e.g.,