1. Introduction
This manual provides detailed instructions for the assembly and use of your Miuzei Raspberry Pi 3 B+ Case. This kit is designed to protect your Raspberry Pi board and enhance its cooling performance with an integrated fan and heatsinks, along with a dedicated power supply. Please read these instructions carefully before beginning assembly.
2. Package Contents
Please verify that all the following items are included in your package:
- Miuzei Clear Acrylic Case (9 layers)
- Cooling Fan (30mm, DC 5V)
- Aluminum Heatsinks (3 pieces: 1 large for CPU, 1 medium for LAN, 1 small for RAM)
- 5V 3A Power Supply with ON/OFF Switch
- Set of Screws and Nuts for assembly
- Rubber Feet (4 pieces)
- Installation Instructions (printed manual)
Note: The Raspberry Pi board is not included in this package.

Image: All components included in the Miuzei Raspberry Pi 3 B+ Case kit, featuring the clear acrylic case, cooling fan, heatsinks, and power supply.
3. Setup & Assembly
Follow these steps to assemble your Miuzei Raspberry Pi 3 B+ Case. For a visual guide, please refer to the official installation video below.
Video: Official Miuzei Raspberry Pi 3 B+ Case installation guide, demonstrating step-by-step assembly of the acrylic layers, fan, and heatsinks.
3.1. Prepare Case Layers
- Carefully remove all 9 acrylic layers from their packaging.
- Peel off the protective film from both sides of each acrylic layer. This film makes the layers appear cloudy or scratched.

Image: Exploded view of the 9 acrylic layers of the Miuzei Raspberry Pi 3 B+ Case, showing individual components before assembly.
3.2. Install Raspberry Pi Board
- Identify the bottom layer of the case (Layer 1, typically with screw holes and no large cutouts for ports).
- Place the Raspberry Pi board onto the designated middle layer (Layer 4 in the diagram). Ensure the board is correctly oriented so that all ports align with the case cutouts. Incorrect orientation will block USB and HDMI cables.
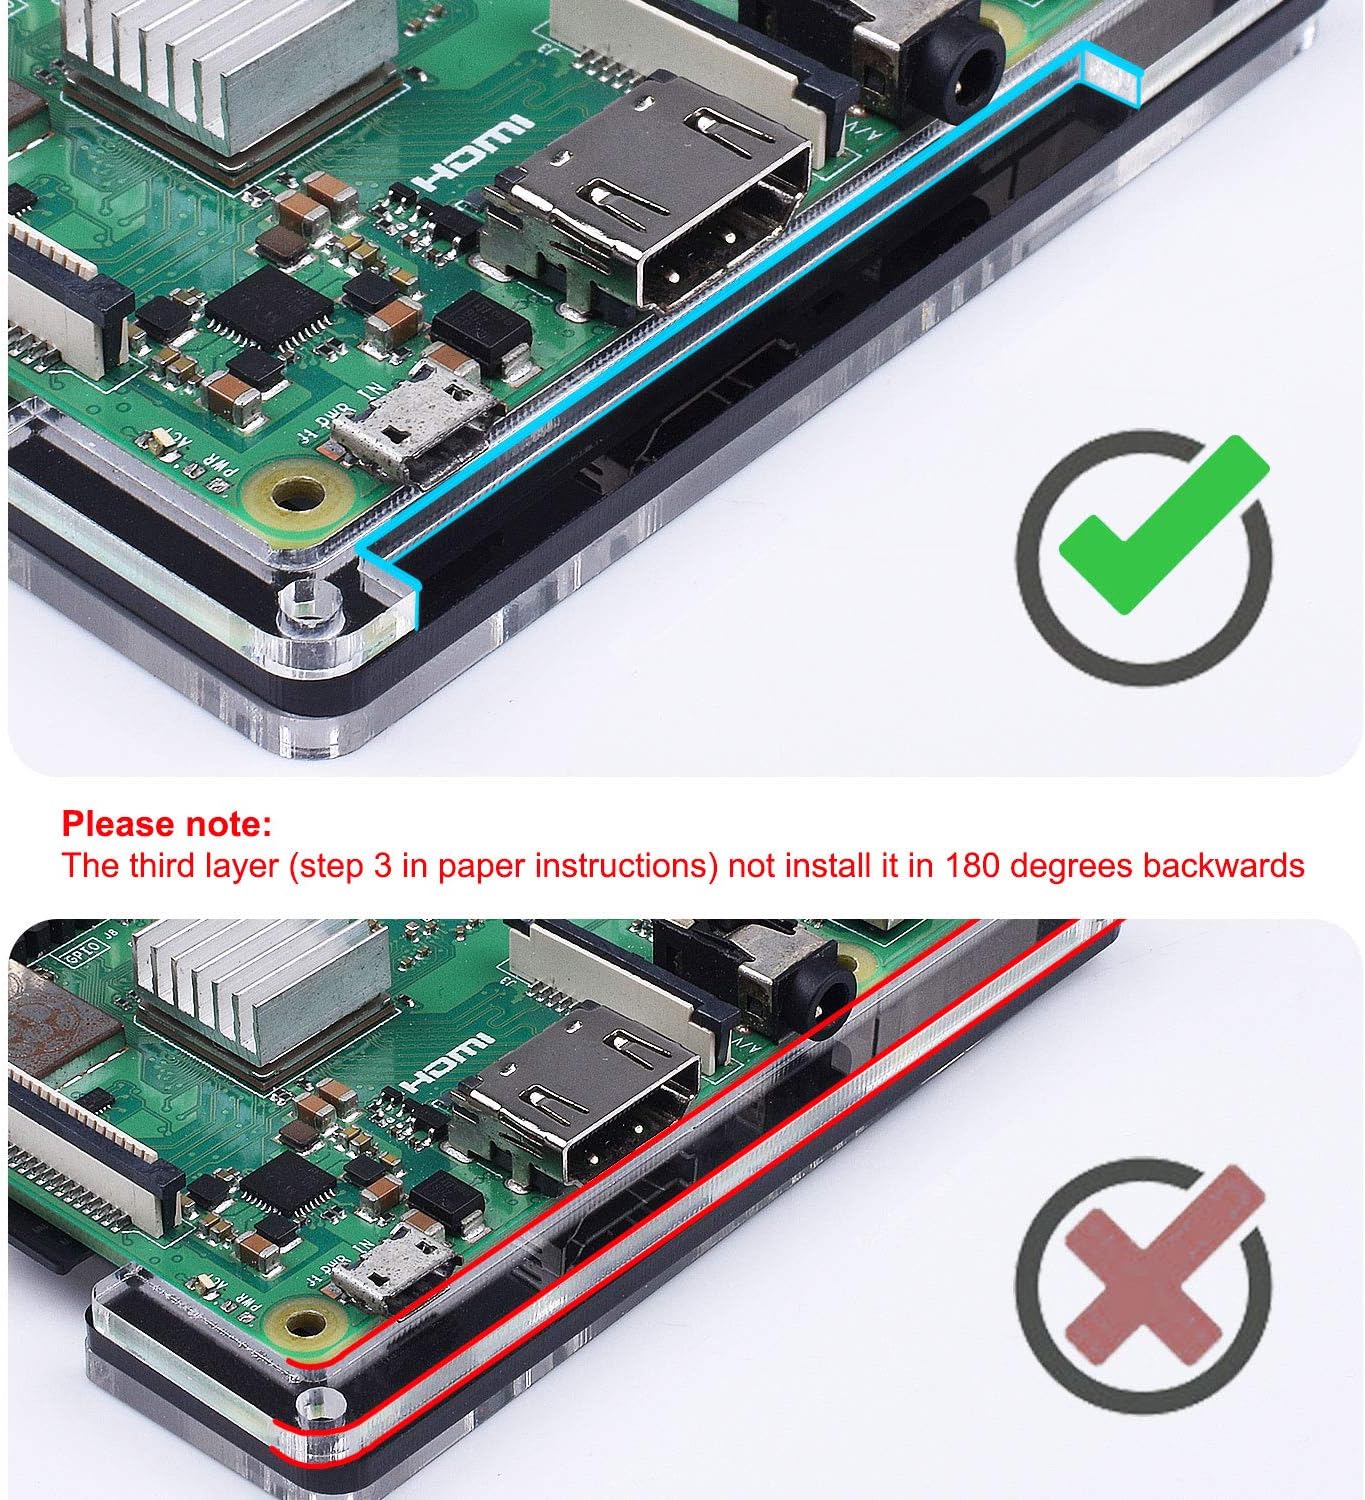
Image: Visual comparison of correct and incorrect Raspberry Pi board placement within the case layers, highlighting proper port alignment.
3.3. Attach Heatsinks
- Peel off the protective backing from the thermal adhesive on each heatsink.
- Carefully place the heatsinks onto the corresponding chips on the Raspberry Pi board: the largest heatsink on the CPU, the medium heatsink on the LAN chip, and the smallest on the RAM chip. Press firmly for good contact.

Image: Illustration showing the three aluminum heatsinks and their recommended placement on the CPU, LAN, and RAM chips of the Raspberry Pi board.
3.4. Install Cooling Fan
- Mount the cooling fan into the designated cutout on the top layer of the case (Layer 9). Ensure the fan's label side is facing downwards, towards the Raspberry Pi board, for optimal airflow.
- Secure the fan with the provided small screws and nuts.
- Connect the fan's red wire to a 5V GPIO pin and the black wire to a GND (Ground) GPIO pin on the Raspberry Pi for high-speed operation. For lower speed and quieter operation, connect the red wire to a 3.3V GPIO pin instead. Refer to your Raspberry Pi's GPIO pinout diagram for exact locations.

Image: Diagram illustrating the double cooling system with the fan and heatsinks, showing airflow and temperature reduction.

Image: Visual guide for connecting the cooling fan to either 3.3V (low speed) or 5V (high speed) GPIO pins on the Raspberry Pi.
3.5. Final Case Assembly
- Stack the remaining acrylic layers in the correct order, starting from the bottom layer with the Raspberry Pi board, and working your way up to the top layer with the fan.
- Align the screw holes on all layers and insert the longer screws through the entire stack. Secure with nuts on the top.
- Attach the four rubber feet to the bottom of the assembled case to prevent sliding and provide stability.
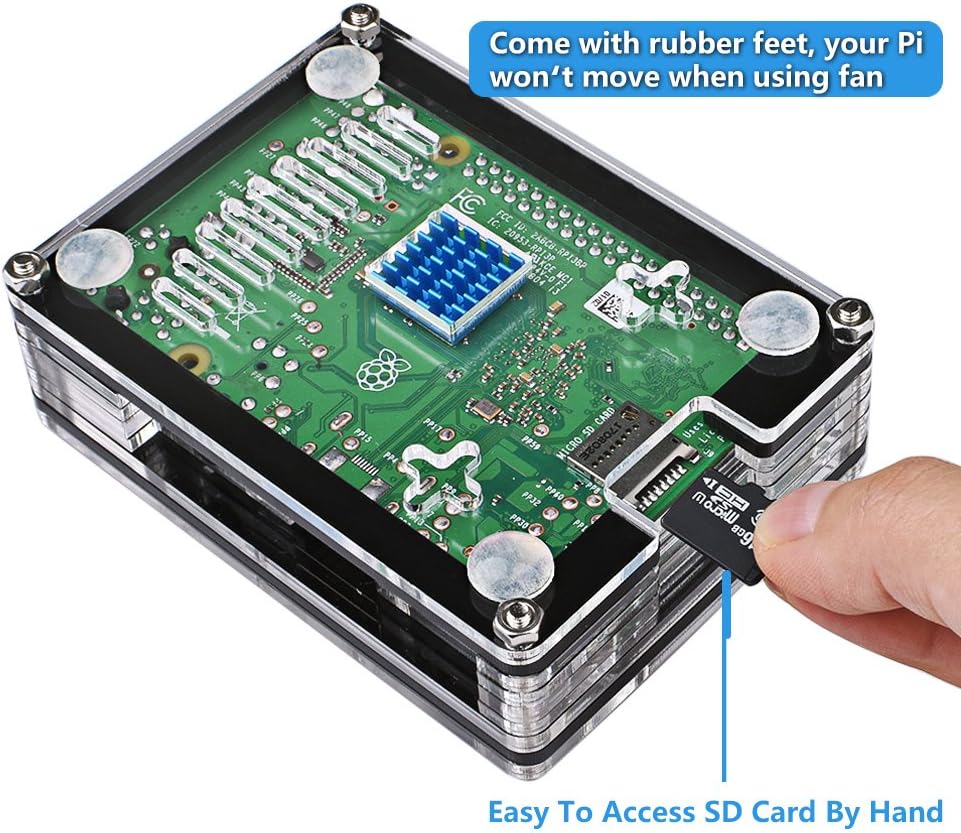
Image: The fully assembled case demonstrating easy access to the Micro SD card slot.

Image: The assembled case showcasing accessible ports including GPIO, Display, Camera, and SD card slot.
4. Operating Instructions
Once assembled, connect the provided 5V 3A power supply to the Micro USB power port on your Raspberry Pi. The power supply features an integrated ON/OFF switch for convenient control of your device.

Image: The 5V 3A power supply with an integrated ON/OFF switch, connected to the Raspberry Pi case.
5. Maintenance
- Keep the case clean by wiping it with a soft, dry cloth. Avoid abrasive cleaners.
- Ensure the cooling fan is free from dust and obstructions to maintain optimal airflow.
- Periodically check all screw connections to ensure they remain secure.
6. Troubleshooting
- Fan Not Spinning: Check that the fan's red and black wires are securely connected to the correct GPIO pins (5V/3.3V and GND). Ensure the Raspberry Pi is powered on.
- Overheating: Verify that the heatsinks are firmly attached to the chips and the fan is operating correctly. Ensure the case layers are properly aligned and not obstructing airflow.
- Ports Blocked: If any ports are obstructed, disassemble the case and re-check the orientation of the Raspberry Pi board and the acrylic layers, especially Layer 3, as shown in the assembly section.
- Power Issues: Ensure the 5V 3A power supply is correctly plugged into a wall outlet and the ON/OFF switch on the cable is in the 'ON' position.
7. Specifications
| Brand | Miuzei |
| Model Name | Raspberry Pi 3B Case |
| Compatibility | Raspberry Pi 3 B+, 3B, 2B |
| Material | Acrylic, Aluminum |
| Cooling Method | Air (Fan + Heatsinks) |
| Fan Size | 30mm |
| Power Supply Output | 5V 3A |
| Item Weight | 7.9 ounces |
8. Warranty and Support
Miuzei products are designed for quality and reliability. If you encounter any issues or have questions regarding your Miuzei Raspberry Pi 3 B+ Case, please contact Miuzei customer support for assistance. Specific warranty details may vary; refer to your purchase documentation or the official Miuzei website for more information.


