Introduction
Thank you for choosing the SortWise Adjustable 4-Tier Shower Caddy Corner Pole. This instruction manual provides detailed guidance for the assembly, installation, usage, and maintenance of your new bathroom organizer. Please read these instructions carefully before beginning assembly to ensure proper setup and safe operation.
Product Components
Before assembly, please verify that all parts listed below are present and undamaged. Refer to the diagram for visual identification.

Figure 1: All components included in the SortWise Shower Caddy package.
- Poles: Various pole sections (e.g., Extendable pole, Lower poles, Middle poles) to achieve desired height.
- Baskets: Four wire baskets with self-draining function. Includes small basket, adjustable shelves, and adjustable shelf with toothbrush/razor holder.
- Feet: Upper foot and Bottom foot for stability.
- Spring: Internal spring mechanism for tension.
- Plastic Caps & Rings: For securing pole sections and baskets.
- Assembly Guide: Printed instructions (this document).
Setup and Installation
The SortWise Shower Caddy is designed for easy, no-drilling installation using constant tension. Please measure your ceiling height carefully before proceeding.
1. Measure Your Space
Measure the height from your shower floor or tub ledge to the ceiling. The caddy is adjustable from 45 to 106 inches (115-270 cm).

Figure 2: Measuring the installation height from floor to ceiling.
2. Assemble the Pole Sections
Select the appropriate number of pole sections (Extendable, Middle, Lower) to match your measured height. Connect the sections by twisting them securely together. Ensure the spring-loaded section is at the top.
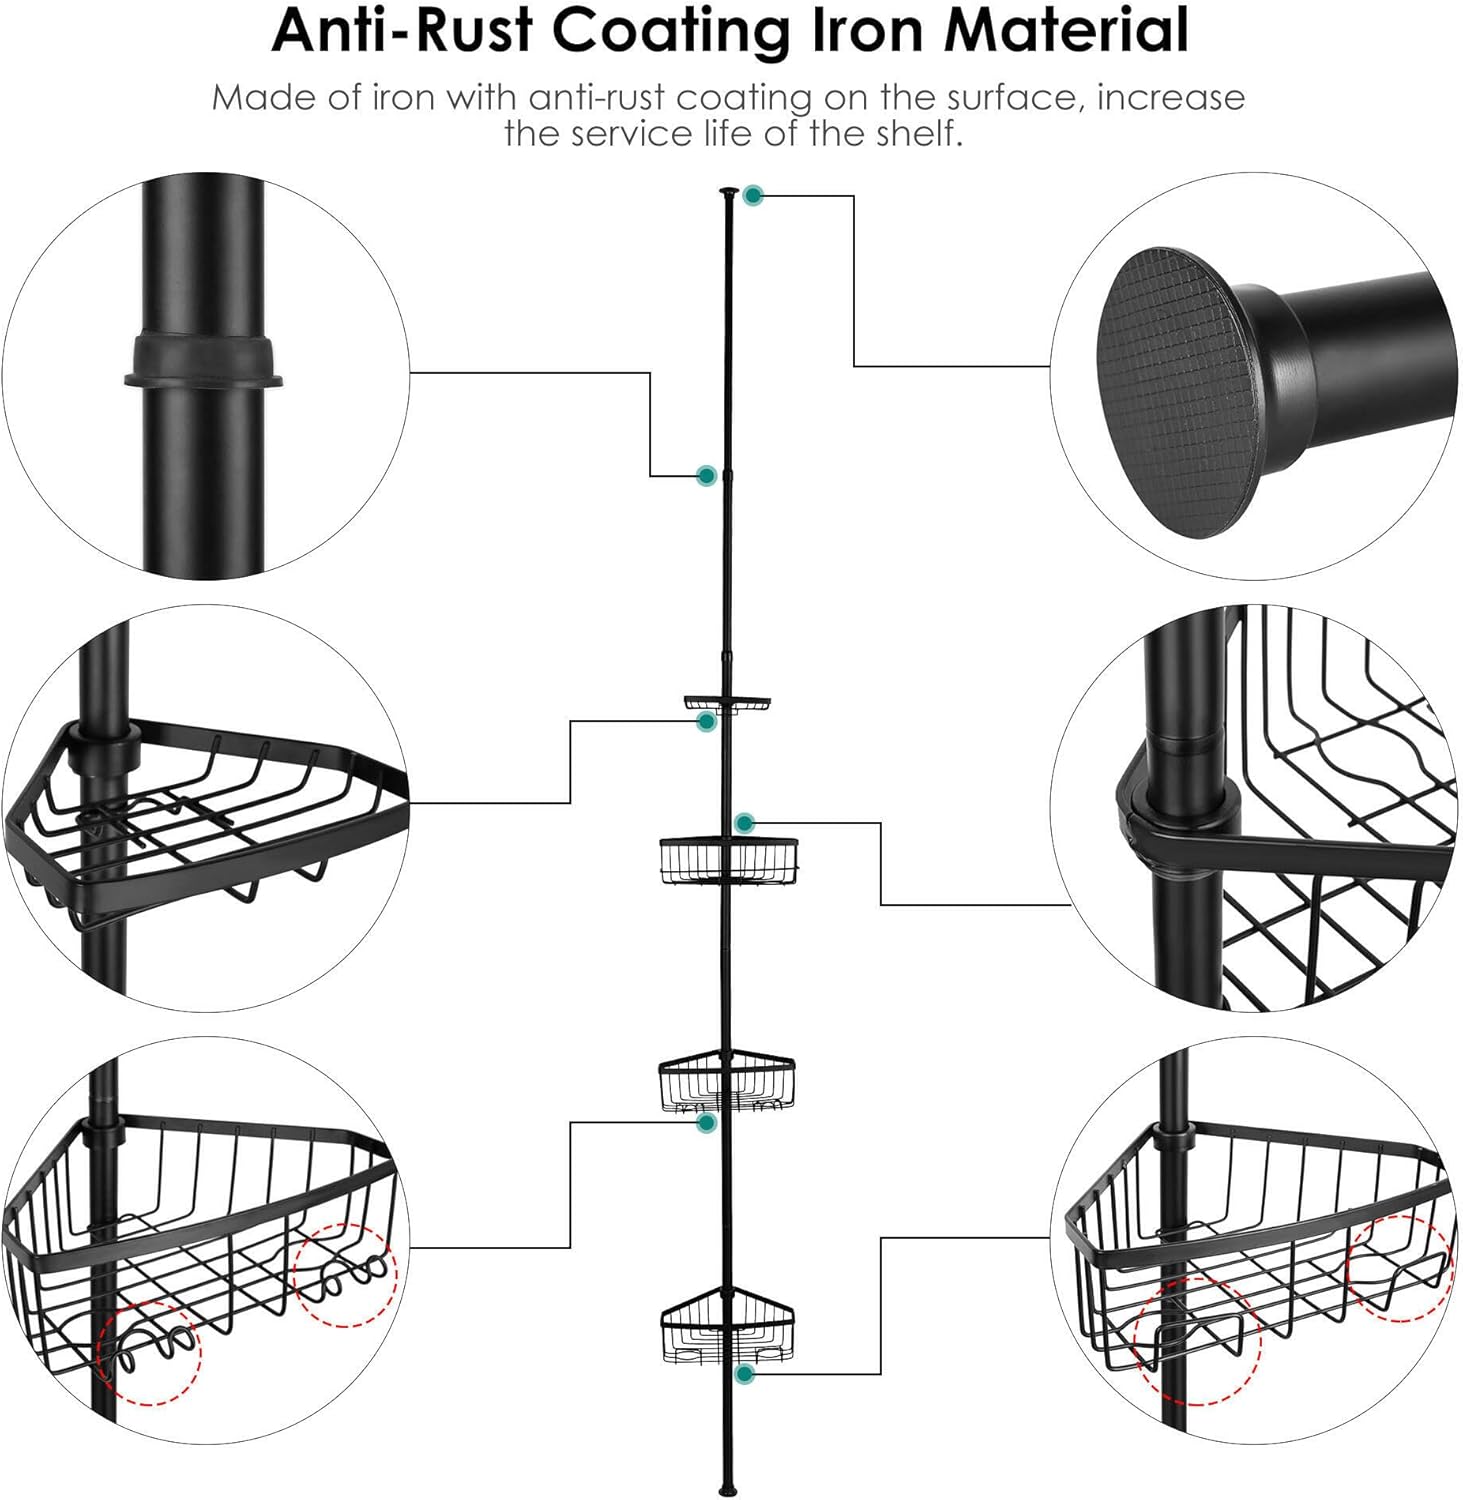
Figure 3: Pole sections and anti-rust coating detail.
3. Attach Baskets and Accessories
Slide the plastic rings onto the pole sections at your desired heights. Then, attach the baskets by snapping them onto these rings. The spacing between baskets can be adjusted freely. Ensure the baskets are firmly secured.

Figure 4: Attaching baskets and adjusting their positions.
4. Install the Caddy in the Corner
- Compress the top of the assembled pole against the ceiling.
- Push the bottom pole into the corner until the entire assembly is vertical.
- Release the tension, allowing the spring mechanism to secure the pole firmly between the floor/tub ledge and the ceiling.

Figure 5: Tension rod mechanism for secure installation.
Installation Videos
For visual guidance, please refer to the following installation videos:
How to Install the 80-inch Model
Video 1: Demonstrates the installation process for the 80-inch model, including pole assembly and tensioning.
Corner Shower Caddy Installation
Video 2: General installation guide for a corner shower caddy, showing pole assembly and placement.
Usage
Your SortWise Shower Caddy is designed to organize your bath accessories efficiently. The four tiers provide ample space for shampoo, soap, towels, and other items. The wire baskets feature a self-draining function to prevent water accumulation.
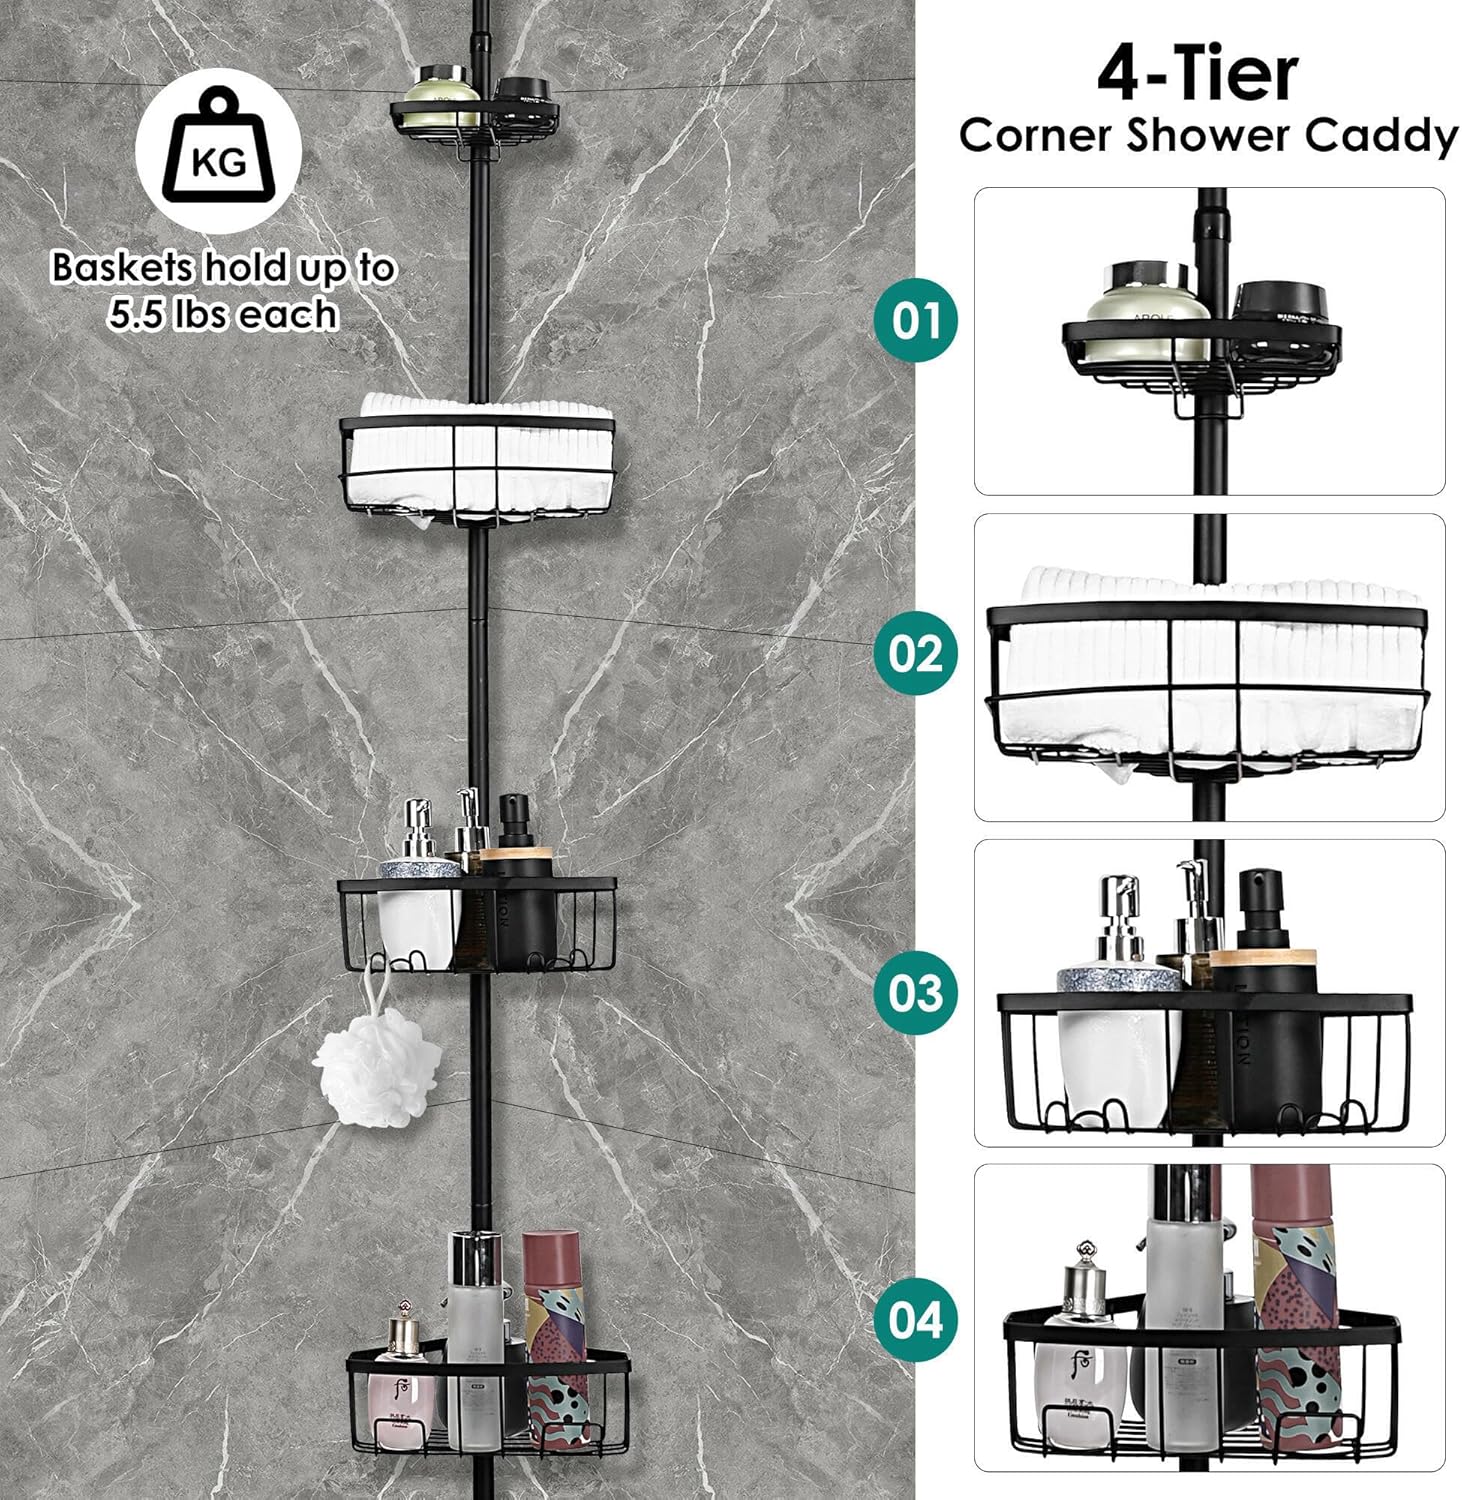
Figure 6: Shower caddy in use, demonstrating storage capacity.
- Place heavier items on lower baskets for better stability.
- Utilize the adjustable spacing of the baskets to accommodate bottles of various heights.
- The caddy is suitable for showers and can also be used in other areas requiring vertical storage.
Maintenance
To ensure the longevity and appearance of your SortWise Shower Caddy, follow these maintenance guidelines:
- Regularly clean the caddy with mild soap and water. Avoid abrasive cleaners or scouring pads, which can damage the rustproof coating.
- Rinse thoroughly after cleaning to remove any soap residue.
- Wipe dry with a soft cloth to prevent water spots and maintain the finish.
- Periodically check the tension of the pole to ensure it remains securely in place.
Troubleshooting
If you encounter any issues with your shower caddy, please refer to the following common solutions:
- Caddy feels wobbly or unstable: Ensure the pole sections are twisted tightly together. Re-adjust the tension by compressing the top against the ceiling and releasing it to allow the spring to expand firmly. Verify that the bottom foot is securely placed in the corner.
- Baskets slide down: Ensure the plastic rings are properly snapped onto the pole and the baskets are firmly attached to the rings. Gently shake each basket after installation to confirm it is secure.
- Difficulty assembling pole sections: Ensure you are using the correct combination of pole sections for your measured height. Some sections may require firm twisting to lock into place.
Specifications
| Feature | Detail |
|---|---|
| Brand | SortWise |
| Model | Adjustable Shower Caddy Corner Pole |
| Product Dimensions | 23.83 x 26.29 x 269.98 cm (9.38 x 10.35 x 106.29 inches) |
| Adjustable Height | 45-106 inches (115-270 cm) |
| Material | Iron |
| Finish | Painted |
| Color | Black |
| Mounting Type | Free Standing (Constant Tension) |
| Number of Tiers | 4 |
| Special Features | Adjustable, Space Saving, Rust Resistant |
| Item Weight | 2.7 kg (5.95 lbs) |
Warranty and Support
For warranty information or customer support, please refer to the product packaging or contact SortWise customer service directly. Keep your purchase receipt for any warranty claims.