
Introduction
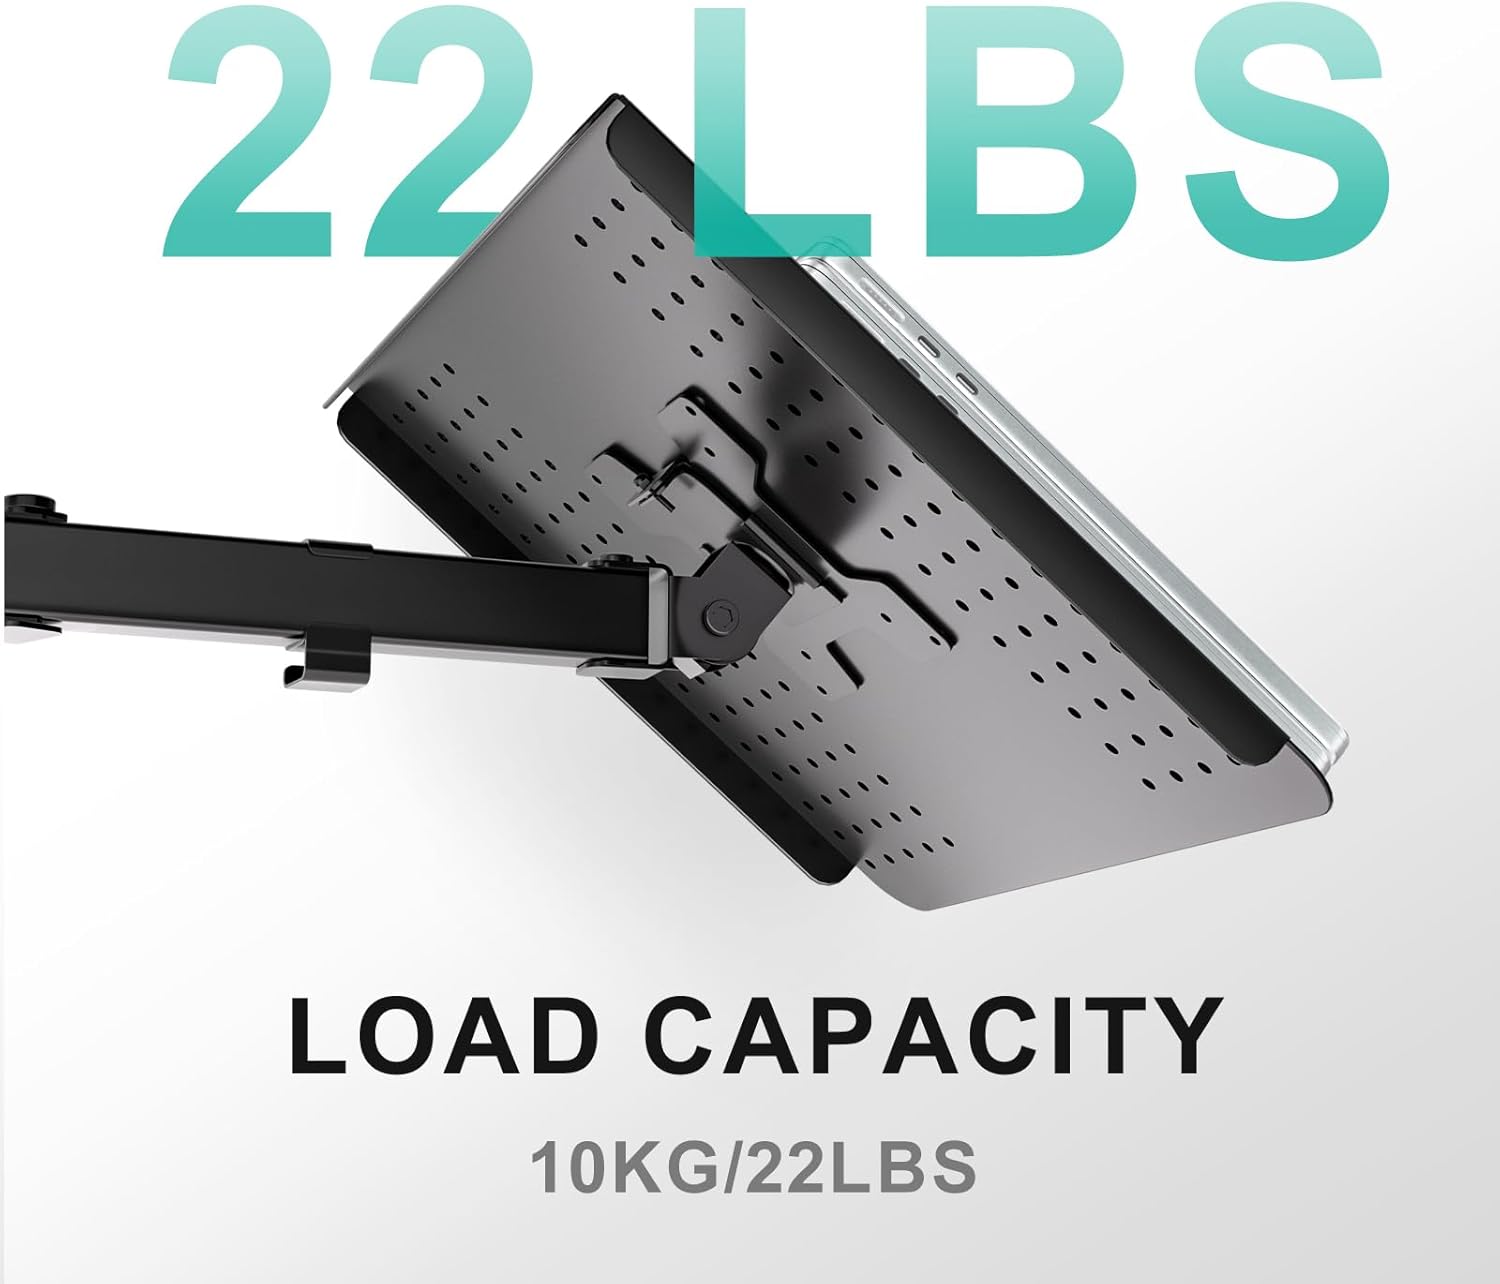
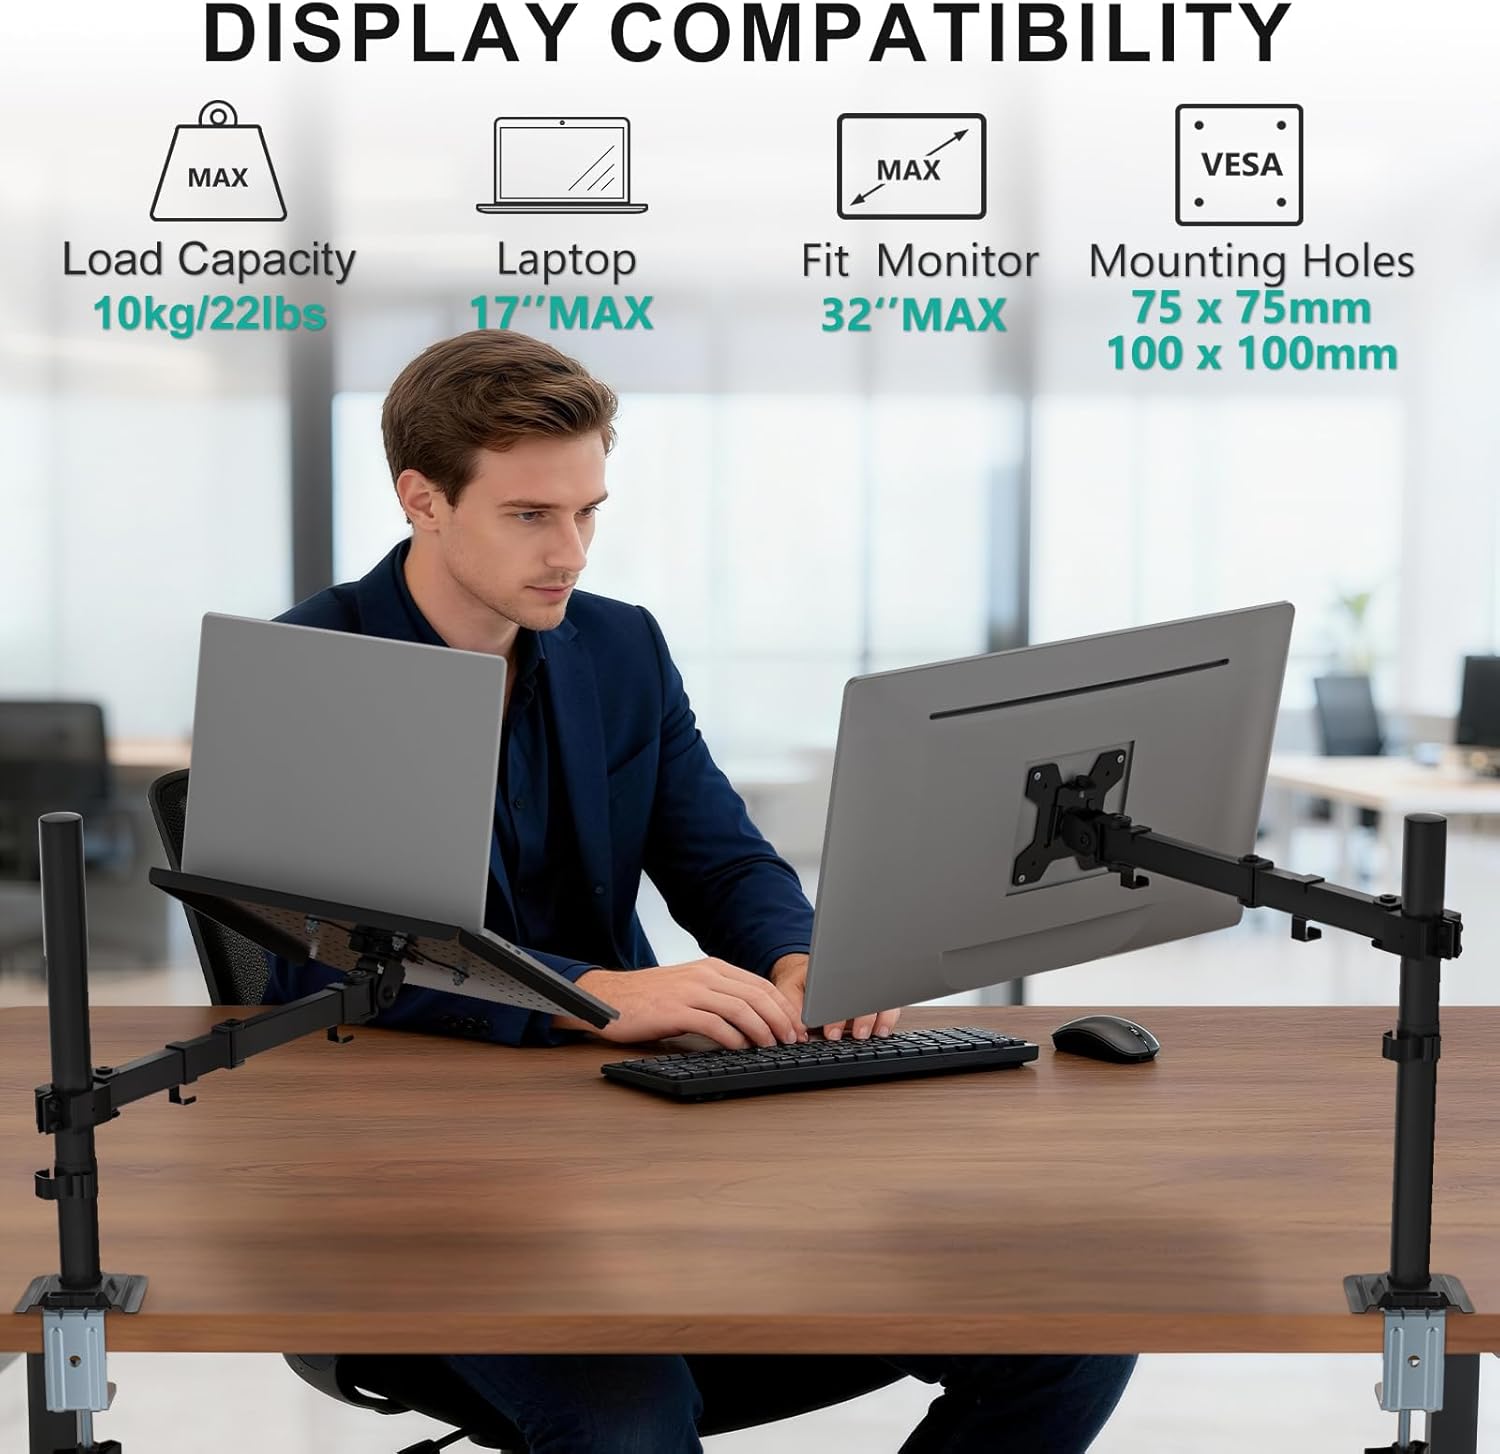
This manual provides detailed instructions for the installation, operation, and maintenance of your WALI M00LP Adjustable Laptop Desk Mount. Please read this manual thoroughly before installation and retain it for future reference. This product is designed to securely hold laptops or notebooks up to 17 inches and monitors up to 32 inches, with a maximum weight capacity of 22 lbs (10 kg).
Safety Information
WARNING: Failure to read and follow all instructions may result in personal injury or property damage.
- Ensure the mounting surface can safely support the combined weight of the mount and your device.
- Do not exceed the maximum weight capacity of 22 lbs (10 kg).
- Tighten all screws firmly but do not overtighten. Overtightening can damage the threads or components.
- Keep small parts away from children.
- If you have any questions or concerns, contact WALI customer support.
Package Contents
Verify that all components are present and undamaged before proceeding with installation.
- 1 x WALI Laptop Tray Desk Mount (Black)
- 1 x Mounting Hardware Kit
- 1 x User Manual
Setup Instructions
The WALI M00LP mount offers two installation options: C-clamp and Grommet base. Choose the method best suited for your desk.
1. Choose Mounting Option
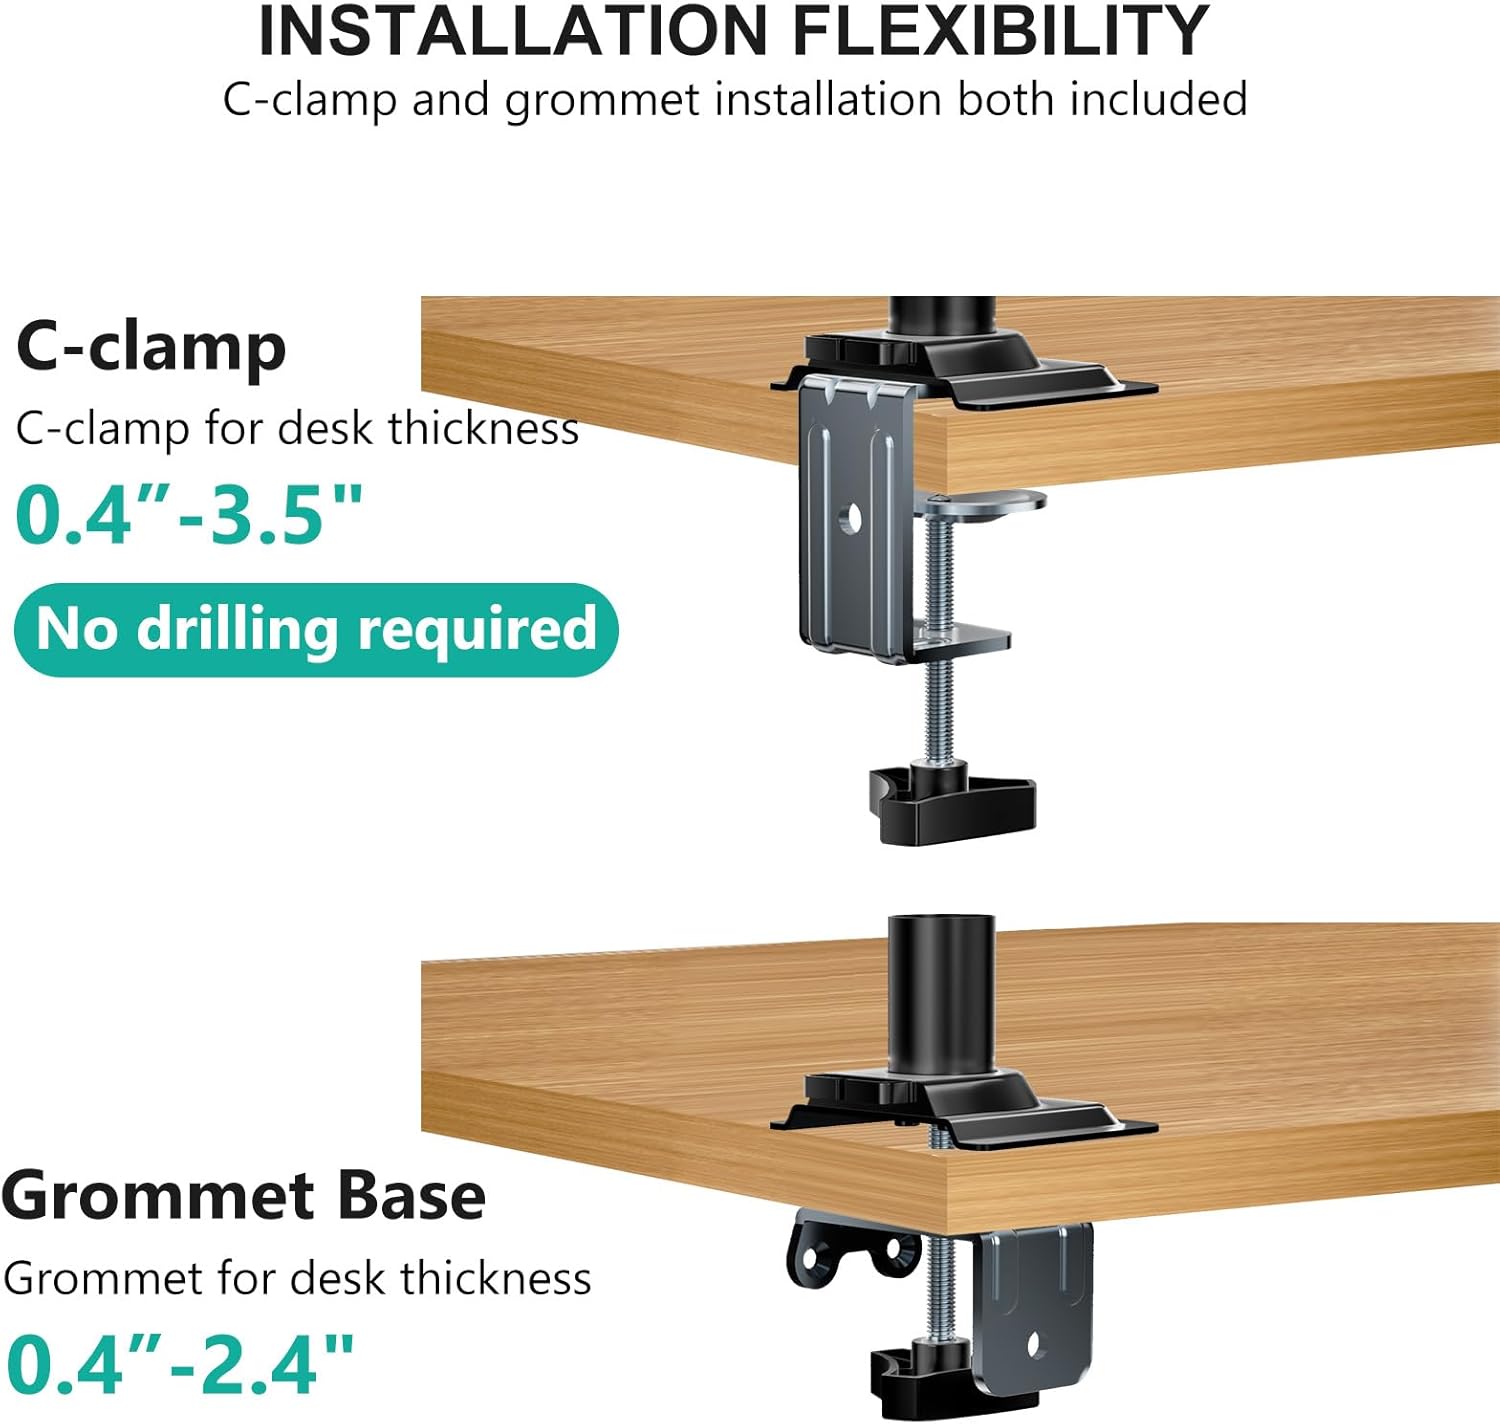
C-Clamp Installation: Suitable for desks with a thickness between 0.4 inches and 4 inches. No drilling required.
Grommet Base Installation: Suitable for desks with a thickness between 0.4 inches and 2.2 inches, utilizing an existing grommet hole or a drilled hole.
2. Assemble the Mount
- Attach the chosen base (C-clamp or Grommet) to your desk according to the specific instructions provided in the hardware kit. Ensure it is securely fastened.
- Insert the pole into the base and secure it.
- Slide the arm onto the pole at your desired height and tighten the securing screw.
- Attach the laptop tray to the arm. Ensure all connections are tight to prevent wobbling.
3. Cable Management
Utilize the integrated cable management clips to route your laptop's power and peripheral cables along the arm and pole. This helps maintain a tidy workspace and prevents cable damage.

4. Official Setup Video
Video 1: Official WALI Laptop Desk Mount (M00LP) setup and feature overview. This video demonstrates the installation process and various adjustments of the mount.
Operating Instructions
The WALI M00LP mount offers extensive adjustability to achieve an ergonomic workspace.
1. Adjusting Height
Loosen the screw on the arm clamp, slide the arm up or down the pole to the desired height, and then re-tighten the screw firmly. The mount allows for a 16-inch height adjustment range.
2. Adjusting Angle (Tilt, Swivel, Rotation)
The laptop tray and arm offer multiple points of adjustment:
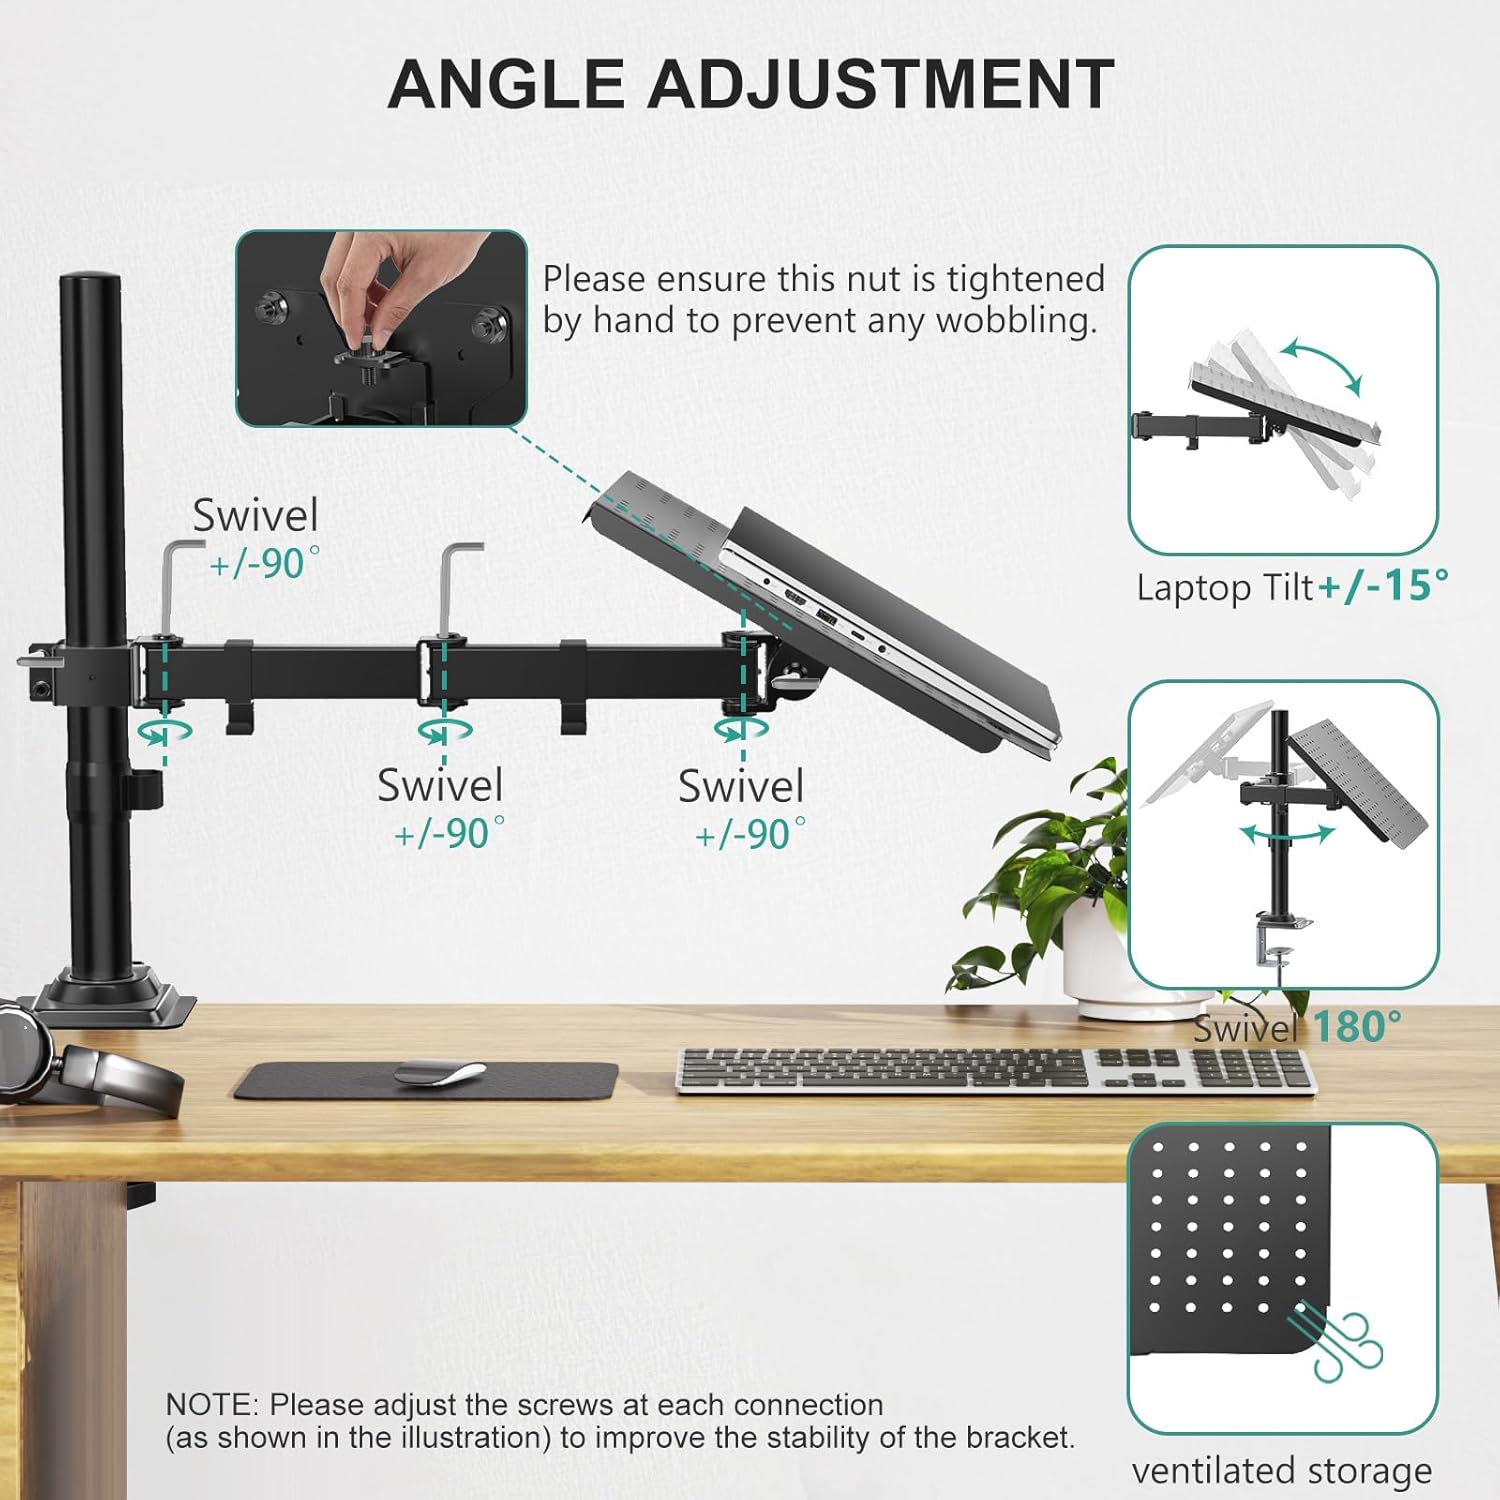
- Laptop Tilt: Adjust the laptop tray +/-15 degrees to find your optimal viewing angle. Ensure the nut is tightened by hand to prevent wobbling.
- Arm Swivel: The arm can swivel +/-90 degrees at two points along its length, allowing you to position your laptop precisely.
- Tray Rotation: The laptop tray can rotate 360 degrees, enabling portrait or landscape orientation.
3. Ergonomic Positioning
Proper adjustment of the mount can significantly reduce neck and eye strain. Position your laptop screen so that the top of the screen is at or slightly below eye level when you are sitting or standing comfortably. The adjustable height and angles facilitate an ergonomic setup.
4. Cooling Design
The laptop tray features venting holes to absorb cooling air from your laptop's fan, aiding in heat dissipation and preventing overheating during extended use.
Maintenance
Regular maintenance ensures the longevity and safe operation of your WALI M00LP mount.
- Cleaning: Wipe the mount with a soft, damp cloth. Avoid abrasive cleaners or solvents that could damage the finish.
- Tightness Check: Periodically check all screws and connections to ensure they remain tight. Re-tighten if any looseness is detected. This is especially important for the main pole and arm connections.
- Lubrication: No lubrication is typically required for this product.
Troubleshooting
If you encounter issues with your WALI M00LP mount, refer to the following common solutions:
| Problem | Possible Cause | Solution |
|---|---|---|
| Mount is wobbly or unstable. | Loose connections; desk surface not stable. | Ensure all screws, especially those on the C-clamp/grommet base and arm connections, are securely tightened. Verify the desk itself is stable. |
| Laptop tray tilts unexpectedly. | Tilt adjustment nut is loose. | Tighten the nut on the laptop tray's tilt mechanism by hand until secure. |
| Difficulty adjusting height or swivel. | Screws are too tight; mechanism is stiff. | Loosen the relevant screws slightly before attempting adjustment. Do not force movement. |
| Laptop slides off the tray. | Bottom lip not engaged; rubber pads missing/worn. | Ensure the laptop is placed against the protruding bottom lip. Verify rubber pads are correctly installed on the tray to provide friction. |
If the problem persists after attempting these solutions, please contact WALI customer support.
Specifications
- Brand: WALI
- Model Number: M00LP
- Color: Black
- Compatible Devices: Laptops or notebooks up to 17 inches; Monitors up to 32 inches (with VESA 75x75mm or 100x100mm mounting holes)
- Weight Capacity: 22 lbs (10 kg) maximum
- Mounting Type: Tabletop Mount (C-clamp or Grommet)
- C-clamp Desk Thickness: 0.4" - 4"
- Grommet Desk Thickness: 0.4" - 2.2"
- Adjustments: 16" height adjustment, +/-15° tilt, +/-90° swivel, 360° rotation
- Laptop Tray Dimensions: 14 x 11 inches (L x W) with 0.6" protruding bottom lip
- Material: Metal
- Item Dimensions: 17.24 x 4.06 x 11.14 inches (overall, approximate)
- Item Weight: 3.7 pounds
- Additional Features: Venting holes for cooling, Two-stage locking system

Warranty and Support
Your WALI M00LP Adjustable Laptop Desk Mount is covered by a 10-Year Warranty. For any product inquiries, technical assistance, or warranty claims, please contact WALI customer support. Our experienced and US-based customer support team is available to assist you 7 days a week.
Contact Information: Please refer to the contact details provided on the WALI official website or the packaging for the most current support information.


