
1. Introduction
This manual provides detailed instructions for the VASTFIRE C10 LED Green Hunting Flashlight Kit. Please read this manual thoroughly before using the product to ensure proper operation, safety, and longevity.
The VASTFIRE C10 is a specialized green LED flashlight designed for night hunting and observation. It features a fixed beam with a long throw, making it suitable for targeting wild game at extended ranges. The kit includes essential accessories for versatile mounting and power management.
2. Package Contents
Verify that all items listed below are present in your package:
- VASTFIRE C10 Green LED Flashlight
- Remote Pressure Switch (Momentary-on, Constant-on)
- Picatinny Rail Mount (1 inch body, for 16-22mm rails)
- Scope Mount (Adjustable for 25mm-30mm scope tubes)
- USB Charger
- 2 Rechargeable Lithium Metal Batteries (18650 type)
- Carrying Case

Image 2.1: All components included in the VASTFIRE C10 Green LED Hunting Flashlight Kit.
3. Setup
3.1 Battery Installation and Charging
- Unscrew the tail cap of the flashlight.
- Insert one of the provided 18650 rechargeable batteries with the positive (+) end facing towards the flashlight head.
- Screw the tail cap back on securely.
- To charge the batteries, place them into the USB charger. Connect the charger to a standard USB power source. The indicator light on the charger will show charging status (typically red for charging, green for fully charged).

Image 3.1: Flashlight, charger, and mounts for assembly.
3.2 Mounting the Flashlight
The kit includes two types of mounts for various applications:
3.2.1 Picatinny Rail Mount Installation
- Loosen the screws on the Picatinny rail mount.
- Attach the mount to a compatible Picatinny rail (16-22mm width).
- Place the flashlight into the 1-inch ring of the mount.
- Tighten the screws to secure both the mount to the rail and the flashlight within the mount. Ensure it is firm but do not overtighten.

Image 3.2: Detailed view of the Picatinny rail mount.
3.2.2 Scope Mount Installation
- Open the adjustable clamps of the scope mount.
- Position the mount on your rifle scope (compatible with 25mm-30mm diameter scope tubes).
- Place the flashlight into the other clamp.
- Tighten the thumb screw to secure both the mount to the scope and the flashlight within the mount.
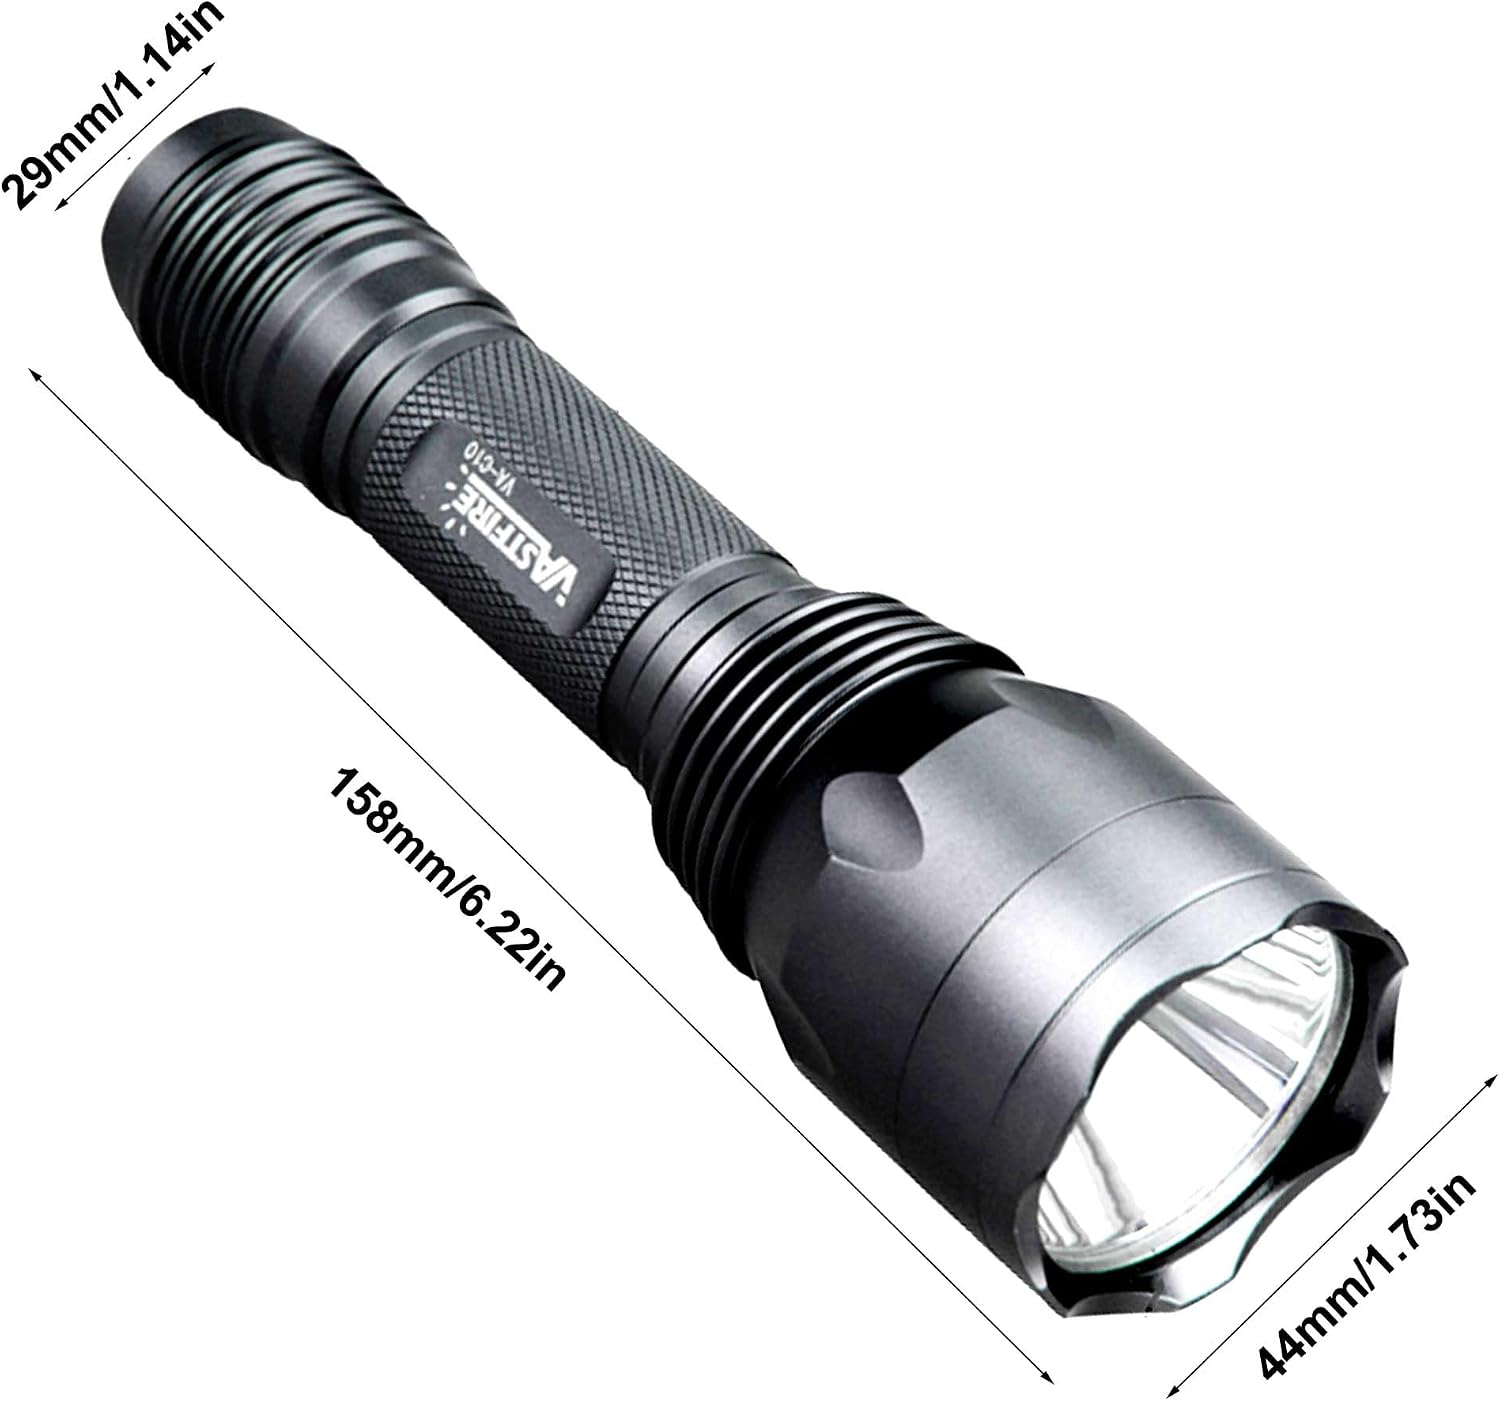
Image 3.3: Adjustable scope mount for flashlight attachment.
3.3 Attaching the Remote Pressure Switch
- Unscrew the standard tail cap from the flashlight.
- Screw on the remote pressure switch tail cap in its place.
- Secure the pressure pad to your desired location on the weapon using the attached Velcro or other suitable means.

Image 3.4: Flashlight with remote pressure switch attached.
4. Operating Instructions
4.1 Basic Operation (Tail Switch)
- Press the tail switch fully to turn the flashlight ON or OFF.
- The flashlight operates in a single, brightest mode.
4.2 Remote Pressure Switch Operation
- Momentary-On: Press and hold the pressure pad for temporary illumination. Release to turn off.
- Constant-On: Press the round button on the pressure switch for continuous illumination. Press again to turn off.
4.3 Beam Characteristics
The VASTFIRE C10 features a fixed green LED beam. It is designed with a deeper reflector to provide a tight beam with optimal peripheral illumination, ensuring a long throw distance of approximately 250 yards (228 meters).

Image 4.1: The VASTFIRE C10's green beam illuminating a distant area.

Image 4.2: Illustration of a deeper reflector design for enhanced beam throw.
5. Maintenance
5.1 Cleaning
- Wipe the flashlight body with a clean, soft cloth.
- For the lens, use a lens cleaning cloth and solution to avoid scratches.
- Do not use harsh chemicals or abrasive materials.
5.2 Battery Care
- Always use the provided USB charger or a compatible 18650 battery charger.
- Store batteries in a cool, dry place when not in use.
- Do not expose batteries to extreme temperatures or direct sunlight.
- If the flashlight will not be used for an extended period, remove the battery to prevent discharge or leakage.
5.3 Water and Shock Resistance
The VASTFIRE C10 is rated IPX6 waterproof, meaning it is protected against powerful water jets. It is also designed to be shock and vibration resistant. While durable, avoid intentional submersion or severe impacts to prevent damage.
6. Troubleshooting
| Problem | Possible Cause | Solution |
|---|---|---|
| Flashlight does not turn on | Battery low or depleted Battery inserted incorrectly Loose tail cap Faulty switch | Charge or replace battery Ensure positive (+) end faces head Tighten tail cap Contact support if switch is faulty |
| Light is dim or flickers | Low battery Loose connections Dirty contacts | Charge battery Ensure tail cap and head are tight Clean battery and flashlight contacts with a clean cloth |
| Mounts do not secure flashlight/scope | Incorrect size mount Not tightened sufficiently | Verify compatibility with flashlight body (1 inch) and scope/rail dimensions Tighten screws/thumb screw firmly (do not overtighten) |
7. Specifications
| Feature | Specification |
|---|---|
| Model | C10 |
| Light Source Type | LED (Green) |
| Brightness | Up to 1000 Lumens |
| Beam Distance | Approx. 250 yards (228 meters) |
| Power Source | Battery Powered |
| Battery Type | 18650 Lithium Metal (2 included) |
| Average Battery Life | 4 Hours |
| Material | Aluminum |
| Product Dimensions (Flashlight) | Length: 6.6 inches (158mm) Head Diameter: 1.73 inches (44mm) Tail Diameter: 1.0 inch (25.4mm) |
| Item Weight (Flashlight) | 7.5 ounces (189g) |
| Water Resistance Level | IPX6 (Waterproof) |
| Mounting Type | Weapon Mounts (Picatinny Rail, Scope) |

Image 7.1: Flashlight dimensions for reference.
8. Warranty and Support
8.1 Warranty Information
- Pressure Switch: Free lifetime warranty.
- Flashlight Kit: 2-year warranty.
- Returns: 60-day return policy.
Please retain your proof of purchase for warranty claims.
8.2 Customer Support
For any questions, technical assistance, or warranty claims, please contact VASTFIRE customer support through your retailer or the official VASTFIRE website.

