
FSP CMT230
FSP CMT230 ATX Mid Tower PC Gaming Case User Manual
Model: CMT230
1. Introduction
This manual provides comprehensive instructions for the installation, operation, and maintenance of your FSP CMT230 ATX Mid Tower PC Gaming Case. Please read this manual carefully before proceeding with installation to ensure proper setup and optimal performance.
The FSP CMT230 is designed to accommodate ATX, Micro-ATX, and Mini-ITX motherboards, offering a versatile platform for building your computer system. It features a sleek design with a mesh front panel and pre-installed blue LED fans for efficient cooling.

Image 1.1: Front-side view of the FSP CMT230 PC Gaming Case, showcasing the translucent side window and illuminated blue LED fans.
2. Package Contents
Verify that all components are present in the package:
- FSP CMT230 ATX Mid Tower PC Gaming Case
- Accessory Kit (screws, standoffs, cable ties)
- User Manual (this document)
3. Setup and Component Installation
3.1 Preparing the Case
- Place the case on a stable, flat surface.
- Remove the side panels by unscrewing the thumbscrews at the rear of the case and sliding the panels backward.

Image 3.1: Top-down view of the FSP CMT230 case with the translucent side panel removed, revealing the spacious interior for component installation.
3.2 Motherboard Installation
- Install the I/O shield into the rear opening of the case.
- Align the motherboard with the pre-installed standoffs. Ensure the correct standoffs are used for your motherboard form factor (ATX, Micro-ATX, Mini-ITX).
- Secure the motherboard with the provided screws.
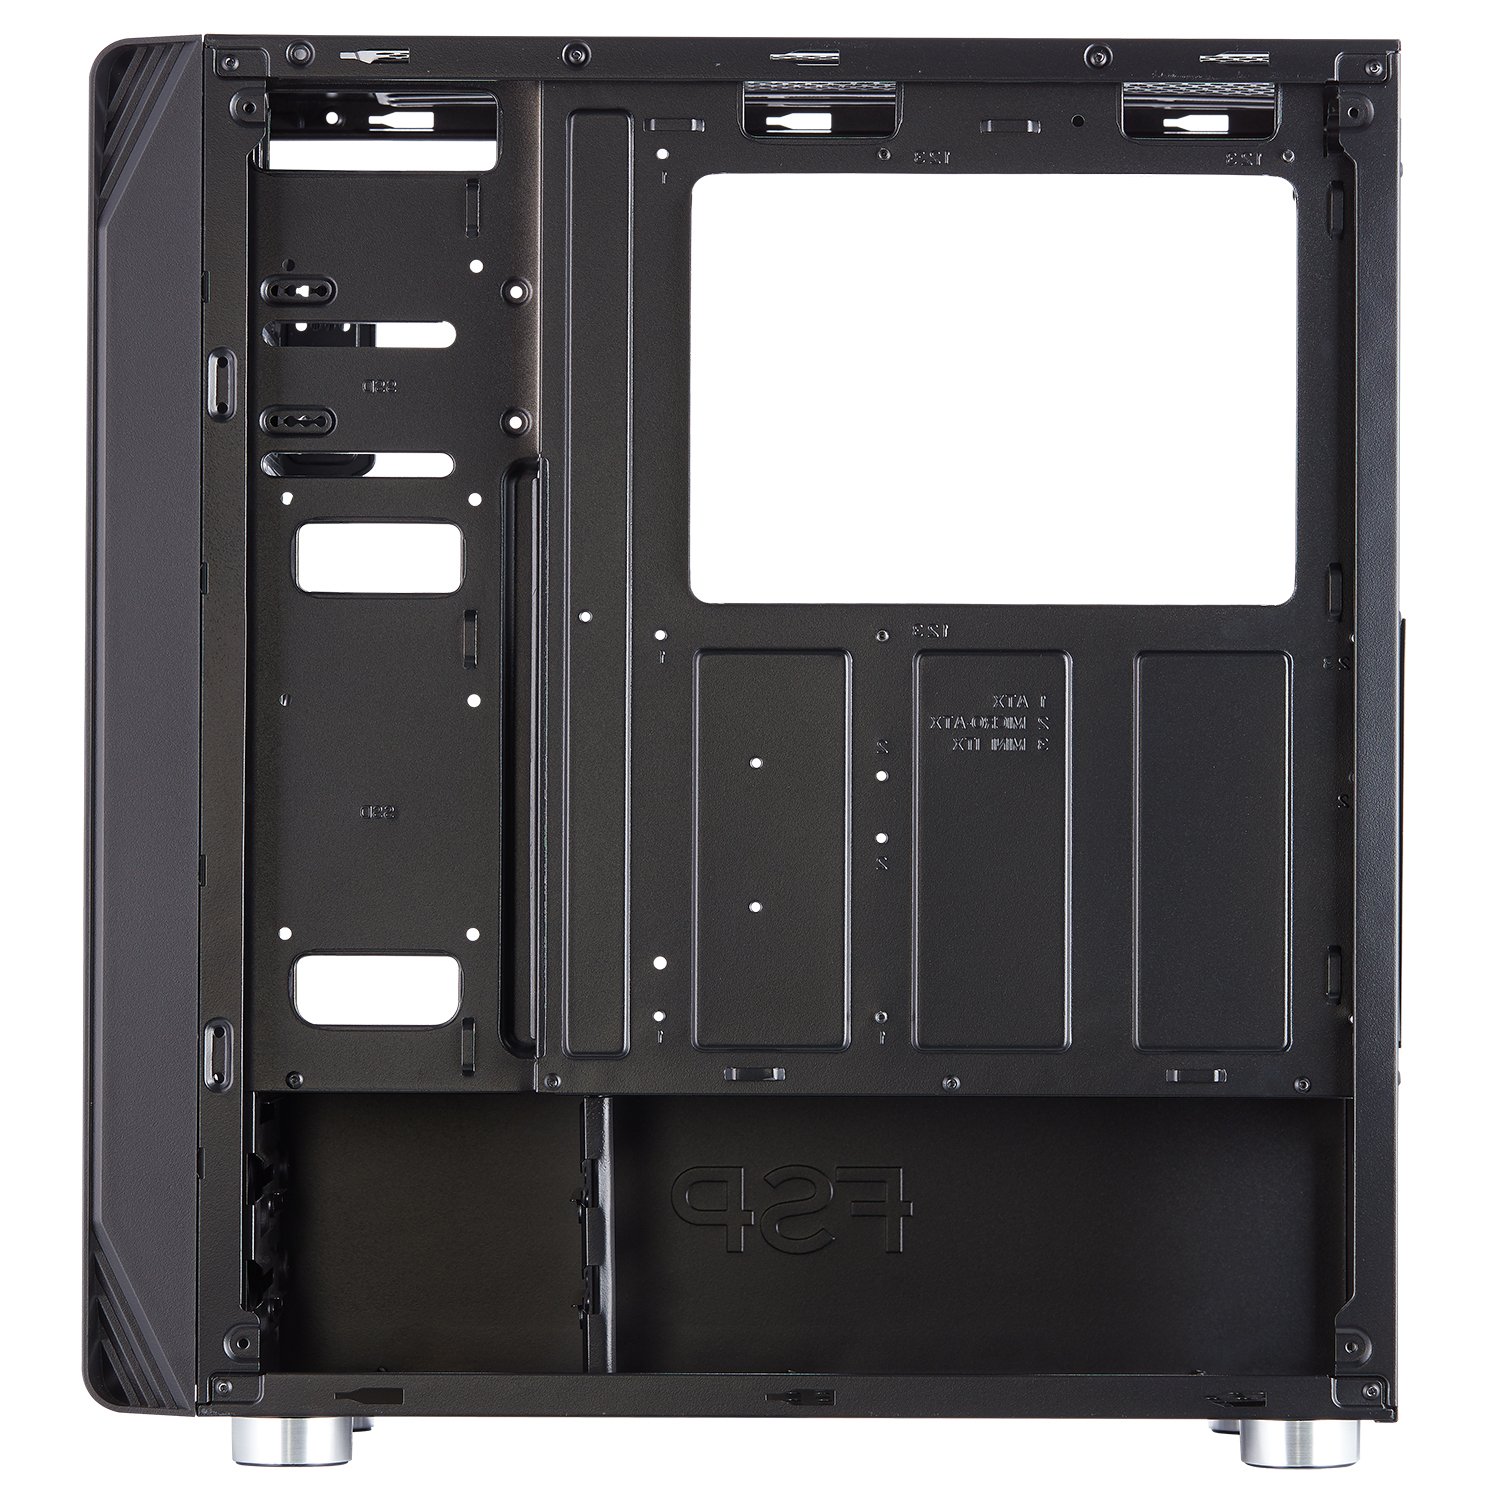
Image 3.2: Internal view of the FSP CMT230, highlighting the motherboard tray with clearly marked mounting points for various motherboard sizes.
3.3 Power Supply Unit (PSU) Installation
- Position the PSU in the dedicated compartment at the bottom rear of the case.
- Secure the PSU with screws from the rear of the case.
3.4 Drive Installation (HDD/SSD)
- 3.5" HDDs: Install into the drive cages located beneath the PSU shroud or in designated bays.
- 2.5" SSDs: Mount SSDs to the dedicated SSD trays or mounting points on the motherboard tray or behind it.
3.5 Expansion Card (GPU) Installation
- Remove the necessary PCI-E slot covers from the rear of the case.
- Insert the expansion card (e.g., graphics card) into the appropriate PCI-E slot on the motherboard.
- Secure the card with screws.
3.6 Fan and Radiator Installation
The CMT230 comes with three pre-installed 120mm blue LED fans (two in the front, one in the rear). Additional fan and radiator support is available:
- Front: Supports up to two 120mm/140mm fans or one 280mm radiator.
- Top: Supports up to two 120mm/140mm fans or one 280mm radiator.
- Rear: Supports one 120mm fan (one pre-installed).
3.7 Cable Management
Utilize the cable routing holes and tie-down points behind the motherboard tray to organize cables. This improves airflow and maintains a clean interior aesthetic.

Image 3.3: Rear internal view of the FSP CMT230, illustrating the space and routing options for effective cable management behind the motherboard tray.
3.8 Front I/O Connections
Connect the front panel cables (USB 3.0, USB 2.0, Audio, Power, Reset, LED) to the corresponding headers on your motherboard. Refer to your motherboard manual for specific header locations.

Image 3.4: Front view of the FSP CMT230, detailing the front panel with USB 3.0, USB 2.0, audio ports, and power/reset buttons.
4. Operating Instructions
4.1 Powering On/Off
Press the power button located on the top front panel of the case to turn your computer system on or off. A short press typically initiates power-on or sleep mode, while a long press (usually 4-5 seconds) forces a shutdown.
4.2 Using Front Panel Ports
The front panel provides convenient access to:
- USB 3.0 Ports (x2): For high-speed data transfer with compatible devices.
- USB 2.0 Ports (x2): For standard USB devices.
- Audio Jacks: For connecting headphones and microphones.
4.3 LED Fan Operation
The pre-installed blue LED fans illuminate automatically when the system is powered on. The LED color is fixed to blue and cannot be changed or turned off independently.
5. Maintenance
5.1 Cleaning
- Exterior: Wipe the exterior surfaces with a soft, damp cloth. Avoid abrasive cleaners.
- Dust Filters: Regularly remove and clean the dust filters (if applicable) to maintain optimal airflow and prevent dust buildup inside the case.
- Interior: Use compressed air to remove dust from internal components and fans. Ensure the system is powered off and unplugged before cleaning the interior.
5.2 Airflow Optimization
Ensure that the case has adequate clearance around its intake and exhaust vents to facilitate proper airflow and cooling performance.
6. Troubleshooting
If you encounter issues with your FSP CMT230 case, consider the following:
- System not powering on: Verify all power connections (PSU to motherboard, front panel power switch to motherboard header) are correctly seated.
- Fans not spinning: Check fan power connections to the motherboard or PSU. Ensure pre-installed fans are connected via Molex if applicable.
- Front panel USB/Audio not working: Confirm that the front panel headers are correctly connected to the motherboard.
For persistent issues, consult your motherboard manual or contact FSP support.
7. Specifications
| Feature | Specification |
|---|---|
| Brand | FSP |
| Model | CMT230 |
| Case Type | Mid Tower |
| Motherboard Compatibility | ATX, Micro-ATX, Mini-ITX |
| Dimensions (LxWxH) | 39 x 21 x 45 cm (approx.) |
| Item Weight | 4.54 kg |
| Expansion Slots | 7 x PCI-E |
| Drive Bays | 2 x ODD, 2 x HDD, 2 x SSD |
| Front I/O Ports | 2 x USB 3.0, 2 x USB 2.0, Audio In/Out |
| Pre-installed Fans | 3 x 120mm Blue LED (2 Front, 1 Rear) |
| Max GPU Length | 373mm |
| Max CPU Cooler Height | 179mm |
| Radiator Support | Up to 2 x 280mm (Front/Top) |
| Material | Metal |
| Special Features | LED Lighting, Unique Airflow Design |
8. Warranty and Support
FSP products are manufactured to high-quality standards. For warranty information and technical support, please refer to the official FSP website or contact your local FSP distributor. Keep your proof of purchase for warranty claims.
Related documentsCMT230


Ask a question about this manual
Ask about setup, troubleshooting, compatibility, parts, safety, or missing instructions. Manuals+ will review the question and use this page’s manual context to help answer it.