
Introduction
Thank you for choosing the Vitapur Bottom Load Water Dispenser, Model VWD1076BLST. This dispenser provides convenient access to hot, room temperature, and cold water. Its bottom-loading design eliminates the need to lift heavy water bottles, making bottle replacement simple and spill-free. This manual provides essential information for safe operation, installation, maintenance, and troubleshooting.

Image: The Vitapur VWD1076BLST water dispenser in operation, dispensing cold water into a glass.
Safety Information
Please read all safety instructions before operating the appliance to reduce the risk of fire, electric shock, or injury.
- Always place the dispenser on a level surface.
- Ensure the dispenser is plugged into a grounded electrical outlet. Do not use extension cords.
- Keep the dispenser away from direct sunlight and heat sources.
- Do not operate the dispenser if the power cord is damaged.
- The hot water function dispenses water at high temperatures. Exercise caution to prevent burns. This unit includes a child safety lock for the hot water faucet.
- Never immerse the dispenser, cord, or plug in water or other liquids.
- Unplug the dispenser before cleaning or performing any maintenance.
- This appliance is not intended for use by persons with reduced physical, sensory, or mental capabilities, or lack of experience and knowledge, unless they have been given supervision or instruction concerning use of the appliance by a person responsible for their safety.
Product Components
Familiarize yourself with the main parts of your Vitapur water dispenser:
- Dispensing Faucet: Provides hot, room, or cold water.
- Control Panel: Electronic buttons for dispensing and temperature selection.
- Drip Tray: Collects spills and is removable for cleaning.
- Bottom Cabinet: Houses the water bottle and pump mechanism.
- Bottle Probe: Tube inserted into the water bottle for drawing water.
- Power Cord: Connects the dispenser to an electrical outlet.
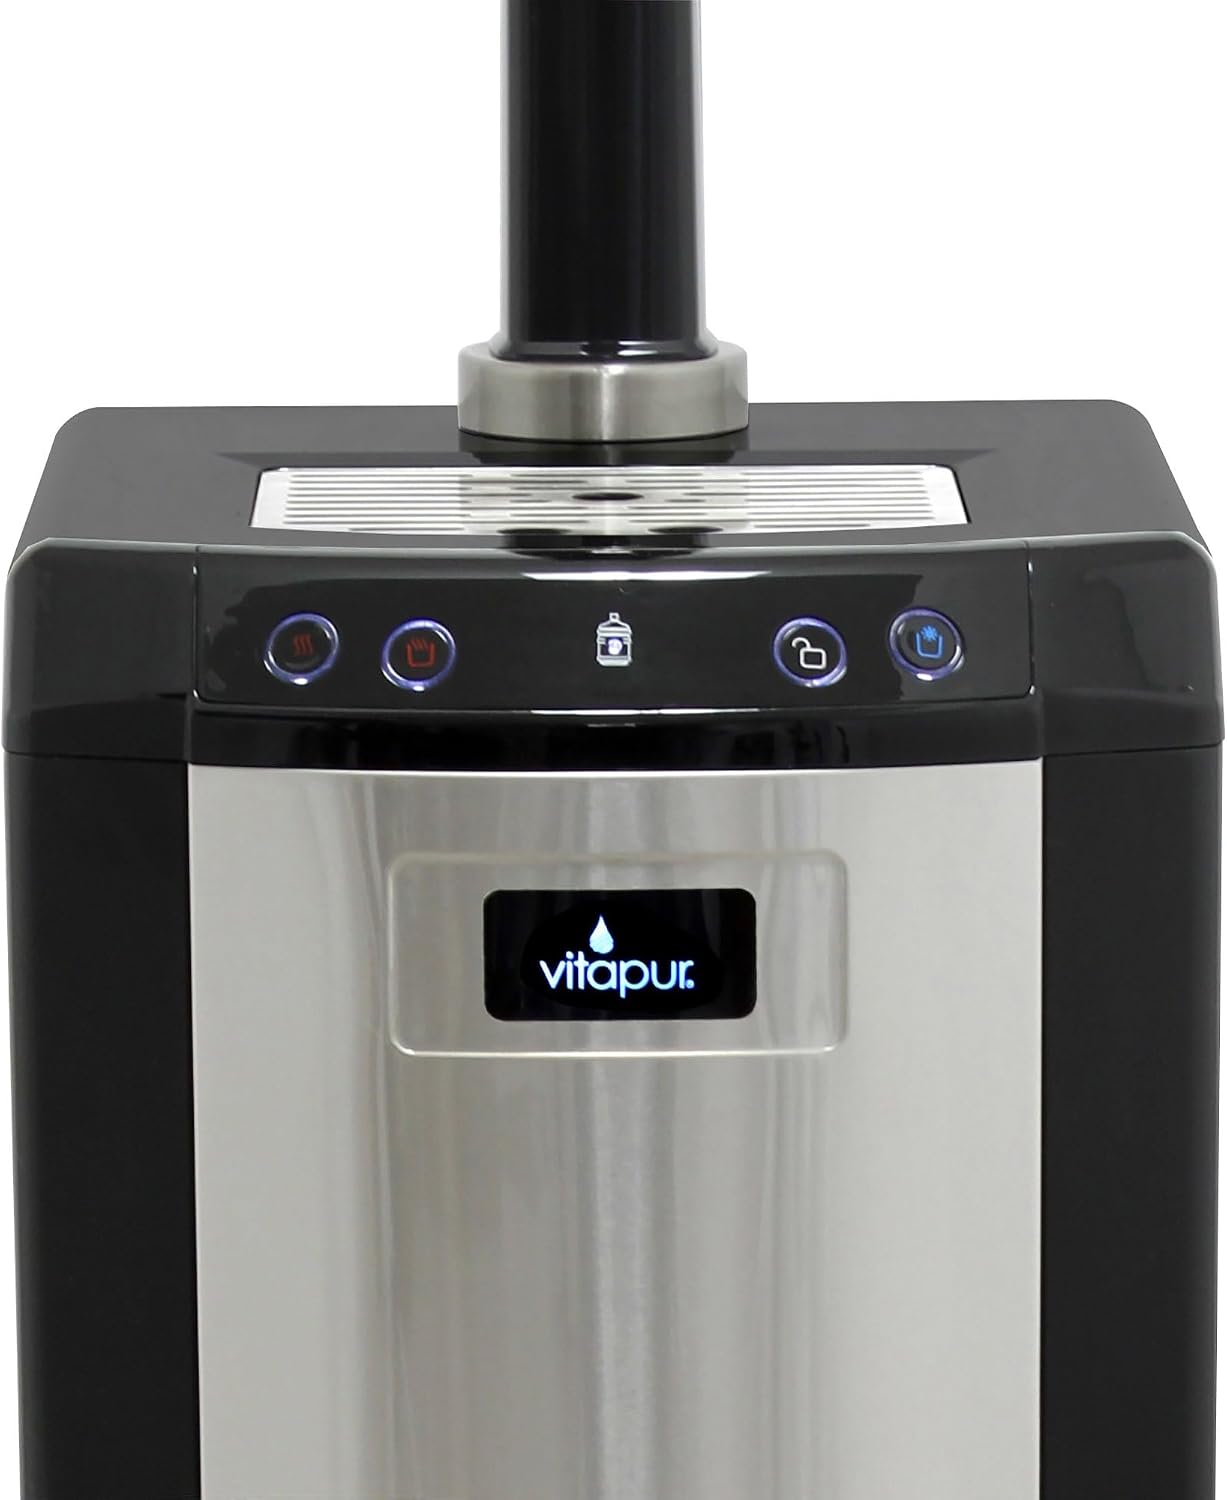
Image: Close-up of the electronic control panel with illuminated buttons for dispensing and temperature selection.
Setup
- Unpacking and Placement: Remove all packaging materials. Place the dispenser upright on a hard, level surface. Ensure there is at least 4 inches of clearance from the back and sides of the dispenser to allow for proper ventilation. Do not plug in the unit immediately. Allow it to stand upright for at least 24 hours before plugging it in, especially if it was transported on its side.
- Initial Cleaning: Before first use, clean the exterior with a soft, damp cloth. Remove and wash the drip tray and grill with mild soap and water. Rinse thoroughly.
- Install Water Bottle: Open the bottom cabinet door. Place a new 3 or 5-gallon water bottle on the floor inside the cabinet. Remove the protective cap from the water bottle. Insert the bottle probe assembly firmly into the bottle opening. Close the cabinet door.
- Priming the System: Plug the dispenser into a grounded electrical outlet. The pump will activate to fill the internal tanks. Allow the pump to run until it stops automatically. Dispense water from each faucet (hot, room, cold) until water flows steadily, ensuring all air is purged from the system. This step is crucial before activating heating or cooling functions.
- Power On: Once primed, you can activate the heating and cooling functions using the respective buttons on the control panel.

Image: The bottom cabinet of the dispenser open, showing a water bottle being inserted and connected via the bottle probe.
Operating Instructions
Your Vitapur dispenser offers three temperature options:
- Cold Water: Press the cold water button. The cold water thermostat is adjustable, allowing you to select your ideal cold temperature.
- Room Temperature Water: Press the room temperature water button.
- Hot Water: This dispenser features a patented energy-saving kettle feature. Press the hot water button. Hot water will be rapidly provided on demand in under three minutes, without the constant energy cost of continuously re-heating water. A child safety lock is integrated into the hot water faucet for safety.

Image: Diagram illustrating the energy-saving kettle feature, which provides hot water rapidly and uses less energy.
To dispense water, place your cup or container under the faucet and press the corresponding button. For hot water, engage the child safety lock mechanism before pressing the dispense button.
Maintenance
Regular maintenance ensures optimal performance and longevity of your dispenser.
- Exterior Cleaning: Wipe the exterior surfaces with a soft, damp cloth. Do not use abrasive cleaners or solvents.
- Drip Tray Cleaning: The drip tray should be emptied and cleaned regularly. Simply slide it out, wash with mild soap and water, rinse, and replace.
- Internal Cleaning/Descaling: Periodically, the internal tanks may require cleaning or descaling. Consult the manufacturer's website or customer support for detailed instructions on internal cleaning procedures. Always unplug the unit before attempting internal cleaning.
- Water Bottle Replacement: When the water bottle is empty, the dispenser will indicate this. Replace the bottle as described in the Setup section.

Image: A hand demonstrating the removal of the drip tray for cleaning.
Troubleshooting
If you encounter issues with your dispenser, refer to the following common problems and solutions:
| Problem | Possible Cause | Solution |
|---|---|---|
| No water dispensed | Empty water bottle; Air lock in system; Pump malfunction. | Replace water bottle; Re-prime the system by dispensing from all faucets; Contact customer support if pump issue persists. |
| Water not hot/cold enough | Heating/cooling functions not activated; Thermostat setting; Insufficient time for heating/cooling. | Ensure hot/cold buttons are on; Adjust cold water thermostat; Allow 15-30 minutes for water to reach desired temperature. |
| Dispenser is noisy | Compressor cycling; Pump operating; Unit not level. | Some noise during compressor or pump operation is normal. Ensure the unit is on a level surface. |
| Water leaking | Improperly seated water bottle/probe; Damaged bottle; Loose connections. | Check water bottle and probe for proper installation; Inspect bottle for cracks; Unplug and check all connections. |
| Hot water child safety lock not working | Mechanism not engaged correctly. | Ensure you are correctly engaging the safety mechanism before pressing the hot water dispense button. |
Specifications
| Feature | Detail |
|---|---|
| Model Name | Bottom Load Water Dispenser (Hot, Room and Cold) Black/Stainless Steel |
| Model Number | VWD1076BLST |
| Brand | Vitapur |
| Color | Black |
| Material | Steel (rust and corrosion resistance) |
| Special Feature | Rapid Boil (Kettle Feature) |
| Wattage | 1000 watts |
| Product Dimensions | 12.52 x 14.33 x 50.98 inches |
| Item Weight | 47.7 pounds |
| UPC | 872076003380 |
| Manufacturer | GHP Group, Inc. |
| Product Care Instructions | Hand Wash (for removable parts) |
Warranty and Support
For warranty information, technical support, or service inquiries, please contact GHP Group, Inc., the manufacturer of Vitapur products. Keep your purchase receipt and model number (VWD1076BLST) handy when contacting support.
Please refer to the official Vitapur website or your product's packaging for the most current contact information and detailed warranty terms.


