
Makita DHP483RFJ
Makita DHP483RFJ 18V Li-Ion Hammer Drill User Manual
Model: DHP483RFJ
1. Introduction
This manual provides essential information for the safe and effective operation, maintenance, and troubleshooting of your Makita DHP483RFJ 18V Li-Ion Hammer Drill. Please read this manual thoroughly before using the tool to ensure proper handling and to maximize its performance and lifespan.
The Makita DHP483RFJ is a versatile and powerful cordless hammer drill, featuring a brushless motor for enhanced power and productivity. Its ultra-compact and ergonomic design ensures reduced operator fatigue, making it ideal for a wide range of drilling and fastening applications in steel, wood, and masonry.
2. Important Safety Instructions
WARNING: Read all safety warnings, instructions, illustrations, and specifications provided with this power tool. Failure to follow all instructions listed below may result in electric shock, fire, and/or serious injury.
2.1. Work Area Safety
- Keep work area clean and well lit. Cluttered or dark areas invite accidents.
- Do not operate power tools in explosive atmospheres, such as in the presence of flammable liquids, gases, or dust. Power tools create sparks which may ignite the dust or fumes.
- Keep children and bystanders away while operating a power tool. Distractions can cause you to lose control.
2.2. Electrical Safety
- Power tool plugs must match the outlet. Never modify the plug in any way.
- Avoid body contact with earthed or grounded surfaces, such as pipes, radiators, ranges, and refrigerators. There is an increased risk of electric shock if your body is earthed or grounded.
- Do not expose power tools to rain or wet conditions. Water entering a power tool will increase the risk of electric shock.
2.3. Personal Safety
- Always wear eye protection. Use safety glasses, goggles, or a face shield.
- Dress properly. Do not wear loose clothing or jewelry. Keep your hair and clothing away from moving parts.
- Stay alert, watch what you are doing, and use common sense when operating a power tool.
2.4. Power Tool Use and Care
- Do not force the power tool. Use the correct power tool for your application.
- Disconnect the battery pack from the power tool before making any adjustments, changing accessories, or storing power tools.
- Store idle power tools out of the reach of children and do not allow persons unfamiliar with the power tool or these instructions to operate the power tool.
2.5. Battery Tool Use and Care
- Recharge only with the charger specified by the manufacturer.
- Use power tools only with specifically designated battery packs.
- When battery pack is not in use, keep it away from other metal objects, like paper clips, coins, keys, nails, screws or other small metal objects, that can make a connection from one terminal to another.
3. Components and Features
Familiarize yourself with the main components of your Makita DHP483RFJ Hammer Drill:
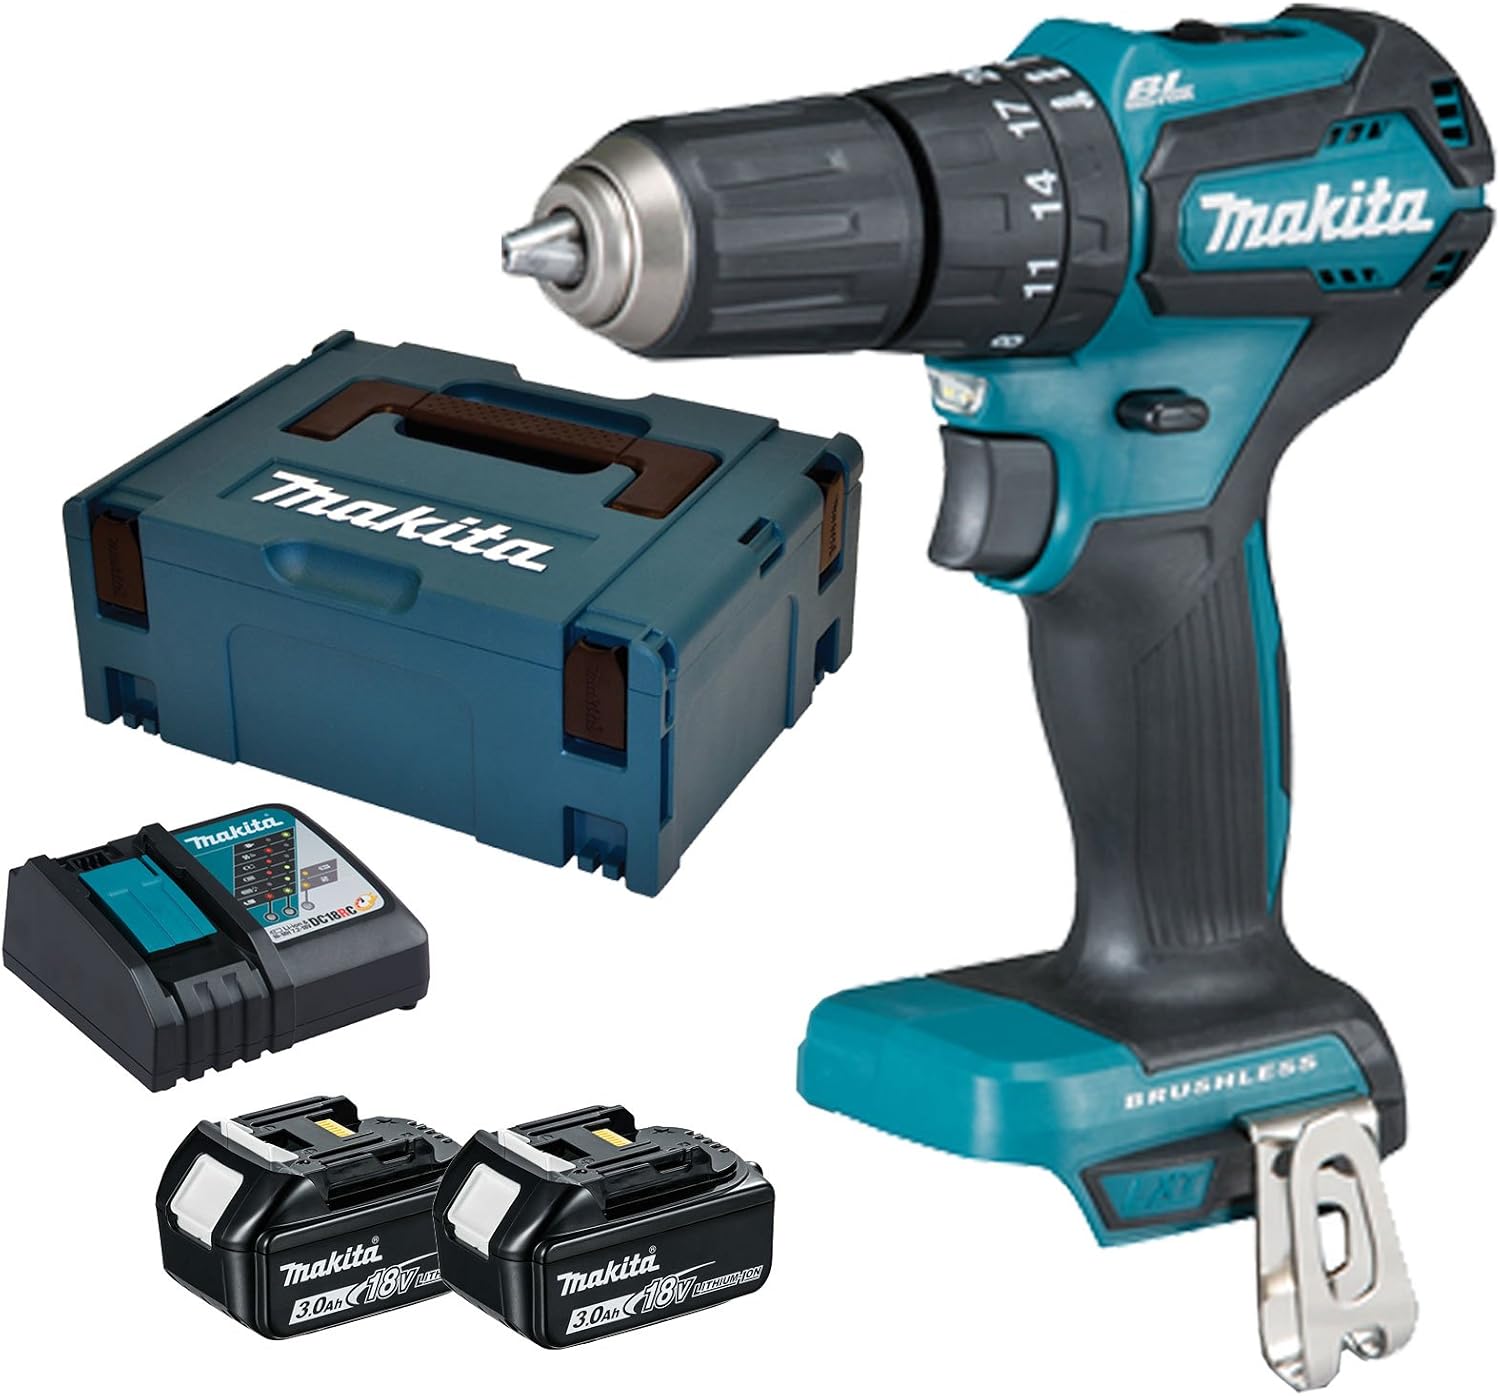
Figure 3.1: Overview of the Makita DHP483RFJ Hammer Drill, including the drill unit, two 18V Li-Ion batteries, a battery charger, and a carrying case. The drill features a brushless motor and an ergonomic design.
- Chuck: Keyless chuck for quick and easy bit changes. Capacity: 1.5 - 13 mm.
- Torque Setting Ring: Adjusts the clutch to prevent overtightening screws.
- Mode Selector Ring: Switches between drilling, hammer drilling, and screwdriving modes.
- Speed Selector Switch: Allows selection between high (0-1,700 RPM) and low (0-500 RPM) speeds.
- Trigger Switch: Variable speed control based on pressure applied.
- Forward/Reverse Switch: Changes the rotation direction.
- LED Job Light: Illuminates the work area.
- Battery Pack: 18V Li-Ion battery for cordless operation.
- Belt Clip: Convenient for temporary tool hanging.
4. Setup and Preparation
4.1. Charging the Battery
- Ensure the battery charger is connected to a power outlet.
- Slide the battery pack into the charger until it clicks into place.
- The charging indicator lights on the charger will indicate the charging status. Refer to the charger's specific manual for detailed light patterns.
- Once fully charged, remove the battery pack from the charger.
4.2. Installing/Removing the Battery Pack
- To Install: Align the battery pack with the receptacle on the tool and slide it in until it locks with a click.
- To Remove: Press the release button on the battery pack and slide it out of the tool.
4.3. Installing/Removing Drill Bits or Accessories
- Ensure the tool is switched off and the battery pack is removed.
- Hold the chuck ring and rotate the sleeve counter-clockwise to open the chuck jaws.
- Insert the drill bit or accessory fully into the chuck.
- Rotate the sleeve clockwise to tighten the chuck jaws securely around the bit. Ensure the bit is centered and firmly gripped.
- To remove, reverse the process.
5. Operating Instructions
5.1. Selecting Operating Mode
Rotate the mode selector ring to choose the desired operation:
- Drilling Mode (Drill icon): For drilling into wood, metal, and plastic.
- Hammer Drilling Mode (Hammer icon): For drilling into masonry, brick, and concrete.
- Screwdriving Mode (Screw icon): For driving screws, with adjustable torque settings.
5.2. Adjusting Speed and Torque
- Speed Selector: Use the switch on top of the tool to select High (for faster drilling/smaller holes) or Low (for higher torque/larger holes/screwdriving).
- Variable Speed Trigger: The trigger switch allows for variable speed control. Pressing the trigger further increases the speed.
- Torque Setting: In screwdriving mode, rotate the torque setting ring to select the desired torque level. Higher numbers indicate higher torque.
5.3. Drilling and Fastening

Figure 5.1: The Makita DHP483RFJ Hammer Drill in action, demonstrating its capability to drill into masonry. The user is wearing protective gloves, and the drill is held firmly against the brick surface.
- Secure your workpiece to prevent movement.
- Select the appropriate mode, speed, and torque setting for your material and task.
- Position the drill bit on the desired spot.
- Start the drill by gently pressing the trigger switch. Gradually increase pressure as the bit engages the material.
- Maintain a firm grip on the tool and apply steady, even pressure.
- For hammer drilling, ensure sufficient pressure is applied to allow the hammer mechanism to engage.
- When finished, release the trigger switch.
6. Maintenance
Regular maintenance ensures the longevity and optimal performance of your tool.
6.1. Cleaning
- Always disconnect the battery pack before cleaning.
- Clean the tool's ventilation openings regularly to prevent overheating. Use a soft brush or compressed air.
- Wipe the tool housing with a soft, damp cloth. Do not use harsh chemicals or abrasive cleaners.
- Keep the chuck jaws clean and free of debris for proper bit gripping.
6.2. Storage
- Store the tool and battery pack in a cool, dry place, away from direct sunlight and moisture.
- Ensure the battery pack is partially charged (around 50%) before long-term storage to preserve battery health.
- Store out of reach of children.
6.3. Battery Care
- Do not store battery packs in temperatures above 50°C (122°F).
- Avoid fully discharging the battery pack frequently, as this can reduce its lifespan.
- If the battery pack becomes hot during use, allow it to cool down before recharging.
7. Troubleshooting
| Problem | Possible Cause | Solution |
|---|---|---|
| Tool does not start. | Battery pack not installed correctly or discharged. | Ensure battery is fully inserted. Charge battery pack. |
| Reduced power or speed. | Battery pack low on charge. Overload protection activated. | Recharge battery. Reduce pressure on the tool. Allow tool to cool. |
| Chuck not holding bit securely. | Chuck jaws dirty or worn. Bit shank dirty. | Clean chuck jaws and bit shank. If problem persists, chuck may need replacement. |
| Hammer function not engaging. | Incorrect mode selected. Insufficient pressure applied. | Ensure hammer drilling mode is selected. Apply firm, steady pressure. |
8. Specifications
| Feature | Specification |
|---|---|
| Model Number | DHP483RFJ |
| Power Source | 18V Li-Ion Battery (Battery Powered) |
| No Load Speed (High) | 0 - 1,700 RPM |
| No Load Speed (Low) | 0 - 500 RPM |
| Impacts Per Minute (High) | 0 - 25,500 IPM |
| Impacts Per Minute (Low) | 0 - 7,500 IPM |
| Max. Fastening Torque (Hard) | 40 N·m |
| Max. Fastening Torque (Soft) | 23 N·m |
| Chuck Capacity | 1.5 - 13 mm |
| Drilling Capacity (Steel) | 13 mm |
| Drilling Capacity (Wood) | 36 mm |
| Drilling Capacity (Masonry) | 13 mm |
| Item Weight | 5.1 Kilograms (approx. 11.22 pounds) |
| Product Dimensions | 14.96 x 11.42 x 5.91 inches |
9. Warranty Information
Makita power tools are engineered to the highest standards and come with a limited warranty against defects in materials and workmanship. For specific warranty terms and conditions, please refer to the warranty card included with your product or visit the official Makita website. Keep your purchase receipt as proof of purchase for warranty claims.
10. Customer Support
For technical assistance, service, or replacement parts, please contact Makita customer support. You can find contact information on the official Makita website or through your local authorized Makita service center.
Website: www.makitatools.com
Service Center Locator: Refer to the Makita website for authorized service centers in your region.
Related documentsDHP483RFJ


Ask a question about this manual
Ask about setup, troubleshooting, compatibility, parts, safety, or missing instructions. Manuals+ will review the question and use this page’s manual context to help answer it.