1. Introduction
The BTF-LIGHTING SK6812 RGBW LED Strip is an advanced individually addressable lighting solution. It integrates four colors (Red, Green, Blue, and Natural White) into a single LED, offering enhanced color mixing and pure white illumination. This strip is designed for dynamic lighting effects and is compatible with a range of programmable controllers.
Key features include:
- Individually Addressable LEDs: Each LED can be controlled independently for color and brightness, allowing for complex lighting patterns and animations.
- RGB + Pure White (4-in-1 LED): Provides a wider color gamut and the ability to produce true white light, which is more energy-efficient than mixing RGB for white.
- High Brightness and Color Depth: Features 256 brightness levels and 32-bit color display for vibrant and smooth transitions.
- Chainable Design: Equipped with 3-pin JST-SM connectors for easy extension or cutting at designated points.
- Versatile Compatibility: Supports various programmable controllers such as K-1000C, SP630E, SP639E, SP617E, SP530E WiFi Alexa, and other DIY controllers.


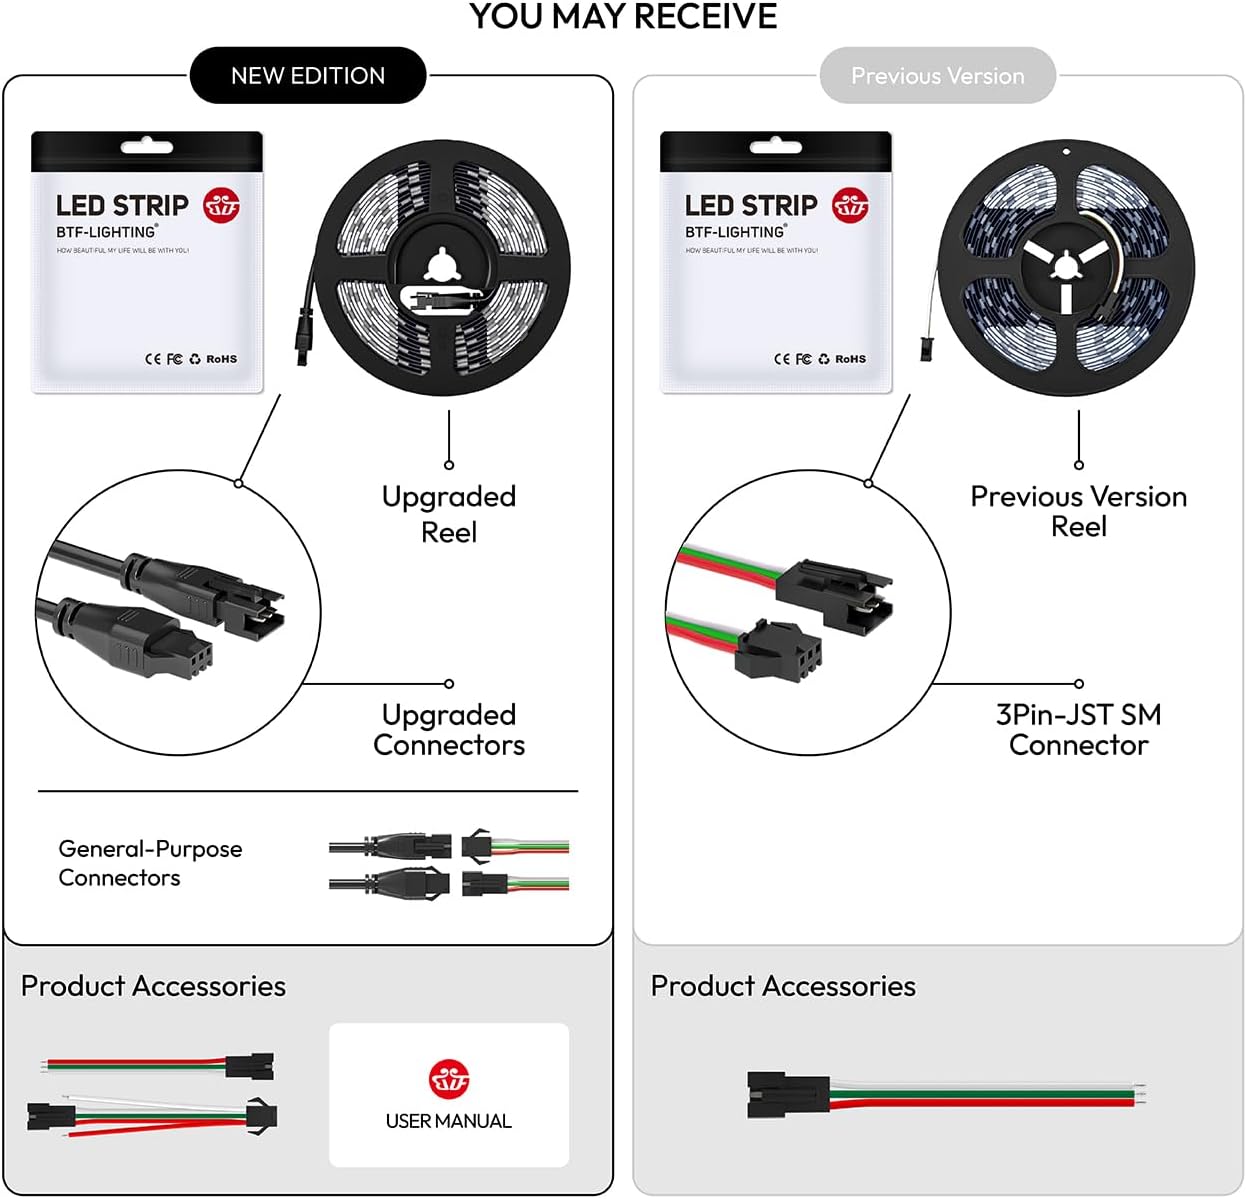
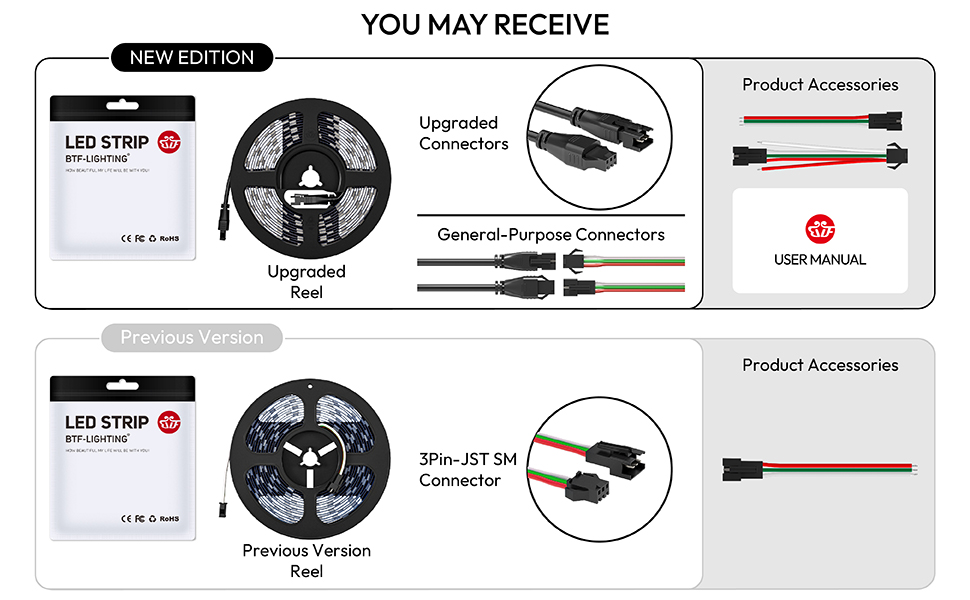
2. What's in the Box
Your BTF-LIGHTING SK6812 RGBW LED Strip package includes:
- 1x SK6812 RGBW LED Strip (16.4ft, 60 pixels/m, 300 LEDs)
- 1x 3-pin JST-SM male connector
Note: A power supply and controller are not included and must be purchased separately.

3. Setup Instructions
3.1 Power Requirements
The SK6812 RGBW LED strip operates on DC 5V. A power supply with a recommended output of DC 5V 10A (50W) is required for optimal performance. Ensure your power supply can handle the total wattage of your LED strip configuration.
3.2 Controller Compatibility
This LED strip requires an external controller for operation. Compatible controllers include, but are not limited to:
- K-1000C programmable controllers
- SP630E, SP639E, SP617E APP controllers
- SP530E WiFi Alexa controller
- Various DIY controllers (e.g., Arduino, Raspberry Pi)

3.3 Connection Steps
- Connect Power: Connect the DC 5V power supply to the LED strip's +5V and GND terminals.
- Connect Data: Connect the data output (DO) of your controller to the data input (Din) of the LED strip. Ensure the data direction is correct (indicated by arrows on the strip).
- Ground Connection: Ensure a common ground connection between the power supply, controller, and LED strip.
- Multiple Strips: For extending the strip, use the 3-pin JST-SM connectors to link multiple strips. Ensure adequate power injection for longer runs to prevent voltage drop.
3.4 Mounting
The mounting method depends on the IP rating of your specific LED strip:
- IP30 / IP65 (Non-Waterproof / Silicone Coating): These strips typically have adhesive tape on the back for convenient attachment to surfaces. Ensure the surface is clean and dry before application.
- IP67 (Silicone Sheathing Waterproof): These strips do not have double-sided tape and are designed to be fixed using screws and clips.

4. Operating Instructions
Once properly connected to a compatible controller, the SK6812 RGBW LED strip can be operated to achieve various lighting effects:
- Color Control: Utilize your controller's interface (app, remote, or programming) to select from millions of colors, including pure white. Adjust individual pixel colors or apply uniform colors across the strip.
- Brightness Adjustment: Most controllers allow for brightness adjustment from 1% to 100%.
- Dynamic Effects: Explore a wide range of pre-programmed dynamic effects such as chasing, flowing water, raindrops, jump flashes, and more. The specific effects available depend on your chosen controller.
5. Maintenance
To ensure the longevity and optimal performance of your LED strip, follow these maintenance guidelines:
- Cleaning: Gently wipe the LED strip with a dry, soft cloth to remove dust. Avoid using harsh chemicals or abrasive materials.
- Adhesive Longevity: For IP30/IP65 strips, if the adhesive backing loses its stickiness over time, consider using additional mounting clips or a stronger double-sided tape designed for LED strips.
- Environmental Conditions: Ensure the strip is used within its specified operating temperature range (-20°C to +50°C). Avoid exposing non-waterproof (IP30) strips to moisture or high humidity.
6. Troubleshooting
If you encounter issues with your LED strip, refer to the following common troubleshooting steps:
- No Light/Partial Light:
- Verify that the power supply is correctly connected and providing the specified DC 5V.
- Check all connections, especially the 3-pin JST-SM connectors, for secure contact.
- Ensure the data input (Din) and data output (DO) are connected in the correct direction.
- Confirm that the controller is powered on and sending signals.
- Incorrect Colors/Flickering:
- Ensure your controller is configured for the correct LED type (SK6812 RGBW).
- Check for voltage drop, especially on longer runs. Consider injecting power at multiple points along the strip.
- If using multiple power supplies for the strip and controller, ensure they share a common ground to prevent signal interference.
- Adhesive Not Sticking (IP30/IP65):
- Clean the mounting surface thoroughly with rubbing alcohol and allow it to dry completely before applying the strip.
- If the pre-applied adhesive is insufficient, use additional mounting clips or a high-quality double-sided adhesive tape.
7. Specifications
| Feature | Detail |
|---|---|
| Model Number | SK68125M60RGBNWB30 |
| LED Type | SK6812 RGBW (4 colors in 1 LED) |
| Color | RGB + Natural White (4000K-5000K) |
| Length | 16.4 feet (5 meters) |
| LEDs per Meter | 60 LEDs/meter |
| Total LEDs | 300 LEDs |
| Input Voltage | DC 5V |
| Max Power Consumption | 90 Watts (18W/meter) |
| Recommended Power Supply | DC 5V 10A (50W) |
| PCB Color | Black |
| Water Resistance Level | IP30 (Non-waterproof) |
| Operating Temperature | -20°C to +50°C |
| Connectivity Protocol | Controller dependent (e.g., Wi-Fi for compatible controllers) |
| Control Method | Controller dependent (e.g., Voice for compatible controllers) |
| Material Type | Metal+PCB+Plastic |
| Item Weight | 30 Grams |

8. Warranty and Support
For warranty information and technical support, please refer to the documentation provided with your purchase or visit the official BTF-LIGHTING website. Keep your purchase receipt for warranty claims.


