
Gladiator A7TA3377, 91H20-03270, 91H20-03271, 90-27-3325N, 90-27-3325, A7TA3377A, 8772271, 8775058, 23100-FU410
Gladiator Premium Alternator User Manual
Model: A7TA3377, 91H20-03270, 91H20-03271, 90-27-3325N, 90-27-3325, A7TA3377A, 8772271, 8775058, 23100-FU410
Introduction
This manual provides essential information for the installation, operation, and maintenance of your Gladiator Premium Alternator. Please read this manual thoroughly before installation and retain it for future reference. Proper installation and maintenance are crucial for optimal performance and longevity of the unit.
Product Overview
The Gladiator Premium Alternator is a high-quality replacement component designed to meet or exceed OEM specifications for various lift truck applications. It features an internal regulator and internal fan, operating at 12 Volts and providing 50 Amps of power.
Key Features:
- Designed to meet or exceed OEM specifications for reliable performance.
- Equipped with an internal regulator for stable voltage output.
- Features an internal fan for efficient cooling and heat dissipation.
- Operates at 12 Volts with a 50 Amp output.
- Durable construction for long service life.
Compatibility
This alternator is compatible with a wide range of lift truck models from various manufacturers. Please verify your vehicle's specific requirements against the detailed compatibility list below:
Compatible with:
- Nissan Lift Trucks: AL30, AL35, AL50, CL30, CL35, CL40, CL50 (with K21 Eng. models from 2004-2006).
- Mitsubishi Lift Trucks: C3000, C3500, CC4000 (K21 Eng.), C4000, C5000, C5500, C6500 (K25 Eng.), P3000, P3500 (K21 Eng.), P4000, P5000, P5500, P6000, P6500 (K25 Eng.), PCC4000 (K21 Eng.) - All 2004-2009 models. Also FG15N K21, FG15ZN K15, FG18N K21, FG18ZN K15, FG20N K21, FG20N-HO K25, FG25N K21 Eng., FG33N K25, FGC15N K21, FGC18N K21, FGC20CN K21, FGC20N K21, FGC20N-HO K25, FGC25N K21, FGC25N-HO K25, FGC25NR K21, FGC28N K25, FGC30N K25, FGC33N K25 (2004-2009 and many more).
- Kalmar AC Lift Trucks: C30AX (K21 Eng. 2001-2005), C35AX, C35BX, C40BX, C50BX (K21 Eng. 2001-2005), C60BXH (K25 Eng.), P30AX (K21 Eng. 2001-2005), P35AX, P40BX (K21 Eng. 2001-2005), P50BX (K21 Eng.), P60BXH (K25 Eng. 2001-2005).
- Komatsu Lift Trucks: FG10-20 (K15), FG15-20, FG18-20HT (K15 Eng. 2004-2009), FG15HT-17, FG15HT-20 (K21 Eng. 2007-2009), FG18HT/SHT-17 (K21 Eng. 2004-2006), FG18SHT-20 (K21 Eng. 2007-2009), FG20C-14, FG20SHT-14 (K21 Eng. 2004-2006), FG20C-16, FG20SHT-16 (K21 Eng.), FG25C-14 (K21 Eng.), FG25SHT-14 (K21 Eng.), FG25T-14 (K21 Eng. 06-09), FG28HT-16, FG28SHT-16 (K25 Eng. 2006-2009), FG30C-14 (K21 Eng.), FG30HT-14 (K25 Eng. 2004-2005), FG30SHT/FG32SHT-16, FG32HT-16 (K25 Eng. 2006-2009).
- TCM Equipment Lift Trucks: FCG15-4 (K21 Eng. 2007-2009), FCG15T-3 (K21 Eng. 2004-2007), FCG18T-3 (K21 Eng. 2004-2009), FCG20-4 (K21 Eng. 2007-2009), FCG20-4H (K25 Eng. 2007-2009), FCG20T-3 (K21 Eng. 2004-2007), FCG25-4 (K21 Eng. 2007-2009).
Installation and Setup
Installation of an alternator requires mechanical aptitude and appropriate tools. If you are not confident in your ability to perform this installation, it is recommended to seek assistance from a qualified mechanic or service professional.
General Installation Steps (Consult Vehicle Service Manual for Specifics):
- Safety First: Disconnect the negative terminal of the vehicle's battery to prevent electrical shorts.
- Access: Locate the existing alternator. Depending on the vehicle, this may require removing other components.
- Disconnect Wiring: Carefully disconnect all electrical connections from the old alternator. Note their positions for reinstallation.
- Remove Belt: Loosen the tensioner and remove the serpentine belt from the alternator pulley.
- Remove Mounting Bolts: Unbolt the old alternator from its mounting brackets.
- Install New Alternator: Position the new Gladiator alternator into place and secure it with the mounting bolts. Do not overtighten.
- Reinstall Belt: Route the serpentine belt correctly around the new alternator pulley and tension it according to vehicle specifications.
- Reconnect Wiring: Reconnect all electrical connections securely. Ensure all terminals are clean and tight.
- Reconnect Battery: Reconnect the negative battery terminal.
- Test: Start the vehicle and check the charging system indicator light. Verify proper voltage output with a multimeter.

Figure 1: Front view of the Gladiator Premium Alternator, showing the pulley and mounting points. This view is typical for installation reference.
Operation
Once properly installed, the alternator operates automatically as part of the vehicle's electrical system. Its primary function is to convert mechanical energy from the engine into electrical energy to power the vehicle's electrical components and recharge the battery.
Normal Operation:
- The alternator begins charging the battery and supplying power to electrical systems once the engine is running.
- The internal regulator maintains a consistent voltage output, typically between 13.5 and 14.8 volts, to prevent overcharging or undercharging the battery.
- The internal fan ensures the alternator remains within optimal operating temperatures during use.
Maintenance
The Gladiator Premium Alternator is designed for durability and requires minimal direct maintenance. However, regular checks of related components can help ensure its long-term performance.
Recommended Checks:
- Battery Condition: Ensure the vehicle's battery is in good condition and holds a charge. A failing battery can put undue strain on the alternator.
- Belt Tension and Condition: Periodically inspect the serpentine belt for cracks, fraying, or excessive wear. Ensure it has proper tension; a loose belt can cause slipping and reduce alternator output.
- Wiring Connections: Check all electrical connections to the alternator for corrosion or looseness. Clean and tighten as necessary.
- Charging System Light: Pay attention to your vehicle's dashboard charging system warning light. If it illuminates during operation, it indicates a potential issue with the charging system.

Figure 2: Side view of the Gladiator Premium Alternator, highlighting the pulley and cooling fins.
Troubleshooting
If you experience issues with your vehicle's charging system, the following table outlines common symptoms and potential causes related to the alternator. Always consult a qualified technician for diagnosis and repair if you are unsure.
| Symptom | Possible Cause | Action |
|---|---|---|
| Battery warning light on dashboard | Alternator not charging, loose belt, faulty wiring, dead battery. | Check belt tension, inspect wiring, test battery and alternator output. |
| Dim headlights or interior lights | Insufficient power from alternator, failing battery. | Test alternator output and battery voltage. |
| Growling or whining noise from engine bay | Worn alternator bearings, loose or worn belt. | Inspect alternator for bearing noise, check belt condition and tension. |
| Battery constantly dead | Alternator not charging, parasitic drain, old battery. | Test charging system, check for electrical drains, test battery health. |

Figure 3: Rear view of the Gladiator Premium Alternator, showing electrical connections and mounting points.
Specifications
| Attribute | Value |
|---|---|
| Brand | Gladiator |
| Model Numbers | A7TA3377, 91H20-03270, 91H20-03271, 90-27-3325N, 90-27-3325, A7TA3377A, 8772271, 8775058, 23100-FU410 |
| Voltage | 12 Volts |
| Amperage | 50 Amps |
| Internal Regulator | Yes |
| Internal Fan | Yes |
| Item Weight | 10 pounds (approx. 4.54 kg) |
| Product Dimensions | 7.3 x 6.5 x 4.8 inches (approx. 18.5 x 16.5 x 12.2 cm) |
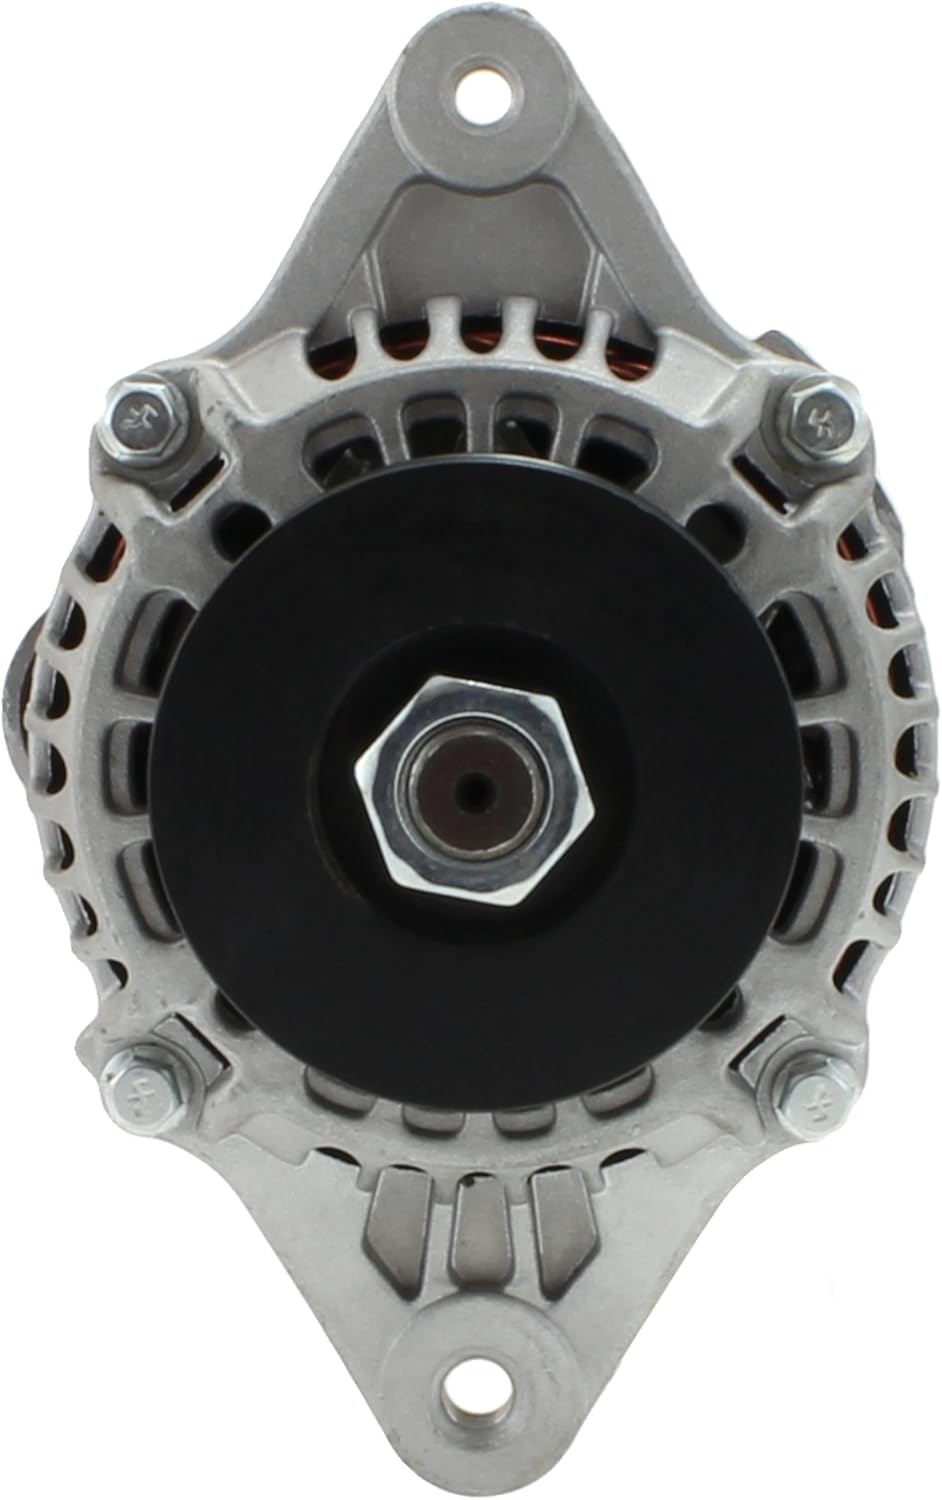
Figure 4: Top view of the Gladiator Premium Alternator, showing the overall shape and mounting points.
Warranty Information
The Gladiator Premium Alternator comes with a One Year Warranty from the date of purchase. This warranty covers defects in materials and workmanship under normal use and service. For warranty claims or further details, please retain your proof of purchase and contact the seller or manufacturer directly.
This warranty does not cover damage resulting from improper installation, misuse, neglect, accident, alteration, or unauthorized repair.
Support and Contact
For technical assistance, troubleshooting guidance, or warranty inquiries, please contact the seller from whom you purchased this product. Ensure you have your product model number and purchase details ready when contacting support.
Seller: Quality Solution
For general product information, you may refer to the Gladiator brand website or product listings.
Ask a question about this manual
Ask about setup, troubleshooting, compatibility, parts, safety, or missing instructions. Manuals+ will review the question and use this page’s manual context to help answer it.