Introduction
This manual provides detailed instructions for the installation, operation, and maintenance of your Kingston Brass AET200-1 Vintage Tub Faucet Body. Please read this manual thoroughly before beginning installation or use to ensure proper function and longevity of your product. Keep this manual for future reference.
Safety Information
- Always turn off the main water supply before beginning any installation or repair work.
- Wear appropriate personal protective equipment (PPE) such as safety glasses and gloves during installation.
- If you are unsure about any part of the installation process, consult a qualified plumber.
- Ensure all connections are secure and watertight to prevent leaks.
- Do not use harsh chemicals or abrasive cleaners on the faucet finish.
Package Contents
Verify that all components are present before beginning installation:
- Kingston Brass AET200-1 Faucet Body
- Mounting Hardware
- (Additional components may vary based on specific model variations)
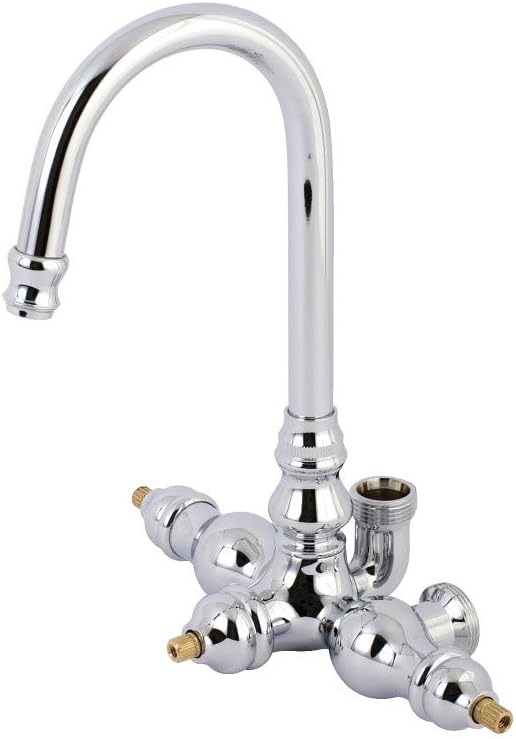
Figure 1: Kingston Brass AET200-1 Vintage Tub Faucet Body. This image displays the polished chrome faucet body with its gooseneck spout and two handle connections.
Specifications
| Feature | Detail |
|---|---|
| Brand | Kingston Brass |
| Model Number | AET200-1 |
| Material | Solid Brass Construction |
| Finish | Polished Chrome |
| Mounting Type | Wall Mount 2-Hole Installation |
| Number of Handles | 2 (Handles sold separately) |
| Spout Reach | 4-1/2 inches |
| Spout Height | 9-7/16 inches |
| Max Flow Rate | 7.0 GPM / 26.5 LPM at 80 PSI |
| Inlet Connection | 3/4"-14 NPS |
| Cartridge Type | Drip-Free Ceramic Disc |
| Product Dimensions | 9.44 x 8.75 x 4.5 inches |
| Item Weight | 4.02 pounds |

Figure 2: Detailed technical drawing of the AET200-1 faucet body, showing key dimensions including spout reach (4-1/2"), spout height (9-7/16"), and wall mount spacing (3-3/8").
Installation
This faucet is designed for wall-mount, 2-hole installation. Professional installation is recommended.
- Prepare the Installation Area: Turn off the main water supply to the bathroom. Clear the area around the tub where the faucet will be installed.
- Verify Wall Openings: Ensure your wall has two pre-drilled holes spaced 3-3/8 inches apart, suitable for the faucet's inlet connections.
- Apply Thread Sealant: Apply plumber's tape or thread sealant to the threaded inlet connections of the faucet body.
- Insert Faucet Body: Carefully insert the faucet body into the wall openings, ensuring the spout is oriented correctly.
- Secure Mounting Hardware: From behind the wall (if accessible) or using the provided mounting hardware, secure the faucet body firmly to the wall. Tighten nuts evenly to prevent stress on the connections.
- Connect Water Lines: Connect the hot and cold water supply lines to the corresponding inlet connections on the faucet body. Ensure connections are tight but do not overtighten.
- Install Handles (Sold Separately): Attach the desired handles (not included with faucet body) according to their specific instructions.
- Test for Leaks: Slowly turn on the main water supply. Check all connections for leaks. If leaks are detected, turn off the water supply and re-tighten connections as necessary.
- Flush the System: Allow water to run through the faucet for a few minutes to flush out any debris from the new installation.
Operation
The Kingston Brass AET200-1 faucet body is designed for use with two separate handles (hot and cold), which control water flow and temperature.
- Turning On/Off: Rotate the hot and cold handles to turn the water flow on or off.
- Adjusting Temperature: Mix hot and cold water by adjusting both handles until the desired water temperature is achieved.
- Adjusting Flow: The flow rate can be adjusted by how much the handles are opened.
Maintenance
Proper care and maintenance will ensure the longevity and appearance of your faucet.
- Cleaning: Clean the faucet regularly with a soft cloth and mild soap and water. Rinse thoroughly and dry with a soft cloth to prevent water spots.
- Avoid Harsh Cleaners: Do not use abrasive cleaners, harsh chemicals, ammonia-based products, or scouring pads, as these can damage the polished chrome finish.
- Ceramic Disc Cartridge: The faucet features a drip-free ceramic disc cartridge, which typically requires no maintenance. If a drip occurs, it may indicate a need for cartridge replacement.
Troubleshooting
| Problem | Possible Cause | Solution |
|---|---|---|
| Water leaks from spout when off. | Worn ceramic disc cartridge. | Replace the ceramic disc cartridge. |
| Water leaks from base of faucet. | Loose connections or damaged O-rings/gaskets. | Turn off water supply, check and tighten connections. Inspect and replace O-rings/gaskets if damaged. |
| Low water flow. | Partially closed shut-off valves, clogged aerator (if applicable), or debris in water lines. | Ensure shut-off valves are fully open. Clean or replace aerator. Flush water lines. |
Warranty Information
This Kingston Brass product comes with a limited warranty. For specific details regarding warranty coverage, terms, and conditions, please refer to the official Kingston Brass website or contact their customer support. Proof of purchase may be required for warranty claims.
Customer Support
For further assistance, technical support, or replacement parts, please contact Kingston Brass customer service:
- Website: www.kingstonbrass.com
- Phone: Refer to the Kingston Brass website for current contact numbers.


