1. Introduction
This manual provides detailed instructions for the installation, operation, maintenance, and troubleshooting of your Renogy Rover 40A MPPT Solar Charge Controller. This advanced charge controller is designed to maximize the performance of your solar system by efficiently converting solar panel output to charge various battery types, including Gel, Sealed, Flooded, and Lithium batteries.
2. Safety Information
Please read all instructions and warnings in this manual carefully before installation and operation. Failure to follow these instructions may result in electric shock, serious injury, or death, and may damage the charge controller or other equipment. Keep this manual in a safe place for future reference.
- Ensure all wiring is securely connected to prevent loose connections that can cause excessive heating.
- Always disconnect the solar panel and battery power before installing or adjusting the controller.
- Do not disassemble or attempt to repair the controller yourself. Contact Renogy technical support for assistance.
- Install the controller in a well-ventilated area, away from flammable materials and direct sunlight.
- Use appropriate wire gauges for all connections to prevent overheating.
3. Product Overview
The Renogy Rover 40A MPPT Charge Controller is a robust and efficient component for your solar power system. It features an intuitive LCD display and multiple LED indicators for easy monitoring and parameter adjustment.
3.1. What's in the Box
- 1 x Renogy Rover MPPT Charge Controller
- 1 x Bluetooth Module (BT-2 or BT-1 version)
3.2. Key Features
- Innovative MPPT Design: Up to 99% tracking efficiency and 98% peak conversion efficiency.
- Battery Activation: Can activate dead batteries (0 volt) with small current.
- Automatic System Voltage Detection: Automatically detects 12V or 24V DC system voltages.
- Multiple Battery Adaptation: Compatible with Sealed Lead Acid, GEL, Flooded, and user-customizable Lithium battery parameters.
- 4-Stage Charging: (Bulk, Absorption, Float, Equalization) for Lead Acid Batteries and 2-stage (Bulk, Absorption) for Lithium batteries, including Lithium Reactivation.
- Comprehensive Safety Protections: Against reverse polarity, battery overcharging, over-discharging, overload, short-circuiting, overheating, and reverse current. UL certified insulated shell.
- LCD Screen & LED Indicators: For displaying system operation information, customizable parameters, and error codes.
- Bluetooth Connectivity: Monitor consumption and customize parameters via the Renogy DC Home App using the included Bluetooth Module (BT-2 or BT-1).
- Mute & Excellent Heat Dissipation: Integrated heat sink provides silent operation (0 dB) and ensures maximum charging efficiency and safety.
3.3. Product Components

Figure 3.1: Renogy Rover 40A MPPT Solar Charge Controller and its accessories, including the Bluetooth module and temperature sensor.

Figure 3.2: The Rover 40A MPPT Charge Controller is built with a robust and well-crafted structure designed for outstanding durability and longevity, capable of withstanding wear and tear over time.
4. Setup and Installation
The Renogy Rover 40A MPPT Charge Controller is designed for hassle-free installation. Follow these steps for a quick and simple setup.
4.1. Mounting the Controller
The controller should be mounted vertically on a solid surface to allow for proper heat dissipation. Ensure there is adequate clearance around the unit for airflow. Mounting brackets are included for convenient setup.

Figure 4.1: Back view of the Renogy Rover 40A MPPT Charge Controller, highlighting the pre-drilled holes for easy mounting.
4.2. Wiring Connections
Follow the wiring sequence carefully to ensure safe and correct operation. The Rover 40A can accept up to 8AWG wires. Do not insert wires into the space below the socket/hatch, as this will damage terminals or lead to loose connections.
- Step 1: Loosen the screws above the terminals to make the socket/hatch descend.
- Step 2: Insert the wires into the socket/hatch.
- Step 3: Tighten the screws to elevate the socket/hatch and complete the wiring.

Figure 4.2: Step-by-step guide for wiring connections on the Renogy Rover 40A MPPT Charge Controller.
Connect the components in the following order:
- Connect the battery to the charge controller.
- Connect the solar panel to the charge controller.
- Connect the load to the charge controller (optional).

Figure 4.3: Side view of the Renogy Rover 40A MPPT Charge Controller, illustrating the various terminal connections for solar, battery, and load.
5. Operating Instructions
The Renogy Rover 40A MPPT Charge Controller is designed for simple and intuitive programming and monitoring.
5.1. LCD Display and Indicators
The LCD screen and multiple LED indicators provide real-time system operation information, allowing you to understand the charging status and set parameters easily.
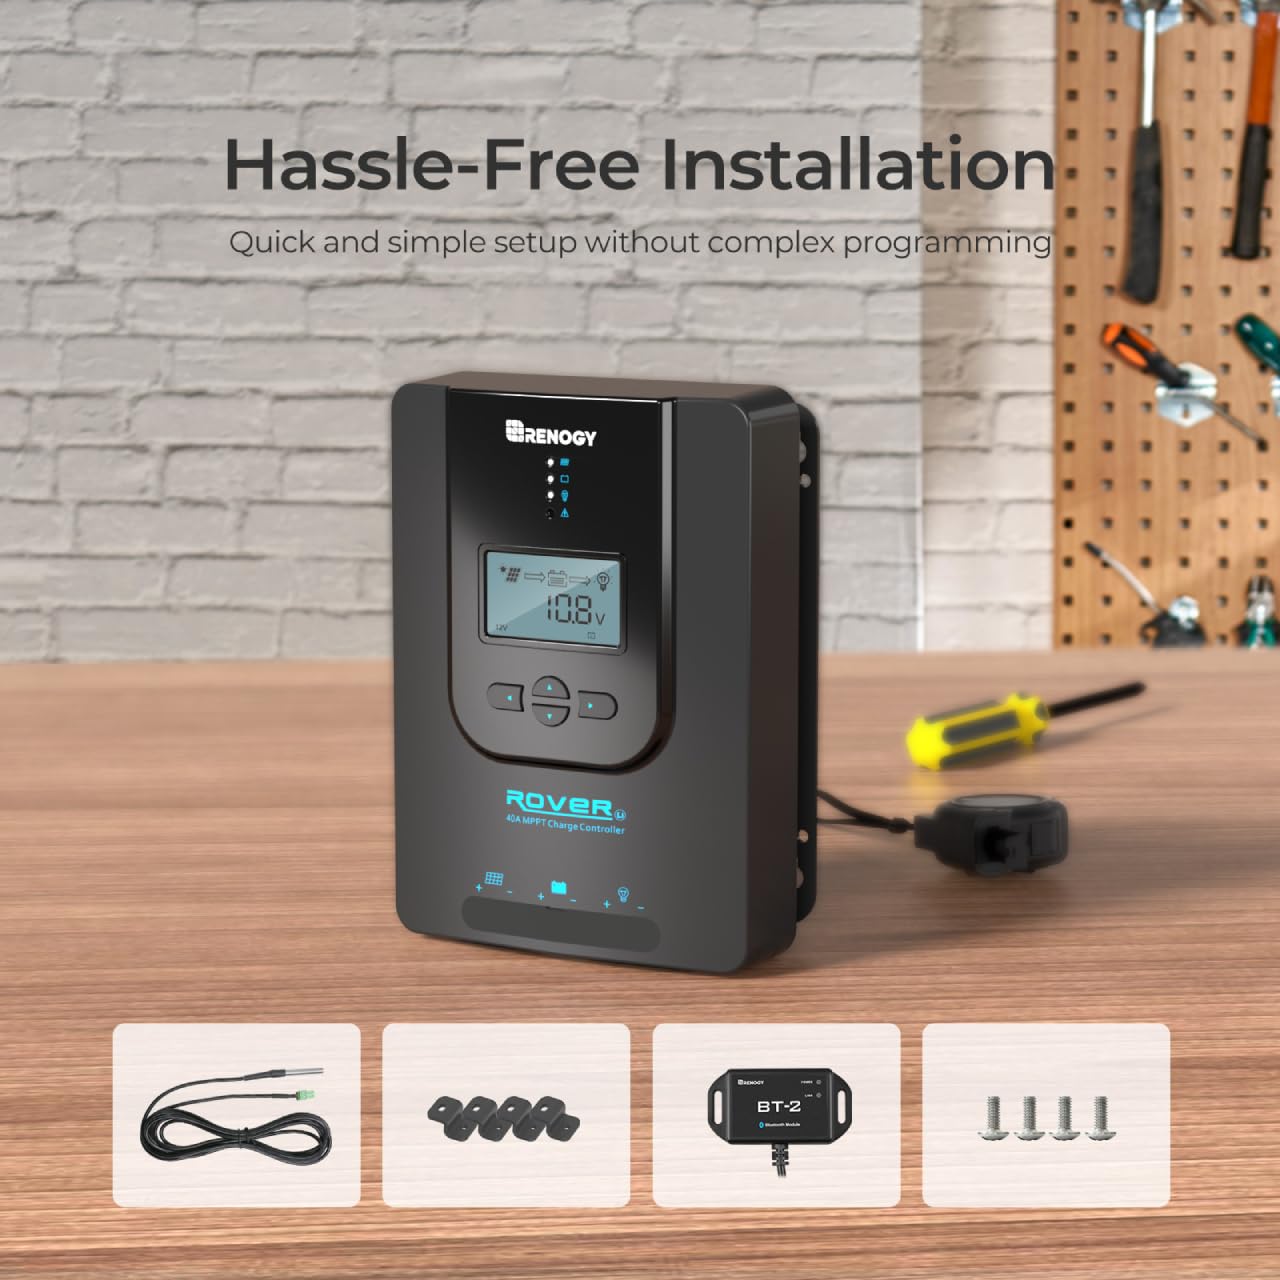
Figure 5.1: Close-up of the LCD display on the Renogy Rover 40A MPPT Charge Controller, showing various system parameters and icons.
5.2. Parameter Adjustment
Parameters can be adjusted directly on the controller using the buttons below the LCD screen. For advanced settings and easier configuration, use the Renogy DC Home App via Bluetooth.
5.3. Bluetooth Connectivity and App Monitoring
The included Bluetooth Module (BT-2 or BT-1) allows you to monitor your solar system's status and productivity directly from your smartphone using the Renogy DC Home App. This provides real-time data and allows for convenient customization of parameters.

Figure 5.2: Real-time monitoring of the Renogy Rover 40A MPPT Charge Controller via the Renogy DC Home app on a smartphone, showing voltage, current, and capacity.
To connect:
- Download the Renogy DC Home App from your device's app store.
- Ensure the Bluetooth module is connected to the controller's RJ45 communication port.
- Open the app and follow the instructions to connect to your Rover 40A controller.
5.4. Battery Type Selection
The controller automatically detects 12V or 24V DC system voltages for Non-Lithium batteries. For Lithium batteries, it is crucial to manually adjust the battery parameters to ensure proper charging and voltage matching. This can be done through the controller's interface or the Renogy DC Home App.
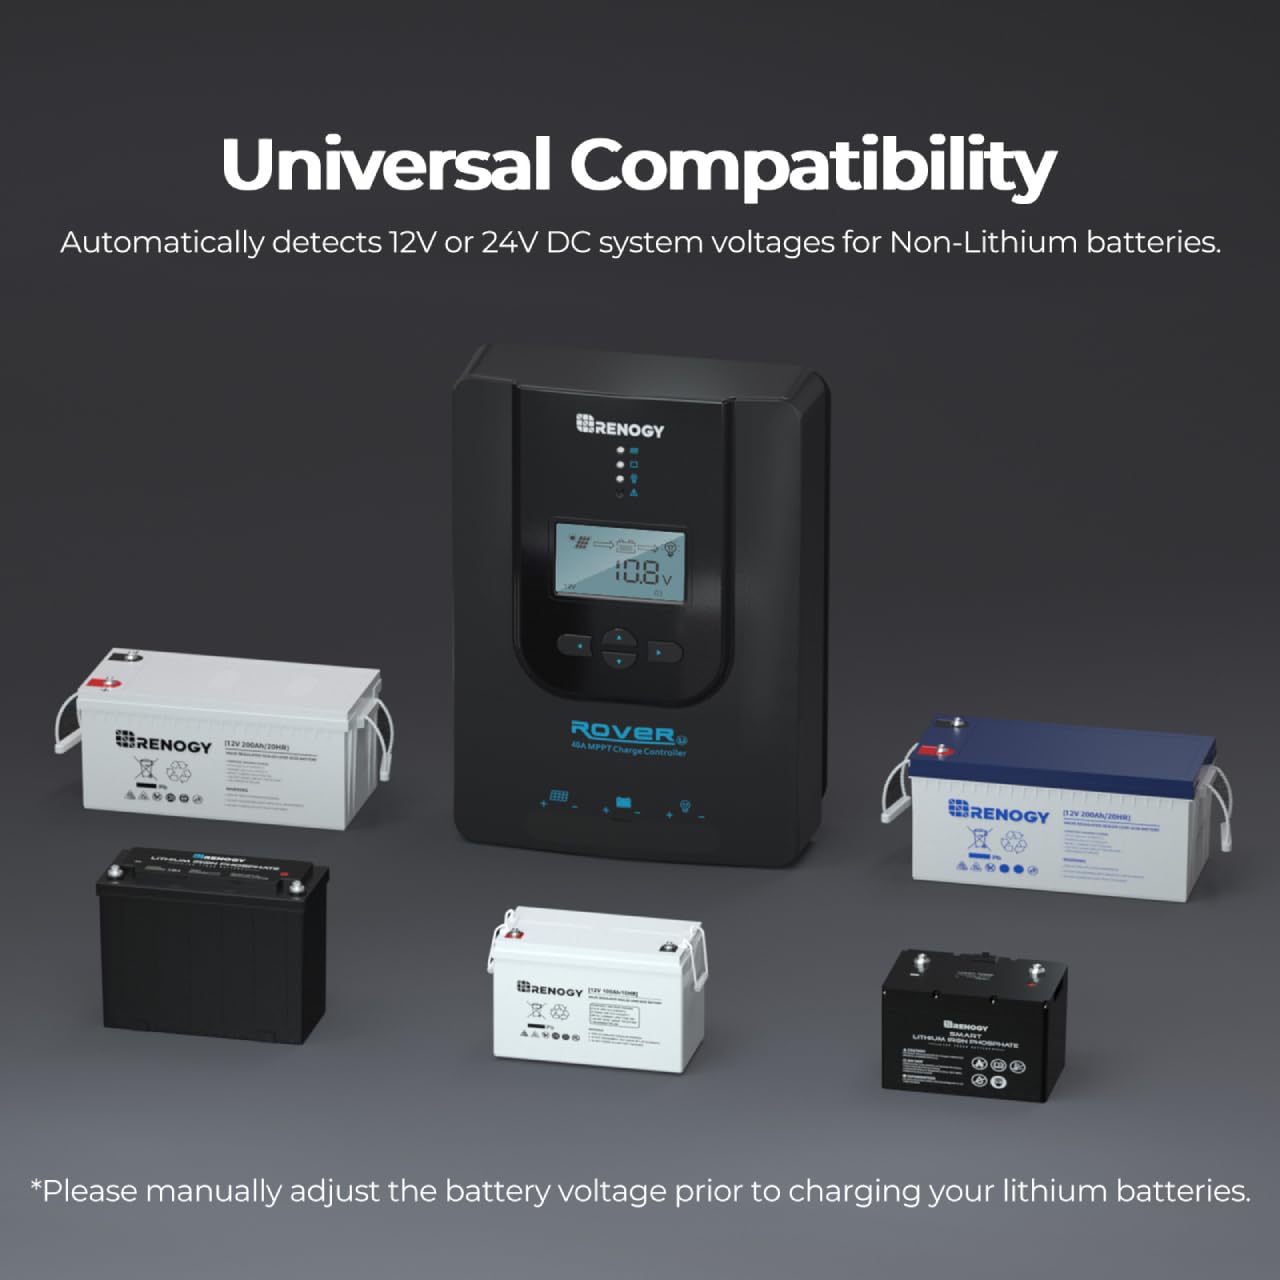
Figure 5.3: The Renogy Rover 40A MPPT Charge Controller is universally compatible with various battery types, including Sealed Lead Acid, GEL, Flooded, and Lithium batteries. Manual adjustment is required for Lithium batteries.
6. Maintenance
Regular maintenance ensures the longevity and optimal performance of your Renogy Rover 40A MPPT Solar Charge Controller.
- Cleaning: Periodically clean the controller's exterior with a dry cloth. Do not use solvents or corrosive cleaners.
- Connections: Annually check all wiring connections for tightness and ensure there are no signs of corrosion or damage.
- Ventilation: Ensure the area around the controller remains clear and well-ventilated to prevent overheating.
- Firmware Updates: Check the Renogy website or DC Home App for any available firmware updates to ensure your controller has the latest features and bug fixes.
7. Troubleshooting
This section addresses common issues you might encounter with your Renogy Rover 40A MPPT Solar Charge Controller.
| Problem | Possible Cause | Solution |
|---|---|---|
| Controller not turning on | No power from battery or solar panel; incorrect wiring. | Check battery and solar panel connections and voltage. Ensure correct polarity. |
| Low charging current | Insufficient solar input (cloudy weather, shading); incorrect battery settings; undersized solar array. | Check solar panel exposure. Verify battery type and charging parameters are correctly set. Consider adding more solar panels if needed. |
| Battery not fully charged | Incorrect battery settings; insufficient charging time; battery degradation. | Adjust battery charging parameters (e.g., absorption voltage, float voltage). Allow more time for charging. Test battery health. |
| Bluetooth connection issues | Bluetooth module not connected; app issues; out of range. | Ensure Bluetooth module is securely connected. Restart the app and your phone's Bluetooth. Move closer to the controller. |
| Error codes on LCD | Indicates specific system faults. | Refer to the detailed error code list in the full user manual (PDF) for specific solutions. |
If you encounter issues not listed here or if the suggested solutions do not resolve the problem, please contact Renogy Technical Support.
8. Specifications
Below are the technical specifications for the Renogy Rover 40A MPPT Solar Charge Controller:
| Specification | Value |
|---|---|
| Model Number | RNG-CTRL-RVR40-BT |
| Product Dimensions | 9.37 x 6.81 x 2.85 inches (2.85"L x 6.81"W x 9.37"H) |
| Weight | 4.58 ounces |
| System Voltage | 12V/24V Auto Detect |
| Max. PV Input Power (12V System) | 520W |
| Max. PV Input Power (24V System) | 1040W |
| Material | Plastic |
| Color | Black |
| Manufacturer | Renogy |
9. Warranty and Support
Renogy provides a limited warranty for the Rover 40A MPPT Solar Charge Controller. For detailed warranty information, please refer to the official Renogy website or the full user manual PDF.
For technical support, troubleshooting assistance, or warranty claims, please contact Renogy customer service. You can also find additional resources and the complete user guide in PDF format at the following link:


