
1. Introduction
This manual provides comprehensive instructions for the installation, operation, and maintenance of your LoraTap Wireless Switch Kit. This kit allows for convenient remote control of lighting and other electrical appliances without the need for complex wiring. Please read this manual thoroughly before installation and use to ensure proper function and safety.

Figure 1: LoraTap Wireless Switch Kit components, including the receiver and transmitter.
2. Product Overview
2.1 Transmitter (Remote Control)
- Dimensions: 7 x 1.6 cm
- Wireless Range: Up to 30 meters indoors (even through walls), up to 200 meters outdoors (without obstacles)
- Radio Frequency: 868 MHz, high security with self-learning program
- Lifespan: More than 220,000 clicks
- Battery Life: More than 10 years
- Battery Type: CR2032 (included and pre-installed)

Figure 2: LoraTap remote control with magnetic base and battery details.
2.2 Receiver
- Dimensions: 2.46 x 5.03 x 6.03 cm
- Input: 85-265 VAC, 50/60 Hz
- Output: 85-265 V AC, 50/60 Hz
- Maximum Load: 10A
- Maximum Power:
- For energy-saving lamps (LED, fluorescent): up to 300W (10A)
- For incandescent, tungsten, halogen lamps: up to 2500W (10A)
- For other electrical appliances: up to 2500W (10A)
3. Safety Information
Always observe the following safety precautions:
- Ensure power is disconnected at the main circuit breaker before installing or servicing the receiver.
- Installation should be performed by a qualified electrician if you are unsure about electrical wiring.
- Do not exceed the maximum load and power ratings specified for the receiver.
- Keep the device away from water and extreme temperatures.
- This product is designed for indoor use unless otherwise specified for outdoor components. The IP20 rating indicates protection against solid objects larger than 12.5mm, but no protection against water.
4. Setup
4.1 Receiver Wiring
The receiver must be wired between the power source and the load (e.g., light fixture). Follow these steps:
- Disconnect Power: Turn off the main power supply at your circuit breaker before starting any wiring.
- Connect Input: Connect the Live (L) and Neutral (N) wires from your power supply to the 'Input' terminals on the receiver.
- Connect Output: Connect the Live (L) and Neutral (N) wires from your load (e.g., lamp) to the 'Output' terminals on the receiver.
- Secure Connections: Ensure all wire connections are secure. A small screwdriver is often included for this purpose.
- Restore Power: Once all connections are secure and the receiver is safely housed, restore power at the circuit breaker.
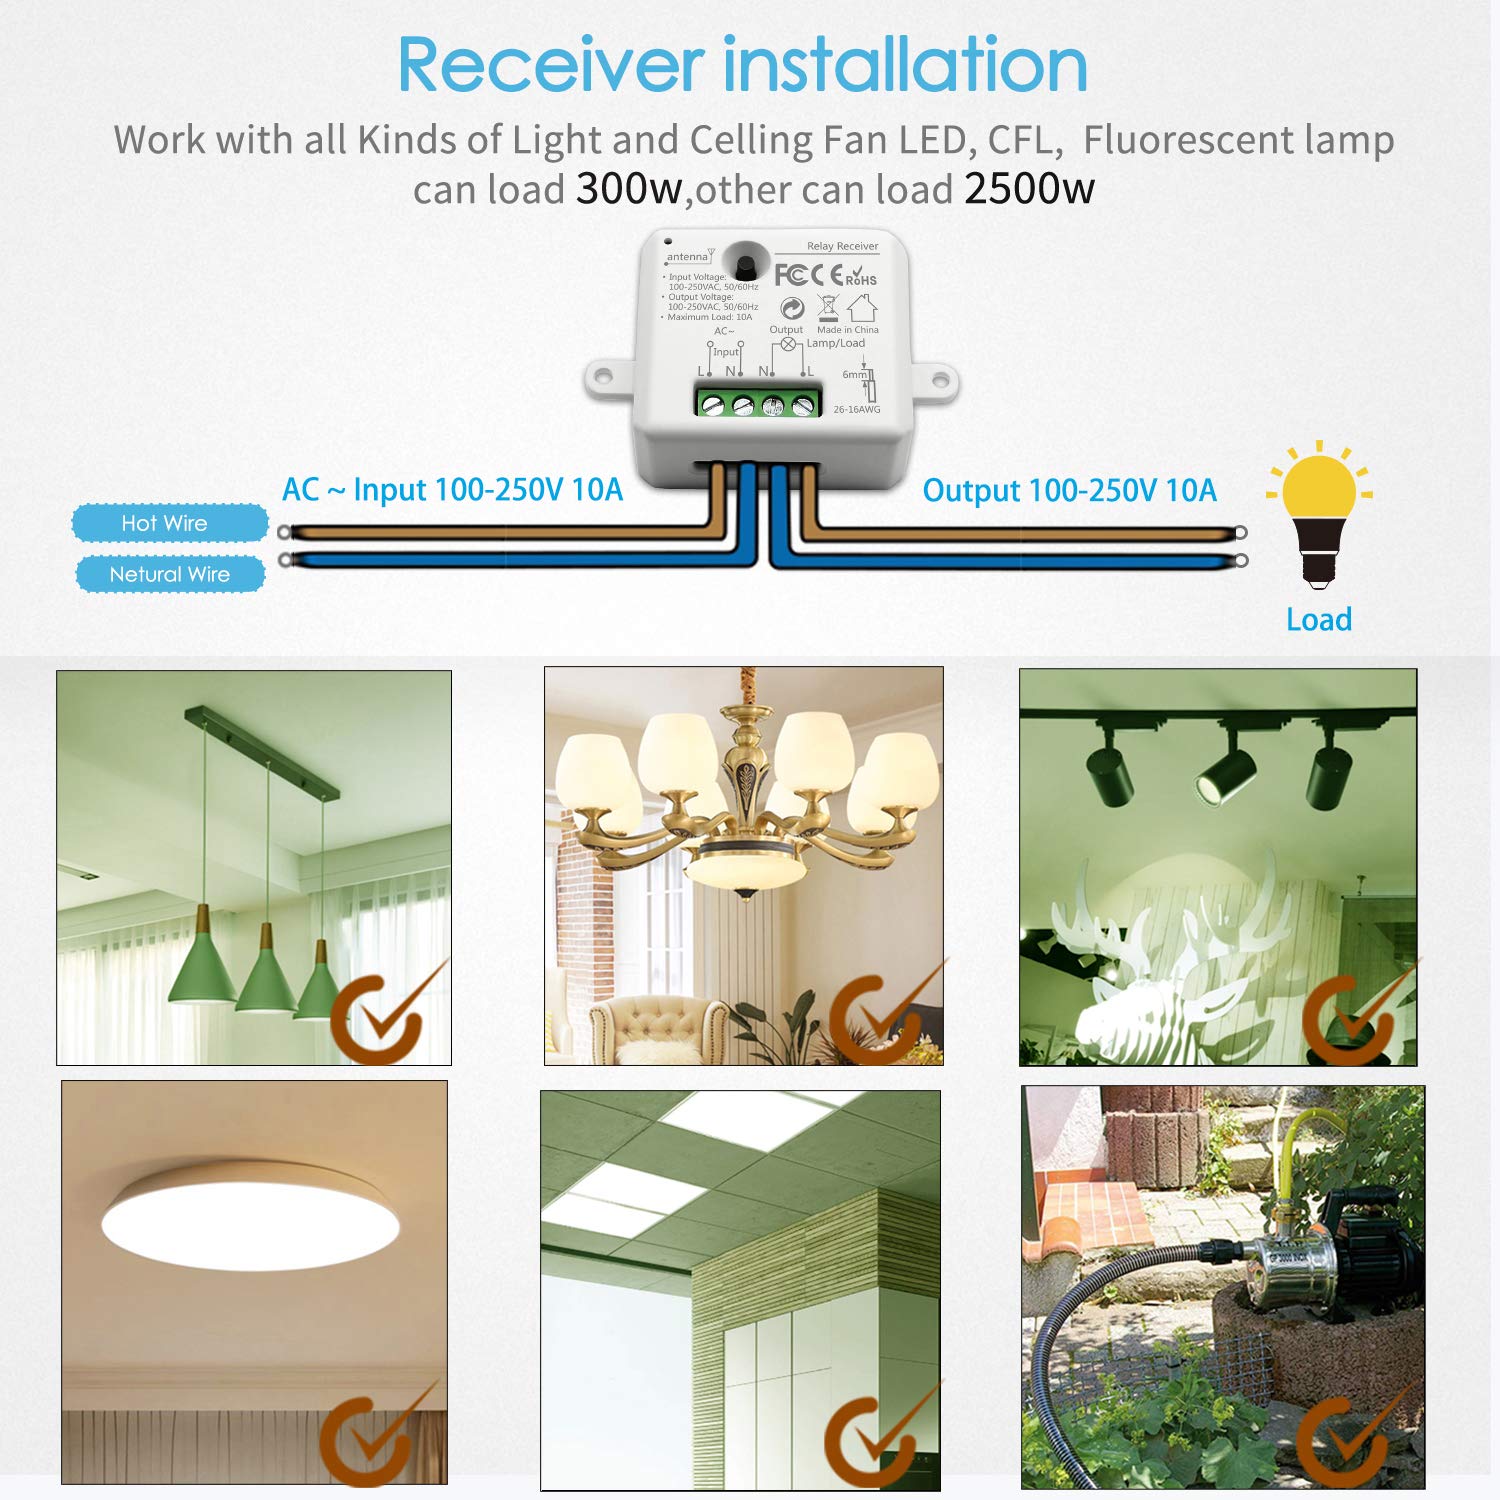
Figure 3: Receiver wiring diagram and compatible load types.
4.2 Pairing the Transmitter with the Receiver
The transmitter and receiver are typically pre-paired. If re-pairing is needed or for additional transmitters:
- Ensure the receiver is powered on.
- Press and hold the pairing button on the receiver (refer to receiver diagram for exact location) until its indicator light starts flashing.
- Within a few seconds, press either the 'ON' or 'OFF' button on the wireless transmitter.
- The receiver's indicator light will stop flashing, indicating successful pairing.
4.3 Mounting the Transmitter
The transmitter features a magnetic base for flexible mounting:
- Adhesive Mounting: Use the included double-sided adhesive sticker to fix the magnetic base to a desired wall surface.
- Magnetic Attachment: The transmitter can then be magnetically attached to or removed from this base, allowing it to function as a wall switch or a portable remote control.
5. Operating Instructions
5.1 Basic ON/OFF Function
Simply press the 'ON' button on the transmitter to turn the connected appliance on, and the 'OFF' button to turn it off.
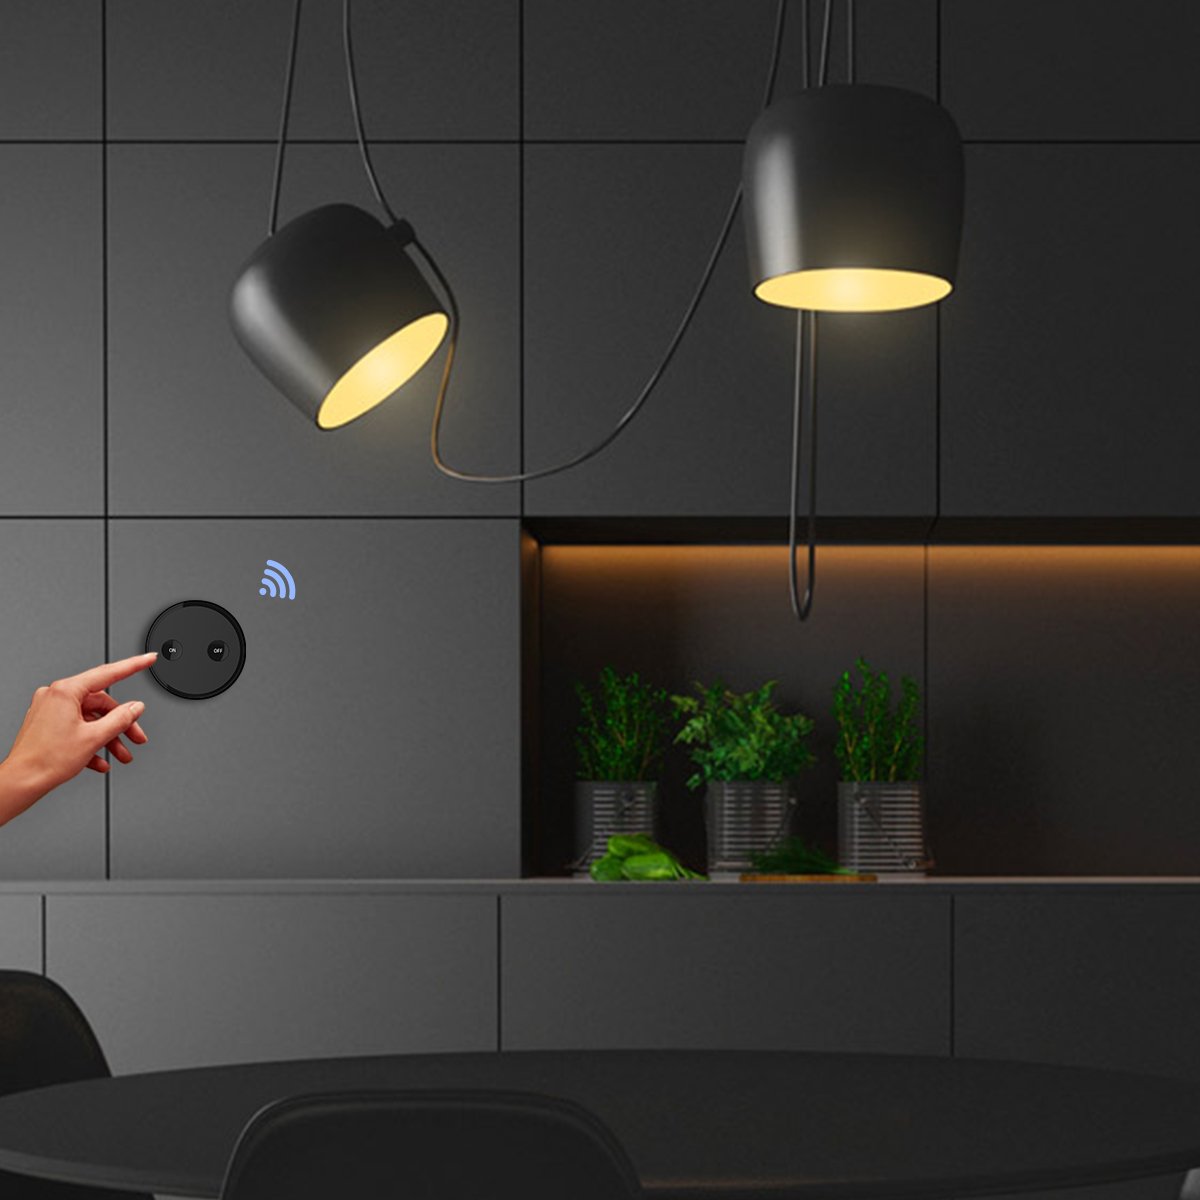
Figure 4: Operating the LoraTap wireless switch.
5.2 Portable Remote Control
Due to its magnetic attachment, the transmitter can be easily removed from its wall base and used as a portable remote control, offering flexibility in controlling your devices from anywhere within its range.

Figure 5: Transmitter used as a portable remote control.
5.3 Flexible Pairing Options
The LoraTap system supports flexible pairing configurations:
- Multiple Transmitters to One Receiver: Several transmitters can be paired to control a single receiver, allowing for multiple control points for one light or appliance.
- One Transmitter to Multiple Receivers: A single transmitter can be paired to control multiple receivers simultaneously, ideal for controlling groups of lights.
- The 868MHz frequency ensures no interference when using multiple units in the same area.

Figure 6: Flexible pairing configurations.
5.4 Signal Transmission
The wireless signal is designed to transmit effectively through walls, providing reliable control across rooms and even between floors.

Figure 7: Signal transmission through walls and control range.
6. Maintenance
6.1 Battery Replacement (Transmitter)
The transmitter uses a CR2032 battery with an expected life of over 10 years. To replace the battery:
- Carefully open the transmitter casing (refer to product diagram for battery compartment access).
- Remove the old CR2032 battery.
- Insert a new CR2032 battery, ensuring correct polarity.
- Close the casing securely.
6.2 Cleaning
Wipe the surfaces of the transmitter and receiver with a soft, dry cloth. Do not use liquid cleaners or abrasive materials.
7. Troubleshooting
- Device not responding:
- Check if the receiver has power.
- Ensure the transmitter battery is not depleted.
- Re-pair the transmitter and receiver as described in Section 4.2.
- Verify that the load connected to the receiver is within the specified power limits.
- Reduced control range:
- Ensure there are no new large metal objects or thick walls obstructing the signal path.
- Check for sources of strong radio interference nearby.
- The maximum range is achieved in open areas; indoor range is reduced by obstacles.
8. Specifications
| Brand | LoraTap |
| Item Model Number | 0745844206767 |
| ASIN | B079DV4W3B |
| Operating Voltage | 85-265 Volts AC |
| Current Rating | 10 A |
| Maximum Power | 2500W (Incandescent/Halogen), 300W (LED/Fluorescent) |
| Operating Mode | ON-ON-OFF |
| Switch Type | Remote control, Two-way (Va et vient) |
| Actuator Type | Two-way (Va et vient) |
| Mounting Type | Wall Mount |
| Material | Acrylonitrile Butadiene Styrene (ABS) |
| International Protection (IP) Rating | IP20 |
| Battery Type (Transmitter) | 1 Lithium metal (CR2032) |
9. Warranty and Support
The LoraTap Wireless Switch Kit comes with a 5-year warranty. This product is CE and RoHS certified, ensuring compliance with European safety, health, and environmental protection standards. For technical support or warranty claims, please contact LoraTap customer service through your purchase platform or the official LoraTap website.

