
Introduction
The NueMedics TENS Unit Muscle Stimulator is designed to provide temporary relief from pain associated with sore and aching muscles in the shoulder, waist, back, neck, upper extremities (arm), and lower extremities (leg) due to strain from exercise or normal household and work activities. This device uses Transcutaneous Electrical Nerve Stimulation (TENS) technology to deliver low-voltage pulses to the skin, stimulating nerve fibers and helping to block pain signals.
Important Safety Information
Legal Disclaimer: Statements regarding dietary supplements have not been evaluated by the FDA and are not intended to diagnose, treat, cure, or prevent any disease or health condition. Consult with a healthcare professional before using this device, especially if you have pre-existing medical conditions, are pregnant, or have a pacemaker.
Do not use this device if you have a pacemaker, defibrillator, or other implanted metallic or electronic device. Do not use on broken skin, open wounds, or areas with rashes. Avoid using near the heart, on the head, or on the front of the neck. Keep out of reach of children.
Package Contents
- NueMedics TENS Unit (Main Device)
- Electrode Pads (various sizes, including small and large)
- Lead Wires (2 sets)
- USB Charging Cable
- Wall Adapter
- User Manual
- Carrying Pouch
- Pad Placement Guide
- Silicone Cover Case
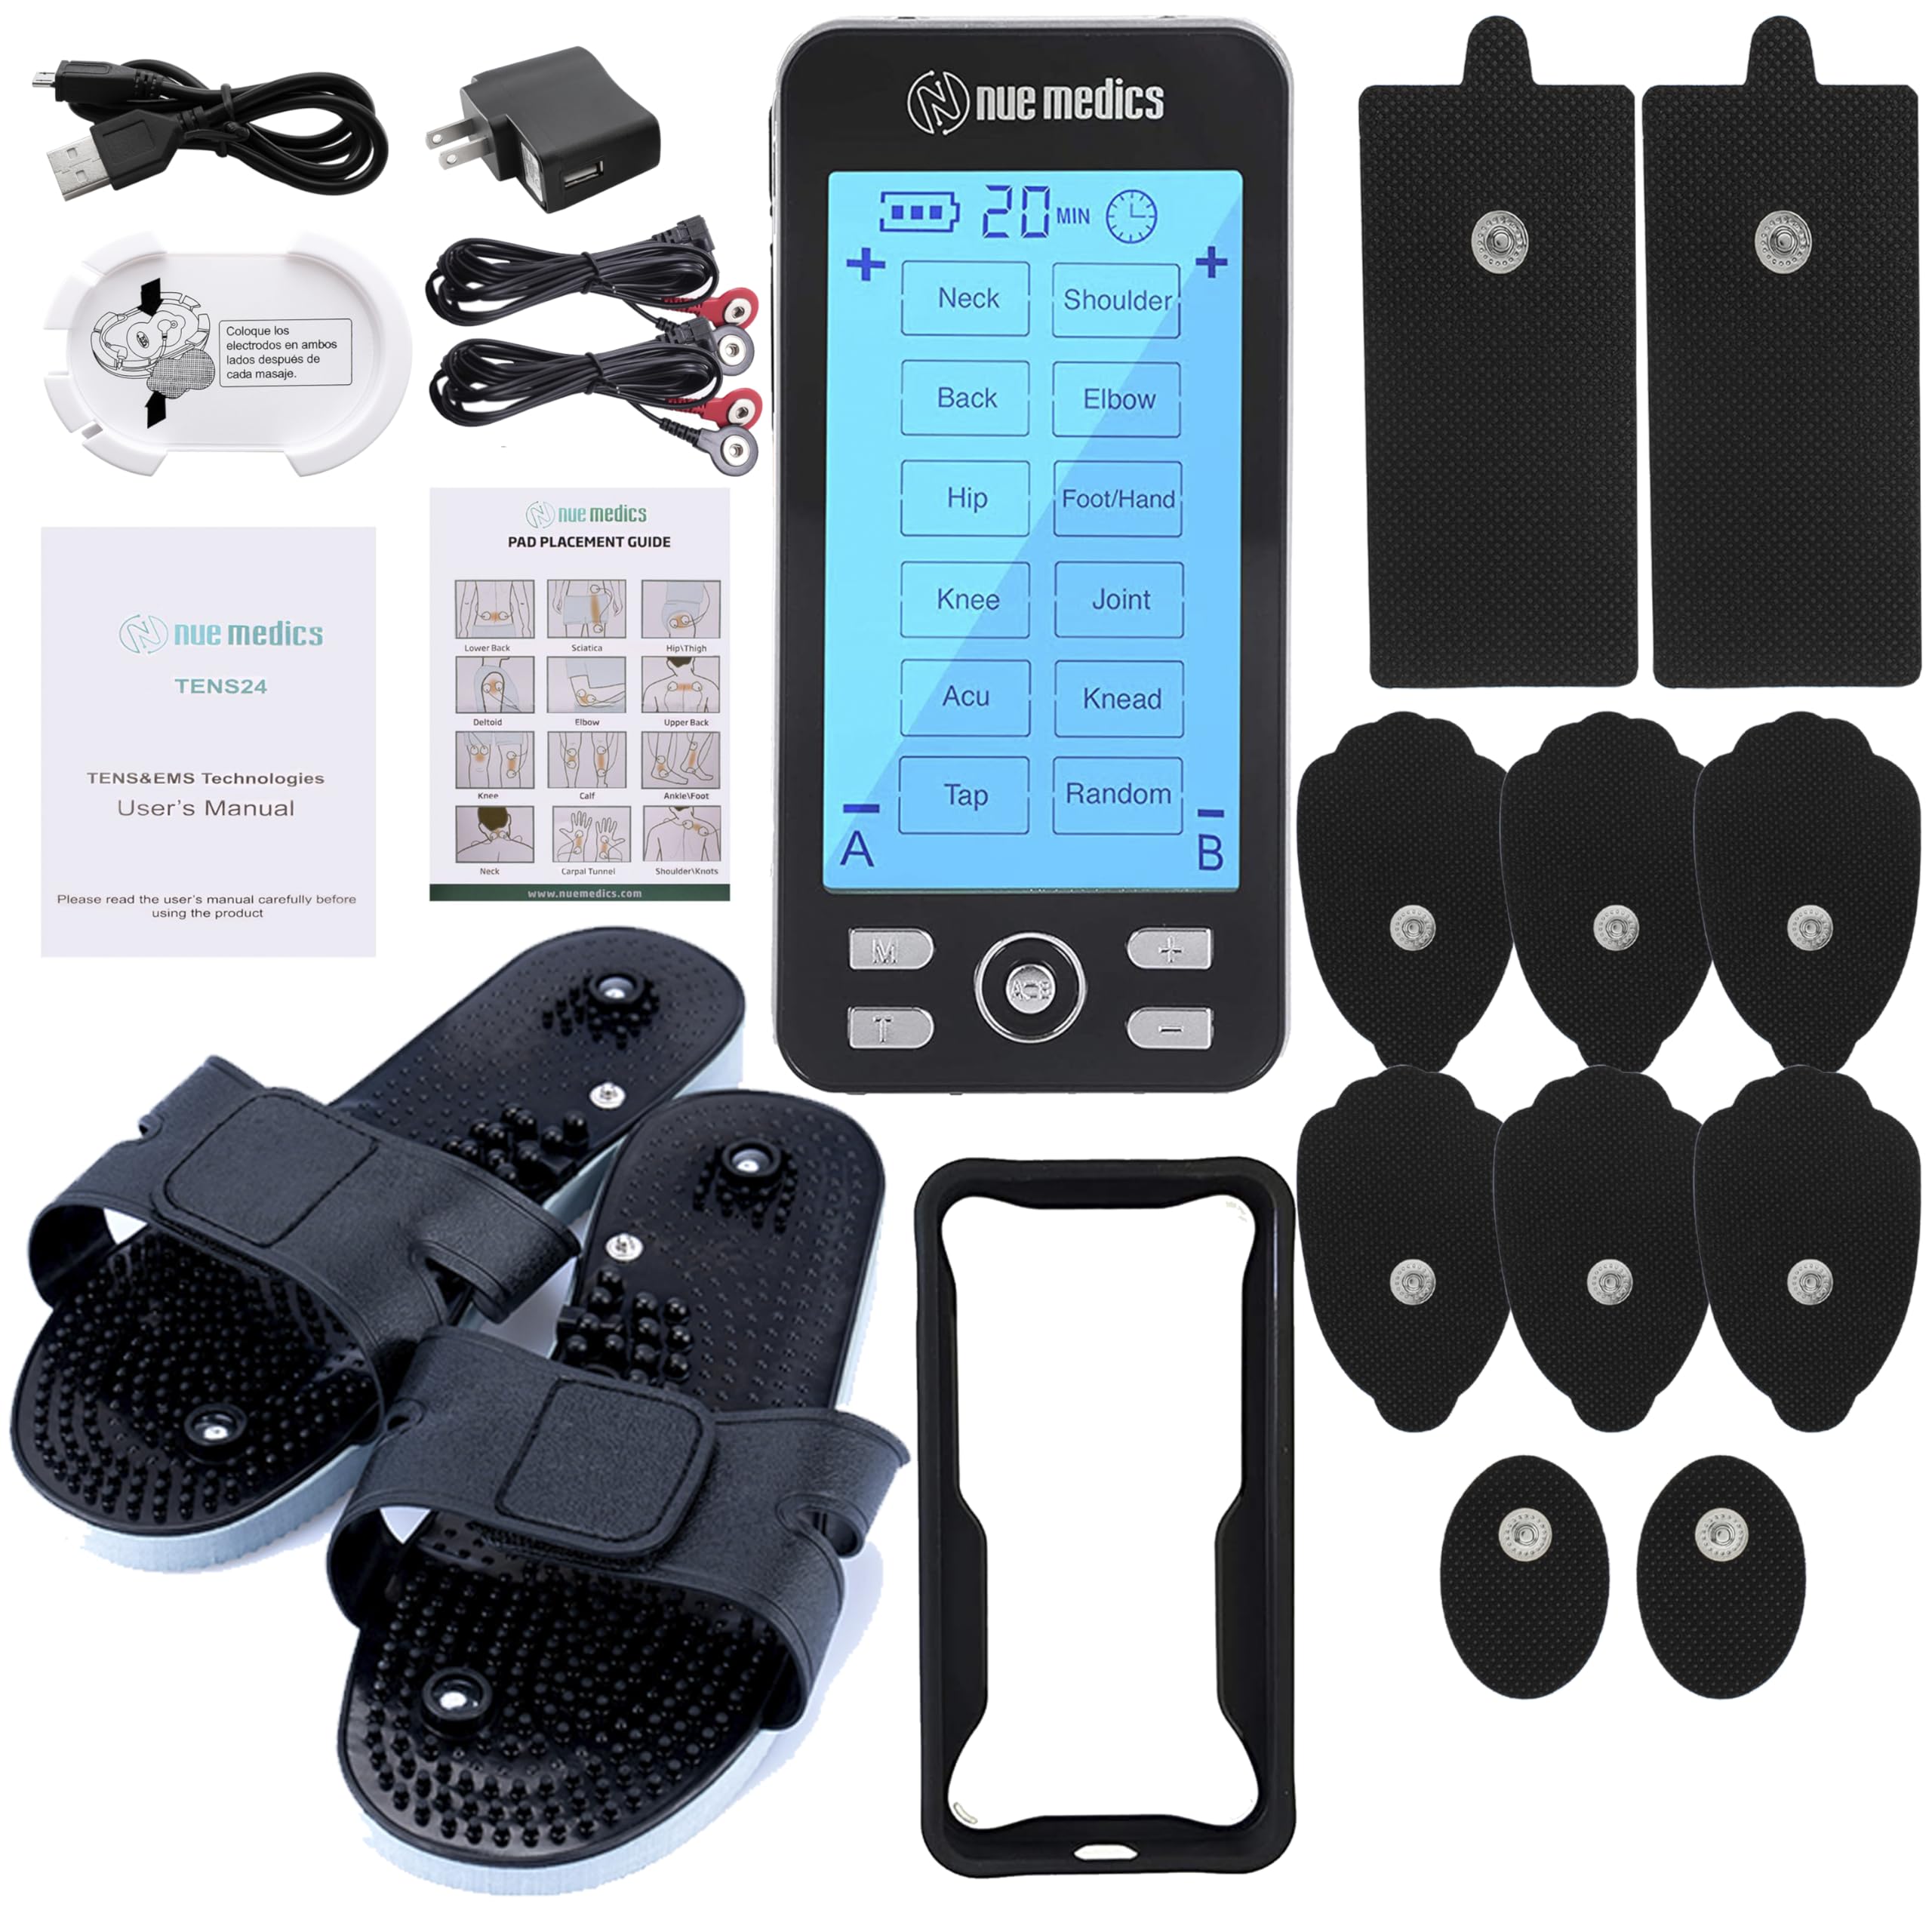
Image: The NueMedics TENS Unit with its included accessories, such as electrode pads, lead wires, and charging components.
Product Overview
The NueMedics TENS Unit is a compact, rechargeable device featuring an LCD screen and intuitive controls for easy operation. It offers 24 massage modes and adjustable intensity levels to suit individual needs.

Image: Front view of the TENS unit, showing the screen with various mode selections.

Image: Back view of the TENS unit, highlighting the silicone cover case for protection.
Controls and Ports:
- Power Switch: Located on the top of the unit.
- Mode (M) Button: Cycles through main massage modes.
- Time (T) Button: Adjusts treatment duration.
- Intensity Buttons (+/-): Increases or decreases stimulation intensity.
- Channel (A/B) Button: Switches between output channels for independent intensity control.
- Lock Button: Locks the screen to prevent accidental changes.
- Lead Wire Ports: Located at the top for connecting electrode cables.
- Charging Port: Micro-USB port at the bottom for charging.
Setup Instructions
- Charge the Unit: Before first use, fully charge the TENS unit using the provided USB cable and wall adapter. The battery indicator on the screen will show charging status.
- Connect Lead Wires to Pads: Insert the pin connectors of the lead wires into the small holes on the electrode pads. Ensure a secure connection.
- Attach Pads to Skin: Peel the protective film from the adhesive side of the electrode pads. Apply the pads firmly to clean, dry skin on the desired treatment area. Ensure the pads are not placed on broken skin or over sensitive areas.
- Connect Lead Wires to Unit: With the unit turned OFF, plug the lead wire connectors into the ports at the top of the TENS unit.
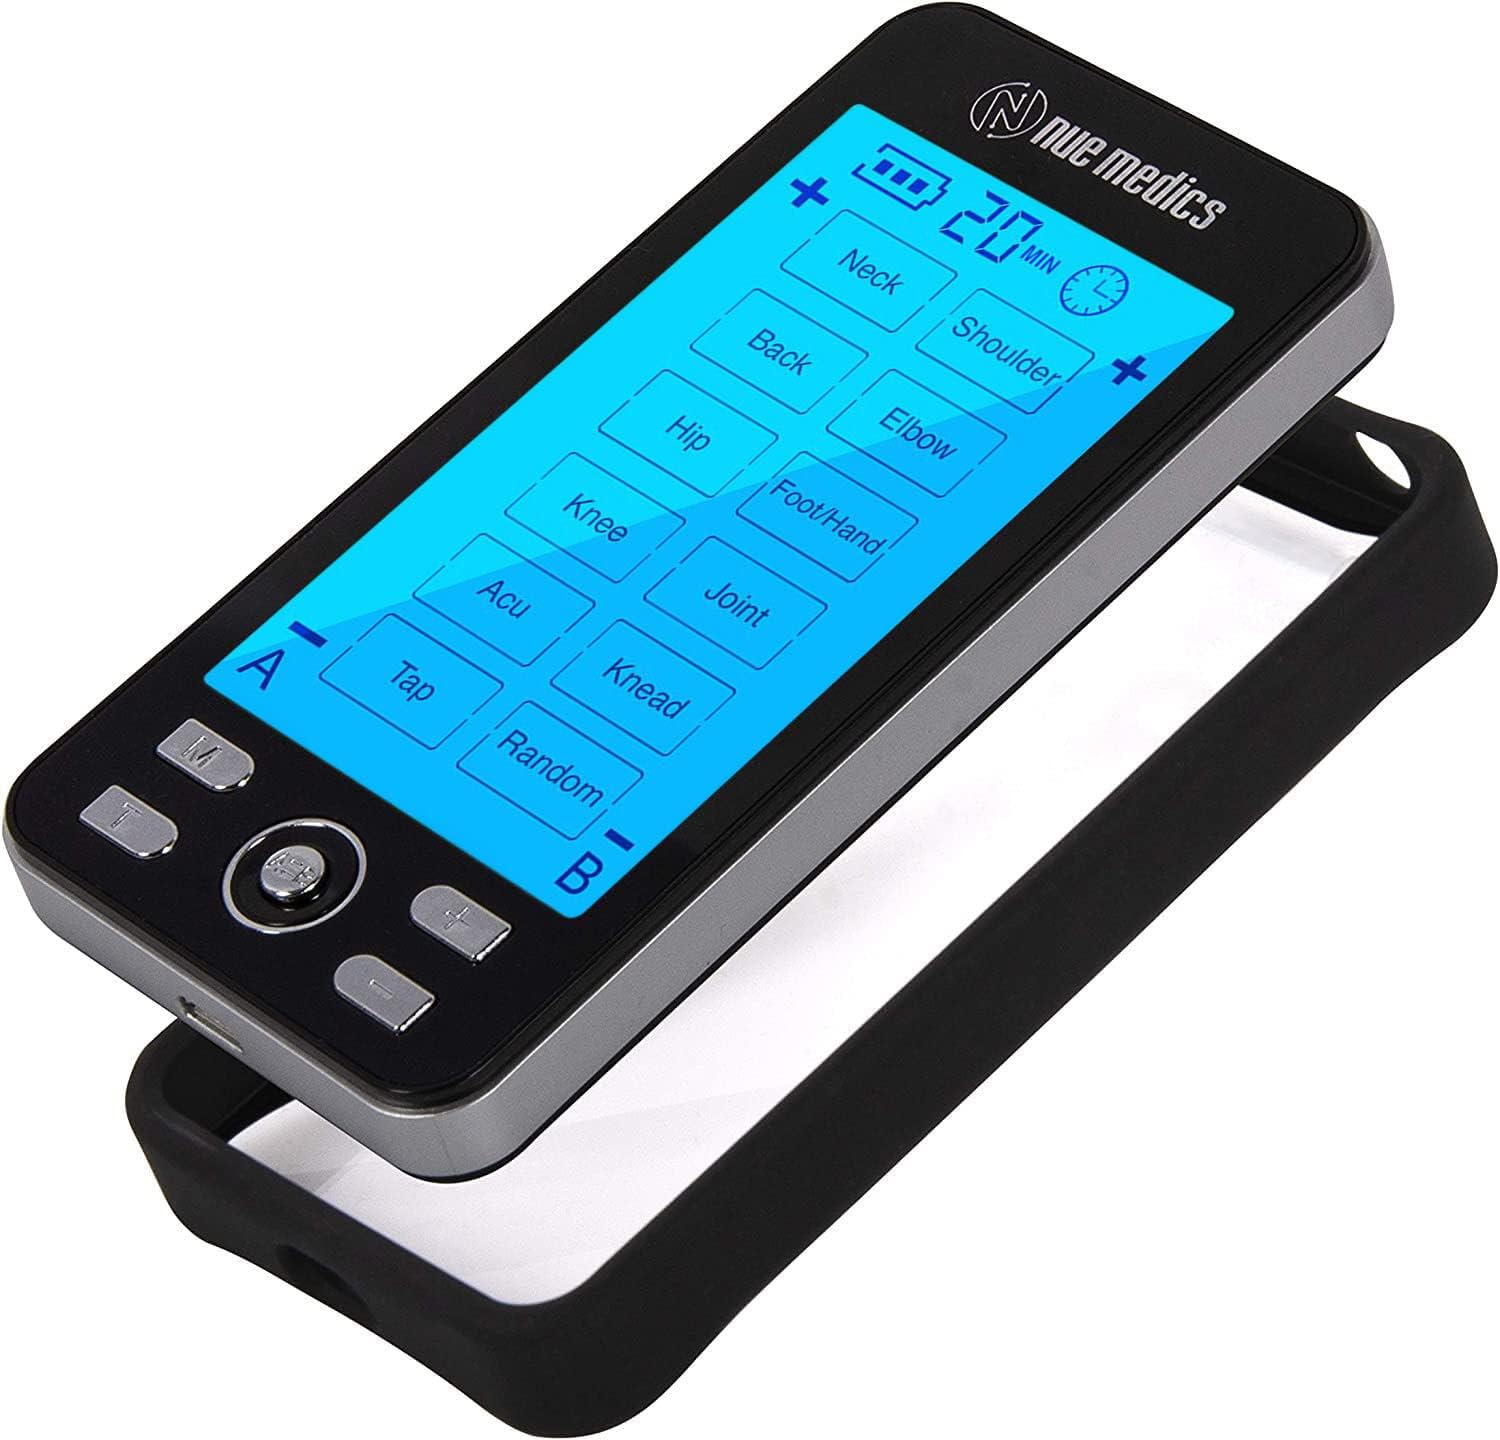
Image: The TENS unit with lead wires properly connected to both the device and the electrode pads.
Operating Instructions
- Turn On: Slide the power switch located on the top of the unit to the "ON" position. The screen will illuminate.
- Select Mode: Press the M (Mode) button to cycle through the 24 available massage modes. Each mode offers a different type of stimulation (e.g., kneading, tapping, acupuncture-like).
- Adjust Intensity: Use the + and - buttons to increase or decrease the intensity of the stimulation. Start with the lowest intensity and gradually increase until you feel a comfortable, yet effective, sensation.
- Set Timer: Press the T (Time) button to adjust the treatment duration. The default time is typically 20 minutes, and it can be adjusted in increments.
- Lock Screen (Optional): To prevent accidental changes during use, long-press the central button (often labeled A/B or with a lock icon) to lock the screen. Repeat to unlock.
- Independent Channel Control: If using two sets of pads (connected to Channel A and Channel B ports), you can adjust their intensities independently. Use the A/B button to switch between channels and then adjust intensity with +/- buttons.
- Turn Off: After your session, slide the power switch to the "OFF" position.

Image: Diagram showing the 'M' (Mode) button.

Image: Diagram showing the 'T' (Time) button.

Image: Diagram showing the '+/-' (Intensity) buttons.

Image: Diagram showing the 'A/B' (Channel) button.
Electrode Pad Placement Guide
Proper placement of electrode pads is crucial for effective and safe stimulation. Refer to the diagrams below for common application areas. Always ensure pads are placed on clean, dry, unbroken skin.

Image: Visual guide for optimal electrode pad placement on different body areas to target specific muscle groups for pain relief.
Specialized Pad Use:
The unit also supports specialized accessories like conductive slippers for foot stimulation. Connect the lead wires to the slippers as shown.

Image: Instructions for connecting lead wires to conductive slippers for targeted foot stimulation.
Maintenance
- Cleaning Pads: After each use, gently wipe the adhesive side of the pads with a damp cloth. Do not use harsh chemicals.
- Storing Pads: Reattach the protective film to the adhesive side of the pads after use to maintain stickiness and prolong their lifespan. Store them in a cool, dry place.
- Replacing Pads: Electrode pads are reusable but will lose their adhesiveness over time (typically up to 6 uses). Replace them when they no longer stick firmly to the skin. Replacement pads can be purchased separately.
- Cleaning Unit: Wipe the main unit with a soft, dry cloth. Do not immerse in water or use abrasive cleaners.
Troubleshooting
If you experience issues with your TENS unit, consider the following common problems and solutions:
- No Sensation or Weak Stimulation:
- Ensure the unit is turned ON and fully charged.
- Check that lead wires are securely connected to both the pads and the unit.
- Verify pads are firmly attached to the skin.
- Increase the intensity level gradually using the '+' button.
- Replace old or worn-out electrode pads.
- Sparking Sensation:
- This can occur if an electrode is not fully touching the skin. Reapply the pad firmly or replace it if it has lost adhesiveness.
- Screen Flashing / Device Malfunction:
- Ensure proper connection of pads to skin and unit.
- If the screen continues to flash or the device behaves unexpectedly, refer to the detailed user manual or contact customer support.
Visual Troubleshooting Guide:
For specific visual troubleshooting scenarios, refer to the official video guide below:
Video: Official troubleshooting guide for common issues like screen flashing and device connectivity problems.
Specifications
| Model Number | B07995GLHW |
| Brand | NueMedics |
| Power Source | 1 Lithium Polymer battery (rechargeable) |
| Number of Modes | 24 Massage Modes |
| Dimensions | 12.2 x 6.81 x 6.61 inches |
| Weight | 5 ounces |
| Manufacturer | NueMedics |
Warranty and Support
For any questions, concerns, or support needs regarding your NueMedics TENS Unit, please refer to the contact information provided in your product packaging or visit the official NueMedics website. This product is from a small business brand, dedicated to customer satisfaction.
Common Questions:
- What is Tens 24? It is a combination of TENS and PMS devices programmed for 24 massage modes, a drug-free method of pain relief used by Physical Therapists and prescribed by Doctors for over 40 years. NueMedics Tens unit delivers low-voltage pulses to the skin to stimulate nerve fibers effectively blocking the pain signal to your brain. It also increases natural endorphins (a natural pain reliever).
- Does this device require batteries or is it rechargeable? NueMedics Tens Unit 24 has a rechargeable internal lithium battery. Up to 20 hours of continuous use.