
1. Introduction
Thank you for choosing Luposwiten 100 LED Solar Motion Lights. This manual provides essential information for the safe and efficient use of your new solar lights. Please read it thoroughly before installation and operation.
These solar lights are designed to provide bright, motion-activated illumination for outdoor areas, utilizing solar energy for power. They are an energy-efficient and convenient lighting solution for various outdoor applications.
2. Product Details
The Luposwiten 100 LED Solar Motion Lights are equipped with advanced features for optimal performance and durability.
- LED Light: 4.8W, 6000K-6500K color temperature, 100 powerful LEDs.
- Brightness: 2000 Lumens, providing excellent illumination.
- Li-ion Battery: 3.7V, 2600mAh capacity.
- Solar Panel: 2W Polycrystalline Silicon for efficient charging.
- IP Degree: IP65 Waterproof, ensuring durability in various weather conditions.
- Beam Angle: 125° wide lighting angle.
- Detection Distance: 8-10 meters (26-33 feet).
- Material: Acrylonitrile Butadiene Styrene.
- Dimensions: 10"L x 4"W x 3"H.

Image: Luposwiten 100 LED Solar Light with 125° wide lighting angle for broad coverage.
3. Package Contents
Each package contains the following items:
- 2 x Luposwiten Solar Lights
- 4 x Expansion Pillar-hinges
- 4 x Installing Screws
- 1 x Key Pin (for activation)
- 1 x User Manual
4. Setup Instructions
Follow these steps to prepare your solar lights for use:
- Unpack: Carefully remove all components from the packaging.
- Remove Protective Film: Peel off the transparent protective film from the solar panel to ensure optimal charging.
- Activate the Solar Light: Locate the small on/off switch hole (often indicated by a power symbol) near the motion sensor. Insert the provided key pin into this hole and press firmly to activate the light. You should feel a click.
- Initial Charge: Place the solar lights in direct sunlight for 6-8 hours to allow the battery to fully charge before first use. This ensures maximum performance.
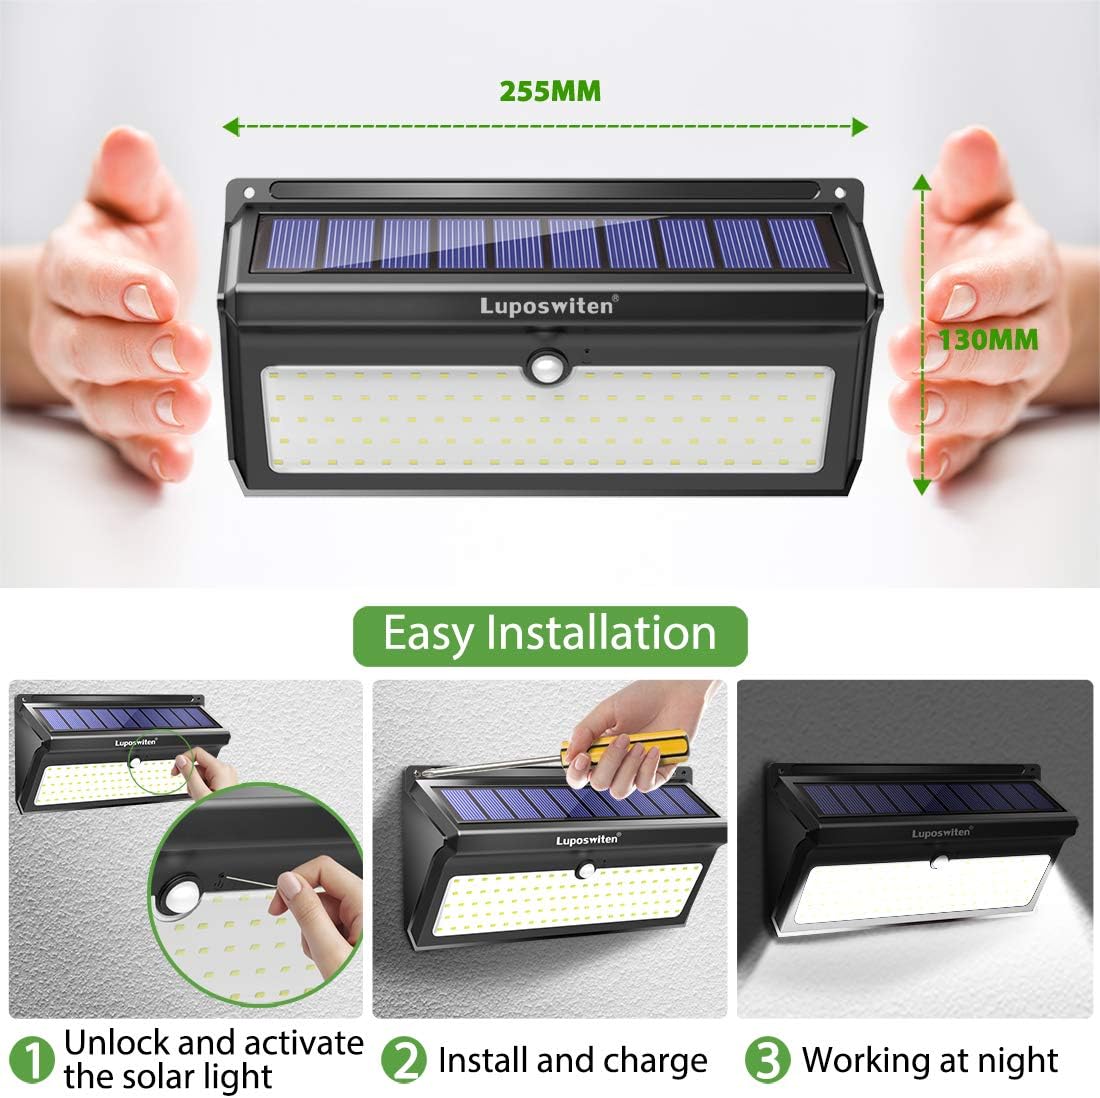
Image: Visual guide for unlocking, installing, and charging the solar light.
Video: Unboxing and initial activation of the Luposwiten solar light, demonstrating how to use the key pin to turn it on.
5. Operating Modes
The Luposwiten solar lights feature a single operating mode:
- Motion Sensor Mode: The light will automatically turn on at full brightness (2000 lumens) when motion is detected in the dark. It will remain on for approximately 30 seconds and then turn off if no further motion is detected. This mode is designed for security and energy saving.
Note: These lights do not have a dim mode or a dusk-to-dawn continuous light mode. They operate solely on motion detection in dark conditions.
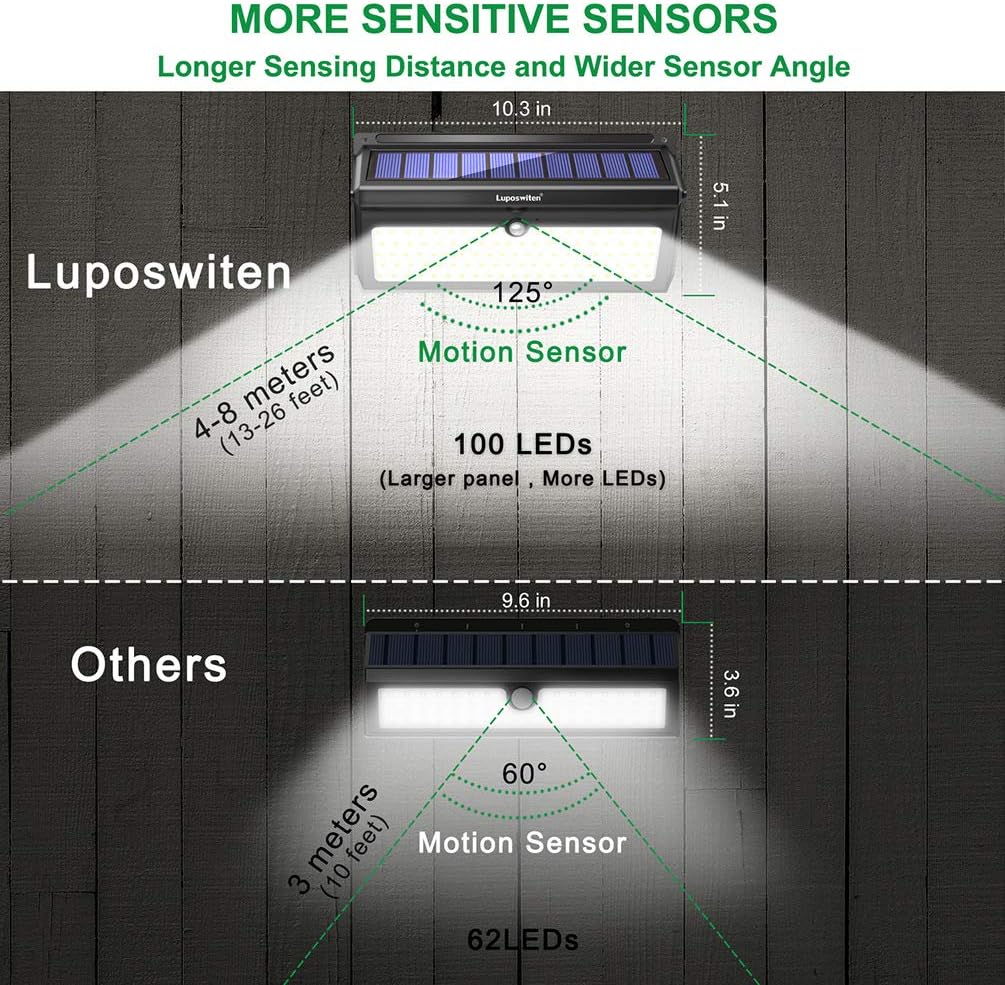
Image: Illustration comparing the wider sensing distance and angle of Luposwiten lights versus other models.
6. Installation
Choose an installation location that receives ample direct sunlight throughout the day. The recommended installation height is 2.5-4 meters (8-13 feet) for optimal motion detection and light coverage.
- Mark Drill Holes: Hold the light against the desired surface and mark the positions for the two screw holes.
- Drill Holes: Use a drill to create holes at the marked positions.
- Insert Pillar-hinges: Insert the expansion pillar-hinges into the drilled holes.
- Mount the Light: Align the light's mounting holes with the pillar-hinges and secure it with the provided screws.
Video: A detailed demonstration of installing the Luposwiten solar light on a wall, including drilling and securing the unit.
7. Maintenance
To ensure the longevity and optimal performance of your solar lights, regular maintenance is recommended:
- Clean Solar Panel: Periodically wipe the solar panel with a soft, damp cloth to remove dust, dirt, or debris that may obstruct sunlight and reduce charging efficiency.
- Clear Obstructions: Ensure no trees, bushes, or other objects are blocking direct sunlight from reaching the solar panel.
- Check Mounting: Periodically check that the light is securely mounted and has not become loose due to weather conditions.
8. Troubleshooting
If your solar light is not functioning as expected, consider the following:
- Light Not Turning On:
- Ensure the light has been activated using the key pin.
- Verify the solar panel is receiving adequate direct sunlight for charging (6-8 hours).
- Check if the ambient light is too bright; the motion sensor only activates in dark conditions.
- Short Illumination Time:
- The battery may not be fully charged. Allow more time for charging in direct sunlight.
- Ensure the solar panel is clean and free from obstructions.
- Motion Sensor Not Responding:
- Confirm the light is installed within the recommended height range (2.5-4 meters).
- Ensure there are no obstructions directly in front of the sensor.
If problems persist, please contact customer support for assistance.
9. Specifications
| Feature | Detail |
|---|---|
| Brand | Luposwiten |
| Model Number | LP-SL-100D |
| LED Quantity | 100 |
| Brightness | 2000 Lumens |
| Color Temperature | 6000K-6500K (White) |
| Power Source | Solar Powered |
| Battery | 3.7V, 2600mAh Li-ion |
| Solar Panel | 2W Polycrystalline Silicon |
| Water Resistance | IP65 Waterproof |
| Beam Angle | 125° |
| Detection Distance | 8-10 meters (26-33 feet) |
| Working Time | 4-5 nights (after full charge) |
| Charging Time | 6-8 hours (direct sunlight) |
| Installation Height | 2.5-4 meters (8-13 feet) |
| Material | Acrylonitrile Butadiene Styrene |
| Product Dimensions | 10"L x 4"W x 3"H |
| Item Weight | 6.7 ounces |
10. Warranty and Support
Luposwiten provides a 60-day warranty for replacement on these solar lights. For any issues or inquiries, please contact the seller directly.
Seller: LuposwitenDirect
For further assistance, refer to the contact information provided in your product packaging or on the seller's Amazon store page.