1. Introduction
The BMI Power Badger Engine Block Heater Controller 1800US is designed to optimize the operation of engine block heaters, battery warmers, and pad/tank heaters. This device intelligently senses outside temperatures and automatically adjusts heating times, leading to significant energy savings and reliable cold-weather vehicle starting. Its rugged, water-resistant design ensures durability in harsh winter conditions.
This manual provides essential information for the proper setup, operation, and maintenance of your Power Badger controller.
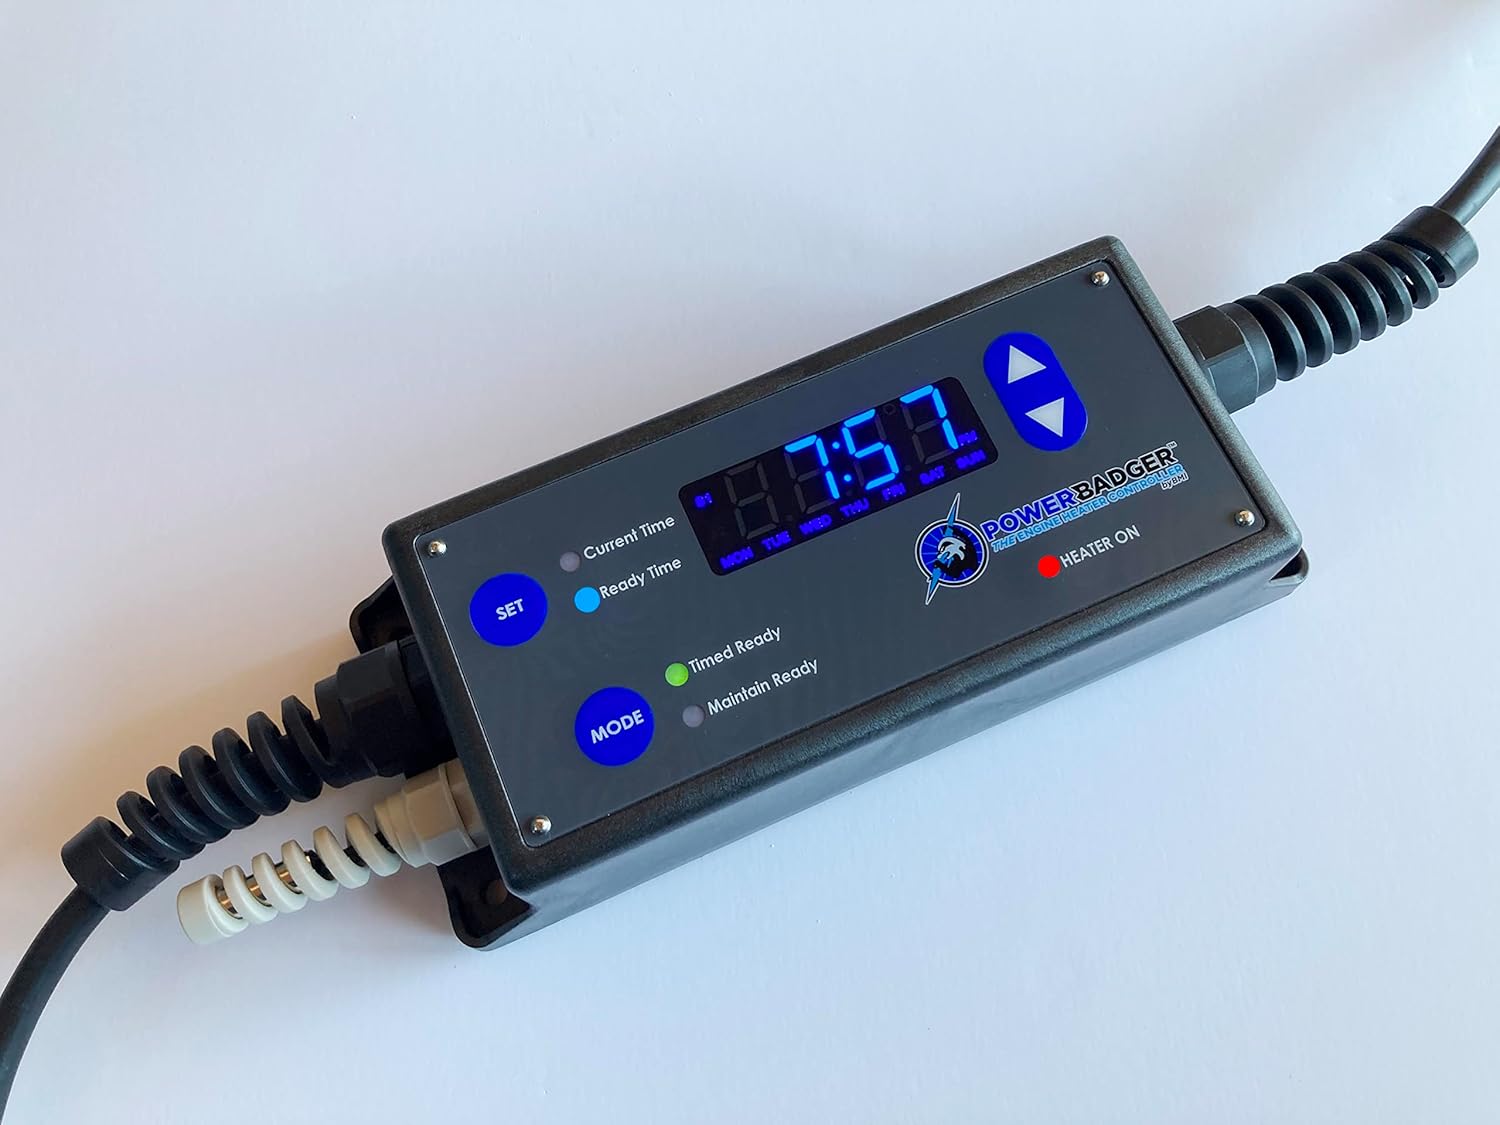
Figure 1: BMI Power Badger Engine Block Heater Controller 1800US.
2. Product Features
- Energy Efficiency: Automatically senses outside temperature to adjust heating cycles, reducing electricity consumption.
- Dual Operating Modes: Features 'Timed Ready' and 'Maintain Ready' modes to suit various user needs.
- Robust Design: Constructed with a rugged, water-resistant casing suitable for extreme cold, snowy, icy, and wet environments.
- Versatile Control: Capable of controlling block heaters, battery warmers, and pad/tank heaters up to 1800 Watts.
- 7-Day Programmable: Allows for custom scheduling of heating cycles throughout the week.
- Easy Installation: No complex installation required; simply plugs in between the wall outlet and your heater.
3. Setup
Setting up your Power Badger controller is a straightforward process. Ensure the unit is placed in a location where its temperature sensor can accurately read ambient outdoor temperatures and is protected from direct immersion in water.
- Mounting: The controller features mounting screws on its backside for secure attachment to a surface, preventing it from dangling.
- Power Connection: Plug the Power Badger controller directly into a standard 120V AC wall outlet.
- Heater Connection: Plug your engine block heater, battery warmer, or pad heater into one of the two available outlets on the Power Badger controller. The unit supports up to 1800 Watts total.

Figure 2: Power Badger Controller showing input and output connections.

Figure 3: Rear view of the Power Badger Controller, highlighting mounting screw locations.
4. Operating Modes
The Power Badger offers two primary operating modes, selectable via the MODE button:
- Timed Ready Mode: In this mode, you set a specific time by which your engine should be ready to start. The controller uses its temperature sensor to determine the optimal time to activate the heater, ensuring the engine is warm by your set 'Ready Time' while minimizing energy consumption.
- Maintain Ready Mode: This mode is ideal for situations where the engine needs to be ready to start at any moment. The controller will continuously monitor the temperature and activate the heater as needed to maintain the engine at a ready state 24/7, balancing readiness with energy efficiency.

Figure 4: User interacting with the MODE button to select operating mode.
5. Programming Instructions
The Power Badger controller allows for up to 10 different programmable schedules. The control panel is protected by a weatherproof door.
5.1. Setting Current Time
- Open the weatherproof door to access the control panel.
- Press the SET button to enter time setting mode.
- Use the Up/Down arrows to adjust the hour, minute, and AM/PM settings.
- Press SET again to confirm each setting and move to the next.
5.2. Setting Ready Time (Timed Ready Mode)
This setting defines the time by which your engine should be warm and ready to start.
- Ensure the controller is in 'Timed Ready' mode (indicated by the corresponding LED).
- Press the SET button until 'Ready Time' is displayed.
- Use the Up/Down arrows to set your desired ready time (hour, minute, AM/PM).
- Press SET to save the ready time.
5.3. Programming Schedules
The Power Badger allows for detailed 7-day programming. Refer to the official product video for a visual guide on advanced programming.
Video 1: Official Power Badger Engine Block Heater Controller Introduction and Programming Guide. This video provides a visual walkthrough of the controller's features and programming steps.
- Press the PROG button to enter programming mode.
- Use the WEEK button to select the day(s) of the week for the program.
- Use the HOUR and MIN buttons to set the ON time for the program.
- Press PROG again to set the OFF time for the same program.
- Repeat for up to 10 different ON/OFF programs.
- To exit programming mode, press the CLOCK button.
5.4. Manual Override
To manually turn the heater ON or OFF, press the MANUAL button. This will override any active program until the next scheduled ON/OFF event.
5.5. Resetting the Controller
If you need to clear all settings and return the controller to its factory defaults, locate the recessed RESET button (usually requires a small pointed object like a pen tip to press). Pressing this button will erase all programmed times and reset the clock.
6. Maintenance
The Power Badger controller is designed for durability in outdoor conditions. Regular maintenance helps ensure its longevity and optimal performance.
- Cleaning: Periodically wipe down the unit with a damp cloth to remove dirt, snow, or ice. Ensure the weatherproof door is securely closed after cleaning.
- Connection Check: Regularly inspect the power plug and heater connections for any signs of wear, damage, or corrosion. Ensure they are firmly seated.
- Temperature Sensor: Keep the temperature sensor clear of debris, snow, or ice to ensure accurate readings.
- Storage: If storing the unit for an extended period, unplug it from the power source and store it in a dry, protected area.

Figure 5: Power Badger Controller operating in snowy conditions, demonstrating its rugged design.
7. Troubleshooting
If you encounter issues with your Power Badger controller, refer to the following common troubleshooting steps:
- No Power/Display Off:
- Ensure the controller is securely plugged into a live 120V AC outlet.
- Check the circuit breaker for the outlet.
- The unit has an internal battery backup for settings, but requires external power for the display and operation.
- Heater Not Activating:
- Verify that the heater is properly plugged into the Power Badger's output.
- Check the selected operating mode (Timed Ready or Maintain Ready) and ensure the programmed times are correct.
- In 'Timed Ready' mode, the heater will only activate when necessary to reach the target temperature by the set time. If the ambient temperature is too high, it may not activate.
- Ensure the total wattage of connected devices does not exceed 1800 Watts.
- Incorrect Time/Date:
- Reprogram the current time and date as described in Section 5.1.
- If settings are lost frequently, ensure the unit maintains consistent power or consider a full reset and reprogramming.
- Display Issues:
- Ensure the weatherproof door is clean and not obstructing the display.
- If the display is faint or erratic, ensure the unit is receiving stable power.
8. Specifications
| Specification | Value |
|---|---|
| Brand | BMI |
| Model | 1800US |
| Item Weight | 3 pounds |
| Amperage | 15 Amps |
| Voltage | 120 Volts |
| Wattage | 1800 watts |
| Manufacturer Part Number | 1800US |
| Date First Available | January 11, 2018 |
9. Warranty and Support
For warranty information, technical support, or service inquiries regarding your BMI Power Badger Engine Block Heater Controller 1800US, please refer to the documentation included with your purchase or contact BMI directly. Contact details are typically available on the manufacturer's official website or product packaging.


