1. Product Overview
The Andoer PH-720B is a panoramic gimbal head designed for precise and stable camera positioning, ideal for panoramic and close-up photography. Constructed from durable aluminum alloy with CNC precision machining and an anode anti-oxidation treatment, it offers robust support for DSLR cameras.
Key Features:
- Aluminium alloy construction for durability and stability.
- Three independently adjustable arms for versatile camera positioning.
- Quick release plate with a standard 1/4" screw and anti-slip rubber pad for secure camera attachment.
- 360° panning movement with calibrated precision for accurate panoramic image capture.
- Adjustable degree stop increments: 15°, 30°, 45°, 60°, 90°.
- Compatible with tripods, monopods, and Arca-Swiss standard clamps (1/4" or 3/8" screw mounts).
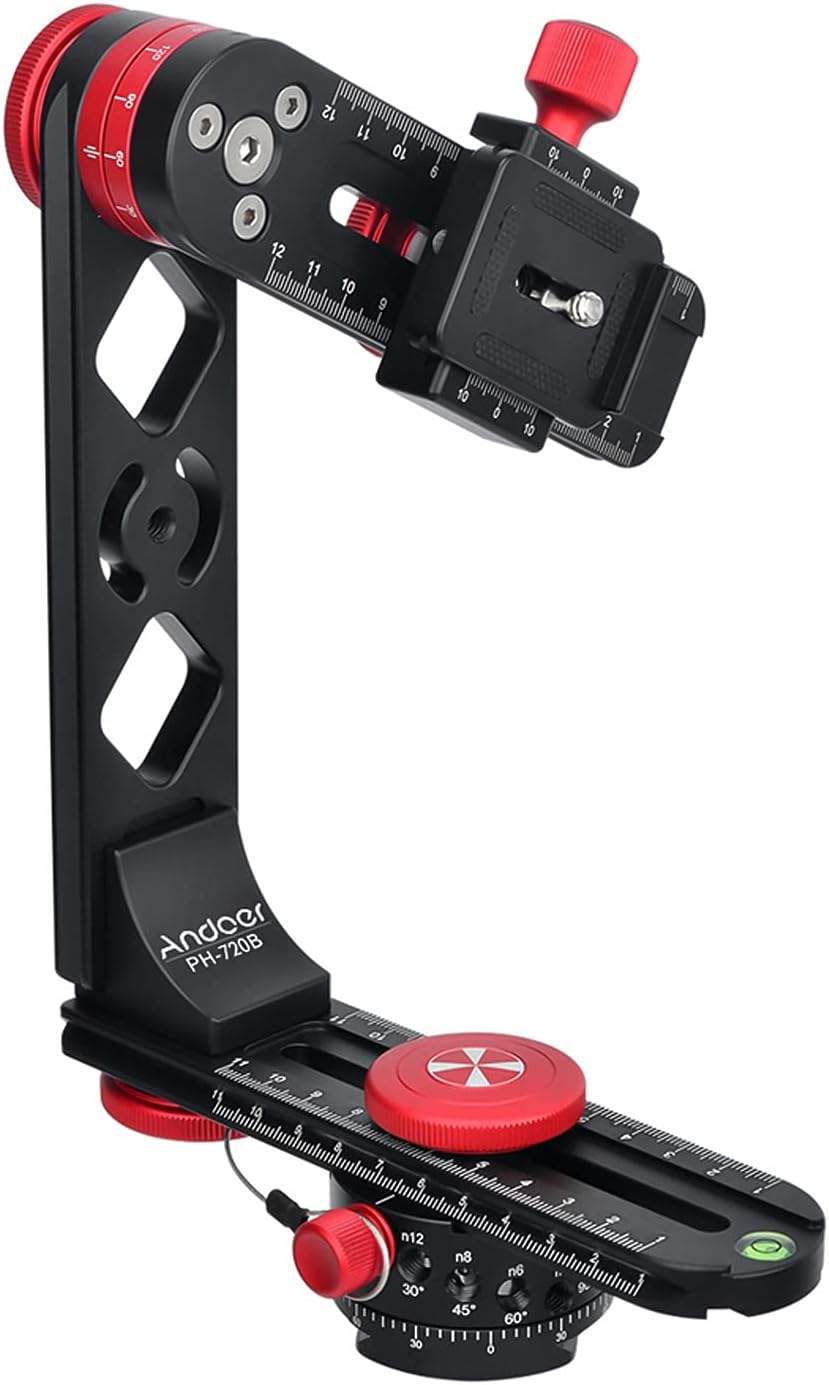
Figure 1: Assembled Andoer PH-720B Panoramic Gimbal Head. This image displays the main components including the horizontal and vertical arms, quick release plate, and adjustment knobs.
2. Package Contents
Please verify that all items are present in the package:
- Andoer PH-720B Panoramic Gimbal Head (main assembly)
- Quick Release Plate
- Carry Bag
- Additional mounting screws/adapters (if applicable)
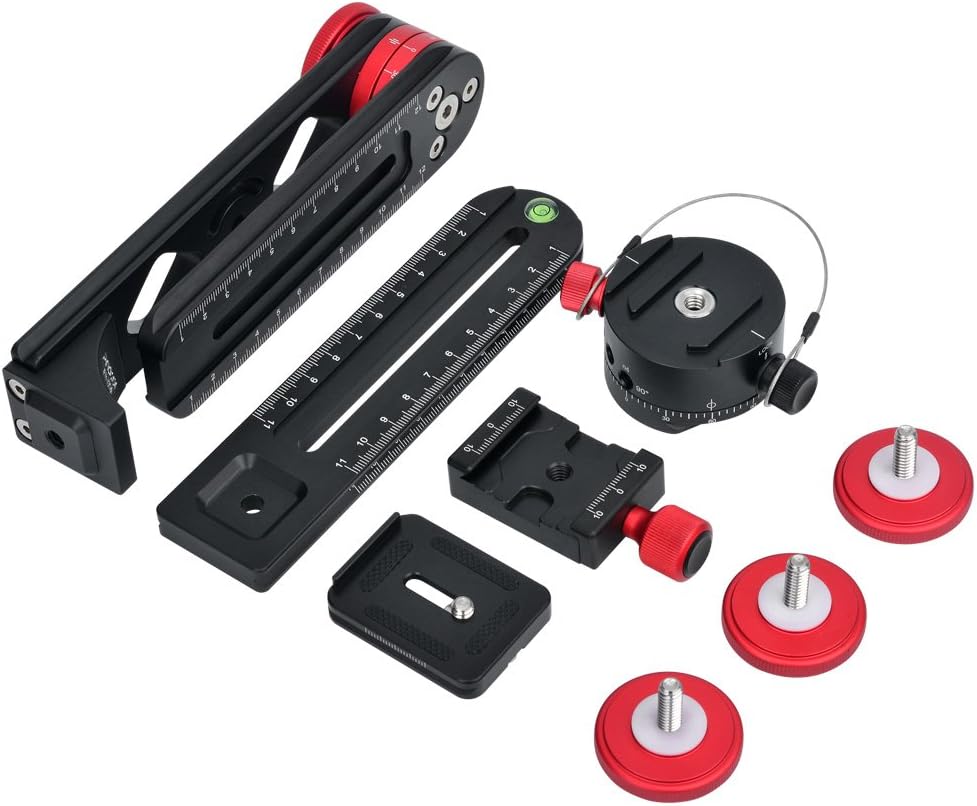
Figure 2: Individual components of the Andoer PH-720B Panoramic Gimbal Head. This includes the main frame, quick release plate, and various adjustment parts.
3. Component Identification

Figure 3: Labeled diagram illustrating the various parts of the Andoer PH-720B. Key components include the Loading Board, Quick Release Plate, Vertical Board, Horizontal Board, Indexing Cradle Head, and various adjustment knobs and screws.
- Loading Board: Top platform for mounting the camera.
- Rotation-fixed Adjusting Knob: Secures the vertical rotation.
- Quick Release Plate Fixing Knob: Secures the quick release plate.
- 1/4" Screw Hole: Standard mounting point.
- Quick Release Plate Clamp: Holds the quick release plate.
- Quick Release Plate: Attaches to the camera.
- Vertical Board: Vertical arm of the gimbal head.
- Clamp Fixed Knob: Secures the horizontal arm.
- Indexing Cradle Head Link Knob: Adjusts the connection to the indexing head.
- Horizontal Board: Horizontal arm of the gimbal head.
- Bubble Level: For ensuring the head is level.
- Indexing Cradle Head Locking Knob: Locks the panning movement.
- Indexing Cradle Head: Base for panoramic rotation.
- Rotation Scale: Markings for precise angular adjustments.
4. Setup Instructions
4.1 Mounting the Gimbal Head to a Tripod
- Ensure your tripod is stable and securely set up.
- Locate the 3/8" screw hole at the base of the Andoer PH-720B (or 1/4" with adapter if needed).
- Screw the gimbal head onto the tripod's mounting screw until it is firmly attached.
- Use the integrated bubble level on the horizontal board to ensure the head is perfectly level. Adjust tripod legs as necessary.
4.2 Attaching the Camera
- Attach the quick release plate to the bottom of your camera using the 1/4" screw. Ensure it is tightened securely.
- Loosen the Quick Release Plate Fixing Knob on the Loading Board of the gimbal head.
- Slide the quick release plate with your camera into the Quick Release Plate Clamp.
- Tighten the Quick Release Plate Fixing Knob to secure the camera. Verify that the camera is firmly attached and does not wobble.

Figure 4: Examples of a DSLR camera mounted on the Andoer PH-720B, demonstrating different vertical and horizontal orientations achievable with the adjustable arms.
5. Operating Instructions
5.1 Adjusting for No-Parallax Point (Nodal Point)
Achieving the no-parallax point is crucial for seamless panoramic stitching. This point is where the lens's optical center rotates, eliminating parallax errors.
- Horizontal Adjustment: Adjust the position of the Quick Release Plate along the Loading Board by loosening the Quick Release Plate Fixing Knob. The goal is to align the lens's nodal point with the vertical axis of rotation.
- Vertical Adjustment: Adjust the height of the Vertical Board by loosening the Vertical Board Fixing Knob. This aligns the lens's nodal point with the horizontal axis of rotation.
- Testing: To find the nodal point, select two objects at different distances (e.g., a foreground object and a background object). Rotate the camera horizontally. If the foreground object shifts relative to the background, adjust the camera's position on the quick release plate until there is no relative shift. Repeat for vertical adjustments.
5.2 Panoramic Panning
The Indexing Cradle Head allows for precise angular rotation for panoramic photography.
- Ensure the Indexing Cradle Head Locking Knob is loosened.
- Select your desired degree stop increment (15°, 30°, 45°, 60°, or 90°) based on your lens's field of view and desired overlap.
- Rotate the camera horizontally, stopping at each increment indicated by the Rotation Scale. Take a photo at each stop.
- For multi-row panoramas, adjust the vertical tilt of the camera using the Rotation-fixed Adjusting Knob, then repeat the horizontal panning process for each row.

Figure 5: Illustration of how multiple images captured at different angles with the Andoer PH-720B can be stitched together to form a wide panoramic photograph.
6. Maintenance
- Cleaning: Wipe the gimbal head with a soft, dry cloth after each use to remove dust and dirt. For stubborn marks, use a slightly damp cloth and then dry thoroughly. Avoid harsh chemicals or abrasive cleaners.
- Lubrication: The moving parts are designed for smooth operation. Avoid applying external lubricants unless specifically instructed by the manufacturer, as this may attract dust and impair function.
- Storage: Store the gimbal head in its provided carry bag in a cool, dry place, away from direct sunlight and extreme temperatures.
- Inspection: Periodically check all screws and knobs to ensure they are tight. Do not overtighten.
7. Troubleshooting
- Issue: Camera wobbles after mounting.
- Solution: Ensure the quick release plate is securely attached to the camera and the Quick Release Plate Fixing Knob on the gimbal head is fully tightened. Check that the camera's 1/4" screw is not loose.
- Issue: Panoramic images show stitching errors (parallax).
- Solution: Re-adjust the camera's position on the quick release plate and the vertical arm to accurately find the no-parallax point (nodal point) of your lens. This is critical for seamless stitching.
- Issue: Gimbal head rotation is stiff or uneven.
- Solution: Check if any locking knobs (e.g., Indexing Cradle Head Locking Knob, Rotation-fixed Adjusting Knob) are partially tightened. Ensure the unit is clean and free of debris. If the issue persists, contact customer support.
- Issue: Bubble level does not show level.
- Solution: Adjust the legs of your tripod until the bubble level indicates a level surface. The gimbal head itself does not have leveling adjustments beyond its mounting to the tripod.
8. Specifications
| Feature | Detail |
|---|---|
| Model | PH-720B |
| Material | Aluminium Alloy |
| Maximum Recommended Load | 10 kg (22 lbs) |
| Product Dimensions (Folded) | 9.3" (L) x 6.3" (W) x 5.1" (H) |
| Item Weight | 1.7 lbs (approx. 0.77 kg) |
| Panning Rotation | 360° with calibrated precision |
| Degree Stop Increments | 15°, 30°, 45°, 60°, 90° |
| Quick Release Plate Screw | Standard 1/4" |
| Mounting Thread | 1/4" or 3/8" (compatible with Arca-Swiss standard clamp) |
9. Warranty and Support
Andoer products are manufactured to high-quality standards. For specific warranty information, please refer to the documentation included with your purchase or visit the official Andoer website. Keep your proof of purchase for warranty claims.
For technical support, troubleshooting assistance, or inquiries regarding parts and service, please contact Andoer customer service through their official channels. You can often find support contact information on the brand's official website or through the retailer where the product was purchased.
Online Resources:
- Andoer Official Store: Visit Andoer Store on Amazon


