
1. Introduction
This manual provides detailed instructions for the installation, adjustment, maintenance, and troubleshooting of your maXpeedingrods Coilover Suspension Kit. These coilovers are designed to enhance your vehicle's handling and allow for ride height customization. Please read this manual thoroughly before attempting any installation or adjustment.
Video 1: Overview of maXpeedingrods B1 Coilovers for Height Adjustment. This video showcases the general design and features of the B1 coilover series, highlighting their height adjustability.
2. Safety Information
WARNING: Improper installation or adjustment of suspension components can lead to serious injury or death. Professional installation is highly recommended.
- Always wear appropriate personal protective equipment (PPE), including safety glasses and gloves.
- Ensure the vehicle is securely supported on jack stands on a level surface before beginning any work. Never rely solely on a jack.
- Do not work under a vehicle unless it is properly secured.
- Refer to your vehicle's service manual for specific torque specifications and procedures.
- After installation, have a professional alignment performed to ensure proper vehicle handling and tire wear.
- Regularly inspect all suspension components for wear, damage, or loose fasteners.
3. Package Contents
Your maXpeedingrods Coilover Suspension Kit includes the following components:
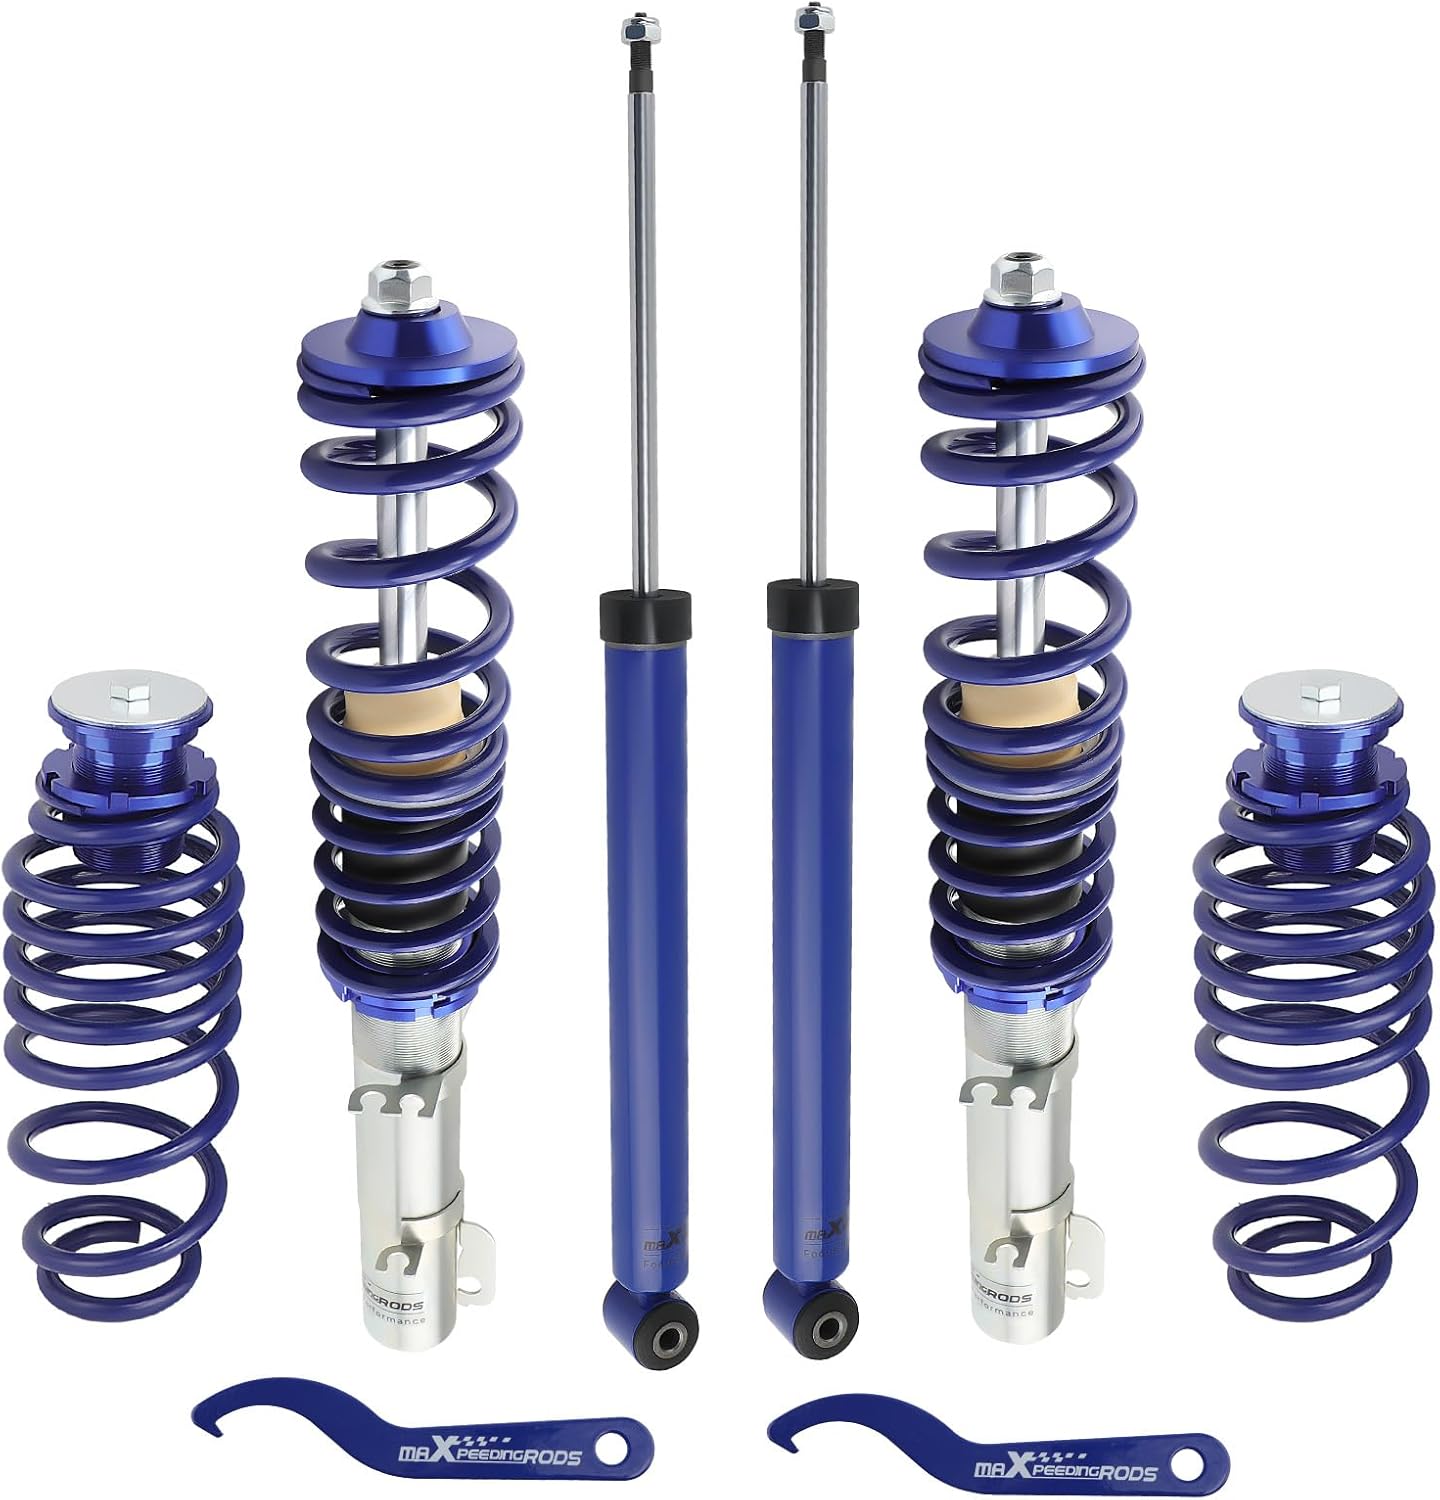
Image 1: A complete maXpeedingrods coilover kit, including front and rear coilover assemblies and adjustment wrenches.
- 2x Front Coilover Assemblies
- 2x Rear Coilover Assemblies (shocks and springs)
- 2x Adjustment Wrenches
- Instruction Manual (this document)
4. Setup & Installation
Installation of coilovers requires mechanical knowledge and specialized tools. If you are not confident in your abilities, seek professional assistance.
General Installation Steps:
- Safely lift and support the vehicle on jack stands. Remove the wheels.
- Carefully remove the original suspension components (struts, springs, shocks). This may involve disconnecting brake lines, sway bar links, and other suspension arms.
- Install the new maXpeedingrods coilover assemblies. Ensure all bolts are tightened to the manufacturer's specified torque.
- Reconnect any disconnected components.
- Repeat for all four corners of the vehicle.
- Lower the vehicle and perform an initial ride height adjustment (see 'Operating & Adjustments' section).
- Drive the vehicle a short distance to allow the suspension to settle, then re-check and fine-tune the ride height.
- An alignment is mandatory after coilover installation to prevent premature tire wear and ensure safe handling.
Video 2: maXpeedingrods Coilovers Series Overview and Installation. This video demonstrates the manufacturing process and general installation steps for various maXpeedingrods coilover series, including component assembly and vehicle fitment.

Image 2: Visual indicators for when to consider changing suspension struts, such as difficult steering, uneven tire wear, rattling noises, and uncomfortable driving.
5. Operating & Adjustments
Ride Height Adjustment:
Your maXpeedingrods coilovers allow for adjustable ride height, typically lowering the vehicle by 35mm-75mm. This adjustment is achieved by rotating the lower mount on the coilover body.
- Loosen the lower locking collar using the provided spanner wrenches.
- Turn the lower mount clockwise to lower the vehicle or counter-clockwise to raise it.
- Once the desired height is achieved, tighten the lower locking collar securely.
- Measure the height from the center of the wheel to the fender lip to ensure even adjustment on both sides.
Video 3: How to Adjust Coilover Height. This video provides a step-by-step guide on adjusting the ride height of your coilovers using the provided wrenches.

Image 3: Diagram illustrating the adjustable height range of the coilovers, showing how the lower mount can be adjusted to achieve desired lowering.
Spring Preload Adjustment:
Spring preload affects how much the spring is compressed at static ride height. Proper preload ensures the spring is seated correctly without being loose or excessively compressed.
- Set the spring at "0" preload by adjusting the spring seat until the spring sits correctly, not loose or compressed.
- Measure the spring length (original length, which is also marked on the spring).
- Adjust the spring seat by 7-10mm to achieve the desired preload.
- Tighten the lock ring to secure your preload setting.
Video 4: How to Adjust Spring Preload. This video demonstrates the process of setting and adjusting the spring preload on your coilovers.
6. Maintenance
Regular maintenance will prolong the life and performance of your coilovers.
- Cleaning: Periodically clean the coilover bodies, especially the threaded sections, to prevent dirt and debris buildup. Use a mild soap and water solution.
- Inspection: Regularly inspect for any signs of oil leaks, rust, or damage to the springs, shock bodies, and mounts. Check for loose bolts or nuts.
- Lubrication: Apply a thin layer of anti-seize lubricant to the threaded sections of the coilover body during initial installation and periodically thereafter to prevent seizing and ease future adjustments.
- Dust Boots: Ensure dust boots are intact to protect the damper seals from contaminants.

Image 4: Diagram illustrating the twin-tube shock design, which helps reduce oil leakage and features a dust boot to protect the damper seal.

Image 5: Illustration of the TPV material dust cover, designed to keep coilovers clean and improve overall performance and handling by resisting impact and wear.
7. Troubleshooting
If you encounter any issues, refer to the following common problems and solutions:
- Noise (Clunking/Rattling):
- Check all mounting bolts for proper torque. Loose bolts are a common cause of noise.
- Inspect for any components making contact with the coilover body or other suspension parts.
- Ensure spring preload is correctly set and springs are not loose. - Uneven Ride Height:
- Re-measure and adjust the ride height on all four corners, ensuring consistency.
- Verify that the vehicle is on a level surface when measuring. - Poor Handling/Ride Quality:
- Ensure all adjustments (height, preload) are set correctly according to your preference and driving conditions.
- An immediate post-installation alignment is crucial for proper handling. - Oil Leaks:
- Small amounts of oil residue can be normal, but significant leaks indicate a seal failure. Contact customer support if you suspect a major leak.
8. Specifications
| Feature | Detail |
|---|---|
| Application | VW Golf MK4 FWD (08/1997-12/2007), VW New Beetle FWD (01/1998-11/2010), VW Jetta MK4 (1999-2005), Seat Leon FWD (11/1999-06/2006) |
| Front Spring Rate | 8 kg/mm (448 lbs/in) |
| Rear Spring Rate | 6 kg/mm (336 lbs/in) |
| Front Spring Length | 170mm |
| Rear Spring Length | 275mm |
| Front Coilover Overall Length | 370mm-540mm |
| Rear Coilover Overall Length | 410mm-650mm |
| Adjustable Height | Lowering 35mm-75mm |
| Structure | Twin-tube |
| Material | 6061 Aluminum Alloy with T6 |

Image 6: Details on the main spring material (55CrSi) and its tensile strength, yield strength, elongation, and reduction of area properties.

Image 7: Close-up view of coilover components made from 6061 T6 aluminum, highlighting the material's quality and precision.
9. Warranty & Support
maXpeedingrods products are designed for high performance and durability. For specific warranty information, please refer to the warranty card included with your product or visit the official maXpeedingrods website.
For technical support, installation assistance, or warranty claims, please contact maXpeedingrods customer service through their official channels. Ensure you have your product model number (QE71@LCO-GOL4-B-LC) and purchase details available.