1. Introduction
Thank you for purchasing the PERLESMITH Slim Tilt TV Wall Mount Bracket. This manual provides detailed instructions for the safe installation, operation, and maintenance of your new TV wall mount. Please read this manual thoroughly before installation and keep it for future reference.
Key Features:
- Supports 32-82 inch TVs with a maximum load capacity of 60 kg (132 lbs).
- Compatible with VESA mounting patterns from 200x100mm to 600x400mm.
- Slim profile design, positioning the TV only 3 cm (1.2 inches) from the wall.
- Adjustable downward tilt angle up to 7 degrees for optimal viewing.
- Constructed from durable cold-rolled steel for enhanced stability and earthquake resistance.
- Designed for super easy installation, even for beginners.
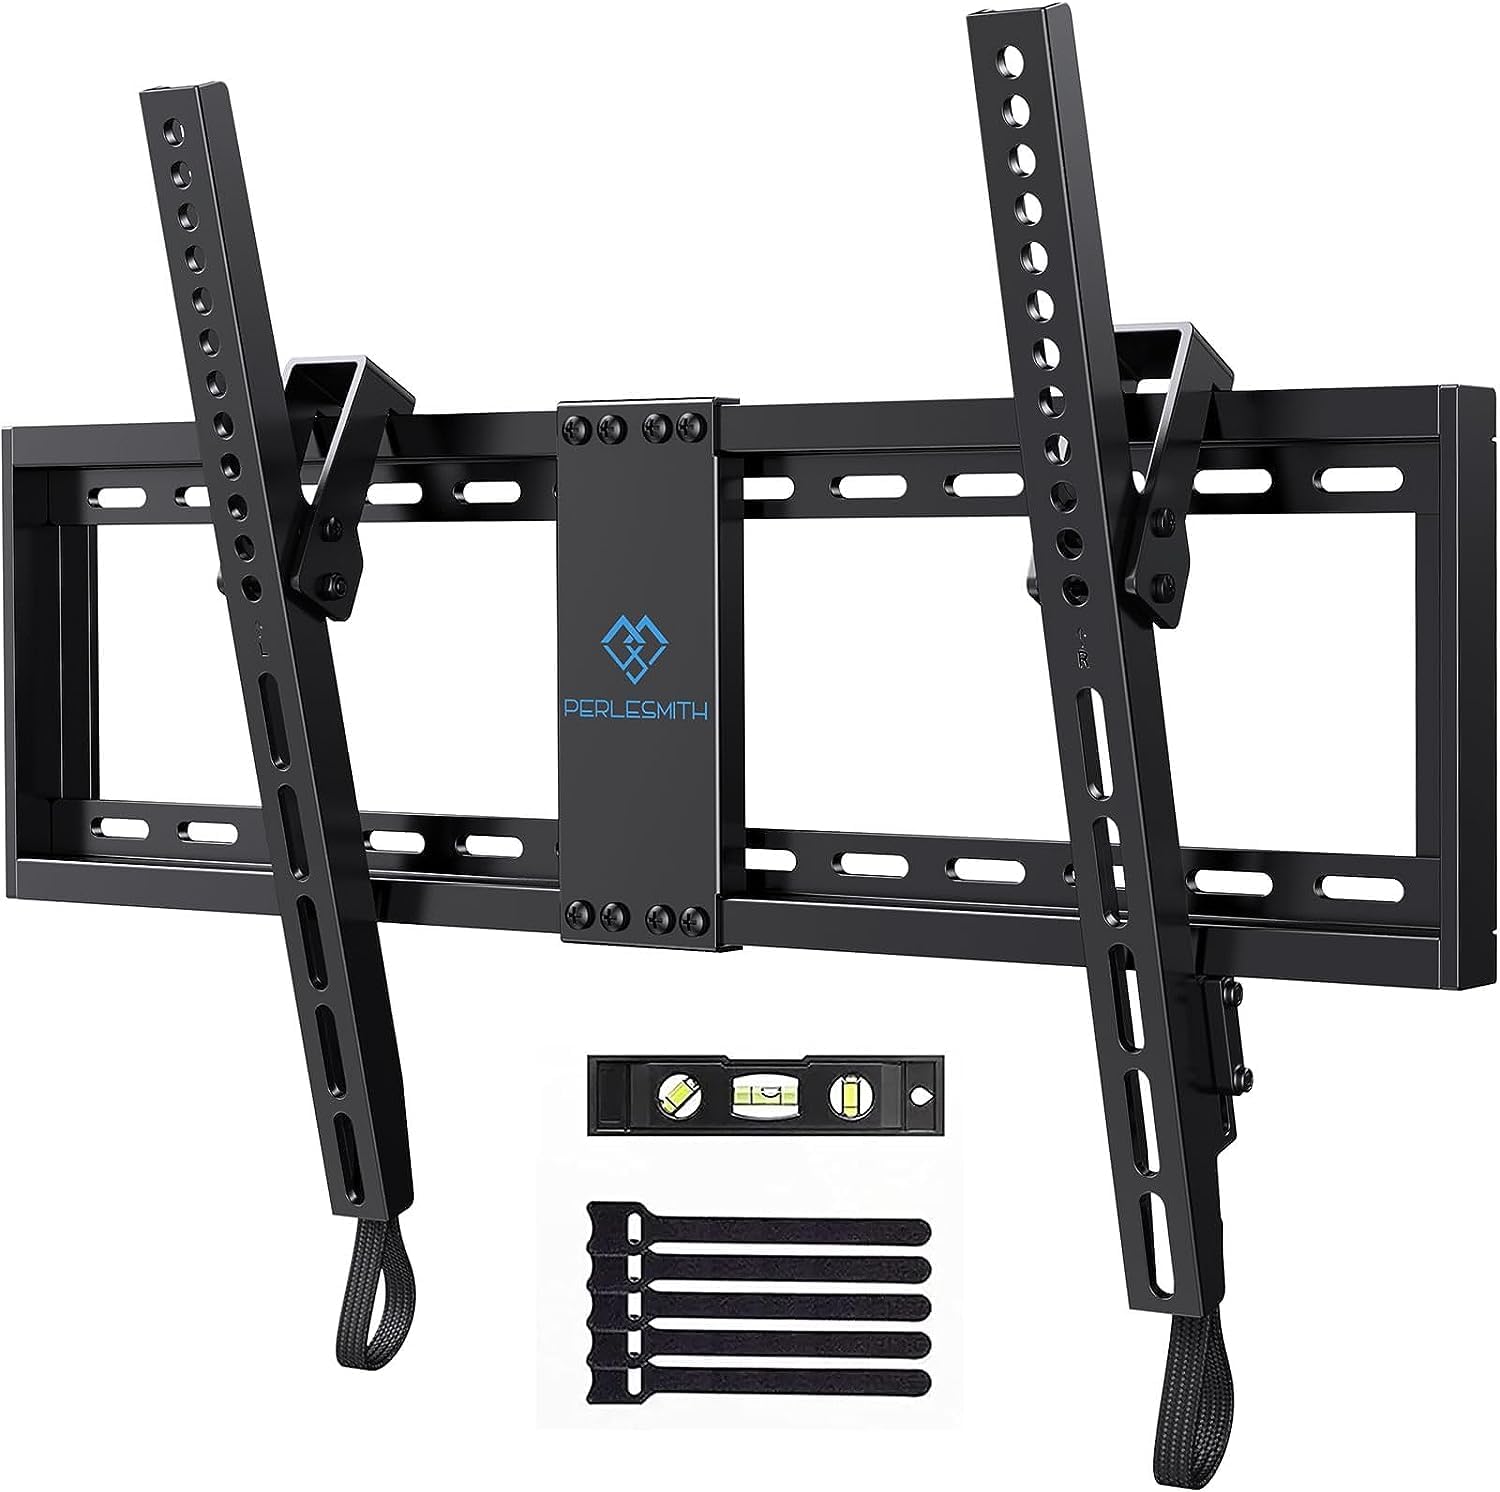
PERLESMITH Slim Tilt TV Wall Mount Bracket with included level and cable ties.
2. Safety Precautions
Before you begin installation, please read and understand all instructions. If you have any questions, contact PERLESMITH customer support.
- This wall mount is designed for TVs weighing up to 60 kg (132 lbs). Do not exceed this weight limit. Exceeding the weight limit may result in serious injury or property damage.
- Ensure your TV's VESA mounting pattern is compatible (200x100mm to 600x400mm) before installation.
- This mount is suitable for installation on wooden stud walls, solid concrete walls, and brick walls. Do not install on drywall alone without proper stud support.
- Always use appropriate safety gear, such as safety glasses, during installation.
- If your TV has an uneven back, use the included spacers to create a flat mounting surface and facilitate cable management.
- Keep children and pets away from the installation area.
3. Package Contents
Please verify that all parts are included and undamaged before starting the installation. If any parts are missing or damaged, please contact PERLESMITH customer support.
- Wall Plate Assembly
- TV Brackets (2 pcs)
- Various TV Screws (M4, M6, M8)
- Washers and Spacers
- Concrete Anchors
- Wood Screws
- Spirit Level
- Cable Ties
4. Specifications
| Specification | Value |
|---|---|
| Compatible TV Size | 32 - 82 inches |
| Maximum Load Capacity | 60 kg (132 lbs) |
| VESA Compatibility | 200x100mm to 600x400mm |
| Distance from Wall | 3 cm (1.2 inches) |
| Tilt Angle | 0 to -7 degrees (downward) |
| Material | Cold-rolled Steel |
| Color | Black |
| Product Dimensions | 44.5 x 22.5 x 5.51 cm (17.5 x 8.9 x 2.2 inches) |
| Product Weight | 2.44 kg (5.38 lbs) |
| Model Number | PSLTK1 |
| UPC | 614251251724 |
5. Setup (Installation)
Follow these steps carefully to install your TV wall mount. It is recommended to have two people for installation.
Step 1: Check Compatibility and Wall Type
Before starting, confirm your TV's size and VESA pattern are compatible with the mount. Also, identify your wall type (wooden stud, concrete, or brick) to use the correct hardware.

Pre-purchase checklist showing compatible TV sizes (32-82 inches) and VESA patterns (Min 200x100mm, Max 600x400mm).

Diagram showing compatible wall types (wooden stud, concrete, brick) and VESA compatibility.
Step 2: Attach Brackets to the TV
Carefully place your TV face down on a soft, clean surface. Attach the two TV brackets to the back of your TV using the appropriate screws, washers, and spacers (if needed) from the hardware kit. Ensure the brackets are securely fastened and centered.

Close-up view of the TV bracket attachment point and pull-cord lock mechanism.
Step 3: Mount Wall Plate to the Wall
Determine the desired height for your TV. Use a stud finder to locate the center of the wooden studs if installing on a wooden wall. Mark the drilling locations for the wall plate. Drill pilot holes and securely fasten the wall plate to the wall using the appropriate screws and anchors for your wall type. Use the included spirit level to ensure the wall plate is perfectly horizontal.

Image showing the wall plate being screwed into the wall with a drill, highlighting safety features like the anti-drop edge.
Step 4: Hang TV onto Wall Plate
With assistance, carefully lift the TV and hook the TV brackets onto the wall plate. Ensure the brackets are properly seated on the wall plate's rails.
Step 5: Secure TV and Adjust
Once the TV is hanging, push the bottom of the TV towards the wall until the safety locks on the brackets engage with the wall plate. This secures the TV in place. You can now proceed to adjust the tilt angle as described in the 'Operating' section.

Image showing a wall-mounted TV, highlighting the stability and safety of the mount in preventing tip-overs.
6. Operating
Adjusting the Tilt Angle:
This mount features an easy-to-use wire release system for tilt adjustment, allowing you to minimize glare and optimize your viewing experience.
- Gently pull the release cords located at the bottom of the TV brackets to unlock the tilt mechanism.
- Adjust the TV to your desired downward angle, up to 7 degrees.
- Release the cords to lock the TV in place. Ensure the TV is securely locked before letting go.

Illustration of the TV wall mount allowing downward tilt adjustment up to 7 degrees to minimize glare.
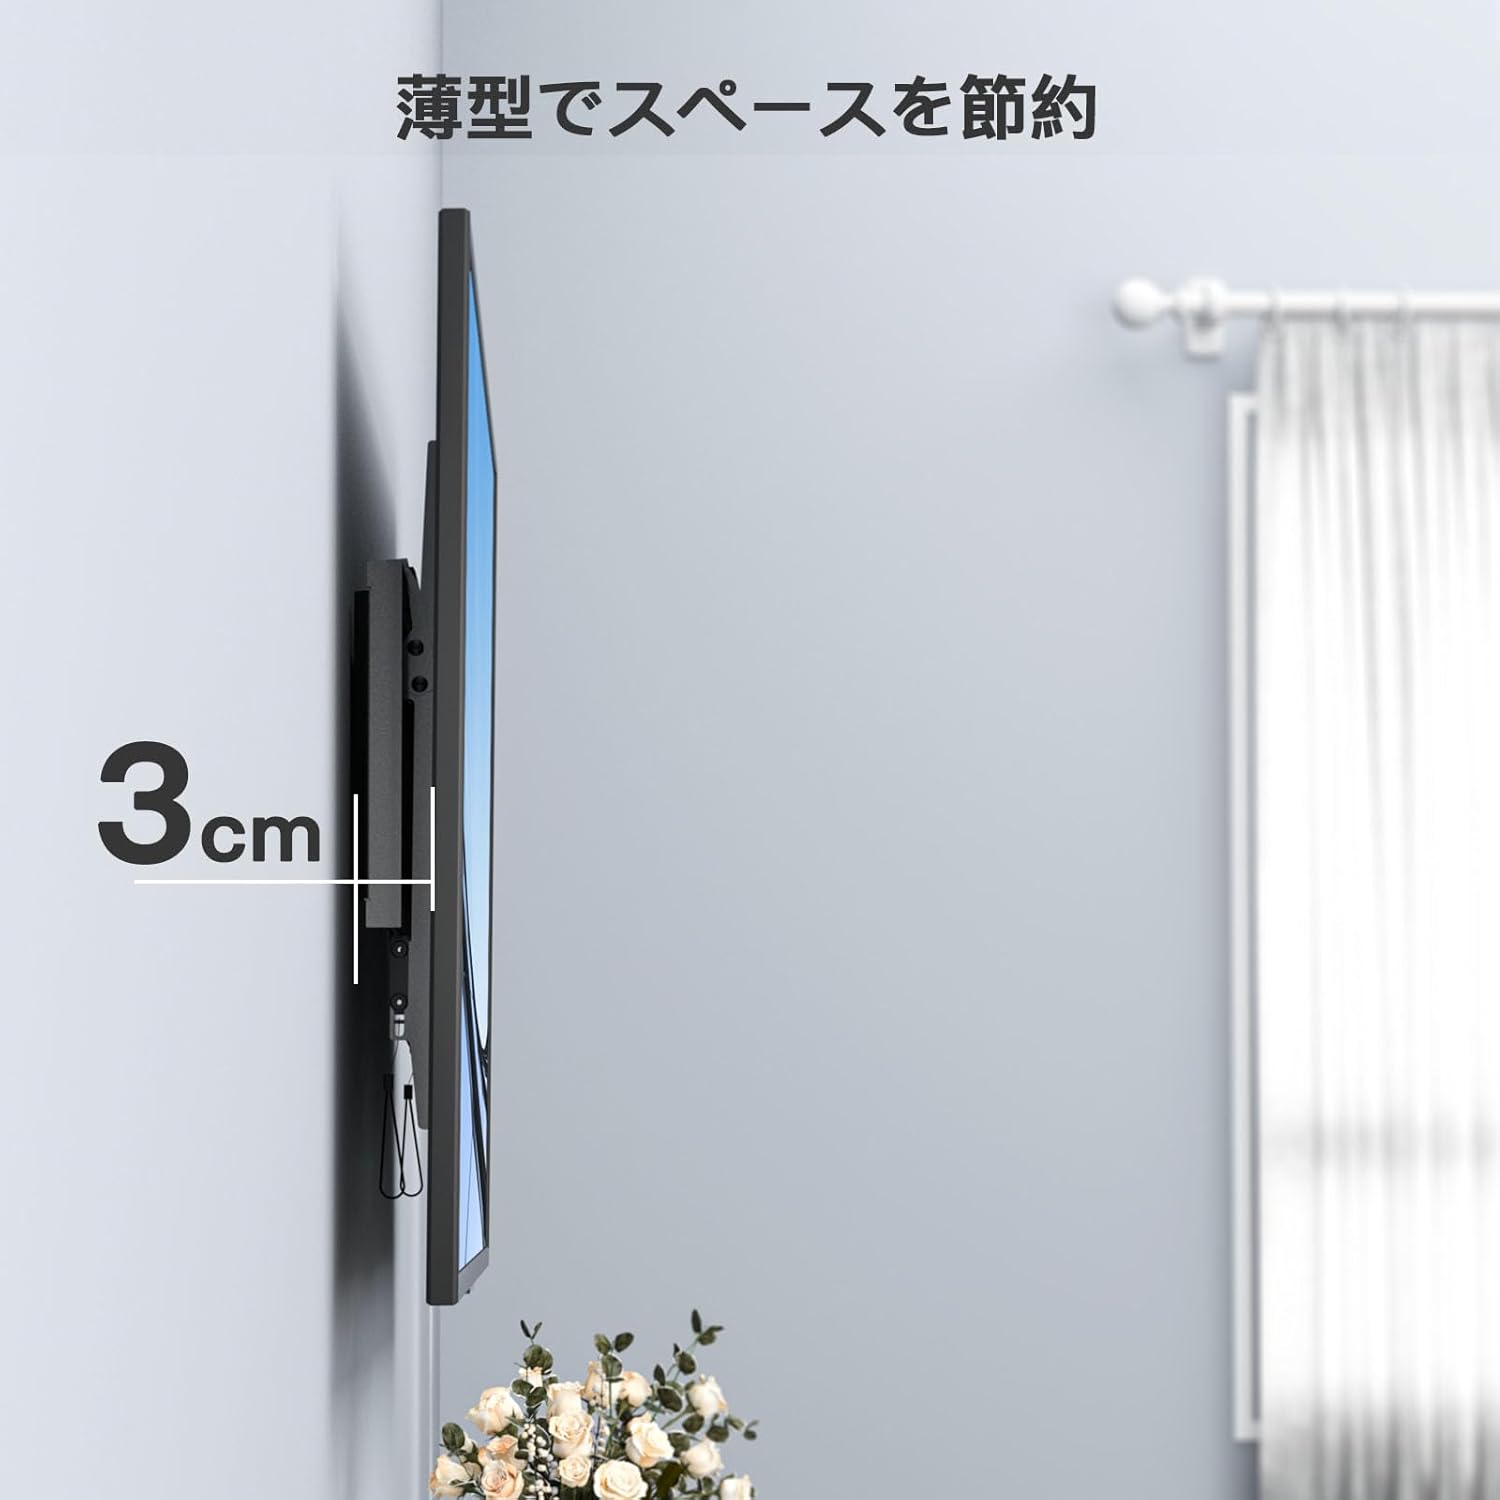
Side view of the installed TV wall mount, demonstrating its slim profile with only 3cm distance from the wall.
7. Maintenance
- Regularly check all screws and connections on the wall mount and TV brackets to ensure they remain tight and secure.
- Clean the mount with a soft, dry cloth. Avoid using abrasive cleaners, solvents, or chemical sprays, as these may damage the finish.
- Do not hang anything from the TV or the mount, as this can exceed the weight capacity and cause damage or injury.
8. Troubleshooting
Issue: TV is not level after installation.
Solution:
- Check the wall plate installation for levelness using a spirit level. If the wall plate is not level, you may need to re-adjust its position.
- Ensure the TV brackets are evenly attached to the TV and that all screws are tightened securely.
Issue: Difficulty adjusting tilt.
Solution:
- Ensure the pull cords are fully engaged to release the lock mechanism before attempting to tilt the TV.
- Check for any obstructions behind the TV or between the TV and the wall mount that might be preventing movement.
Issue: Missing parts or damaged components.
Solution:
- Refer to the 'Package Contents' section to verify all included items.
- Contact PERLESMITH customer support immediately for replacements or assistance.
9. Warranty and Support
PERLESMITH is committed to providing high-quality products. This product comes with a 3-year quality guarantee service from the date of purchase.
For any questions, concerns, or assistance with installation or product issues, please do not hesitate to contact PERLESMITH customer support. You can typically reach us through the Amazon platform where you purchased the product, or via the contact information provided in your product packaging.
We strive to provide prompt and helpful support to ensure your satisfaction.


