
ROVSUN WM20181206-5
Contents
ROVSUN 17.6LBS Portable Twin Tub Washing Machine (Model WM20181206-5) Instruction Manual
Your guide to efficient and convenient laundry care.
1. Introduction
Thank you for choosing the ROVSUN 17.6LBS Portable Twin Tub Washing Machine. This manual provides essential information for the safe and efficient operation, maintenance, and troubleshooting of your appliance. Please read it thoroughly before use and retain it for future reference.

Image 1.1: Front view of the ROVSUN Portable Twin Tub Washing Machine, white with blue lids.
2. Important Safety Instructions
- Read all instructions before using the appliance.
- Do not operate any appliance with a damaged cord or plug, or after the appliance malfunctions or has been damaged in any manner.
- Do not use this appliance in a bathtub or shower.
- Always unplug the appliance from the electrical outlet before cleaning or performing maintenance.
- Keep the power cord away from heated surfaces.
- This appliance is not intended for use by persons (including children) with reduced physical, sensory or mental capabilities, or lack of experience and knowledge, unless they have been given supervision or instruction concerning use of the appliance by a person responsible for their safety.
- Children should be supervised to ensure that they do not play with the appliance.
3. Product Features
The ROVSUN Portable Twin Tub Washing Machine is designed for compact and efficient laundry. Key features include:
- Twin Tub Design: Separate wash and spin tubs for simultaneous or sequential operation.
- Washing Capacity: 11 lbs (5 kg) for the wash tub.
- Spinning Capacity: 6.6 lbs (3 kg) for the spin tub.
- Built-in Drain Pump: Facilitates easy water drainage.
- Control Knobs: Independent timers for wash and spin cycles, and a select switch for wash modes (Soft, Standard, Drain).
- Compact and Portable: Ideal for small living spaces, RVs, camping, dorms, and apartments.

Image 3.1: Diagram highlighting key features such as portability, efficiency, and space-saving design.

Image 3.2: Detailed view of the control panel with wash timer, select switch, and spin timer.
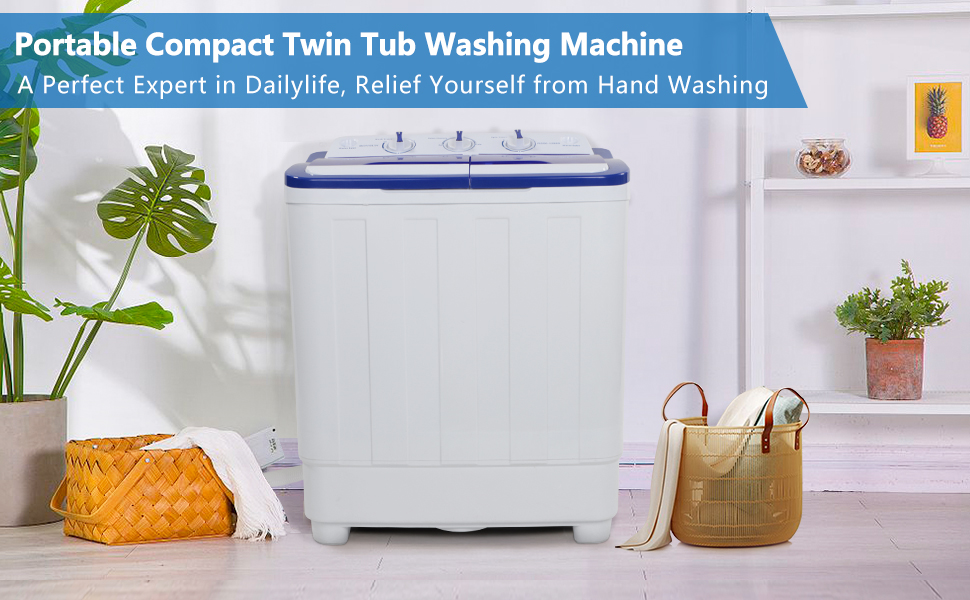
Image 3.3: Lifestyle image showing the washing machine in a home setting, emphasizing its compact size.
4. Components Overview
Familiarize yourself with the main components of your washing machine:

Image 4.1: Labeled diagram of the washing machine components, including the wash tub, spin tub, drain hose, and power cord.
5. Setup
- Unpacking: Carefully remove the washing machine from its packaging. Inspect for any damage.
- Placement: Place the machine on a flat, stable surface. Ensure there is enough space around it for ventilation and operation.
- Power Connection: Plug the power cord into a grounded 110-120V~/60Hz electrical outlet.
- Water Inlet: Connect the water inlet hose to a suitable water source.
- Drainage: Position the drain hose to direct wastewater into a sink, tub, or drain. The built-in pump will assist in draining.
6. Operating Instructions
6.1 Washing Cycle
- Load Laundry: Place clothes into the wash tub, ensuring not to exceed the 11 lbs capacity.
- Add Water and Detergent: Fill the wash tub with water to the desired level and add appropriate detergent.
- Set Wash Timer: Turn the "Wash Timer" knob to select the desired wash duration (up to 15 minutes).
- Select Wash Mode: Use the "Select Switch" to choose between "Soft" for delicate items or "Standard" for regular loads.
- Start Washing: The machine will begin the wash cycle.
- Drain Water: Once the wash cycle is complete, turn the "Select Switch" to "Drain" to empty the water from the wash tub.
6.2 Spin Cycle
- Transfer Laundry: Move the washed clothes from the wash tub to the spin tub. Do not overload the spin tub (max 6.6 lbs).
- Secure Spin Cap: Place the spin cap firmly on top of the clothes in the spin tub.
- Set Spin Timer: Turn the "Spin Timer" knob to select the desired spin duration (up to 5 minutes).
- Start Spinning: The machine will begin the spin cycle to remove excess water.
- Remove Laundry: Once the spin cycle is complete, carefully remove the clothes. They will be damp and require air drying or further drying.

Image 6.2.1: The twin tub design with indicated washing and spinning capacities.
7. Maintenance
- Cleaning the Exterior: Wipe the exterior with a soft, damp cloth. Do not use abrasive cleaners.
- Cleaning the Tubs: Rinse the wash and spin tubs after each use. For deeper cleaning, use a mild detergent and soft brush.
- Drain Hose: Ensure the drain hose is clear of blockages. Periodically check for kinks or damage.
- Storage: When not in use for extended periods, ensure the machine is clean and dry. Store in a cool, dry place.
8. Troubleshooting
| Problem | Possible Cause | Solution |
|---|---|---|
| Machine does not start | Power cord not plugged in; power outage; timer not set. | Check power connection; ensure power is on; set wash/spin timer. |
| Water does not drain | Drain hose kinked or blocked; drain mode not selected. | Straighten drain hose; clear blockages; set "Select Switch" to "Drain". |
| Excessive vibration during spin | Uneven load in spin tub; machine not on a level surface. | Redistribute clothes evenly; ensure machine is on a flat, stable surface. |
| Water leakage | Hoses not properly connected; tub overloaded. | Check all hose connections; reduce laundry load. |
9. Specifications
- Brand: ROVSUN
- Model: WM20181206-5
- Total Capacity: 17.6 lbs (8 kg)
- Rated Washing Capacity: 11 lbs (5 kg)
- Rated Spin Capacity: 6.6 lbs (3 kg)
- Power Supply: 110-120V~/60Hz
- Rated Wash Input Power: 300W
- Rated Spin Input Power: 250W
- Total Power: 550W
- Item Weight: 27.5 lbs (12.5 kg)
- Product Dimensions (D x W x H): 14.37" x 24.4" x 28.74" (36.5 cm x 62 cm x 73 cm)
- Material Type: Plastic
- Drum Material: Stainless Steel
- Operation Mode: Semi-Automatic
- Maximum Rotational Speed: 1300 RPM
- UPC: 611890863370

Image 9.1: Product dimensions diagram.

Image 9.2: Lifestyle image demonstrating the machine's suitability for various environments.

Image 9.3: Internal components diagram, highlighting the drainage pump and dual motor.
10. Warranty and Support
For warranty information or technical support, please refer to the product packaging or contact ROVSUN customer service directly. Keep your purchase receipt as proof of purchase.
Visit the official ROVSUN store for more products and support: ROVSUN Store
Ask a question about this manual
Ask about setup, troubleshooting, compatibility, parts, safety, or missing instructions. Manuals+ will review the question and use this page’s manual context to help answer it.