1. Introduction
This manual provides essential information for the safe and efficient operation, installation, and maintenance of your HECHT 3775 Deep Well Pump. Please read these instructions carefully before using the pump and keep them for future reference. The HECHT 3775 submersible pump is designed for emptying flooded cellars, tanks, or for pumping rainwater. It is capable of transporting both clean and dirty water.
2. Safety Instructions
Always observe the following safety precautions to prevent personal injury and damage to the pump.
- Electrical Safety: Ensure the power supply matches the pump's specifications (230V). Never operate the pump with a damaged power cord or plug. Do not immerse the plug or power cord in water. Always disconnect the pump from the power supply before performing any maintenance or cleaning.
- Water Quality: This pump is designed for pumping clean or slightly dirty water. Do not use it for flammable, corrosive, or explosive liquids. Avoid pumping water containing large abrasive particles, as this can damage the pump.
- Temperature Limits: Do not pump liquids hotter than 35°C (95°F).
- Secure Placement: Ensure the pump is placed on a stable, level surface or suspended securely when in use.
- Children and Pets: Keep children and pets away from the operating pump and the area where water is being pumped.
- Personal Protective Equipment: Wear appropriate personal protective equipment, such as gloves, when handling the pump.
- Overload Protection: The pump is equipped with thermal overload protection. If the pump overheats, it will automatically shut off. Allow it to cool down before restarting.
3. Package Contents
Upon unpacking, please verify that all components are present and undamaged:
- HECHT 3775 Deep Well Pump
- Instruction Manual (this document)
4. Product Overview
Familiarize yourself with the main components of your HECHT 3775 pump.

Figure 4.1: Full view of the HECHT 3775 Deep Well Pump, showcasing its compact design and red and black casing.

Figure 4.2: Top view of the pump, highlighting the integrated carrying handle and the water outlet connection point.

Figure 4.3: Close-up of the red switch on the side of the pump, allowing selection between "Manual" and "Auto" operating modes.
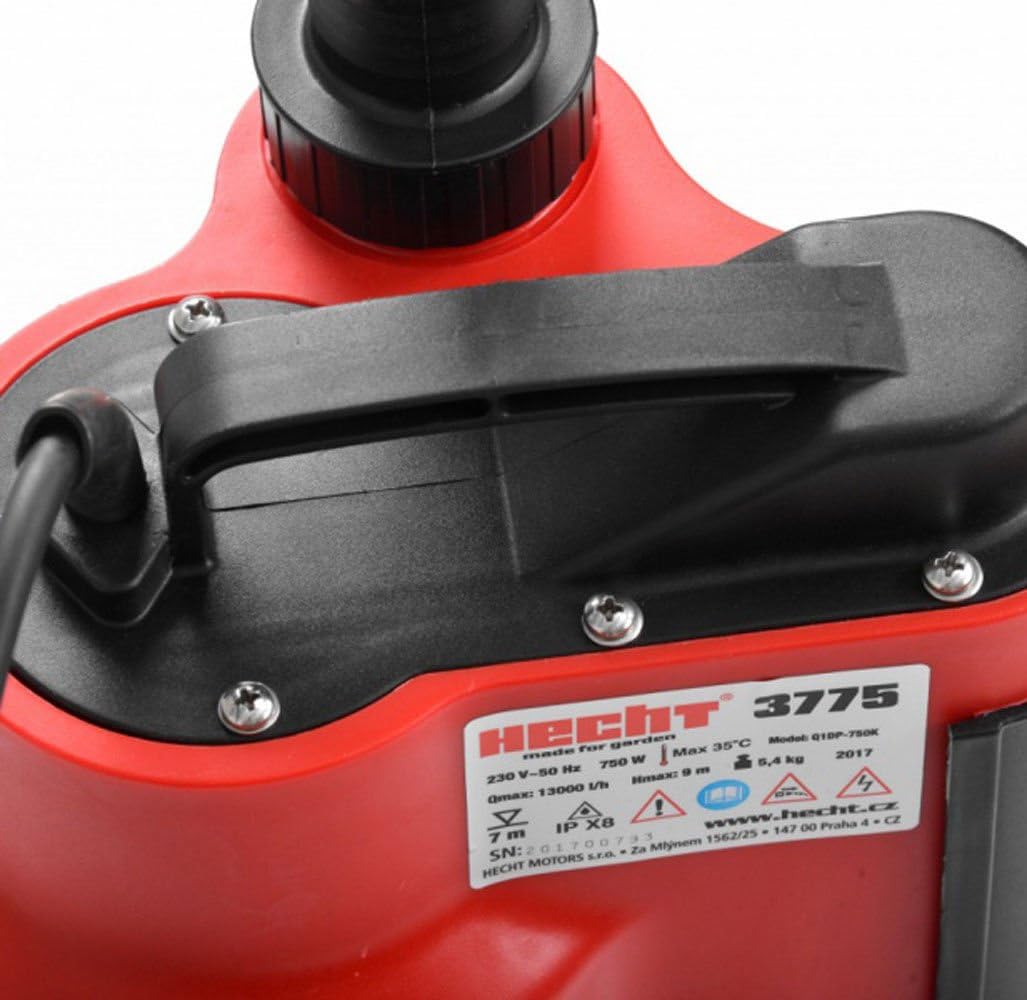
Figure 4.4: Detailed view of the product label, displaying technical specifications such as voltage, wattage, max flow rate, max head, and IP rating.
Key Components:
- Carrying Handle: For easy transport and positioning of the pump.
- Water Outlet: Connection point for discharge hose.
- Power Cable: For connecting to the electrical supply.
- Manual/Auto Switch: Allows selection between continuous operation (Manual) and automatic operation via the float switch (Auto).
5. Setup
Follow these steps for proper installation and setup of your pump:
- Positioning: Place the pump on a firm, level surface in the water to be pumped. Ensure it is fully submerged and stable. If suspending, use a strong rope attached to the carrying handle.
- Hose Connection: Connect a suitable discharge hose to the water outlet. Ensure the connection is secure to prevent leaks. The hose should be routed to the desired discharge location without kinks or sharp bends.
- Electrical Connection: Plug the pump into a grounded electrical outlet (230V). Ensure the outlet is protected by a Residual Current Device (RCD) for safety.
- Float Switch Adjustment: Ensure the float switch has free movement and is set to activate and deactivate the pump at your desired water levels.
6. Operating Instructions
The HECHT 3775 pump offers two operating modes: Manual and Automatic.
6.1. Automatic Mode (Auto)
- Set the Manual/Auto switch (Figure 4.3) to the "Auto" position.
- The pump will automatically start when the water level rises to a predetermined level (activating the internal float switch).
- The pump will automatically stop when the water level drops below a predetermined level (deactivating the internal float switch).
- This mode is ideal for unattended operation in sumps or tanks.
6.2. Manual Mode (Manual)
- Set the Manual/Auto switch (Figure 4.3) to the "Manual" position.
- The pump will operate continuously, regardless of the water level.
- Caution: In Manual mode, the pump will not automatically shut off when the water level is low. Monitor the pump closely to prevent it from running dry, which can cause damage. Disconnect power once the desired water level is reached.
6.3. Shutting Down
- In Manual mode, disconnect the pump from the power supply.
- In Auto mode, the pump will stop automatically. If you wish to stop it immediately, disconnect from the power supply.
- Remove the pump from the water and drain any remaining water from the pump and hose.
7. Maintenance
Regular maintenance ensures the longevity and optimal performance of your pump.
- Cleaning: After each use, especially when pumping dirty water, rinse the pump thoroughly with clean water. Remove any debris that may have accumulated around the intake screen or impeller.
- Inspection: Periodically inspect the power cable and plug for any signs of damage. Check the pump casing for cracks or leaks.
- Storage: When not in use, store the pump in a dry, frost-free location. Ensure all water is drained from the pump to prevent freezing damage.
- No User-Serviceable Parts: The pump motor and internal components are not user-serviceable. Do not attempt to open or repair the pump yourself. Contact qualified service personnel for repairs.
8. Troubleshooting
Before contacting customer support, try these troubleshooting steps:
| Problem | Possible Cause | Solution |
|---|---|---|
| Pump does not start. | No power supply. Thermal overload activated. Float switch not activated (in Auto mode). Manual/Auto switch in wrong position. |
Check power connection and circuit breaker. Allow pump to cool down for 15-30 minutes. Ensure water level is high enough to activate float switch. Set switch to "Manual" for continuous operation or "Auto" for float-controlled operation. |
| Low pumping capacity or no water flow. | Intake screen blocked. Discharge hose kinked or blocked. Air lock in the pump. Impeller damaged or blocked. |
Clean the intake screen. Check and clear the discharge hose. Slightly tilt the pump to release trapped air. Disconnect power and inspect impeller for debris (if accessible, otherwise contact service). |
| Pump runs but does not stop (in Auto mode). | Float switch stuck in "on" position. Water level not dropping sufficiently. |
Check float switch for obstructions and ensure free movement. Ensure discharge hose is not blocked and water can be pumped out effectively. |
| Pump makes unusual noise. | Debris in impeller. Pump running dry. |
Disconnect power and inspect impeller for debris. Ensure pump is fully submerged. Do not run dry. |
9. Specifications
Technical data for the HECHT 3775 Deep Well Pump:
| Feature | Specification |
|---|---|
| Model | HECHT 3775 |
| Manufacturer | Hecht |
| Voltage | 230 V ~ 50 Hz |
| Power Consumption | 750 W |
| Max Flow Rate (Qmax) | 13000 l/h |
| Max Head (Hmax) | 9 m |
| Max Water Temperature | 35°C |
| Protection Class | IP X8 |
| Dimensions (L x W x H) | 220 x 190 x 300 mm |
| Weight | 9.4 kg |
| Material | Impact-resistant plastic housing |
| Special Features | Practical carrying handle, Manual/Auto switch |
10. Warranty and Support
The HECHT 3775 Deep Well Pump comes with a manufacturer's warranty of 24 months from the date of purchase. This warranty covers defects in materials and workmanship under normal use.
The warranty does not cover damage resulting from improper installation, misuse, neglect, unauthorized repairs, or normal wear and tear. Please retain your proof of purchase for warranty claims.
For technical support, warranty claims, or spare parts inquiries, please contact your retailer or the authorized Hecht service center. Do not attempt to repair the pump yourself, as this may void the warranty and pose safety risks.


