
1. Introduction
The GODOX XPro-N is a professional flash trigger designed for Nikon DSLR cameras, offering comprehensive control over Godox flash systems. This device supports i-TTL autoflash and various advanced functions, enhancing your photographic workflow. This manual provides detailed instructions for setting up, operating, and maintaining your XPro-N flash trigger.

Image 1.1: GODOX XPro-N Flash Trigger and included cleaning cloth.
2. Safety Information
Please read and understand the following safety precautions before using the GODOX XPro-N Flash Trigger:
- Do not disassemble or modify the device. Repairs should only be performed by authorized service personnel.
- Keep the device dry. Do not expose it to rain, moisture, or high humidity.
- Avoid strong impacts or vibrations.
- Do not touch the internal parts of the device if it has been dropped or damaged.
- Keep out of reach of children.
- Use only specified batteries (AA batteries). Ensure correct polarity during installation.
- Remove batteries if the device will not be used for an extended period.
3. Product Overview
The XPro-N features a large dot matrix LCD for clear display and intuitive control. It is designed for seamless integration with Nikon cameras and Godox 2.4G wireless X system flashes.
3.1 Key Features
- 2.4G Wireless System: Offers reliable wireless control and triggering.
- i-TTL Autoflash Support: Fully supports Nikon's i-TTL autoflash system.
- High-Speed Sync (HSS): Up to 1/8000s for freezing fast action or using wide apertures in bright conditions.
- Multi Flash & Manual Flash: Provides creative control over lighting.
- Flash Exposure Compensation (FEC): Adjust flash output for precise exposure.
- TCM Transform Function: Converts TTL flash value to manual power output.
- Magnification Function: Enlarges display for easier viewing of settings.
- Group Control: 16 groups and 32 channels for managing multiple flashes.
- Wireless ID Settings: Prevents interference from other systems.
- USB Type-C Port: For firmware upgrades.
- 2.5mm Sync Cord Jack: For wired triggering.
3.2 Components and Controls

Image 3.1: Top view of the XPro-N with LCD and control buttons.
- LCD Display: Shows current settings, groups, channels, and flash modes.
- MODE Button: Changes flash mode (TTL, Manual, Multi).
- CH/Zm Button: Adjusts channel or zoom.
- SYNC Button: Controls sync modes (e.g., HSS).
- Gr Button: Selects flash groups.
- MOD Button: Controls modeling lamp.
- SET Button: Confirms selections.
- Dial: Navigates menus and adjusts values.
- TCM Button: Toggles TCM function.
- RST Button: Resets settings.
- MENU Button: Accesses system menu.
- Power Switch (ON/OFF): Turns the device on or off.
- Light Switch (ON/OFF): Controls backlight.

Image 3.2: Side view showing power and backlight switches.

Image 3.3: Battery compartment for two AA batteries.
4. Setup
4.1 Battery Installation
- Open the battery compartment cover located on the bottom of the trigger.
- Insert two AA batteries, ensuring correct polarity (+ and - terminals).
- Close the battery compartment cover securely.
4.2 Mounting on Camera
- Slide the XPro-N's hot shoe onto your Nikon DSLR camera's hot shoe.
- Tighten the locking ring on the trigger to secure it to the camera.
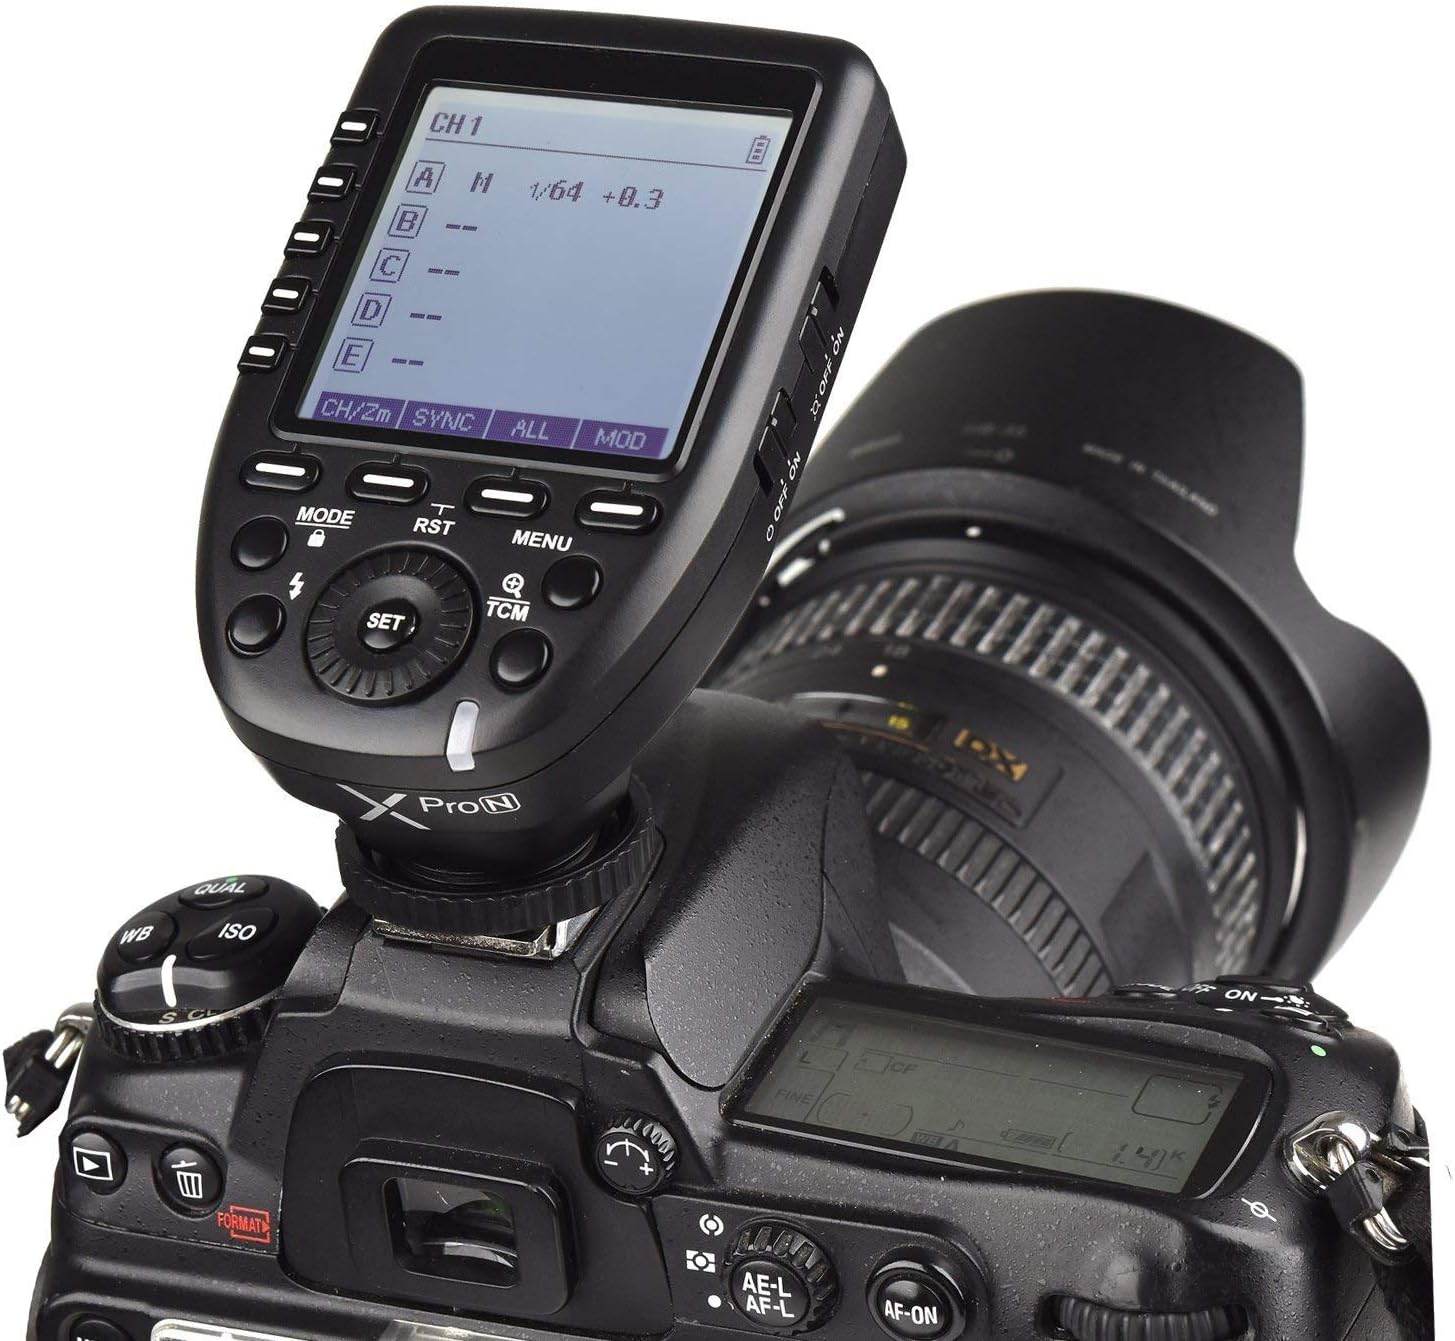
Image 4.1: XPro-N mounted on a Nikon DSLR camera.
4.3 Powering On/Off
Slide the ON/OFF switch to the 'ON' position to power on the trigger. Slide it to 'OFF' to power off.
5. Operating Instructions
5.1 Basic Flash Modes
Press the MODE button to cycle through flash modes: i-TTL Autoflash, Manual (M), and Multi Flash.
- i-TTL Autoflash: The camera and flash automatically determine the correct exposure.
- Manual Flash (M): Manually set the flash power output.
- Multi Flash: Fires a series of rapid flashes during a single exposure.
5.2 Group and Channel Settings
The XPro-N supports 16 groups and 32 channels for wireless control. To set:
- Press the Gr button to select a group (A-F, 0-9).
- Use the dial to adjust settings for the selected group.
- Press the CH/Zm button to change the wireless channel.
- Access the menu to set Wireless ID (01-99) to avoid interference.
5.3 TCM Transform Function
The TCM (TTL Convert Manual) function allows you to convert a TTL flash exposure value into a manual power output value. This is useful for quickly establishing a baseline manual setting after a TTL test shot.
- Long Press TCM Button: Transforms the current TTL flash value into a corresponding manual power output.
- Short Press TCM Button: Switches between one-group and multi-group display modes.
5.4 High-Speed Sync (HSS)
Press the SYNC button to activate High-Speed Sync, allowing you to use flash at shutter speeds faster than your camera's native sync speed (up to 1/8000s).
5.5 Compatibility
The XPro-N is compatible with Nikon cameras that have a PC sync socket and the following Godox flash models:
- AD600 series, AD360II series, AD200, AD400Pro
- V860II series, V850III, TT685 series, TT600, TT350C
- Quickerll series, QTII, SK II series, DP II series, GSII
Compatible Nikon camera models include (but are not limited to): D5, D4, D60, D70S, D90, D100, D200, D300S, D300, D500, D610, D700, D750, D800, D810, D3100, D3200, D3300, D5000, D5100, D5200, D5300, D7000, D7100.
6. Maintenance
- Clean the device regularly with a soft, dry cloth. Do not use solvents or harsh chemicals.
- Keep the hot shoe contacts clean and free from dust or debris.
- Store the device in a dry, cool place when not in use.
- Remove batteries if storing for extended periods to prevent leakage.
7. Troubleshooting
If you encounter issues with your GODOX XPro-N Flash Trigger, refer to the following common solutions:
- Device does not power on: Check battery installation and ensure batteries are charged.
- Flash not firing: Verify that the trigger is securely mounted on the camera, the flash is powered on, and both are set to the same channel and group. Check flash battery levels.
- Inconsistent firing: Ensure there are no obstructions between the trigger and the flash. Check for potential wireless interference and try changing the channel or setting a Wireless ID.
- Incorrect exposure: Adjust Flash Exposure Compensation (FEC) or switch to Manual mode to set power output directly.
- Firmware update issues: Ensure the USB cable is properly connected and follow the instructions provided on the Godox website for firmware updates.
For further assistance, please contact GODOX customer support.
8. Specifications
| Feature | Detail |
|---|---|
| Model Number | XPro-N |
| Product Dimensions | 4.72 x 4.72 x 1.57 inches |
| Item Weight | 3.53 ounces |
| Compatible Mountings | Nikon |
| Camera Flash Type | Slave (Trigger) |
| Flash Sync Speed | 1/8000s |
| Included Components | Flash Trigger |
| Power Source | 2x AA Batteries (not included) |
9. Warranty and Support
GODOX products typically come with a limited warranty. Please refer to the warranty card included with your product or visit the official GODOX website for specific warranty terms and conditions.
For technical support, service, or inquiries, please visit the GODOX Official Store on Amazon or consult the comprehensive User Manual (PDF) for additional details.