
1. Introduction
The Blackmagic Design SDI to HDMI Micro Converter is a compact and robust device designed to convert professional SDI video signals to consumer HDMI. This allows for the monitoring of SDI video on standard HDMI televisions, projectors, and other displays. It supports multi-rate 3G-SDI, automatically switching between all SD and HD formats up to 1080p60. The converter also features a 3G-SDI loop through output, support for Level A and Level B equipment, and convenient power via USB.

Image 1.1: Angled view of the Blackmagic Design SDI to HDMI Micro Converter, showcasing its compact design and port labels.
2. Key Features
- SDI Video Inputs: 1 x SD, HD, or 3G-SDI.
- SDI Video Outputs: 1 x SDI loop out for connecting to additional SDI devices.
- HDMI Outputs: HDMI Type A out for connecting to HDMI displays.
- Multi Rate Support: Automatic detection and switching between SD and HD formats up to 1080p60.
- Power: Can be powered via USB, offering flexible power options.
- Compatibility: Supports Level A and Level B SDI equipment.
3. Setup Guide
Follow these steps to set up your Blackmagic Design SDI to HDMI Micro Converter:
- Connect SDI Input: Connect your SDI source (e.g., camera, switcher) to the SDI IN port on the converter using a BNC cable.
- Connect SDI Loop Out (Optional): If you need to pass the SDI signal to another SDI device, connect a BNC cable from the SDI LOOP OUT port to the next device.
- Connect HDMI Output: Connect an HDMI cable from the HDMI OUT port on the converter to your HDMI display (e.g., monitor, projector).
- Connect Power: Connect a USB cable to the USB POWER port on the converter and plug the other end into a USB power source (e.g., computer USB port, USB wall adapter). The converter will power on automatically.

Image 3.1: Top-down angled view of the converter, showing the SDI IN, SDI LOOP OUT, and HDMI OUT ports, along with the USB power input.
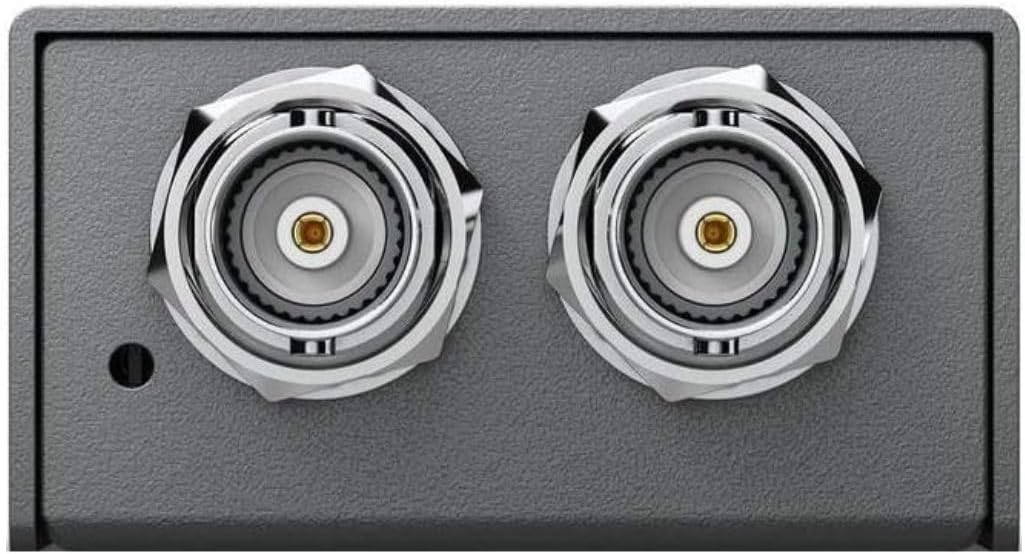
Image 3.2: Detailed view of the SDI IN and SDI LOOP OUT BNC connectors, illustrating the input and pass-through capabilities.

Image 3.3: Detailed view of the HDMI Type A output port and the Micro-USB power input, highlighting the connectivity for display and power.
4. Operating Instructions
The Blackmagic Design SDI to HDMI Micro Converter is designed for ease of use with automatic operation:
- Once powered, the converter will automatically detect the incoming SDI video format (SD, HD, or 3G-SDI) and convert it to the appropriate HDMI signal.
- No manual configuration or software is typically required for standard operation.
- Ensure your HDMI display is set to the correct input source to view the converted video signal.

Image 4.1: Top view of the converter, clearly showing the 'Micro Converter SDI to HDMI' branding and port labels for easy identification during operation.
5. Maintenance
To ensure the longevity and optimal performance of your converter, follow these maintenance guidelines:
- Cleaning: Use a soft, dry cloth to clean the exterior of the converter. Avoid using liquid cleaners or solvents, as they may damage the finish or internal components.
- Storage: Store the converter in a cool, dry place away from direct sunlight and extreme temperatures when not in use.
- Handling: Handle the device with care. Avoid dropping it or subjecting it to strong impacts.
- Ventilation: Ensure the converter has adequate ventilation and is not covered, especially during extended operation.
6. Troubleshooting
If you encounter issues with your SDI to HDMI Micro Converter, consider the following troubleshooting steps:
- No Video Output:
- Ensure the converter is properly powered via the USB port.
- Verify that the SDI input cable is securely connected to the SDI IN port and the SDI source is active and outputting a signal.
- Check the HDMI cable connection to both the converter's HDMI OUT port and your display.
- Confirm your HDMI display is set to the correct input source.
- Test with a different SDI source or HDMI display if possible to isolate the issue.
- Flickering or Intermittent Video:
- Check the quality and length of your SDI and HDMI cables. Long or low-quality cables can cause signal degradation.
- Ensure the power supply is stable and sufficient.
- Verify that the SDI source is outputting a stable signal within the supported formats (SD, HD, 3G-SDI up to 1080p60).
- No Audio:
- Ensure the SDI input signal includes embedded audio.
- Check your HDMI display's audio settings and volume.
7. Technical Specifications
| Feature | Specification |
|---|---|
| Model Number | CONVCMIC/SH |
| SDI Video Inputs | 1 x SD, HD, or 3G-SDI |
| SDI Video Outputs | 1 x SDI loop out |
| HDMI Outputs | HDMI Type A out |
| Multi Rate Support | Auto detection of SD or HD |
| Compatible Devices | Projector (and other HDMI displays) |
| Connector Type | HDMI, BNC, Micro-USB |
| Color | Black |
| Product Dimensions (L x W x H) | 9.1 x 9.1 x 9.1 inches |
| Item Weight | 5.6 ounces |
| Manufacturer | Blackmagic Design |
| Date First Available | November 25, 2017 |
8. Warranty and Support
This Blackmagic Design SDI to HDMI Micro Converter comes with a Blackmagic Design 3 Year Limited Warranty. For detailed warranty terms and conditions, please refer to the official Blackmagic Design website or contact their customer support.
For further technical assistance, product updates, or additional support resources, please visit the official Blackmagic Design Store or their main support portal.


