
Introduction
This user manual provides comprehensive instructions for the operation and maintenance of your BAOFENG BF-88A Walkie Talkies. Designed for reliable communication, these portable FRS two-way radios are suitable for various applications including business, camping, family use, and more. Please read this manual thoroughly before using the device to ensure proper function and safety.
What's in the Box
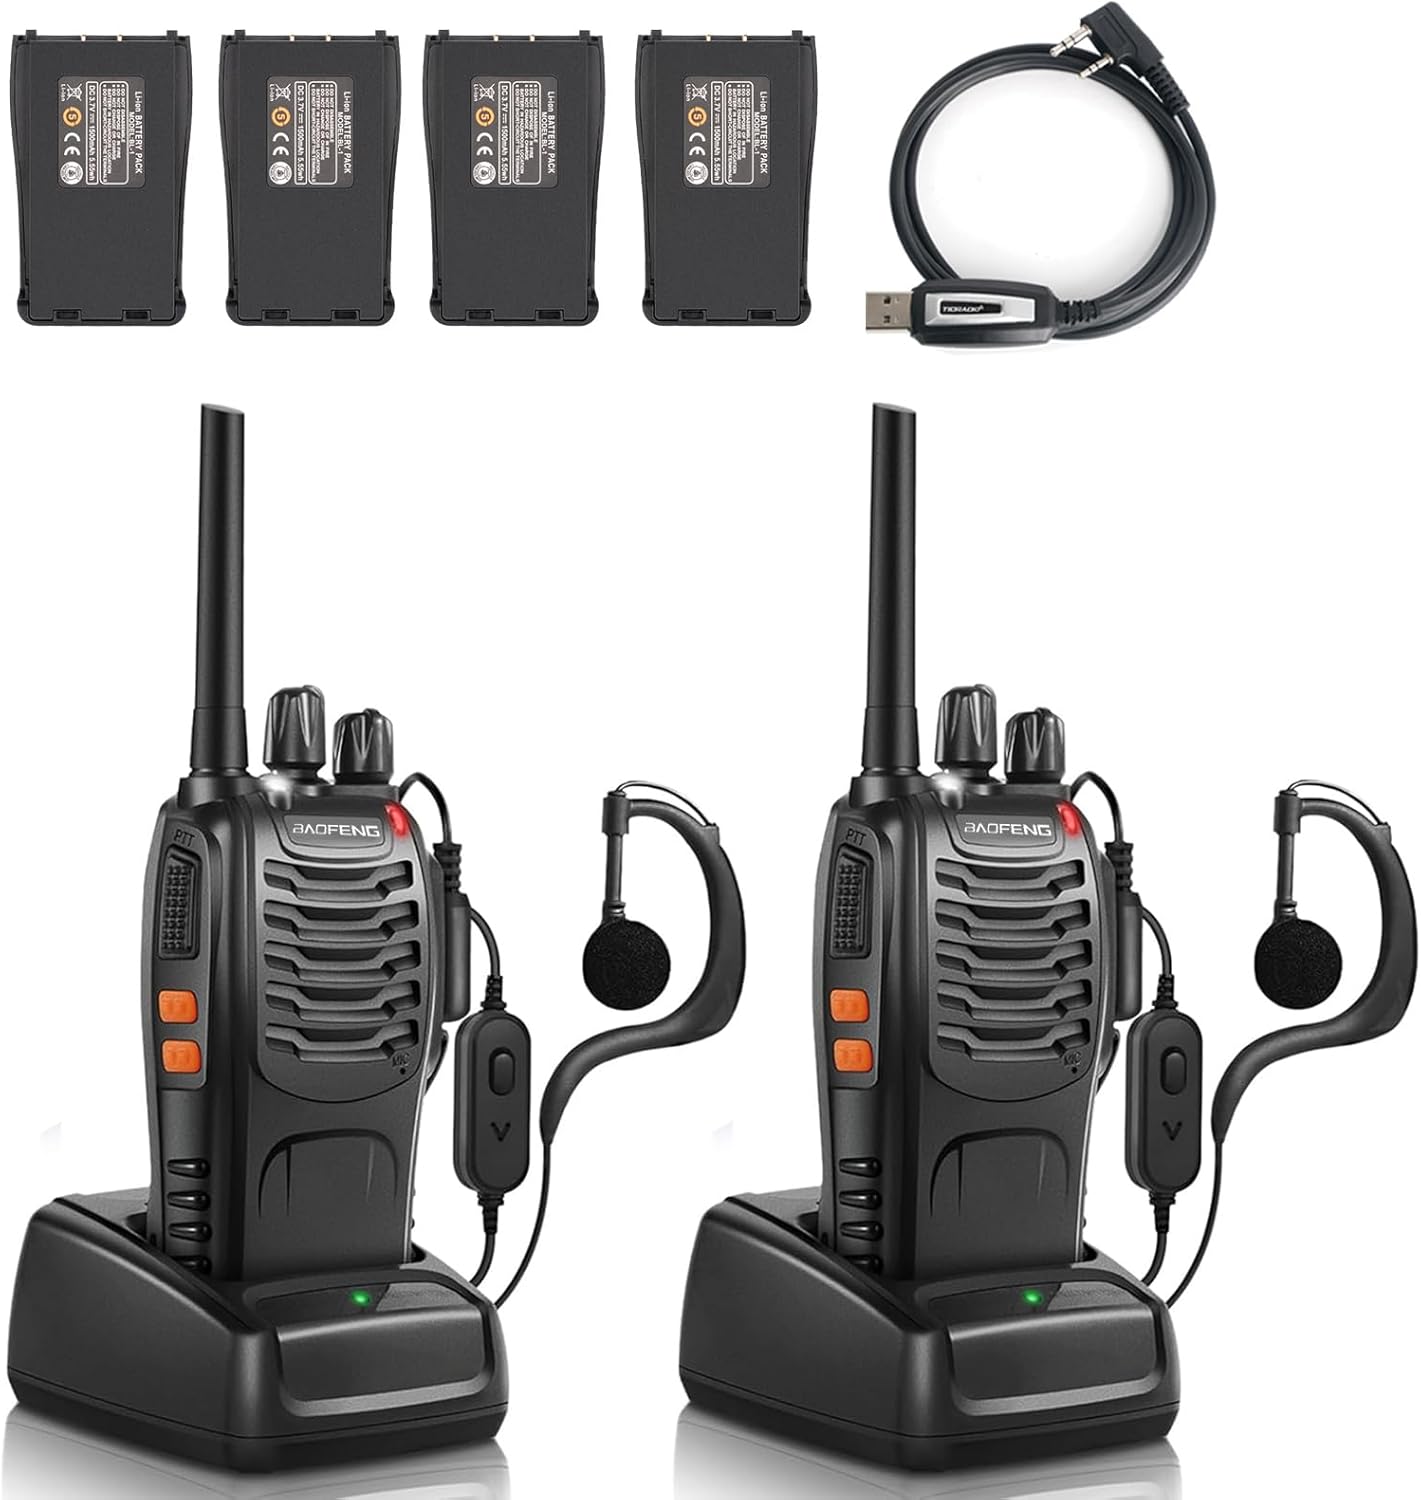
Figure 1: Package Contents
The image displays the complete package contents: two BF-88A walkie talkies, four rechargeable batteries, two earpieces with microphones, and a USB programming cable.
- BAOFENG BF-88A Two-Way Radios (2 units)
- 1500mAh Lithium Polymer Batteries (4 units)
- Earpieces with Microphones (2 units)
- Charging Docks (2 units)
- USB Programming Cable (1 unit)
- Belt Clips (2 units)
- Hand Straps (2 units)
Product Overview

Figure 2: BF-88A Component Diagram
This diagram highlights the key components of the BF-88A radio, including the Antenna, Channel Switch, Power Switch/Volume Control, Flashlight, LED Indicator, PTT Button, SP/MIC Jacks, Moni Button, and Flashlight Button.
Key Features:
- Multi-functional: License-Free (FCC: 2AJGM-BF88A), 155 CTCSS&DCS codes, built-in LED flashlight, VOX hands-free operation, emergency ALARM, scanning, and power save mode.
- Extended Battery Life: Each device includes two 1500mAh batteries, offering 5-7 days standby time and 8-12 hours of continuous use. Low battery reminders are included.
- Clear Communication: High-quality built-in speakers and included G-type earpieces with microphones ensure clear audio, even in noisy environments.
- Easy to Use: Ready for immediate use out of the box with pre-programmed channels.
- Compact and Portable: Upgraded shorter antenna for enhanced portability and improved range.
Setup
1. Battery Installation

Figure 3: Dual Battery Concept
The image illustrates that each BF-88A radio comes with two 1500mAh batteries, one for use and one for charging or as a spare.
- Ensure the radio is powered off.
- Align the battery pack with the battery compartment on the back of the radio.
- Slide the battery pack into place until it clicks securely.
- To remove, press the battery release latch (if present) and slide the battery out.
2. Charging the Battery
- Place the radio with the battery installed into the charging dock.
- Alternatively, you can place a spare battery directly into the charging dock.
- Connect the charging dock to a power source. The LED indicator on the charger will show charging status (typically red for charging, green for fully charged).
- A full charge takes approximately 3 hours.
3. Attaching the Earpiece

Figure 4: Earpiece Connection
This image details the earpiece, showing its Kenwood 2-pin connector, the large Push-To-Talk (PTT) button on the microphone, and the comfortable earhook design, emphasizing clear communication in noisy environments.
- Locate the SP/MIC Jacks on the side of the radio, usually protected by a waterproof casing.
- Carefully open the casing.
- Insert the Kenwood 2-pin connector of the earpiece firmly into the jacks.
- Ensure the connection is secure to prevent audio issues.
Operating Instructions
1. Power On/Off and Volume Control
- To power on the radio, rotate the Power Switch/Volume Control knob clockwise. You will hear a click and a voice prompt indicating the current channel.
- Continue rotating the knob clockwise to increase the volume, and counter-clockwise to decrease it.
- To power off, rotate the knob counter-clockwise until you hear a click.
2. Channel Selection
- Rotate the Channel Switch knob (located next to the antenna) to select one of the 16 available channels.
- The radio will announce the selected channel number.
- Ensure all radios in your group are set to the same channel for communication.
3. Transmitting and Receiving
- To transmit, press and hold the Push-To-Talk (PTT) button on the side of the radio or on your earpiece microphone. Speak clearly into the microphone.
- Release the PTT button to receive.
- The LED Indicator will typically glow red when transmitting and green when receiving a signal.
4. VOX (Voice Operated Transmit)

Figure 5: VOX Function
This image visually represents the VOX (Voice Operated Transmit) feature, showing a sound wave emanating from a person's mouth towards the radio, indicating that transmission is activated by voice, allowing for hands-free operation.
- VOX allows for hands-free transmission. When enabled, the radio will automatically transmit when it detects your voice.
- VOX sensitivity can be adjusted via programming software (see Programming section).
5. Flashlight
- Press the Flashlight Button (located below the PTT button) to turn the built-in LED flashlight on or off.
- Some models may support a flashing mode for the flashlight, which can be activated by pressing the button multiple times or through programming.
6. Scanning
- The scanning feature allows the radio to automatically scan through pre-programmed channels to detect active transmissions.
- Activation of scanning is typically done via programming.
7. Emergency Alarm

Figure 6: Alarm Function
This image depicts an alarm bell icon superimposed on a walkie talkie, symbolizing the emergency alarm feature of the device.
- The emergency alarm function can be activated to emit a loud alert sound.
- This feature is typically activated by a dedicated button (Moni Button) or a combination of buttons, and its behavior can be configured via programming.
8. Squelch
- Squelch automatically mutes the radio speaker when no signal is present, reducing background noise.
- The squelch level can be adjusted via programming software.
Programming the Radio

Figure 7: Radio Customization via Programming
This image demonstrates how the BF-88A radio can be customized using a programming cable, showing a table with channel names and private codes (CTCSS/DCS) for secure communication. It also highlights features like VOX, Alarm, Squelch, and Scan that can be configured.
While the BF-88A is ready to use out of the box, advanced users can customize its functions and frequencies using programming software.
- Chirp Software: The included BaoFeng programming cable can be used with Chirp, a free and open-source radio programming software. This allows for customization of channels, CTCSS/DCS codes, VOX settings, squelch levels, and more.
- TIDRADIO Bluetooth Programmer: For easier programming on a smartphone, the radios can be customized quickly via a TIDRADIO Bluetooth programmer using the Odmaster app.
- FCC Regulations: Be aware of local regulations regarding radio frequencies and power limits. It is recommended to program the radios to legal FRS/GMRS frequencies and power levels for your region, especially in the USA, to ensure compliance.
Specifications
| Feature | Specification |
|---|---|
| Model Number | BF-88A |
| Item Weight | 1.79 pounds (approx. 0.81 kg) |
| Product Dimensions | 1 x 1.5 x 8.5 inches (approx. 2.54 x 3.81 x 21.59 cm) |
| Batteries | 4 Lithium Polymer batteries required (included) |
| Number of Channels | 16 |
| Frequency Range | 400 - 470 MHz |
| Talking Range Maximum | Up to 5 Kilometers (3.1 miles) in open spaces; 0.5-1.2 miles in complex areas. |
| Tuner Technology | UHF |
| Voltage | 3.7 Volts |
| Water Resistance Level | Waterproof |
Maintenance
- Cleaning: Wipe the radio with a soft, damp cloth. Do not use harsh chemicals or abrasive cleaners.
- Battery Care: To prolong battery life, avoid overcharging and completely discharging the batteries. Store batteries in a cool, dry place when not in use.
- Storage: Store the radios in a dry, dust-free environment away from extreme temperatures.
- Antenna: Do not bend or modify the antenna, as this can affect performance.
Troubleshooting
| Problem | Possible Solution |
|---|---|
| No Power | Check battery installation. Ensure battery is charged. |
| Cannot Transmit or Receive | Verify all radios are on the same channel. Check if battery is low. Ensure PTT button is fully pressed when transmitting. Check squelch settings. |
| Poor Audio Quality | Check earpiece connection. Ensure microphone is not obstructed. Adjust volume. Move closer to the other radio. |
| Limited Range | Obstructions (buildings, hills) can reduce range. Ensure antenna is securely attached. Check battery level. |
Warranty and Support
For warranty information and customer support, please refer to the documentation provided with your purchase or contact BAOFENG customer service directly. Keep your proof of purchase for any warranty claims.
Manufacturer: BAOFENG
For additional resources, you may visit the official BAOFENG store: BAOFENG Store on Amazon