1. Introduction
The AWELCO PLUS 210 is a professional inverter welding machine designed for Manual Metal Arc (MMA) welding, also known as electrode welding. This unit utilizes advanced inverter technology to provide a stable and powerful welding current, making it suitable for a wide range of welding tasks. Its compact, lightweight, and reliable design ensures high performance for both professional and demanding DIY users. This manual provides essential information for the safe and efficient operation, setup, and maintenance of your AWELCO PLUS 210 welder.
2. Safety Instructions
Always prioritize safety when operating welding equipment. Failure to follow these instructions can result in serious injury or death.
- Electric Shock: Welding current can cause fatal electric shock. Ensure the welder is properly grounded. Do not touch live electrical parts or electrodes with bare hands or wet gloves. Wear dry, insulating welding gloves.
- Fumes and Gases: Welding produces fumes and gases that can be hazardous to health. Work in a well-ventilated area. Use local exhaust ventilation or respirators if necessary.
- Arc Rays: Arc rays can burn eyes and skin. Wear a welding helmet with appropriate filter lenses and protective clothing (long sleeves, trousers, leather apron). Protect bystanders with welding screens.
- Fire and Explosion: Welding sparks and hot metal can cause fires. Keep flammable materials away from the welding area. Have a fire extinguisher readily available. Do not weld on containers that have held flammable substances.
- Burns: Hot metal and electrodes can cause severe burns. Allow welded materials to cool before handling. Wear protective gloves and clothing.
- Maintenance: Disconnect power before performing any maintenance or service. Only qualified personnel should perform repairs.
3. Product Overview
Familiarize yourself with the components of your AWELCO PLUS 210 welder.
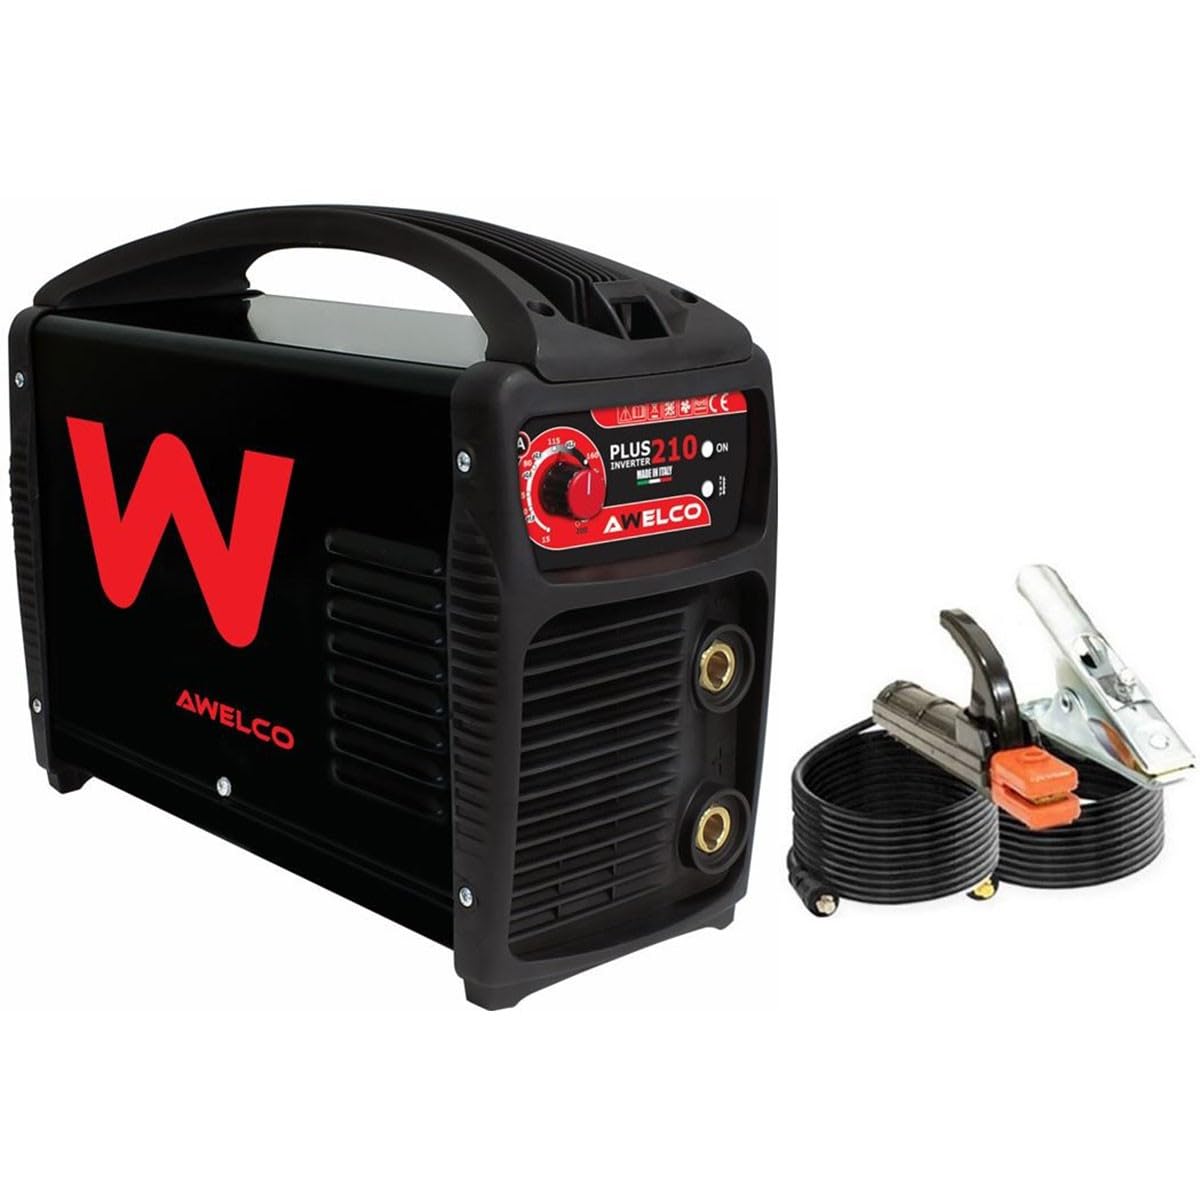
Figure 1: Front view of the AWELCO PLUS 210 Inverter Welder. This image shows the main control panel, the amperage adjustment knob, and the positive and negative terminals for connecting welding cables.

Figure 2: Close-up of the control panel. Features include the amperage adjustment knob (MIN-MAX), digital display, power indicator light (ON), and thermal overload indicator.
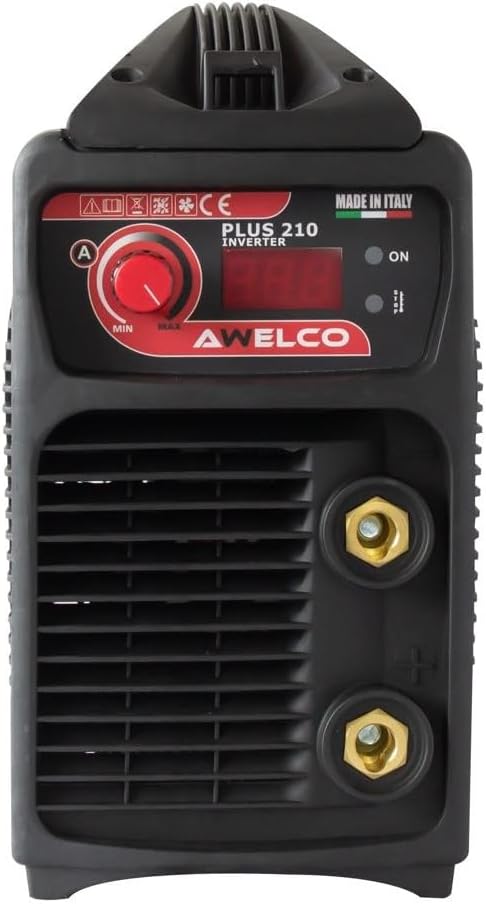
Figure 3: Front view showing the quick-connect terminals for welding cables. The top terminal is typically for the electrode holder, and the bottom for the ground clamp, depending on polarity requirements.

Figure 4: Side view of the AWELCO PLUS 210 welder, highlighting the ventilation grilles essential for cooling the internal components during operation.
4. Setup
Follow these steps to set up your welder for operation.
- Unpacking and Inspection: Carefully remove the welder and all accessories from the packaging. Inspect for any signs of damage during transit. Report any damage to your supplier immediately.
- Power Connection: Connect the welder to a suitable 1PH230 V, 50/60 Hz power supply. Ensure the electrical outlet is properly grounded and can handle the welder's power requirements (up to 8 KVA).
- Connecting Welding Cables:
- Connect the electrode holder cable to the positive (+) terminal on the welder.
- Connect the ground clamp cable to the negative (-) terminal on the welder.
- Ensure connections are secure and fully inserted.

Figure 5: Example of welding cables (electrode holder and ground clamp) and a chipping hammer/wire brush, which are common accessories for MMA welding.
- Electrode Selection: Choose an electrode appropriate for the material type and thickness you intend to weld. The AWELCO PLUS 210 supports electrodes from Ø1.6 mm to Ø5.0 mm. Refer to the electrode manufacturer's recommendations for optimal amperage settings.
- Workpiece Preparation: Clean the workpiece thoroughly to remove rust, paint, oil, or other contaminants that can affect weld quality. Secure the ground clamp firmly to the workpiece, ensuring good electrical contact.
5. Operating Instructions
Operating your AWELCO PLUS 210 welder for MMA welding.
- Power On: Turn on the main power switch on the welder. The 'ON' indicator light should illuminate.
- Set Amperage: Use the amperage adjustment knob on the control panel to set the desired welding current. The digital display will show the selected amperage. Adjust based on electrode diameter and material thickness.
- Welding Technique:
- Arc Striking: Gently scratch the electrode tip against the workpiece like striking a match, then quickly lift it slightly to establish an arc. Maintain a consistent arc length.
- Maintaining the Arc: Hold the electrode at an angle (typically 10-30 degrees from vertical in the direction of travel) and move it steadily along the joint. Maintain a consistent arc length and travel speed to achieve a uniform weld bead.
- Slag Removal: After welding, allow the weld to cool slightly, then remove the slag using a chipping hammer and wire brush.
- Duty Cycle: The AWELCO PLUS 210 has a duty cycle of 40% at 200A. This means it can weld continuously for 4 minutes at 200A within a 10-minute period, followed by 6 minutes of cooling. Exceeding the duty cycle will activate the thermal overload protection, and the welder will temporarily shut down until it cools.
- Power Off: After completing your welding tasks, turn off the main power switch and disconnect the welder from the power supply.
6. Maintenance
Regular maintenance ensures the longevity and safe operation of your welder.
- Cleaning: Periodically clean the internal components of the welder using dry compressed air to remove dust and metal particles. Ensure the power is disconnected before cleaning. Pay special attention to the ventilation grilles to ensure proper airflow.
- Cable Inspection: Regularly inspect welding cables, electrode holder, and ground clamp for damage, cuts, or loose connections. Replace damaged components immediately.
- Storage: Store the welder in a clean, dry, and dust-free environment when not in use. Protect it from moisture and extreme temperatures.
7. Troubleshooting
Refer to this section for common issues and their solutions.
| Problem | Possible Cause | Solution |
|---|---|---|
| Welder does not power on | No power supply; Faulty power cable; Internal fault | Check power connection and outlet; Inspect power cable; Contact service center |
| No welding arc | Poor ground connection; Incorrect amperage setting; Wet or faulty electrode; Damaged cables | Ensure ground clamp is secure and clean; Adjust amperage; Use dry electrodes; Inspect and replace cables |
| Weak or unstable arc | Low amperage; Poor electrical connections; Incorrect electrode type | Increase amperage; Check all cable connections; Use appropriate electrode |
| Overheating / Thermal overload light on | Exceeded duty cycle; Blocked ventilation; High ambient temperature | Allow welder to cool down; Clean ventilation grilles; Work in a cooler environment |
| Poor weld quality | Incorrect amperage; Improper arc length or travel speed; Contaminated workpiece | Adjust amperage; Practice welding technique; Clean workpiece thoroughly |
8. Specifications
Technical specifications for the AWELCO PLUS 210 Inverter Welder.
| Feature | Specification |
|---|---|
| Model | PLUS 210 |
| Input Voltage | 1PH230 V |
| Frequency | 50/60 Hz |
| Power Consumption (60%) | 8 KVA |
| No-load Voltage | 90 V |
| Welding Current Range | 25-200 A |
| Duty Cycle (at 200A) | 40% |
| Electrode Diameter (Min) | Ø1.6 mm |
| Electrode Diameter (Max) | Ø5.0 mm |
| Protection Index | IP 21S |
| Dimensions (L x W x H) | 38 x 16 x 30 cm |
| Weight | 6 kg |
9. Warranty and Support
For warranty information, technical support, or spare parts, please contact your retailer or the AWELCO customer service department. Keep your purchase receipt as proof of purchase.


