Introduction
Thank you for purchasing the GPX Mini Projector (Model PJ308W). This compact and versatile projector is designed to transform any space into an entertainment hub, allowing you to project your favorite movies, games, and photos onto a large screen. With multiple input options and easy adjustments, the PJ308W offers a convenient and immersive viewing experience. Please read this manual thoroughly before operating the device to ensure proper use and maintenance.
Important Safety Information
- Do not block ventilation openings: Ensure proper airflow around the projector to prevent overheating.
- Avoid direct eye exposure to the lens: The projector emits a bright light that can cause eye damage.
- Keep away from water and moisture: Do not expose the projector to rain or humidity.
- Use only specified power adapter: Refer to the specifications for correct power requirements.
- Handle with care: Avoid dropping or subjecting the projector to strong impacts.
- Do not attempt to repair: Refer all servicing to qualified service personnel.
Package Contents
Please check to ensure all items are present:
- GPX Mini Projector (PJ308W)
- Power Adapter
- Remote Control (batteries not included)
- User Manual
Product Overview

Figure 1: Front and side view of the GPX Mini Projector, showing the main lens and ventilation grilles.
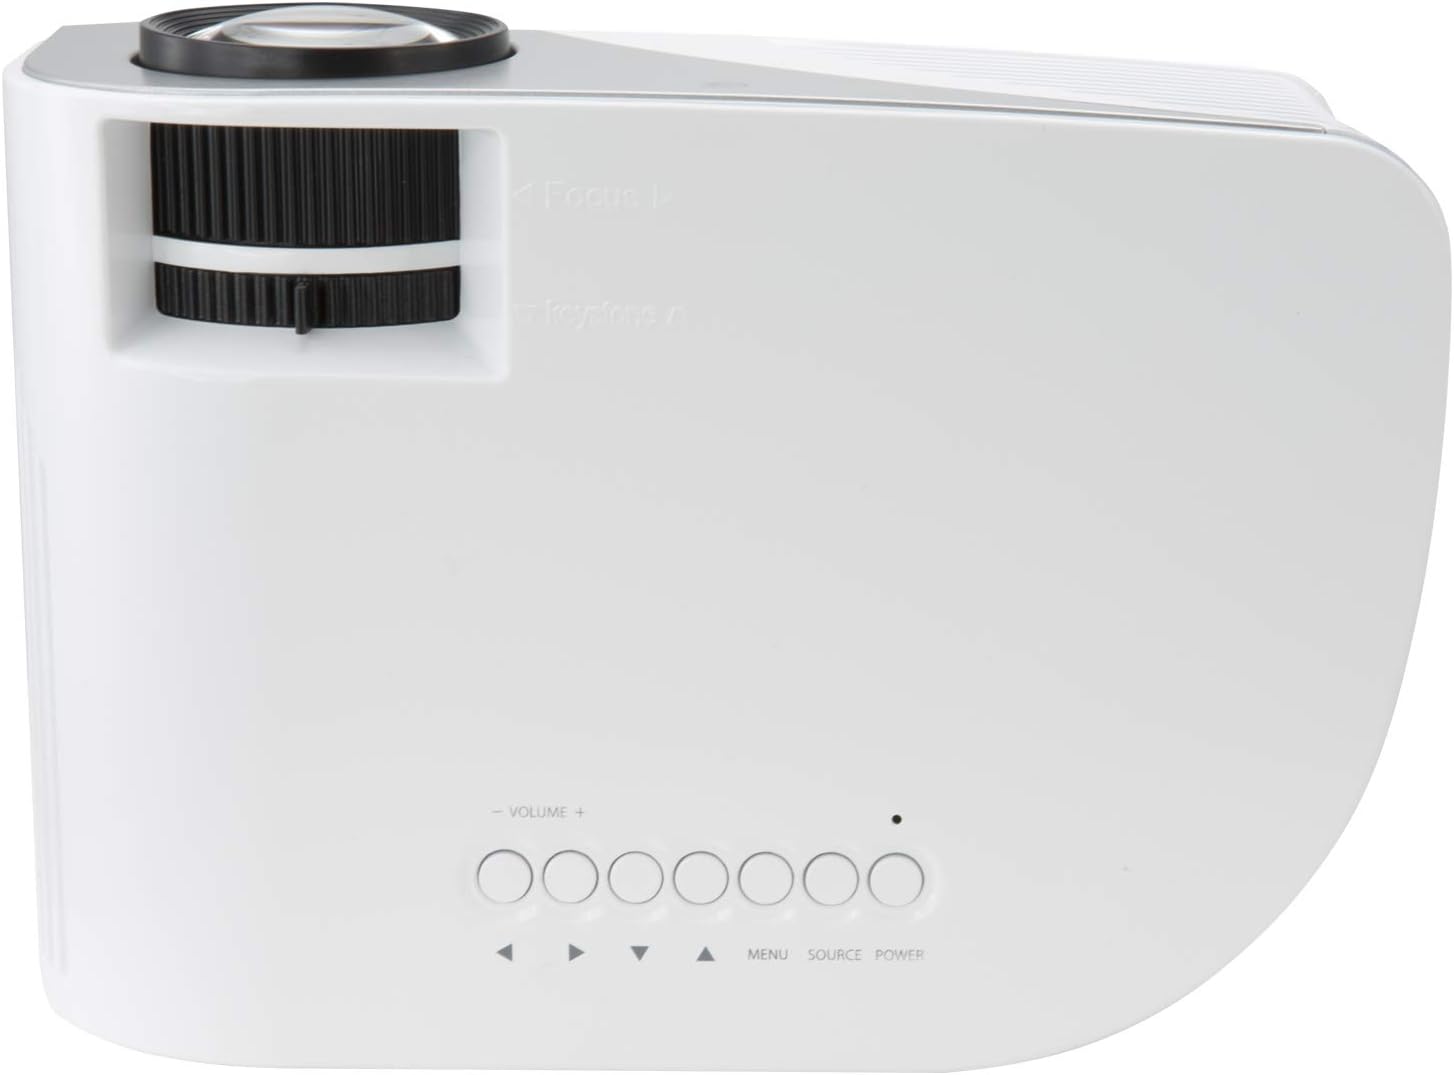
Figure 2: Top view of the projector, highlighting the focus and keystone adjustment dials, along with the onboard control buttons (Volume, Menu, Source, Power).

Figure 3: Rear view of the projector, displaying the various input and output ports: USB, HDMI In, Audio Out, AV In, VGA In, and DC-In.
Components and Controls:
- Projection Lens: Projects the image onto the screen or surface.
- Focus Adjustment Dial: Used to sharpen the projected image.
- Keystone Correction Dial: Adjusts the image shape to correct trapezoidal distortion.
- Control Panel: Buttons for power, source selection, menu navigation, and volume control.
- USB Port: For connecting USB storage devices to play media.
- HDMI Input: For connecting devices like laptops, gaming consoles, or streaming sticks.
- Audio Out (3.5mm): For connecting external speakers or headphones.
- AV Input (3.5mm): For connecting older devices using an AV cable.
- VGA Input: For connecting computers with a VGA output.
- DC-In: Power input port for the included power adapter.
- Built-in Speaker: Provides audio output directly from the projector.
Setup
1. Placement
Place the projector on a stable, flat surface. For optimal viewing, position the projector directly in front of your projection surface (wall or screen). The ideal projection distance is between 3.9 and 6.5 feet (1.2-2 meters) for a screen size up to 110 inches. Ensure there are no obstructions blocking the lens or ventilation openings.
2. Power Connection
- Connect the power adapter to the DC-In port on the back of the projector (refer to Figure 3).
- Plug the other end of the power adapter into a standard electrical outlet.
- The power indicator light on the projector will illuminate, indicating it is receiving power.
3. Connecting Devices
The GPX Mini Projector supports various input sources:
- HDMI: Connect an HDMI cable from your device (e.g., laptop, DVD player, game console) to the HDMI In port on the projector. This is the recommended connection for high-definition content.
- VGA: Connect a VGA cable from your computer to the VGA In port.
- USB: Insert a USB flash drive into the USB port to play compatible media files (photos, videos, music).
- AV: Use the included 3.5mm to RCA AV cable to connect older devices with RCA outputs (yellow for video, red/white for audio) to the AV In port.
4. Focus and Keystone Adjustment
- Focus: Rotate the Focus Adjustment Dial (refer to Figure 2) until the projected image appears sharp and clear.
- Keystone: If the projected image appears trapezoidal (wider at the top or bottom), rotate the Keystone Correction Dial (refer to Figure 2) to square the image.
Operating Instructions
1. Powering On/Off
- To Power On: Press the Power button on the projector's control panel or the remote control. The projector will start up.
- To Power Off: Press the Power button again. The projector will shut down. Always allow the projector to cool down completely before unplugging or moving it.
2. Source Selection
After connecting your desired device, you need to select the correct input source.
- Press the "Source" button on the projector's control panel or the remote control.
- Use the arrow buttons to navigate through the available input sources (HDMI, VGA, USB, AV).
- Press "OK" or "Enter" to confirm your selection.
3. Menu Navigation
The projector has an on-screen display (OSD) menu for adjusting various settings.
- Press the "Menu" button on the projector or remote to access the OSD.
- Use the arrow buttons to navigate through menu options (e.g., Picture Mode, Aspect Ratio, Sound Settings).
- Press "OK" or "Enter" to select an option or enter a sub-menu.
- Use the arrow buttons to adjust values or select sub-options.
- Press "Menu" again to exit the OSD.
4. Audio Output
The projector features a built-in speaker. For enhanced audio, you can connect external speakers or headphones.
- Connect your external audio device to the "Audio Out" (3.5mm) port on the back of the projector (refer to Figure 3).
- Adjust the volume using the Volume buttons on the projector or remote control.
Maintenance
1. Cleaning
- Lens: Use a soft, lint-free cloth specifically designed for optical lenses. Do not use abrasive cleaners or cloths that could scratch the lens.
- Exterior: Wipe the projector's casing with a soft, dry cloth. For stubborn marks, a slightly damp cloth can be used, but ensure no liquid enters the device.
- Ventilation Openings: Periodically check and gently clean the ventilation grilles to prevent dust buildup, which can impede airflow and cause overheating. Use a soft brush or compressed air.
2. LED Bulb Life
The GPX Mini Projector uses an LED light source with an estimated life of 20,000 hours. This means the bulb is designed to last for the lifetime of the product under normal usage and does not require replacement.
3. Storage
When not in use for extended periods, store the projector in a cool, dry place, away from direct sunlight and extreme temperatures. It is recommended to keep it in its original packaging or a protective case to prevent dust accumulation and physical damage.
Troubleshooting
| Problem | Possible Cause | Solution |
|---|---|---|
| No image projected |
|
|
| Image is blurry |
|
|
| Image is trapezoidal |
|
|
| No sound |
|
|
| Projector overheats or shuts down |
|
|
Specifications
| Feature | Detail |
|---|---|
| Model | PJ308W |
| Brand | GPX |
| Display Technology | DLP |
| Supported Resolutions | 480p, 720p, 1080i, 1080p |
| Light Source | LED |
| LED Bulb Life | 20,000 hours |
| Projection Size | Up to 110 inches |
| Display Distance | 3.9 - 6.5 ft. (1.2-2M) |
| Connectivity | HDMI, VGA, USB, AV (3.5mm), Audio Out (3.5mm) |
| Built-in Speaker | Yes |
| Keystone Correction | Yes |
| Product Dimensions | 8.7 x 6.5 x 3.54 inches |
| Item Weight | 1.1 pounds |
| Power Input | DC-In (via included adapter) |
Warranty and Support
For warranty information and technical support, please refer to the warranty card included with your product or visit the official GPX website. Keep your purchase receipt as proof of purchase for any warranty claims.
Online Support: www.gpx.com/support (Example link, actual link may vary)