1. Introduction and Overview
This manual provides essential information for the installation, operation, and maintenance of your Wet Sounds Sinister-SDX6 Marine Amplifier. The Sinister-SDX6 is a high-performance 6-channel marine amplifier designed for robust audio delivery in demanding marine environments.

Image 1.1: Front view of the Wet Sounds Sinister-SDX6 Marine Amplifier, showcasing its sleek black casing and Wet Sounds logo.
Key Features:
- Powerful Performance: Delivers robust audio with 6 channels and a maximum power output of 600 watts.
- Versatile Configuration: Supports configurable operation for 6, 5, 4, 3, or 2 channels to suit various audio setups.
- Premium Components: Constructed with high-quality components for reliable sound and durability in marine conditions.
- Advanced Cooling: Features an advanced cooling system to maintain optimal performance and reliability during extended use.
- Easy Installation: Compact design with user-friendly wiring connections simplifies integration into marine audio systems.
2. Setup and Installation
Proper installation is crucial for the performance and longevity of your amplifier. It is recommended that installation be performed by a qualified marine audio technician.
2.1 Mounting Location
- Choose a dry, well-ventilated location away from direct sunlight and heat sources.
- Ensure adequate airflow around the amplifier for effective cooling.
- Mount the amplifier securely to prevent movement due to boat vibrations. The mounting type is surface mount.
2.2 Wiring Connections
Refer to the diagram below for typical wiring connections. Always ensure power is disconnected before making any connections.
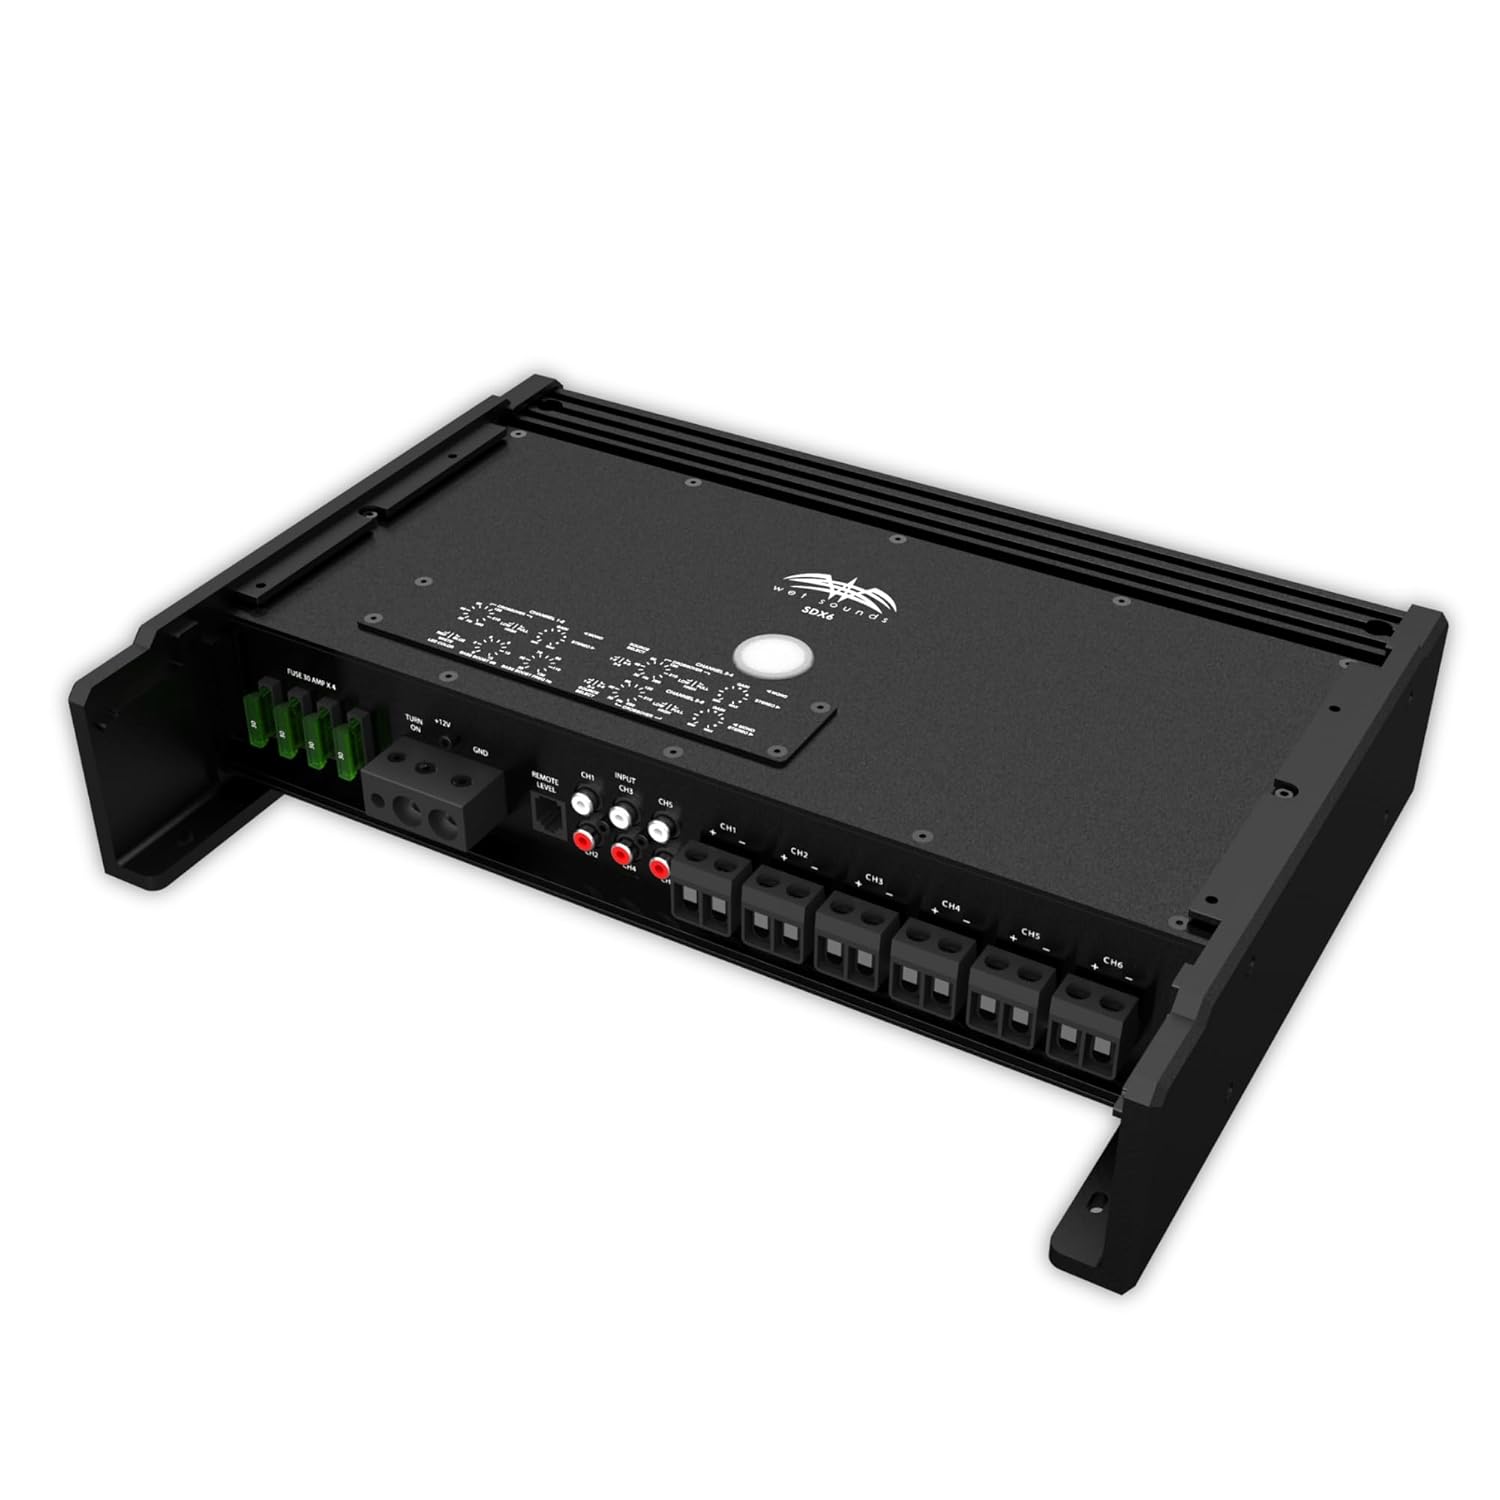
Image 2.1: Rear view of the Sinister-SDX6 amplifier showing power, ground, remote, RCA inputs, and speaker output terminals.
- Power Connection: Connect the main power cable (typically 4-gauge or larger) to the amplifier's +12V terminal and to the positive terminal of the boat's battery. Include an appropriate fuse within 18 inches of the battery.
- Ground Connection: Connect a ground cable of the same gauge as the power cable to the amplifier's GND terminal and to a clean, solid metal point on the boat's chassis or directly to the battery's negative terminal.
- Remote Turn-On: Connect a remote turn-on wire from your head unit or switch to the amplifier's REM terminal. This wire signals the amplifier to turn on and off with your audio system.
- RCA Inputs: Connect RCA cables from your head unit's pre-amp outputs to the amplifier's RCA input jacks (CH1/2, CH3/4, CH5/6).
- Speaker Outputs: Connect your marine speakers to the amplifier's speaker output terminals, ensuring correct polarity (+ to + and - to -). The amplifier supports various channel configurations.
Ensure all connections are secure and insulated to prevent short circuits and corrosion.
3. Operating Instructions
Once properly installed, the Sinister-SDX6 amplifier operates in conjunction with your marine audio head unit.
3.1 Initial Power-Up
- After all wiring is complete and checked, reconnect the boat's battery.
- Turn on your marine head unit. The amplifier should power on automatically via the remote turn-on wire.
- Start with the amplifier's gain controls set to minimum.
- Play audio at a moderate volume from your head unit.
- Slowly increase the amplifier's gain controls until the desired volume and clarity are achieved without distortion.
3.2 Adjusting Settings
The Sinister-SDX6 features adjustable crossovers and input levels to fine-tune your audio system. Consult a professional for optimal sound tuning.
- Gain Control: Matches the output voltage of your head unit to the amplifier's input sensitivity. Adjust carefully to prevent distortion.
- Crossover Settings: Use the built-in crossovers (High-Pass, Low-Pass, Full-Range) to direct specific frequency ranges to your speakers, optimizing sound quality and protecting speakers.
4. Maintenance
To ensure the longevity and optimal performance of your marine amplifier, follow these maintenance guidelines:
- Regular Cleaning: Periodically clean the exterior of the amplifier with a soft, damp cloth. Avoid harsh chemicals or abrasive cleaners.
- Connection Checks: Annually inspect all wiring connections for corrosion, looseness, or damage. Tighten any loose connections and clean any corrosion.
- Ventilation: Ensure that the amplifier's cooling fins are free from obstructions to allow proper heat dissipation.
- Environmental Protection: While designed for marine environments, avoid direct exposure to excessive moisture or saltwater spray whenever possible.
5. Troubleshooting
If you encounter issues with your Sinister-SDX6 amplifier, refer to the following common troubleshooting steps:
| Problem | Possible Cause | Solution |
|---|---|---|
| No Power/Amplifier Not Turning On |
|
|
| No Sound Output |
|
|
| Distorted Sound |
|
|
| Amplifier Overheating |
|
|
If problems persist after attempting these steps, contact Wet Sounds customer support or a certified technician.
6. Specifications
Detailed technical specifications for the Wet Sounds Sinister-SDX6 Marine Amplifier:
- Model Number: Sinister-SDX6
- Number of Channels: 6
- Power Output: 185W x 6 (specific RMS not provided, using title info)
- Voltage: 14.4 Volts
- Mounting Type: Surface Mount
- Package Dimensions: 19.5 x 13.2 x 4.1 inches
- Weight: 14 Pounds
- Manufacturer: Wet Sounds
- Date First Available: November 10, 2017
7. Warranty and Support
Wet Sounds, Inc. provides warranty coverage for products purchased through authorized channels.
7.1 Legal Disclaimer
Wet Sounds, Inc. products sold on any non-authorized website or internet auction site are void of any and all manufacturer's warranty. Please contact Wet Sounds with any questions regarding authorized dealers or warranty claims.
7.2 Customer Support
For technical assistance, warranty inquiries, or further information, please visit the official Wet Sounds website or contact their customer support directly. You can find more information about Wet Sounds products and support here.


