1. Introduction
Thank you for choosing the KitchenAid KXA12AS Automatic Coffeemaker. This appliance is designed to provide a convenient and efficient way to brew delicious coffee. With a capacity of 1.9 liters (approximately 12 large cups of 148ml or 36 small cups of 50ml), a 24-hour programmable timer, and a pause function, it offers flexibility for your daily coffee needs.
Please read this manual carefully before operating your coffeemaker to ensure safe and optimal performance. Keep this manual for future reference.
2. Important Safety Information
When using electrical appliances, basic safety precautions should always be followed to reduce the risk of fire, electric shock, and/or injury to persons, including the following:
- Read all instructions.
- Do not touch hot surfaces. Use handles or knobs.
- To protect against electric shock, do not immerse cord, plugs, or coffeemaker in water or other liquid.
- Close supervision is necessary when any appliance is used by or near children.
- Unplug from outlet when not in use and before cleaning. Allow to cool before putting on or taking off parts, and before cleaning the appliance.
- Do not operate any appliance with a damaged cord or plug or after the appliance malfunctions, or has been dropped or damaged in any manner.
- The use of accessory attachments not recommended by the appliance manufacturer may result in fire, electric shock, or injury to persons.
- Do not use outdoors.
- Do not let cord hang over edge of table or counter, or touch hot surfaces.
- Do not place on or near a hot gas or electric burner, or in a heated oven.
- Always attach plug to appliance first, then plug cord into the wall outlet. To disconnect, turn any control to “off,” then remove plug from wall outlet.
- Do not use appliance for other than intended use.
- Extreme caution must be used when moving an appliance containing hot liquids.
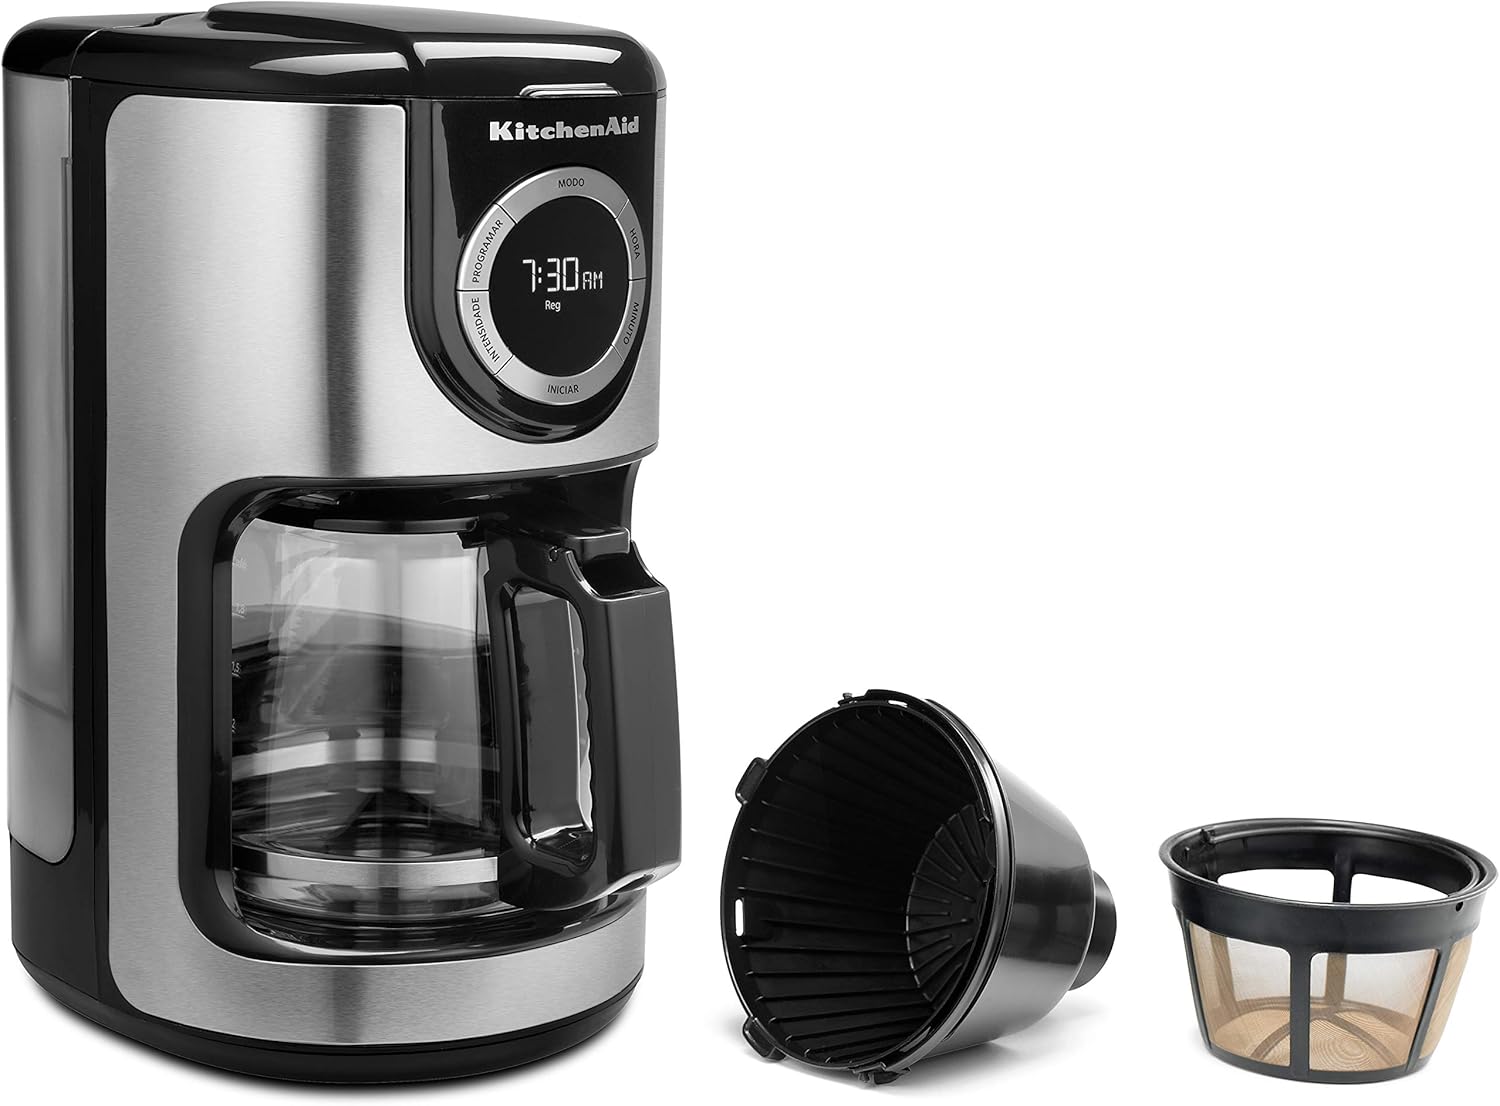
3. Product Overview and Components
Familiarize yourself with the parts of your KitchenAid Automatic Coffeemaker.


4. Setup
4.1 Initial Cleaning
- Before first use, wash the carafe, filter basket, and permanent filter in warm, soapy water. Rinse thoroughly.
- Wipe the exterior of the coffeemaker with a damp cloth. Do not immerse the coffeemaker in water.
4.2 Assembling the Coffeemaker
- Place the coffeemaker on a flat, stable surface.
- Insert the permanent filter into the filter basket. Alternatively, you can use a standard paper filter (cone-shaped).
- Place the assembled filter basket into its designated slot in the coffeemaker.
- Ensure the glass carafe is properly seated on the warming plate.
5. Operating Instructions
5.1 Brewing Coffee
- Open the water reservoir lid and fill with fresh, cold water up to the desired level indicated on the side of the reservoir. (Refer to Figure 3.4 for reservoir access).
- Add ground coffee to the filter. Use approximately one level tablespoon of ground coffee for every 5 ounces (148ml) of water, adjusting to your taste.
- Close the water reservoir lid.
- Press the START button to begin brewing. The coffeemaker will automatically start the brewing cycle.
5.2 Adjusting Coffee Intensity
You can switch between normal and strong coffee with a single touch.
- Before brewing, press the INTENSITY button on the control panel (refer to Figure 3.5).
- Select your desired intensity (e.g., Regular or Strong) as displayed on the digital screen.
5.3 Using the 24-Hour Programmable Timer
Program your coffeemaker up to 24 hours in advance to wake up to fresh coffee or have it ready upon your return.
- Press the PROGRAM button on the control panel.
- Use the HOUR and MINUTE buttons to set the desired brew time.
- Press PROGRAM again to confirm the setting. The display will show the programmed time.
- Ensure the coffeemaker is filled with water and coffee grounds before the programmed time.
5.4 Pause Function
If you wish to serve yourself a cup of coffee before the brewing cycle is complete, simply remove the carafe. A special valve will temporarily stop the coffee flow for up to 30 seconds, preventing drips onto the warming plate. Return the carafe within 30 seconds to resume brewing.

6. Maintenance and Cleaning
6.1 Daily Cleaning
- Always unplug the coffeemaker before cleaning.
- Wash the glass carafe, filter basket, and permanent filter after each use with warm, soapy water. These parts are also top-rack dishwasher safe.
- Wipe the exterior of the coffeemaker with a soft, damp cloth. Do not use abrasive cleaners or scouring pads.
6.2 Descaling
Mineral deposits from water can build up in your coffeemaker over time, affecting performance. Descale your coffeemaker regularly (e.g., every 2-3 months, or more often if you have hard water).
- Fill the water reservoir with a mixture of one part white vinegar and two parts cold water.
- Place an empty carafe on the warming plate.
- Run a brewing cycle with the vinegar solution.
- After the cycle, discard the solution and run 2-3 cycles with fresh, cold water to rinse thoroughly.
7. Troubleshooting
| Problem | Possible Cause | Solution |
|---|---|---|
| Coffee tastes burnt or bitter. | Coffee left on warming plate for too long (e.g., over 1.5 hours). | Brew only the amount of coffee you intend to consume immediately. Transfer remaining coffee to a thermal carafe if you wish to keep it warm for longer periods without affecting flavor. |
| Coffeemaker does not brew. | Not plugged in; water reservoir empty; carafe not properly placed. | Ensure unit is plugged in. Fill water reservoir. Ensure carafe is correctly seated on the warming plate. |
| Coffee is too weak or too strong. | Incorrect coffee-to-water ratio; incorrect intensity setting. | Adjust the amount of coffee grounds. Use the Intensity button to select Regular or Strong brew. |
| Water leaks from coffeemaker. | Overfilled water reservoir; filter basket not seated correctly. | Do not exceed the MAX fill line. Ensure filter basket is securely in place. |
8. Specifications
| Feature | Detail |
|---|---|
| Brand Name | KitchenAid |
| Model | KXA12AS |
| Color | Onyx Black |
| Part Number | KXA12AS |
| Number of Units | 1 |
| Voltage | 110 Volts |
| Energy Efficiency Label (ENCE) | a |
| Battery Operated | No |
| Material Type | Plastic and Glass |
| Product Dimensions | 32.07 x 25.1 x 40.96 cm; 3.5 g |
| ASIN | B077BQ71ZB |
| EAN | 7891129239302 |
| Package Dimensions | 40.8 x 32.6 x 25.2 centimeters |
| Available for purchase since | November 9, 2017 |
| Capacity | 2.8 Liters (Note: Product description states 1.9L, specifications state 2.8L. Using 1.9L from description for consistency in intro, but listing 2.8L here as per specifications.) |
| Specific Product Uses | Coffee |
9. Warranty and Support
For warranty information and customer support, please refer to the warranty card included with your product or visit the official KitchenAid website. You can also contact KitchenAid customer service for assistance with product registration, troubleshooting, or parts replacement.
Visit the official KitchenAid store: KitchenAid Store on Amazon


