1. Introduction
This manual provides detailed instructions for the safe and effective use of the CCLIFE Wheel Bearing Removal and Installation Tool Kit, Model 1501. This universal tool kit is designed for the professional disassembly and assembly of wheel hubs and bearings on most vehicle types. Proper use ensures delicate and precise installation by applying pressure directly to the outer bearing ring, preventing damage to the bearing or hub.

Image 1: Overview of the CCLIFE Wheel Bearing Removal and Installation Tool Kit in its storage case.
2. Safety Information
Always prioritize safety when working with automotive tools. Failure to follow these safety guidelines may result in injury or damage to the vehicle or tools.
- Wear appropriate personal protective equipment (PPE), including safety glasses, gloves, and sturdy footwear.
- Ensure the vehicle is securely supported on jack stands or a lift before beginning any work. Never rely solely on a jack.
- Read and understand all instructions before operating the tool kit.
- Use the correct size components for the specific bearing and hub assembly. Incorrect sizing can lead to tool failure or damage.
- Do not use impact tools with this kit unless explicitly stated for a specific component. Manual force with wrenches is generally recommended.
- Keep the tools clean and in good working condition. Inspect components for wear or damage before each use.
- Keep children and bystanders away from the work area.
3. Package Contents
The CCLIFE Wheel Bearing Removal and Installation Tool Kit, Model 1501, includes the following components:
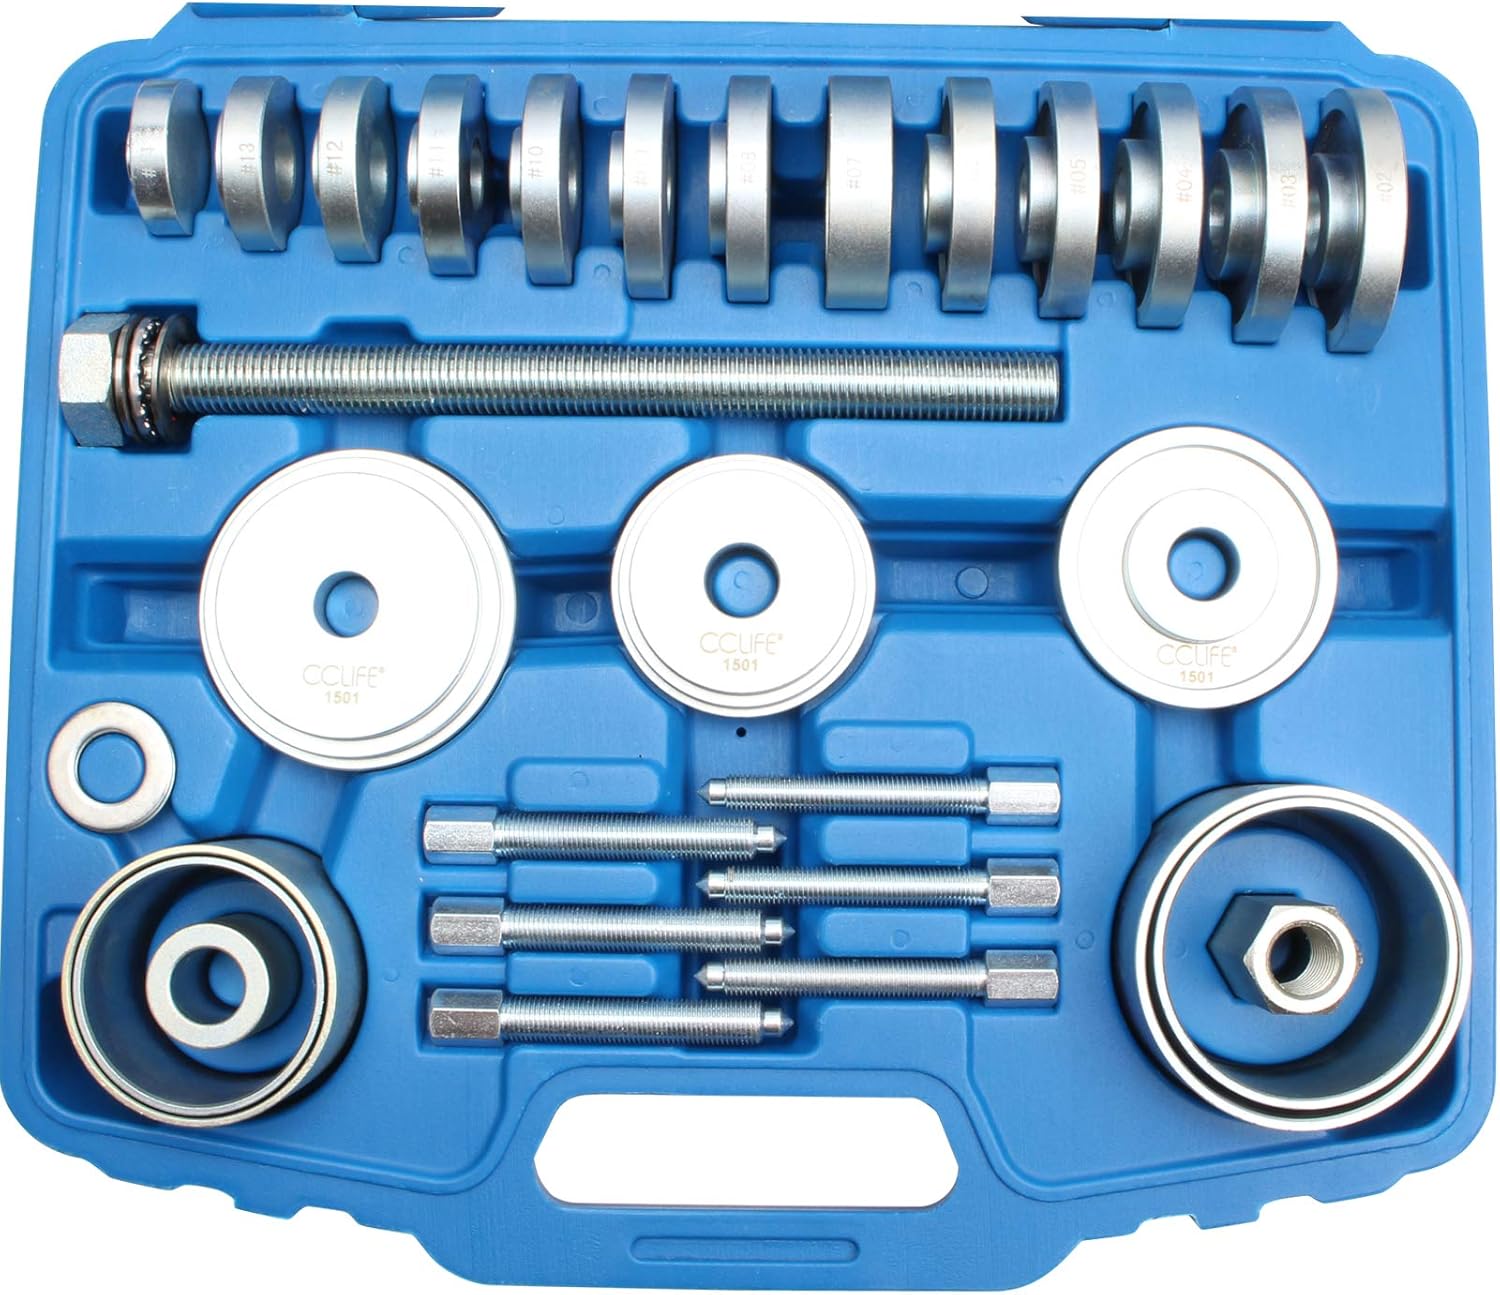
Image 2: Detailed view of the kit components, including pressure plates, sleeves, spindle, and bolts.
- 14 Pressure Plates: Diameters ranging from 50mm to 83.4mm (50 - 55 - 59 - 63.3 - 66.6 - 70.3 - 71.5 - 73.1 - 73.4 - 74.8 - 77.5 - 81.5 - 83.4 mm).
- 2 Pressure Sleeve Sets.
- 4 Sleeves.
- 3 Extractor Bolts: M12 x 1.5 and M14 x 1.5.
- 1 Spindle: 22.2 mm x 300 mm.
- 2 Rings.
- 1 Nut.
4. Operating Instructions
This section details the procedures for removing and installing wheel bearings using the CCLIFE tool kit. Always ensure the correct components are selected for your specific vehicle and bearing size.
4.1. Wheel Bearing Removal
Follow these steps to safely remove a wheel bearing:

Image 3: Exploded view illustrating the setup for wheel bearing removal.
- Prepare the Vehicle: Lift and secure the vehicle. Remove the wheel, brake caliper, brake disc, and any other components obstructing access to the wheel hub and bearing assembly.
- Identify Components: Refer to Image 3. The main components for removal are: (1) Nut, (2) Washer, (3) Wheel Hub/Bearing Assembly, (4) Sleeve, (5) Pressure Plate, (6) Nut, (7) Spindle.
- Select Correct Pressure Plate: Choose a pressure plate (5) that matches the outer diameter of the bearing to be removed. This ensures pressure is applied to the outer race of the bearing.
- Assemble for Removal: Position the selected pressure plate (5) against the outer side of the bearing. On the opposite side, place a suitable sleeve (4) that allows the bearing to be pressed into it. Insert the spindle (7) through the hub and bearing assembly, securing it with the nuts (1, 6) and washer (2) on both ends.
- Press Out the Bearing: Using appropriate wrenches, slowly and evenly tighten the nuts on the spindle. This action will draw the bearing out of the hub assembly and into the sleeve. Ensure the bearing moves smoothly. If excessive force is required, re-check component alignment and sizing.
- Disassemble: Once the bearing is fully removed, loosen the spindle nuts and carefully disassemble the tool components.
4.2. Wheel Bearing Installation
Follow these steps to safely install a new wheel bearing:

Image 4: Exploded view illustrating the setup for new wheel bearing installation.
- Prepare the Hub: Clean the hub bore thoroughly, removing any rust or debris. Ensure the bore is smooth and free of damage.
- Identify Components: Refer to Image 4. The main components for installation are: (1) Nut, (2) Washer, (3) New Bearing, (4) Wheel Hub/Knuckle, (5) Pressure Plate, (6) Nut, (7) Spindle.
- Select Correct Pressure Plate: Choose a pressure plate (5) that matches the outer diameter of the new bearing. This is crucial to apply pressure only to the outer race of the bearing, preventing damage to the internal components.
- Position the New Bearing: Carefully place the new bearing (3) into the hub bore (4), ensuring it is straight and not cocked.
- Assemble for Installation: Place the selected pressure plate (5) against the outer race of the new bearing. On the opposite side of the hub, place a suitable sleeve or pressure plate that provides a stable surface for the spindle nut. Insert the spindle (7) through the assembly, securing it with nuts (1, 6) and washer (2) on both ends.
- Press In the Bearing: Slowly and evenly tighten the nuts on the spindle. The bearing should be pressed smoothly and squarely into the hub bore. Continue until the bearing is fully seated. Do not overtighten.
- Disassemble: Once the bearing is fully seated, loosen the spindle nuts and carefully disassemble the tool components.
- Reassemble Vehicle: Reinstall all removed vehicle components in reverse order, ensuring all fasteners are torqued to manufacturer specifications.
5. Maintenance
Proper maintenance extends the life of your tool kit and ensures its continued performance.
- Cleaning: After each use, clean all components with a clean cloth to remove grease, dirt, and debris.
- Lubrication: Lightly lubricate the spindle threads with appropriate grease to ensure smooth operation and prevent corrosion.
- Inspection: Regularly inspect all components for signs of wear, cracks, bends, or other damage. Replace any damaged parts immediately.
- Storage: Store the tool kit in its original robust blue case in a dry, clean environment to protect it from rust and damage.
6. Troubleshooting
If you encounter issues during operation, consider the following common problems and solutions:
- Difficulty Pressing:
- Ensure the correct size pressure plate and sleeve are used.
- Verify the bearing and hub bore are clean and free of obstructions.
- Check that the spindle is properly lubricated.
- Ensure the components are aligned straight before applying force.
- Bearing Not Moving Evenly:
- Loosen the spindle nuts and re-align all components.
- Apply force slowly and evenly.
- Damage to Bearing or Hub:
- This often indicates incorrect pressure plate selection (e.g., pressing on the inner race of the bearing) or misalignment. Always ensure pressure is applied to the outer race during installation.
7. Specifications
| Feature | Specification |
|---|---|
| Brand | CCLIFE |
| Model Number | 1501 |
| Item Weight | 12.4 Kilograms |
| Product Dimensions (L x W x H) | 49 x 44 x 13 cm |
| Pressure Plate Diameters | 50 - 55 - 59 - 63.3 - 66.6 - 70.3 - 71.5 - 73.1 - 73.4 - 74.8 - 77.5 - 81.5 - 83.4 mm |
| Spindle Dimensions | 22.2 mm x 300 mm |
| Disassembly Bolt Sizes | M12 x 1.5, M14 x 1.5 |
8. Warranty and Support
For warranty information or technical support regarding your CCLIFE Wheel Bearing Removal and Installation Tool Kit, Model 1501, please contact CCLIFE customer service directly. Refer to the product packaging or the official CCLIFE website for current contact details.


