1. Introduction
Thank you for choosing the Einhell TC-MS 2513 L Miter Saw. This precision tool is designed for cutting wood and coated panels with accuracy and efficiency. This manual provides essential information for the safe and effective operation, assembly, maintenance, and troubleshooting of your miter saw. Please read these instructions carefully before using the product for the first time and keep them for future reference.
1.1 General Safety Instructions
- Always wear appropriate personal protective equipment (PPE), including safety glasses, hearing protection, and a dust mask.
- Ensure the workpiece is securely clamped before cutting.
- Keep hands clear of the cutting area and rotating blade.
- Disconnect the power supply before making any adjustments, changing blades, or performing maintenance.
- Operate the saw in a well-lit and well-ventilated area.
- Do not operate the saw in damp or wet conditions.
- Keep children and bystanders away from the operating area.
- Use only sharp, undamaged saw blades suitable for the material being cut.
2. Product Overview
The Einhell TC-MS 2513 L Miter Saw features a high-quality turntable for precise angle adjustments, a durable carbide-tipped saw blade for excellent cutting results, and a laser guide for accurate cuts. It also includes a dust collector for a cleaner workspace and auxiliary clamps for securing long workpieces.
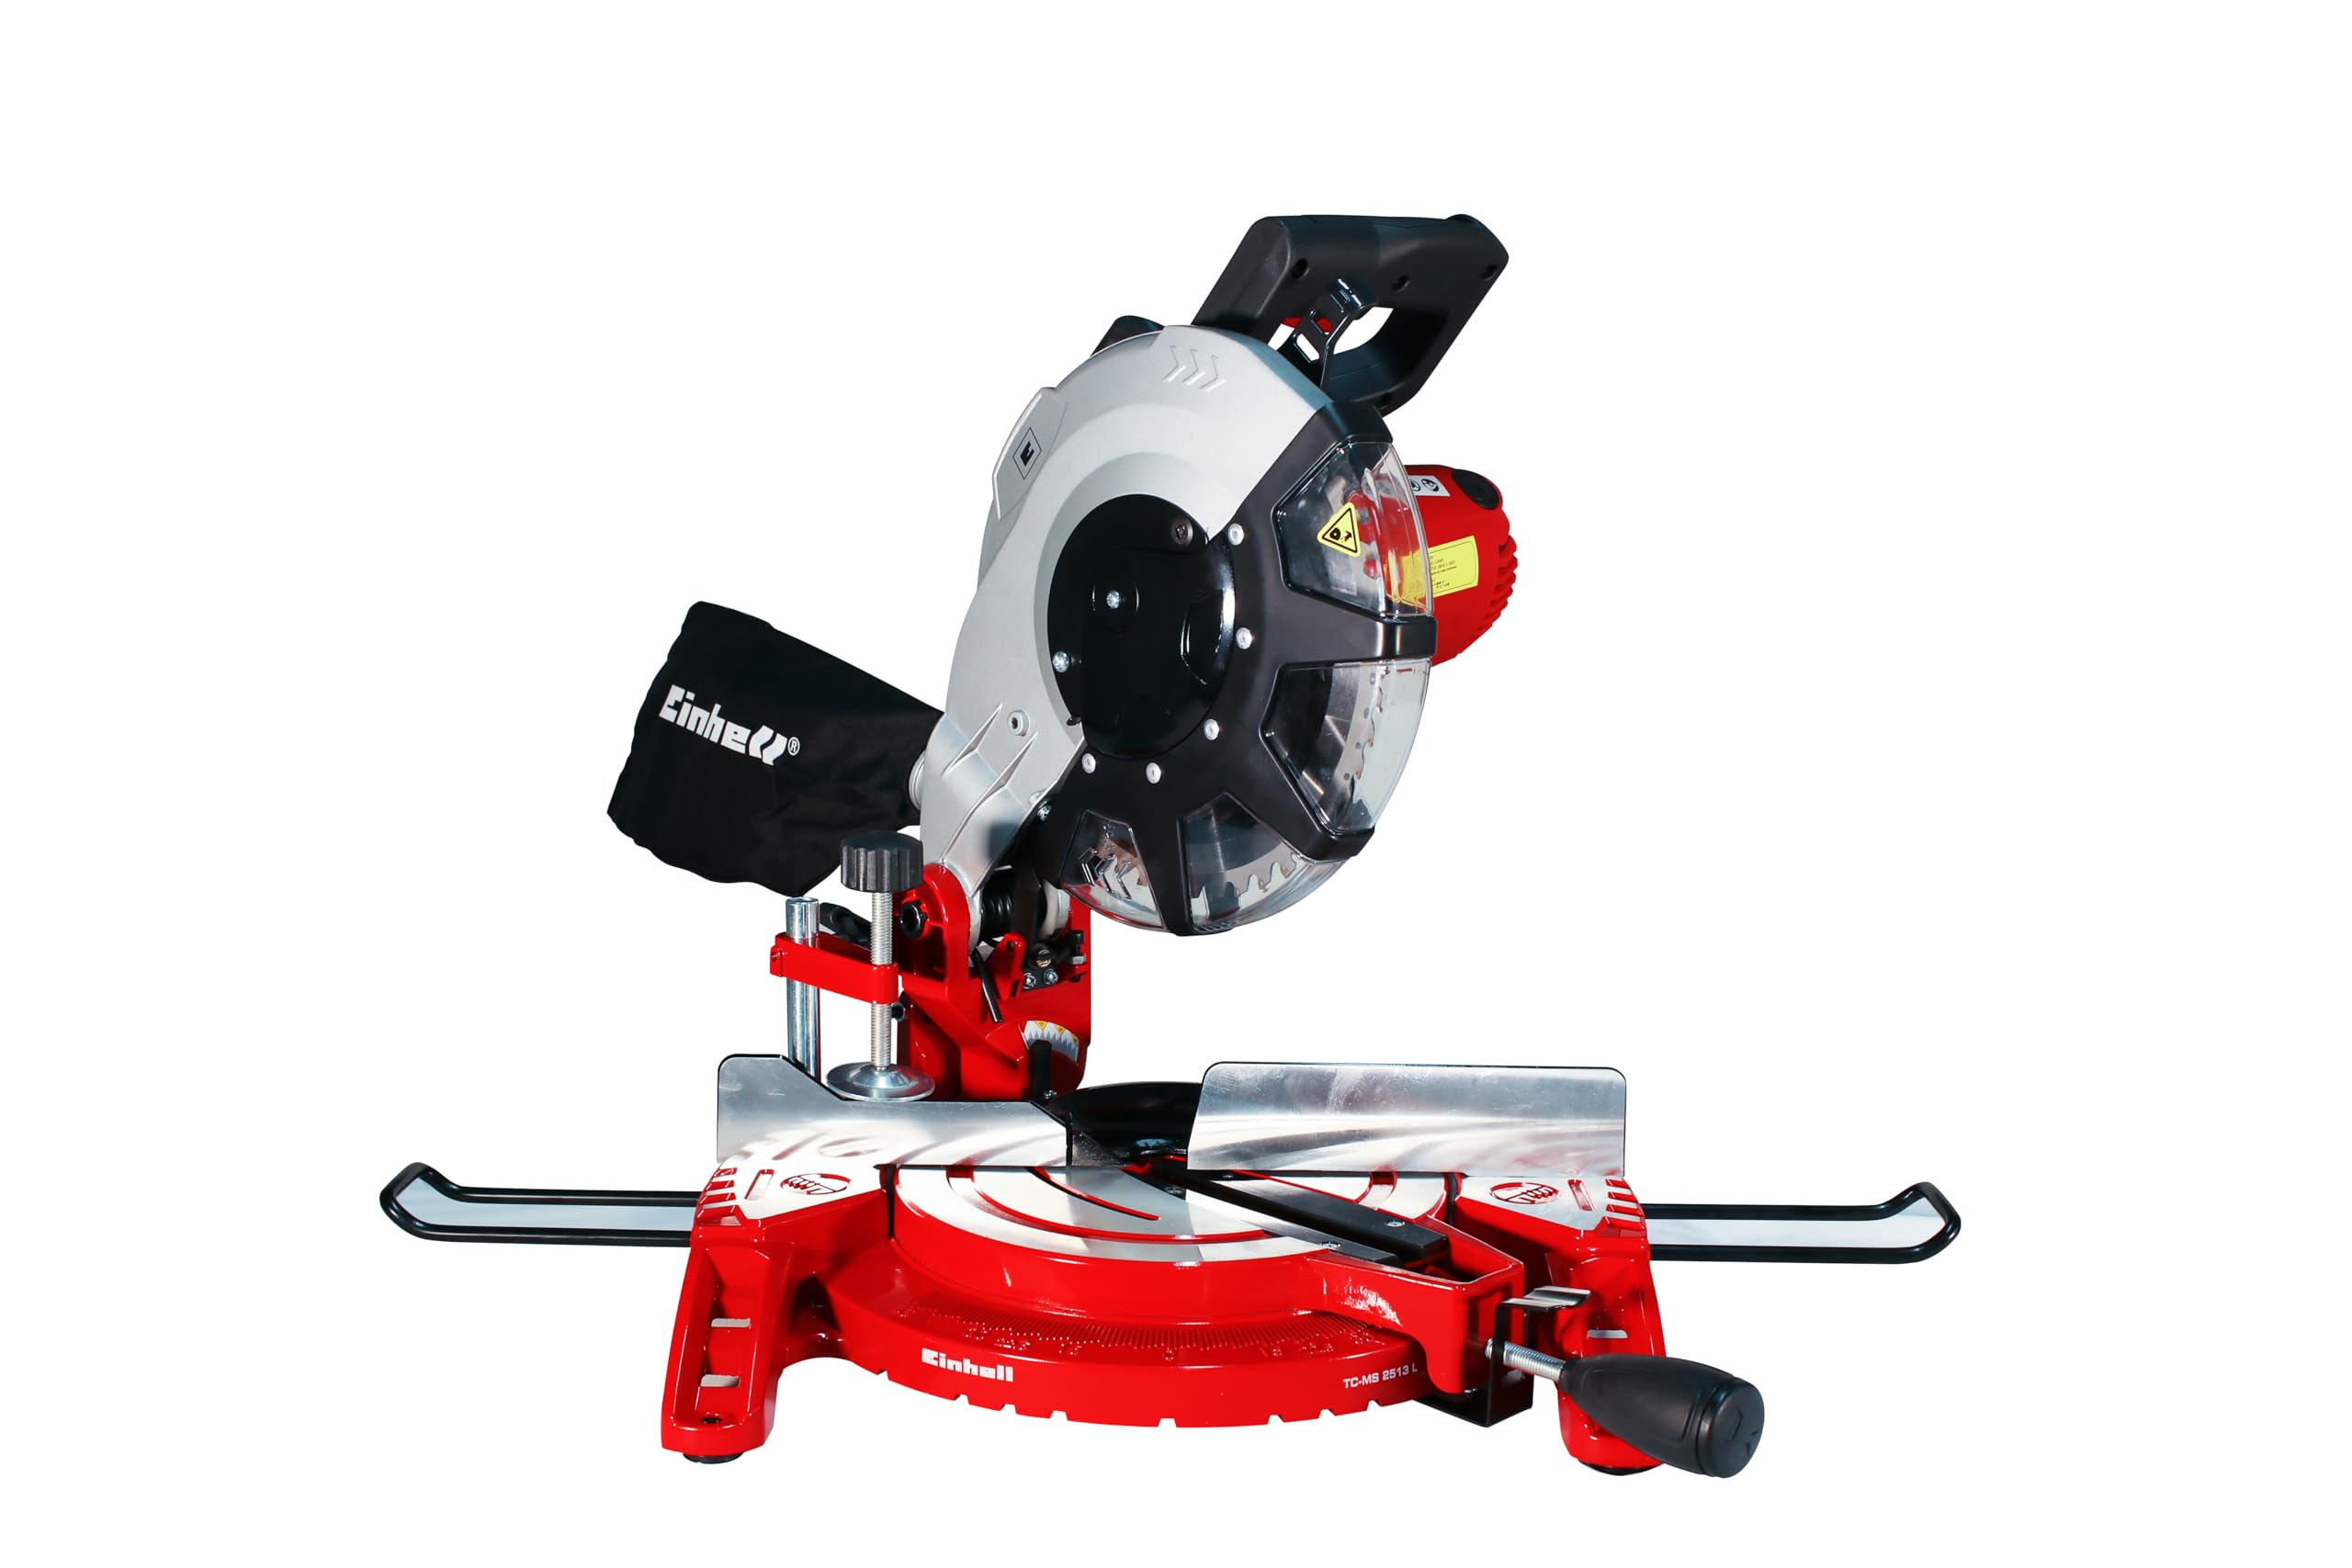
Figure 1: Front view of the Einhell TC-MS 2513 L Miter Saw, showing the main components including the saw head, blade guard, turntable, and base.
2.1 Components
- Saw Head with Motor and Blade Guard
- Handle with Power Switch
- Laser Guide
- Turntable with Angle Scale
- Base Plate
- Workpiece Clamps (Auxiliary Grips)
- Dust Collection Bag
- Blade Locking Button
- Bevel Adjustment Lever
- Workpiece Supports

Figure 2: Included accessories: workpiece supports, clamp, and dust collection bag.
3. Setup
3.1 Unpacking and Assembly
- Carefully remove all components from the packaging.
- Ensure all parts listed in the manual are present and undamaged.
- Attach the workpiece supports to the base plate if not already installed.
- Mount the dust collection bag to the designated port.
3.2 Blade Installation (if not pre-installed)
- WARNING: Disconnect the saw from the power supply before installing or changing the blade.
- Press and hold the blade locking button to prevent the blade from rotating.
- Use the provided wrench to loosen the blade retaining screw.
- Carefully remove the outer flange and the old blade.
- Place the new carbide-tipped saw blade onto the spindle, ensuring the rotation direction arrow on the blade matches the arrow on the blade guard.
- Reattach the outer flange and tighten the retaining screw securely.
- Release the blade locking button.
3.3 Initial Adjustments
- Turntable Angle: Loosen the locking knob for the turntable. Rotate the turntable to the desired angle using the scale. Tighten the locking knob to secure the position. Pre-defined angles can be quickly selected.
- Bevel Angle: Loosen the bevel adjustment lever. Tilt the saw head to the desired bevel angle. Secure the lever.
- Laser Guide: The integrated laser guide assists in precise cutting. Ensure it is clean and functional before use.
4. Operating Instructions
4.1 Basic Operation
- Place the workpiece firmly against the fence and secure it with the workpiece clamp. For long workpieces, use the auxiliary supports.
- Adjust the miter and/or bevel angle as required for your cut.
- Lower the saw head slightly to align the laser line with your cut mark.
- Ensure the blade is not touching the workpiece before starting the motor.
- Press the power switch on the handle to start the motor. Allow the blade to reach full speed.
- Slowly and steadily lower the saw head through the workpiece. Do not force the cut.
- Once the cut is complete, release the power switch and allow the blade to stop completely before raising the saw head.
- Remove the cut workpiece.
4.2 Using the Laser Guide
The laser guide projects a line onto the workpiece, indicating the exact cutting path. Activate the laser by pressing its dedicated switch (if available, or it may activate with the main power). Align this line with your pencil mark for highly accurate cuts.
4.3 Dust Collection
The included dust collection bag helps to keep your workspace clean by collecting sawdust during operation. Regularly empty the dust bag to maintain optimal collection efficiency. For enhanced dust extraction, the saw can be connected to an external dust extractor system (adapter may be required).
5. Maintenance
5.1 Cleaning
- Always disconnect the power plug before cleaning.
- Clean the saw regularly to remove sawdust and debris. Use a brush or compressed air.
- Do not use aggressive cleaning agents or solvents.
- Empty the dust collection bag frequently.
- Keep the ventilation slots on the motor housing clear to prevent overheating.
5.2 Blade Replacement
Refer to section 3.2 "Blade Installation" for detailed instructions on how to safely replace the saw blade. Always use sharp, undamaged blades of the correct size and type for your saw.
5.3 Lubrication
Periodically apply a small amount of machine oil to moving parts, such as the pivot points of the saw head and turntable, to ensure smooth operation. Avoid lubricating the blade or motor components.
6. Troubleshooting
| Problem | Possible Cause | Solution |
|---|---|---|
| Saw does not start | No power supply; faulty switch; motor overload. | Check power connection; ensure switch is fully engaged; allow motor to cool down. |
| Inaccurate cuts | Blade dull or damaged; incorrect angle setting; workpiece not secured. | Replace blade; re-adjust angles; secure workpiece firmly. |
| Excessive vibration | Loose blade; damaged blade; loose mounting bolts. | Check blade tightness; replace damaged blade; tighten all mounting bolts. |
| Poor dust collection | Dust bag full; dust port clogged; improper connection. | Empty dust bag; clear dust port; ensure secure connection. |
If you encounter problems not listed here or if the suggested solutions do not resolve the issue, please contact Einhell customer support.
7. Specifications
| Feature | Value |
|---|---|
| Model | TC-MS 2513 L |
| Voltage | 220 Volts |
| Power Input | 1600 Watts |
| No-Load Speed | 4000 RPM |
| Blade Material | Carbide-tipped |
| Product Dimensions (L x W x H) | 54 x 39 x 40 cm |
| Weight | 10 Kilograms |
| Special Features | Laser guide for cutting, Dust collector, Auxiliary grips |
| GTIN | 4006825609271 |
8. Warranty and Support
Einhell products are manufactured to high-quality standards and undergo strict quality controls. This product is covered by a manufacturer's warranty. Please refer to the warranty card included with your purchase or visit the official Einhell website for detailed warranty terms and conditions specific to your region.
For technical support, spare parts, or service inquiries, please contact your local Einhell service center or the retailer where you purchased the product.
Einhell Germany AG
www.einhell.com


