1. Introduction
This manual provides essential information for the safe and efficient operation, maintenance, and troubleshooting of your HERON EWH 220 Gasoline Welding Generator. Please read this manual thoroughly before operating the unit to ensure proper use and to prevent injury or damage.
The HERON EWH 220 is a high-quality multi-purpose power generator with an integrated welding unit. It is designed for use in construction and assembly work, or any situation where access to a stable electrical grid is unavailable. It functions as a power source for tools and appliances up to 5.5 kW and as a powerful 220A DC welding aggregate for demanding tasks. The unit is equipped with handles and wheels for enhanced portability and ease of handling in various terrains.
2. Important Safety Instructions
WARNING: Failure to follow these safety instructions can result in serious injury, death, or property damage.
- Always operate the generator in a well-ventilated area to prevent carbon monoxide poisoning. Never operate indoors.
- Keep children and pets away from the generator during operation.
- Ensure the generator is placed on a level, stable surface.
- Do not refuel the generator while it is running or hot. Allow it to cool down before adding fuel.
- Use only the recommended fuel type (gasoline) and engine oil.
- Always wear appropriate personal protective equipment (PPE) when welding, including a welding helmet, gloves, and protective clothing.
- Ensure proper grounding for both generator and welding operations.
- Do not operate the generator in wet conditions or expose it to rain.
- The generator and welding functions cannot be used simultaneously. Select one mode of operation at a time.
- Regularly inspect the unit for any damage or wear before each use.
3. Components Overview
Familiarize yourself with the main components of your HERON EWH 220 generator.

Figure 3.1: Front view of the HERON EWH 220 Gasoline Welding Generator, showing the main body, wheels, and handles.

Figure 3.2: Close-up view of the control panel, featuring the engine switch, AC 220V outlets, AC circuit breaker, current control for welding, and DC 12V output terminals.
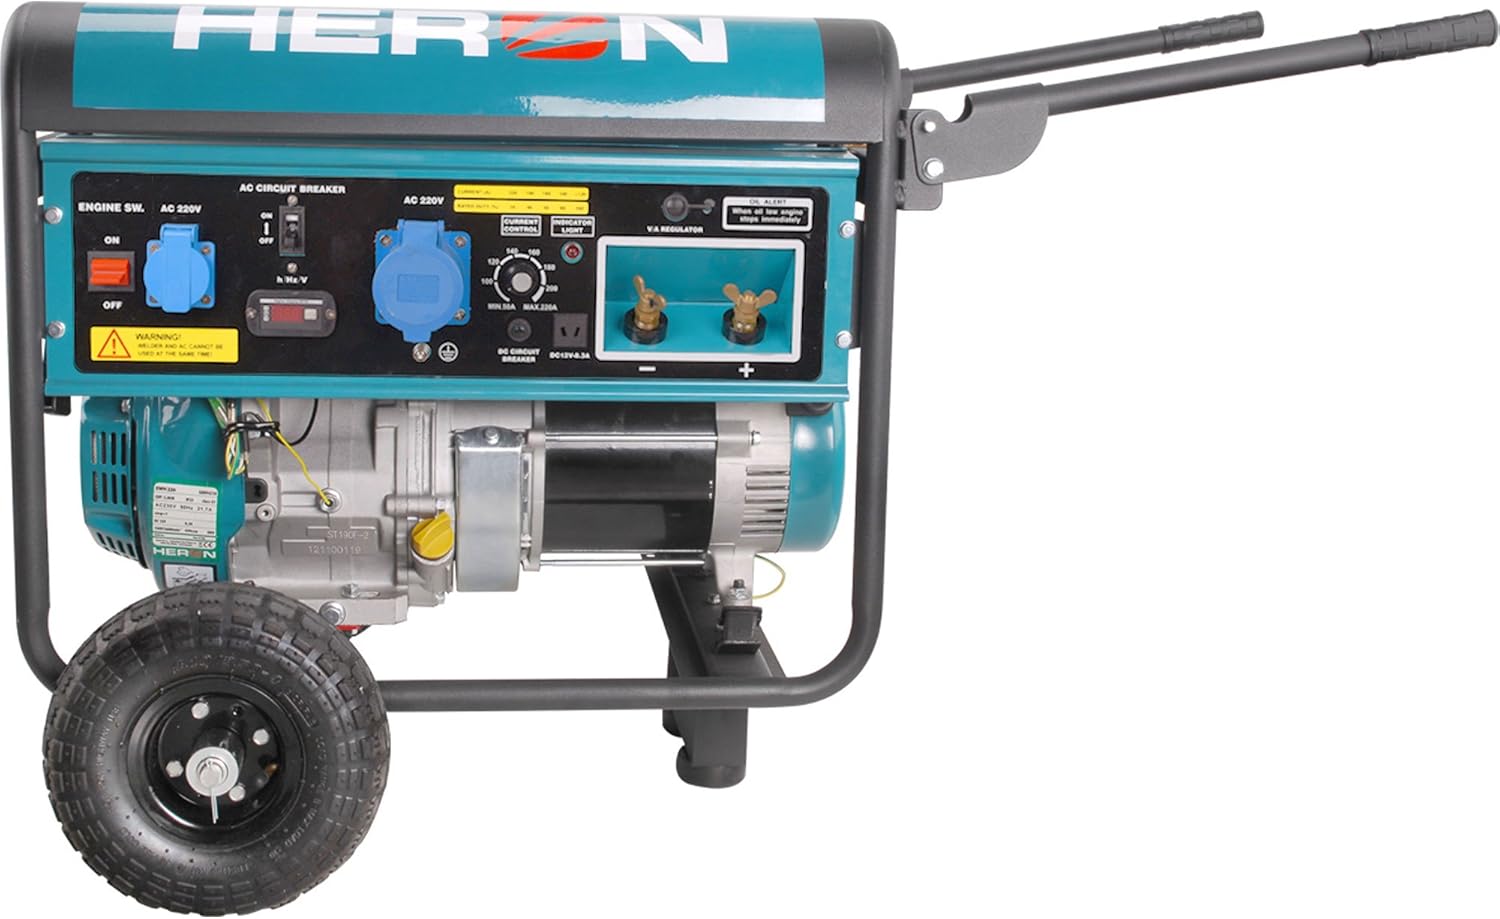
Figure 3.3: Side view of the generator, highlighting the control panel and the robust frame with wheels for portability.

Figure 3.4: Opposite side view of the generator, showing the engine and exhaust components.

Figure 3.5: Rear view of the generator, illustrating the sturdy frame and wheel assembly.
4. Setup and Preparation
4.1 Unpacking and Assembly
Carefully remove the generator from its packaging. Attach the wheels and handles if they are not pre-assembled, following the instructions in the separate assembly guide (if provided). Ensure all bolts and nuts are securely tightened.
4.2 Adding Engine Oil
- Place the generator on a level surface.
- Locate the oil fill cap/dipstick.
- Add the recommended engine oil (refer to specifications for type and capacity) until it reaches the upper mark on the dipstick. Do not overfill.
- Securely replace the oil fill cap.
4.3 Adding Fuel
- Ensure the engine is off and cool.
- Open the fuel tank cap.
- Carefully pour fresh, unleaded gasoline into the fuel tank. Do not overfill; leave space for fuel expansion.
- Securely close the fuel tank cap.
- Wipe up any spilled fuel immediately.
CAUTION: Gasoline is highly flammable. Handle with extreme care. Do not smoke or use open flames near the generator.
5. Operating Instructions
IMPORTANT: The generator and welding functions cannot be used simultaneously. Ensure the engine switch is in the OFF position before switching between modes.
5.1 Starting the Engine
- Ensure the generator is on a level surface and away from flammable materials.
- Turn the fuel valve to the "ON" position.
- Move the choke lever to the "CHOKE" position (for cold starts).
- Turn the engine switch to the "ON" position.
- Pull the recoil starter handle firmly and smoothly until the engine starts.
- Once the engine starts, gradually move the choke lever to the "RUN" position.
- Allow the engine to warm up for a few minutes before applying a load.
5.2 Using as a Power Generator (AC Output)
- Ensure the engine is running stably.
- Connect your electrical appliances to the AC 220V outlet.
- Do not exceed the maximum rated output of 5.5 kW.
- The AVR (Automatic Voltage Regulation) system will help protect your connected devices from voltage fluctuations.
5.3 Using as a Welding Unit (DC Output)
- Ensure the engine is running.
- Connect the welding cables to the DC output terminals (+ and -).
- Select the desired welding current using the "CURRENT CONTROL" knob on the control panel.
- Wear all necessary PPE (welding helmet, gloves, protective clothing).
- The unit supports welding with standard electrodes up to 5mm thickness.
- The DC welding unit with precise rectification provides weld quality comparable to inverter welders.
5.4 Stopping the Engine
- Disconnect all electrical loads and welding cables.
- Turn the engine switch to the "OFF" position.
- Turn the fuel valve to the "OFF" position.
6. Maintenance
Regular maintenance is crucial for the longevity and safe operation of your generator.
- Engine Oil: Check oil level before each use. Change oil after the first 20 hours of operation, then every 50-100 hours or annually.
- Air Filter: Clean or replace the air filter every 50 hours or more frequently in dusty conditions.
- Spark Plug: Inspect and clean the spark plug every 100 hours. Replace if worn.
- Fuel Filter: Inspect and clean the fuel filter periodically.
- General Cleaning: Keep the generator clean and free of debris. Ensure cooling fins are clear.
- Storage: For long-term storage, drain the fuel tank and carburetor, or use a fuel stabilizer. Store in a dry, well-ventilated area.
7. Troubleshooting
| Problem | Possible Cause | Solution |
|---|---|---|
| Engine does not start | No fuel; Low oil level; Choke incorrect; Engine switch OFF; Spark plug issue | Add fuel; Add oil; Adjust choke; Turn engine switch ON; Inspect/replace spark plug |
| No power output (AC) | Circuit breaker tripped; Overload; Loose connections | Reset circuit breaker; Reduce load; Check connections |
| Poor welding performance | Incorrect current setting; Poor electrode contact; Improper grounding | Adjust current; Ensure good contact; Check grounding |
| Engine runs rough | Stale fuel; Clogged air filter; Dirty spark plug | Drain and replace fuel; Clean/replace air filter; Clean/replace spark plug |
8. Technical Specifications
- Model: HERON EWH 220
- Manufacturer: Madal Bal a.s.
- Product Identifier: 8896310
- Dimensions (L x W x H): 105.59 x 113.28 x 161.29 cm
- Output Voltage (AC): 230 Volts
- Generator Power Output: 5.5 kW
- Welding Current (DC): 220 Amperes
- Engine Type: 4-stroke, Gasoline
- Fuel Type: Unleaded Gasoline
- Special Features: AVR Voltage Regulation, Portable (with wheels)
- Power Outlets: 1 x AC 230V
- Welding Electrode Compatibility: Up to 5mm thickness
9. Warranty and Support
For warranty information, please refer to the separate warranty card included with your product or contact your authorized HERON dealer. For technical support or service inquiries, please contact the manufacturer or your point of purchase.
Manufacturer: Madal Bal a.s.
Please have your model number (EWH 220) and product identifier (8896310) ready when contacting support.


